Hi Zoly,Probably because as Keith mentined above he dies not have the patience for these detailes
Me neither at times,
Allan
 |
As a way to introduce our brass coins to the community, we will raffle off a free coin during the month of August. Follow link ABOVE for instructions for entering. |
 |
 |
The beloved Ships in Scale Magazine is back and charting a new course for 2026! Discover new skills, new techniques, and new inspirations in every issue. NOTE THAT OUR FIRST ISSUE WILL BE JAN/FEB 2026 |
 |
Hi Zoly,Probably because as Keith mentined above he dies not have the patience for these detailes




Thank you very much PaulAnother great POF model coming off your workbench, Keef!
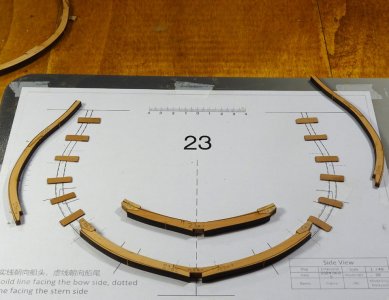
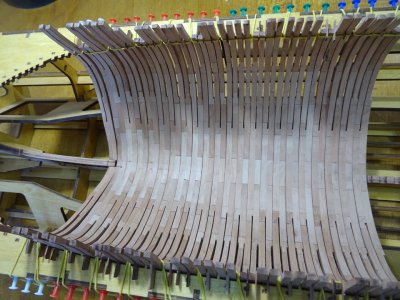
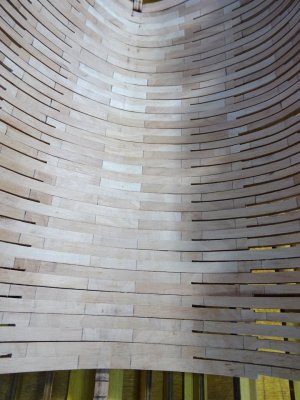
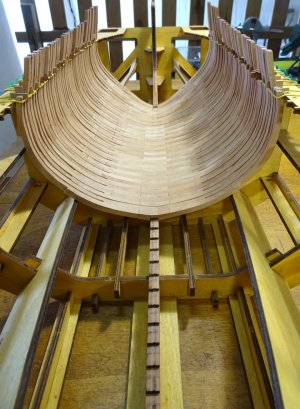
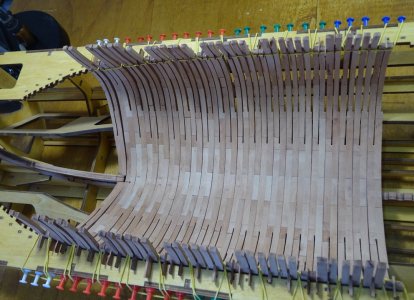
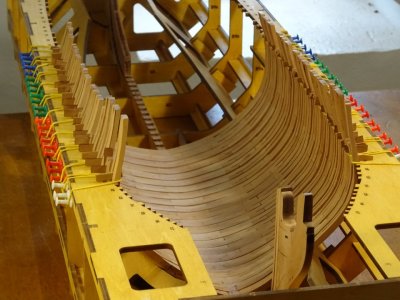
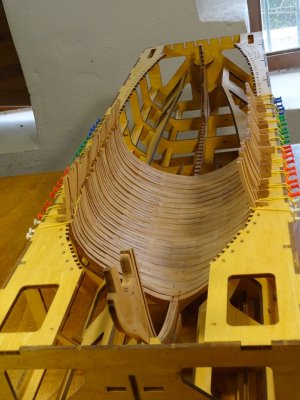
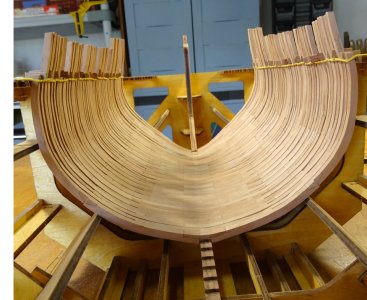
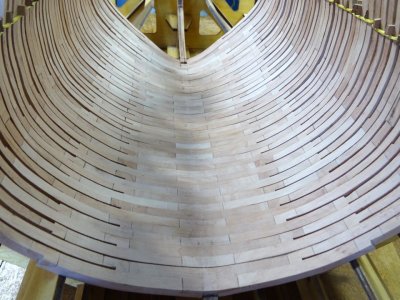
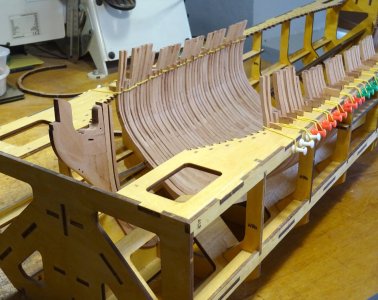
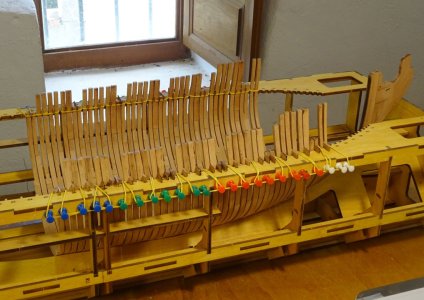
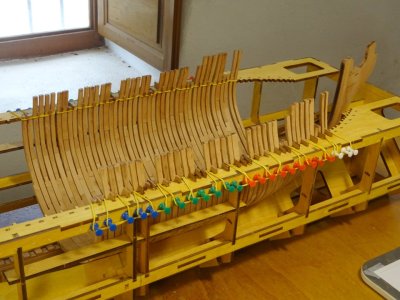
Those dry-fitted frame are now already looking very nice and tight, Keef.Hi All. I have photos of the latest on the Enterprise build, although I'm afraid it's just more frames. Now 1 to 21 are complete and x8 which is the first of the bow cant frames. All are only dry fitted at this stage and I have used elastic bands to hold them against the top edge of the building cradle. Already there is a change of plan. I shall complete all the ''straight'' frames (1 to 37) first, then finish with the bow cant frames and then the stern cant frames. Everything so far with this kit is very accurate and well engineered by M.D. For anybody contemplating giving it a go, this is a great kit
View attachment 522628
View attachment 522629
View attachment 522630
View attachment 522631
View attachment 522632
View attachment 522633
View attachment 522634
View attachment 522635
View attachment 522636
View attachment 522637
View attachment 522638
View attachment 522639
View attachment 522640
View attachment 522641
Good morning Keith. Your frame construction is amazing. You clearly know what you are doing here.Hi All. I have photos of the latest on the Enterprise build, although I'm afraid it's just more frames. Now 1 to 21 are complete and x8 which is the first of the bow cant frames. All are only dry fitted at this stage and I have used elastic bands to hold them against the top edge of the building cradle. Already there is a change of plan. I shall complete all the ''straight'' frames (1 to 37) first, then finish with the bow cant frames and then the stern cant frames. Everything so far with this kit is very accurate and well engineered by M.D. For anybody contemplating giving it a go, this is a great kit
View attachment 522628
View attachment 522629
View attachment 522630
View attachment 522631
View attachment 522632
View attachment 522633
View attachment 522634
View attachment 522635
View attachment 522636
View attachment 522637
View attachment 522638
View attachment 522639
View attachment 522640
View attachment 522641

Thank you very much GrantGood morning Keith. Your frame construction is amazing. You clearly know what you are doing here.. Cheers Grant

Thank you. I do try to get as close as possible to reduce the amount of cleaning up. There is some though at a later dateNice job. Looks very clean so far. Won't be a ton of sanding when all glued up.

Thanks a lot Jeff. Much appreciatedThat is beautiful !!! Great job !

Really helpful Just ordered the Kit (WEll Monday)Sorry, not much to show, but it's a start at last. The first part of the keel, the cutwater
View attachment 511674
View attachment 511676
View attachment 511677
View attachment 511678

I assume its painted white so you can see what stuff you have taken off ?The job I wasn't looking forward to is done. The filing out of the front deadwood to take the cant frame supports. It was time consuming, but actually not as hard as l thought it was going to be and worked out quite well. I am working on cutting out the rabets on the keel pieces, using a file and side scraping with a modelling knife blade along the laser guide lines at a 45 degree angle. The pieces are dry fitted in these photos and all seem to fit perfectly
View attachment 512229
View attachment 512230
View attachment 512231
View attachment 512232
View attachment 512233
View attachment 512234
View attachment 512235
View attachment 512236

What is a spindle sander pleaseIt goes pretty fast with 100 grit foam sanding sticks with a plus being you can easily see if you’re sanding flat. The chocks, I lightly touch on the disc sander, keeps all surfaces pristine. All frames, when built get hit with spindle sander, very quick.

That background makes it very difficult to see you workWhen making up my false keel I made stepped scarf joints. Only took about 15 or 20 minutes to make up with an x-acto knife and a file. As you can see though I installed them upside down. As an old friend once told me; “a dumb man won’t notice and a smart man won’t tell”.
View attachment 514332

Why not just Copy it Should be 100% and no need to use cling filmsome photos of my first frame (no. 7). To protect the drawing which has to be used for both side A and side B, I have used clingfilm to cover it. The photo shows side A complete and side B pieces just laid over the drawing before gluing
View attachment 514604
View attachment 514605
View attachment 514606
View attachment 514607
View attachment 514608

Ive started Anatomy Victorynice work keef..ok...looks like I wont live long enough to await le Fleuron... doing my 1/30 RC now ..planning my next build..1/48 enterprize or al anatomy victory pardon no caps and punct..using one finger..all good ...no severance..just lazy..back in ny

Really getting excited about this model,Hi All. I have photos of the latest on the Enterprise build, although I'm afraid it's just more frames. Now 1 to 21 are complete and x8 which is the first of the bow cant frames. All are only dry fitted at this stage and I have used elastic bands to hold them against the top edge of the building cradle. Already there is a change of plan. I shall complete all the ''straight'' frames (1 to 37) first, then finish with the bow cant frames and then the stern cant frames. Everything so far with this kit is very accurate and well engineered by M.D. For anybody contemplating giving it a go, this is a great kit
View attachment 522628
View attachment 522629
View attachment 522630
View attachment 522631
View attachment 522632
View attachment 522633
View attachment 522634
View attachment 522635
View attachment 522636
View attachment 522637
View attachment 522638
View attachment 522639
View attachment 522640
View attachment 522641
