HMS Hood - 1/200 (with Pontos PE) - Build Log

Where to Start?

Well, most people would say on Page 1, but as many seasoned modellers know, you rarely start on Page 1, Step 1. ;)
To fully employ the Pontos updates, there's quite a bit of prep work to do on both the hull and the deck sections.

The hull requires full removal of the moulded degaussing cable with brass PE cables provided in lieu, along with scuttle additions, torpedo tube doors update and a few other things. Not a huge amount of work, but I expect it to be time consuming.

The three primary deck sections also call out for a swath of work, but mostly removing a bunch of hatches, bollards, bits and pieces; oh, and the almost complete replacement of the anchor chain runs and hawse pipes.

So, feeling energised, I decided to tackle the decks first.
FS1 change.jpegFS TPlate.jpegResin pipe.jpeg
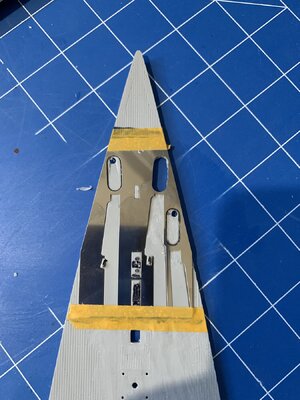
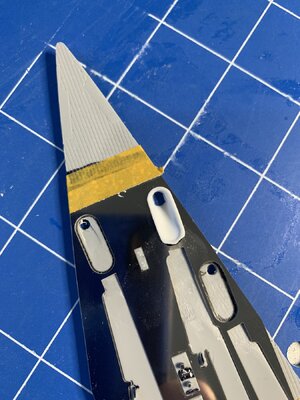
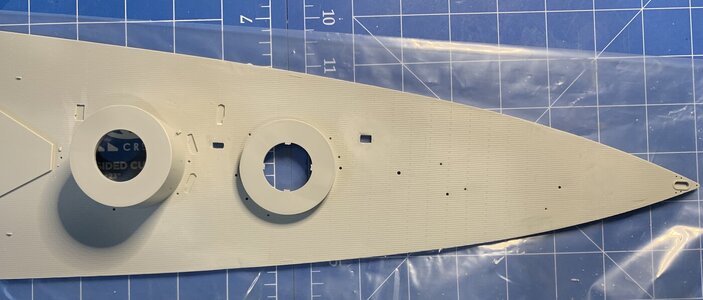
Forecastle. The Pontos instructions show all the existing bits to be removed, so I went to it. Pontos provide a nifty metal template to ensure placement and size of hawse pipe modifications are accurate. The existing pipes are replaced by resin items as seen above. Almost finished these changes and very happy with the progress so far.
Stern.jpeg
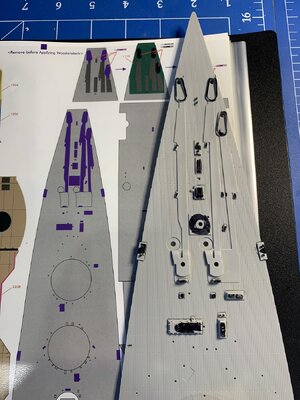
Stern/quarterdeck and middle decks. Only smaller items to remove on these parts, so didn't take too long at all. Any small imperfections left from the mod processes 'should' be totally covered by the wooden decking. :)
 
Last edited:
Well, it had to happen. With three ships now in various stages of completion, I felt the unsuppresible urge to start something new. One day, I will finish a build again, but for now I need a new focus.

I've had the Trumpeter 1/200 HMS Hood in my stash for about 6 years, so she has now been officially dusted off and unboxed. When I got her I was fresh into retirement, with a lot of things happening, so decided to get everything at once to support the build, including the Points Detail Up Set and two reference books. I have been fascinated with this ship, her history and her very sad end at the Battle of Denmark Strait on 24 May 1941 since I was quite young.

With a quick search of YouTube I've located a couple of detailed build videos for the kit and have removed the one piece hull and decks from the kit box to begin initial preparations. What can I say, the 1/200 scale provides a large model for what was an impressive and, for her time, complex warship.
I'm excited to start this build and look forward to giving it the time and detail the historic vessel deserves.

As a Veteran of nearly 40 years service, a portion of which was with our Navy, I wish to dedicate this build to the memory of the 1,415 sailors who made the ultimate sacrifice in the service of their nation.

Rest In Honour
__________________________________________________________________________________________
Wow! you have the PE upgrade set, very impressive mate. Some years back i watched a professional assemble this kit using only the PE supplied with the kit. Most were too small to see and attach so it'll be interesting to see how the PRONTOS goes. All the best with the assembly. Cheers.
 
Hi Steve, welcome back to your own thread, lol. Where abouts are you?
Good start on the kits' destruction, there is quite a lot of chopping needed. Do you know about the too-small rear funnel? It should be the same as the front one. There are 3D print replacements available, or you can lengthen the kit one with a plastic sheet insert. Pontos can supply an additional front funnel PE frame to take care of the details, just send them a note.
 
I'm interested in watching this build. Although I'm wrapped up in learning to build with wood, plastic may be just as interesting. Good luck with the build.
 
Hi Steve, welcome back to your own thread, lol. Where abouts are you?
Good start on the kits' destruction, there is quite a lot of chopping needed. Do you know about the too-small rear funnel? It should be the same as the front one. There are 3D print replacements available, or you can lengthen the kit one with a plastic sheet insert. Pontos can supply an additional front funnel PE frame to take care of the details, just send them a note.
Hey mate,
I'm located in Newcastle, Australia, a little ways from your good self. :) Yes, was aware of the issue with the smaller rear funnel, thanks. Not sure how I'm going to tackle that just yet. I like the Model Monkey products but may see if I can correct it myself first. If I can't make it pretty, I'll opt for one of the 3D printed options.
 
Glad you already knew. Got an Uncle in Cairns and a brother-in-law in Melbourne. Most of the family is still in England, I am in the USA, an hour south of Boston.
 
Glad you already knew. Got an Uncle in Cairns and a brother-in-law in Melbourne. Most of the family is still in England, I am in the USA, an hour south of Boston.
Lived in Cairns back in the early 80's. Was a nice place back then. Also lived over in Seattle for a few years and managed to visit Boston. So much history there and loved seeing the actual USS Constitution!
 
Nice! Boston is a cool city, love the Connie, took my brother to see it last time he was over, he is coming back in May for the 'Stones concert. Haven't made it to the west coast yet, although I have been here since '84! lol.
Haven't made it to your Fair Land yet, but that may change with retirement. Would like to see NZ also.
As you get into the kit, you will find that it is a very worthwhile project and can be made into a fine replica. It does, however, need a fair bit of work.
 
We get a four day long weekend down in AUS for Easter, and I think I've made a solid start on the Hood.

All main deck sections have been modified, to accept the Pontos details and wooden decking.
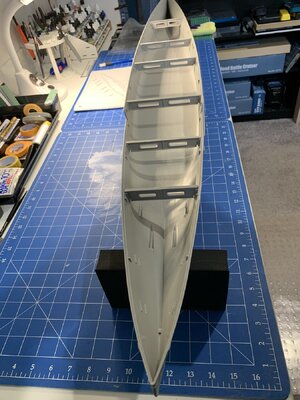
The hull has been modified to remove the degaussing cable, torpedo doors and mold seams. Also installed the hull braces; a nice inclusion by Trumpeter.

HoodHull.jpeg
Next: First journey to the Photo Etch frets........ :)
 
Hey mate,
I'm located in Newcastle, Australia, a little ways from your good self. :) Yes, was aware of the issue with the smaller rear funnel, thanks. Not sure how I'm going to tackle that just yet. I like the Model Monkey products but may see if I can correct it myself first. If I can't make it pretty, I'll opt for one of the 3D printed options.
Happy Easter Steve,
You are almost as bad as me, too many ships in "dry dock" Good luck with your HMS Hood.
Beau.
 
WOW! 241 readers! Steve, you're popular! lol.
Good progress, dry fit the decks to the hull and supports to make sure the supprts are at the correct level. They can sit too low and cause the decks to sag in the center when glued down. (ask me how I know ) If too low then add plastic sheet/strip shims on top to prevent sag.
That sounds like you're speaking from experience. :) Did a rough dry fit and the quarterdeck may need some persuasion to sit flush, but that will come.
 
Yep, I found out about the sag when playing around dry fitting structure parts I found that K1 had rather large gaps towards the center.
Luckily I had used tube glue and it had not fully set so the decks were faily easy to remove.
Another excellent reference book is
"Anatomy of the ship" volume on HMS Hood by John Roberts. ISBN 0-85177-900-X
Get the later revised edition. I found a good used one cheap on Amazon.
 
Back
Top