HMS Hood - 1/200 (with Pontos PE) - Build Log

Not surprised you are leaving the hull alone. I went the whole way and redid the porthole positions, filled in the plating, corrected the anchor holes, etc, etc, etc. A right pain. Am STILL doing it. Takes a loooonngggg time on such a big beastie.
 
Pontos! Why?

The Pontos detail up kit for the Hood is comprehensive in its detail, to say the least.
1. 20 sheets of PE
2. 94 resin pieces
3. 307 brass pieces
4. Wooden decks, brass screws and dry transfers.

I've used Pontos kits in the past, and their PE frets are usually numbered either A or 1 to whatever, and each piece on each fret had a sequential number. Instructions would reference e.g. G12, so it was easy to find. However, the Hood kit numbers the PE frets from 1 up and uses a sequential number for all the PE pieces with no direct reference or relationship to the instructions.

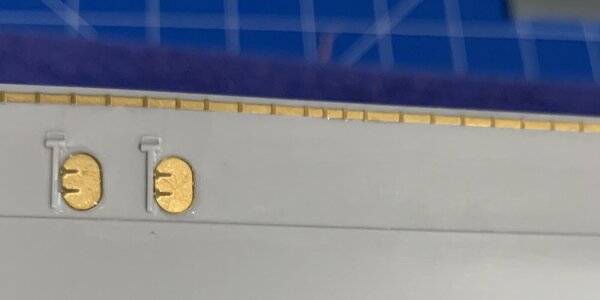
For example, the replacement torpedo hatches, the first piece of PE I used from this kit, were numbered 539 (x4). The instructions identified these parts on Page 6 and after a search, located them on fret 8; however, there's nothing in the instructions to identify that piece(s) 539 were to be found on fret 8. :(

So I ask, why? Why did Pontos choose such a complex method? A bit disappointing, but it is what it is.

Right now I'm considering creating a spreadsheet, starting with Step 1 of the Trumpeter instructions, and working through each build step, identifying what Pontos detail will be applicable to each step and kit part, what the number of that piece of PE is, and where it can be located on the frets. No small task, but it may be beneficial in the long run.

Thoughts or comments from any other members who have used this Pontos kit are more than welcome. :)
 
Maybe I can help. Already been there.
Sheet Part numbers
1 1-130
2 131-199
3 200-283
4 284-392
5 (lg Funnel) 401-450
6 (Sm Funnel) 401-450
7 451-522
8 523-560
9 561-600
10 601-748
11 two sheets 750-797
12 800-916
13 921-984
14 991-1049
15 1048-1074
( there is some crossover of parts between
14 and 15)

16 1080-1172
17 1173-1180
18 1191-1218

This list came from another Hood builder over on Model Warships if I remember right. I printed it out a couple of years ago.
Hey Pete,
Thanks so much for that. I was coming to the realisation that parts were sequentially numbered from sheet 1 onwards, just wasn't looking forward to straining my eyes for days working out the distribution.
That list goes a very long way to helping out. Too bad Pontos didn't have the forethought to include something similar in the instructions.
Cheers,
 
Decks are on.

A productive weekend with the build, getting all 3 of the primary decks sections on, seams/joins filled and prop shafts, skegs and rudder fitted. (Pics to come)

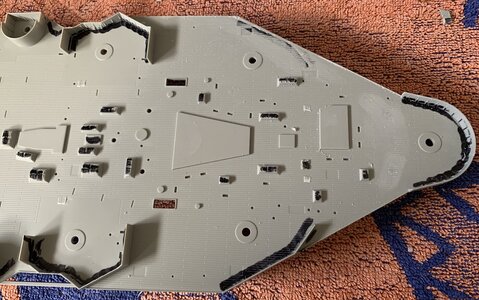
Also started work on the Main/Shelter deck. For the Pontos detail up, there's a LOT of things to be removed, including splinter shields, lockers and hatches (everything marked with black). The decks will be completely covered with either PE or wood deck sheets, so any less than perfect mods should be all covered up in the end.
Main deck.jpeg
 
Hull Colours

Having primed the hull with fine grey I'm ready to get it painted up.

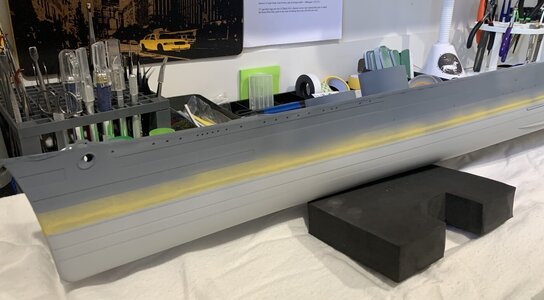
I have decided to go with Tamiya XF-53 for the primary hull and uppers, XF-24 for the anti-fouling and XF-1 for the boot strap. Just dropped a first coat of the XF-53 on the hull and although patchy, obviously after only one coat, I feel it's a good choice. Having the darker colour down has also highlighted a couple of areas on the degaussing cable that will need a dab of glue to flatten, but happy. :)

Will post next when hull painting is complete.

Hull - 1st coat.jpg
 
Looking good Wedgie, glad to see an update, been looking out for one. Good choice on colours, and THANK YOU for not doing a red antifouling. You painting the hull means tgat you are already way ahead of me, lol.
 
Looking good Wedgie, glad to see an update, been looking out for one. Good choice on colours, and THANK YOU for not doing a red antifouling. You painting the hull means tgat you are already way ahead of me, lol.
Thanks Pete. Yeah, red was never an option for the antifouling. :) Hope to get the hull finished over the weekend. Also started on some of the uppers; getting ready for the many PE upgrades.
 
FYI, I have the notifications turned on , so the phone dings on MANY build threads that I like. We are sat at the table chatting after dinner, which is why you get fast responses right now. It's 7:15 PM here in Rhode Island atm.
Pontos do a really good job, and they worked with the Hood Association when developing the set to correct a lot of the kits deficiencies. One thing to look out for on the Pontos etch is that it is fairly brittle and can only take one or two joint bends before it snaps, so be aware of that and plan the part bends carefully.
Hey there!
Hope you enjoyed dinner. 0954 Friday morning here in AUS. :)
Thanks for the tip on the PE. I'v worked with the Pontos PE on my 1/200 Titanic and yes, some of the smaller parts may only allow a single fold before they become unforgiving. I'm as careful as I can be. I'm liking a lot of the larger PE parts with the Hood kit though. There is a lot of kit modifications to do.
Cheers
 
Keep up the good work. At 0954 on friday (tomorrow) I will be down at the boatyard getting our boat ready for the summer season. ( 1990 Formula 26 PC)
 
Wooden Decks and first uppers

I decided to just go with the veneer wooden deck sections provided in the Pontos upgrade kit. However, after previous experience with the adhesive used on these types of decks, I decided to take advice from a video offered by the Midwest Model Shop in their 1/200 Titanic build to place the decking.

Basically, using a non-wax infused black tissue paper, you peel the deck sections off and adhere them to a flat sheet of the tissue paper, trim the excess and openings, and you end up with a nice soft backing. Then apply a coat of white wood glue to both the deck section and the model deck to which it will be fitted. Once done, place the section onto the deck. The coating of white glue is a little more forgiving than the default adhesive on the decking and you can gently peel it up in areas and reseat should the deck be not sitting pretty.

I'm happy with the result so far.
Port side.jpeg
Also to the first uppers installed, with the elements of the shelter deck installed. :) Forecastle.jpeg
 
Back
Top