-

Win a Free Custom Engraved Brass Coin!!!
As a way to introduce our brass coins to the community, we will raffle off a free coin during the month of August. Follow link ABOVE for instructions for entering.
-

PRE-ORDER SHIPS IN SCALE TODAY!
The beloved Ships in Scale Magazine is back and charting a new course for 2026!
Discover new skills, new techniques, and new inspirations in every issue.
NOTE THAT OUR FIRST ISSUE WILL BE JAN/FEB 2026
You are using an out of date browser. It may not display this or other websites correctly.
You should upgrade or use an alternative browser.
You should upgrade or use an alternative browser.
HMS Medea (28) (1778) 1/48 scratch build
- Thread starter Masters Mate
- Start date
- Watchers 44
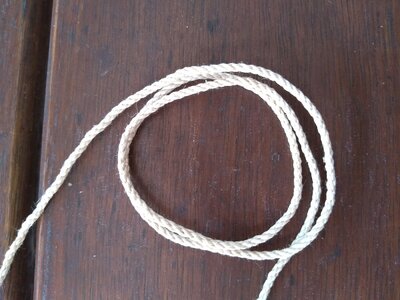
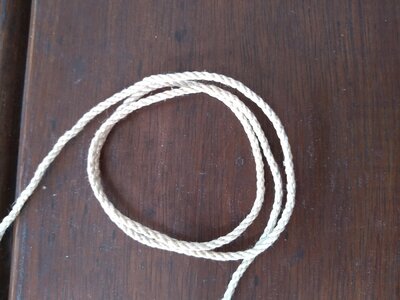
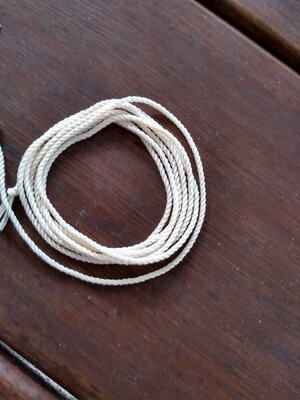
I think so, Ian. Don't want to add trouble to your project, but I would like to suggest a polyester thread. I looked at your images and can see the fuzz, once you will use it on the model, it will attract the dust.think I'm making some progress with my rope walk.
Thanks JimI think so, Ian. Don't want to add trouble to your project, but I would like to suggest a polyester thread. I looked at your images and can see the fuzz, once you will use it on the model, it will attract the dust.
Yes, the last image is polyester - Guterman 100% polyester - but I didn't run a flame along it when finished. I noticed Ohla did that to take off the fuzz. I need a lot more practice yet.
Very good, Ian. No need to run the flame (until you grasp this technique), you can run thread against beeswax brick, it will do it!Thanks Jim
Yes, the last image is polyester - Guterman 100% polyester - but I didn't run a flame along it when finished. I noticed Ohla did that to take off the fuzz. I need a lot more practice yet.
- Joined
- Aug 8, 2019
- Messages
- 5,579
- Points
- 738

Ian, in my thread you can read that I put polyester in the oven.
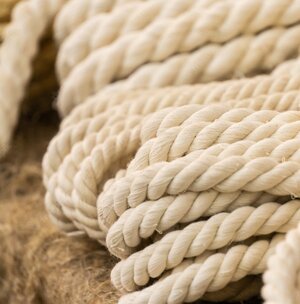
And another tip I can give you is to use Serafil from Amann. 120/2 give a very realistic result of scale rope with no fuzz. The problem is with the yarn you use is, when you look close it looks like cable.
Here you see the difference of real rope and cable
Rope
Cable
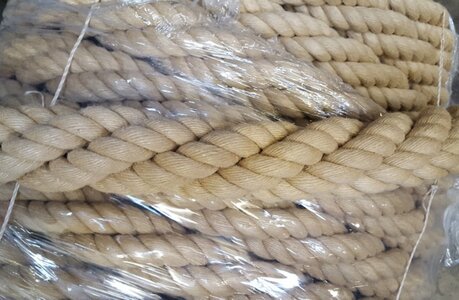
And another tip I can give you is to use Serafil from Amann. 120/2 give a very realistic result of scale rope with no fuzz. The problem is with the yarn you use is, when you look close it looks like cable.
Here you see the difference of real rope and cable
Rope

Cable

Slowly, slowly...I've spent the last few days making the twin capstans.
I made the gundeck one first to learn how to do it. It will be hidden from view eventually.
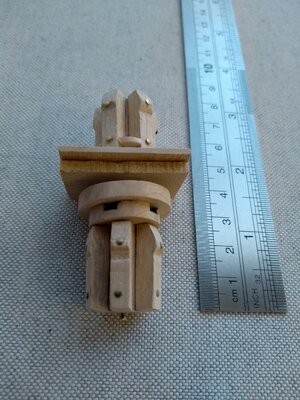
Then I made the Quarterdeck one, with more detail. All dry fitted so not aligned very well yet.
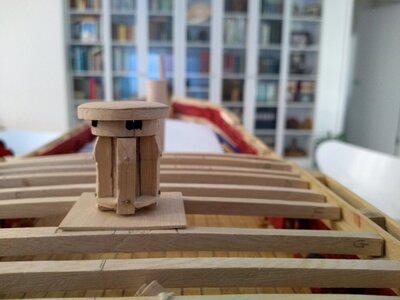
To finish it off I added 5 chains and pins to lock the capstan bars in place. Very fiddly but I'm learning all the time.
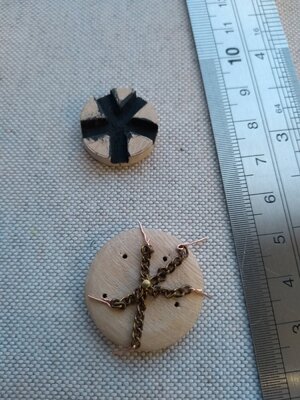
Now I see the photos, those pins look ugly. I'll straighten them a bit more and black them before installing.
Over the weekend I will finish it all off, paint it and install. One more step towards getting that elusive quarterdeck planking on
I made the gundeck one first to learn how to do it. It will be hidden from view eventually.

Then I made the Quarterdeck one, with more detail. All dry fitted so not aligned very well yet.

To finish it off I added 5 chains and pins to lock the capstan bars in place. Very fiddly but I'm learning all the time.

Now I see the photos, those pins look ugly. I'll straighten them a bit more and black them before installing.
Over the weekend I will finish it all off, paint it and install. One more step towards getting that elusive quarterdeck planking on
Thank you for all the likes. I'll put up more images when I get the painting and installation of the capstans done.
Painting isn't my forte but here goes.
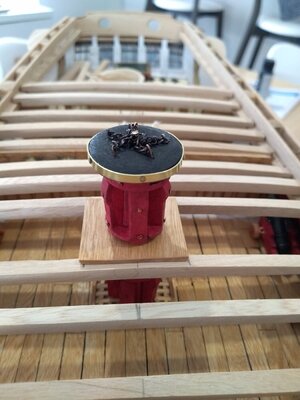
Sharp eyes will notice my big mistake many months ago when I laid the gundeck planks and gratings. The first grating I did is in the wrong place, but since I already have the quarterdeck beams all placed in the correct position I've decided to mount the gundeck capstan on the grating instead of in front of it. Although I know I could have removed the beams, cut out the grating and made a new one, I want to get on with the build. I can live with it once the quarterdeck decking goes on.
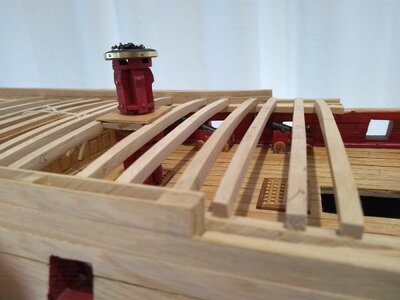
There is camera distortion in this last image but I just want to show off the brass work Brass is my favourite material to work with, but a brass ship would be too expensive to build.
The capstan bars will never be in use (this will be a ship at sea) so they will be stored below the quarterdeck.
Next to continue with the wheels and the binnacle.

Sharp eyes will notice my big mistake many months ago when I laid the gundeck planks and gratings. The first grating I did is in the wrong place, but since I already have the quarterdeck beams all placed in the correct position I've decided to mount the gundeck capstan on the grating instead of in front of it. Although I know I could have removed the beams, cut out the grating and made a new one, I want to get on with the build. I can live with it once the quarterdeck decking goes on.

There is camera distortion in this last image but I just want to show off the brass work
The capstan bars will never be in use (this will be a ship at sea) so they will be stored below the quarterdeck.
Next to continue with the wheels and the binnacle.
Maybe you can lay some "boards" (made out of veneer) on top of the grating (only in the length of the grating) - it will be less visible
Thanks UweMaybe you can lay some "boards" (made out of veneer) on top of the grating (only in the length of the grating) - it will be less visible
Yes, I have tried to do that. Difficult to do without removing some beams but I agree it would be best. Maybe if I just remove one beam I will have more success.
Here you go Uwe. All fixed (without removing any beams).Maybe you can lay some "boards" (made out of veneer) on top of the grating (only in the length of the grating) - it will be less visible
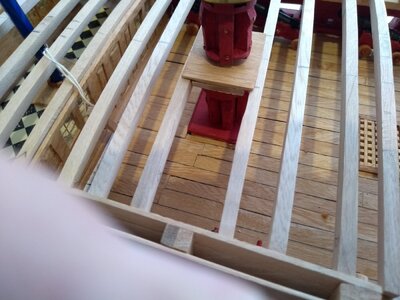
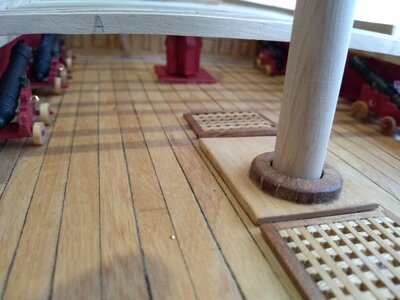
I see it's not quite flat so will adjust it before I glue it in. Thanks for encouraging me to fix it. I can be lazy sometimes.
Much much better - and technically correct (by the view)
If you would not have done something now, you would look at this dteail for the next 20 years and think by yourself why you did not change it in time
Very good
If you would not have done something now, you would look at this dteail for the next 20 years and think by yourself why you did not change it in time
Very good
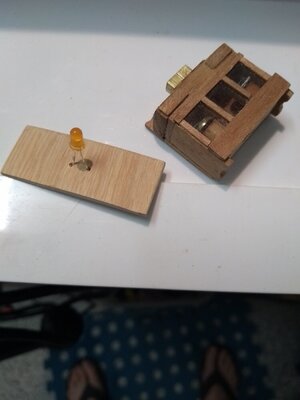
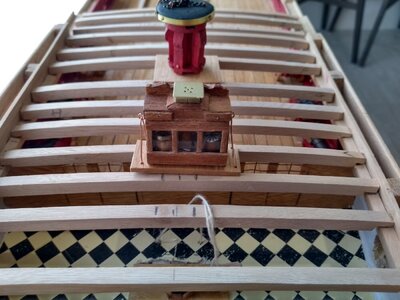
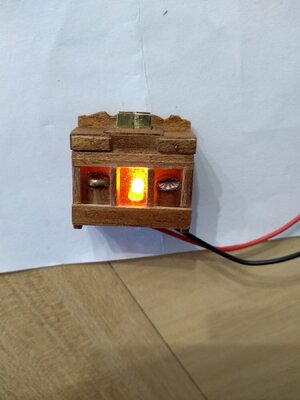
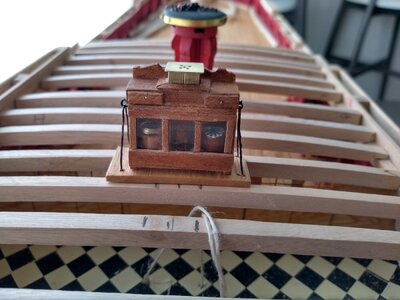
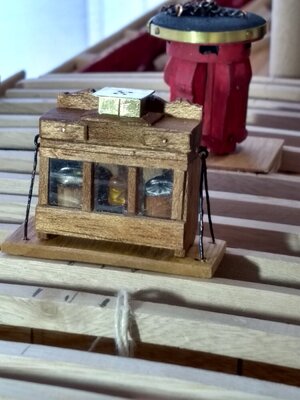
The next item of deck furniture is the binnacle. I started off with some basics.
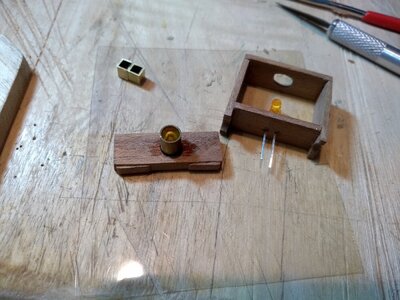
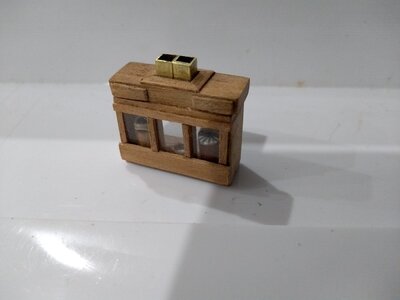
From the start I intended this to be as realistic as possible, including a 3mm LED 'lantern' and actual chimney.
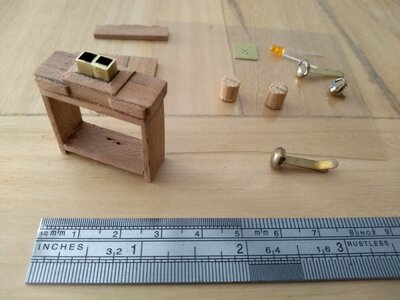
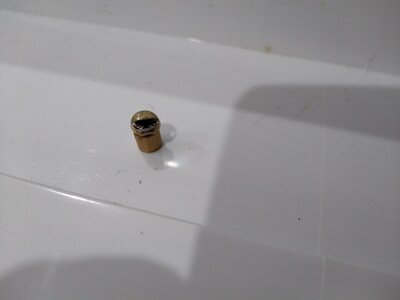
The compasses were made with small dowel and the rounded tops of brass-plated paper clips. A small compass dial was drawn on cardboard and inserted.
More to come...

From the start I intended this to be as realistic as possible, including a 3mm LED 'lantern' and actual chimney.

The compasses were made with small dowel and the rounded tops of brass-plated paper clips. A small compass dial was drawn on cardboard and inserted.

More to come...
Last edited:
great stuff Ian. 
Thanks Bryian. And thanks for all the likes. It gives me encouragement to keep trying.great stuff Ian.
Next is the double wheel so don't expect me back too soon! I've already discarded two attempts so this is IT.
Thank you Shota and the same in return.Ian my friend
Merry Christmas and Happy Holidays for you and your lovely family


So after breaking or rejecting 6 attempts to make a satisfactory double ship's wheel I think I've got it at last.....
Following the images by Lucius (Rüdiger) https://shipsofscale.com/sosforums/threads/hms-euryalus-1803-scale-1-48-completed-build.8335/page-16 I finally settled on what is probably the most difficult method but which helps to prevent the rims breaking when being drilled.
I can't hope to ever reach Rüdiger's skill level but his workmanship gives me ideas which I can practice with.
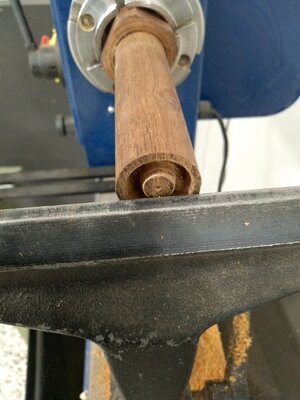
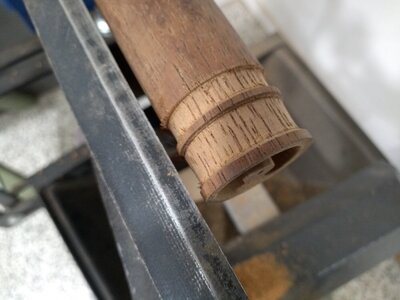
The main barrel was done on the large lathe at our community workshop. Not ideal but I managed.
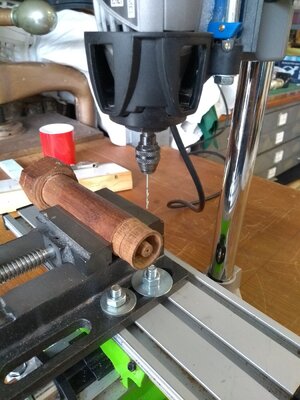
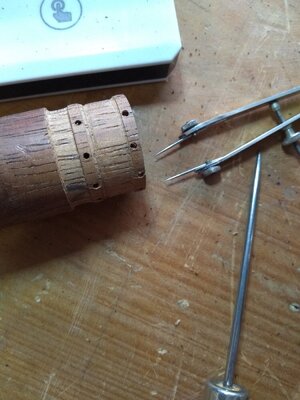
The 1.5 mm holes for the spokes were drilled out with my Dremel drill stand and I must say it was as steady as a rock.
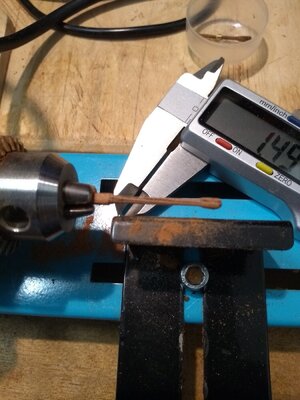
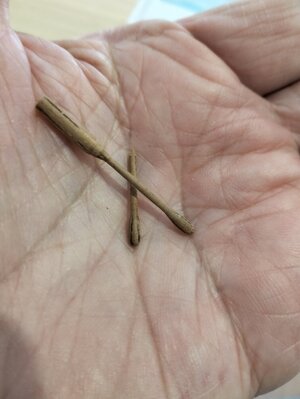
The spokes were turned on my small bead lathe.
Dry fitted for sizing against the plans.
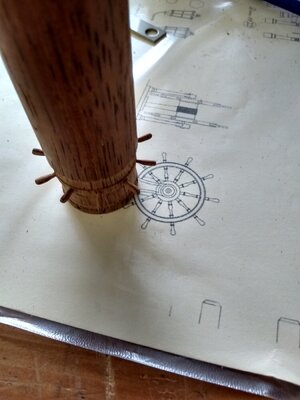
Spokes glued up.
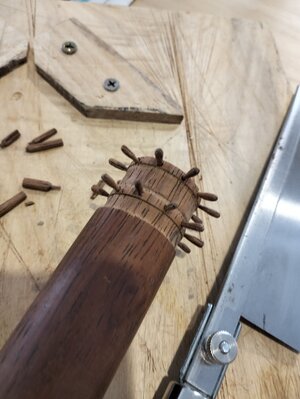
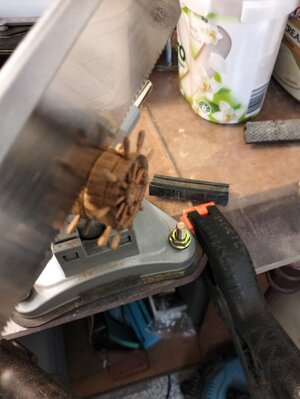
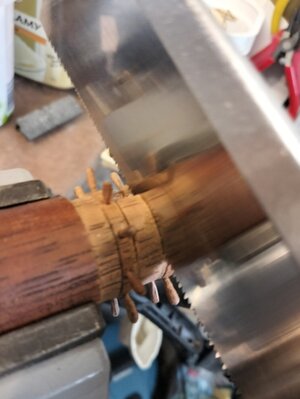
The delicate job of cutting the wheels and drum free.
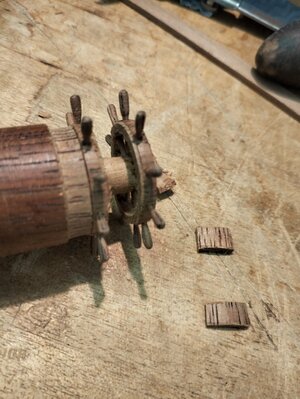
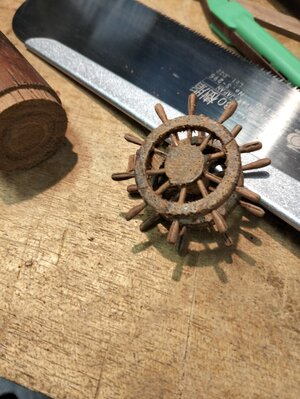
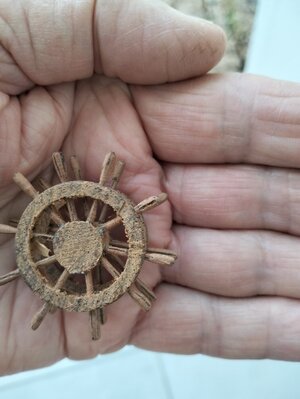
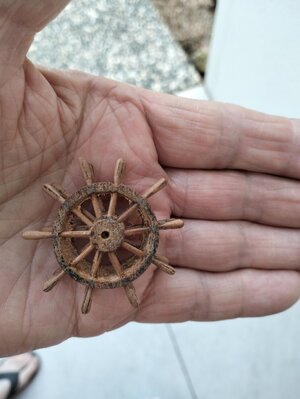
Still plenty of cleaning up to do but I'm satisfied with the result after so many failed attempts.
Happy New Year to all on SOS and may peace break out around the globe in 2023.
Following the images by Lucius (Rüdiger) https://shipsofscale.com/sosforums/threads/hms-euryalus-1803-scale-1-48-completed-build.8335/page-16 I finally settled on what is probably the most difficult method but which helps to prevent the rims breaking when being drilled.
I can't hope to ever reach Rüdiger's skill level but his workmanship gives me ideas which I can practice with.


The main barrel was done on the large lathe at our community workshop. Not ideal but I managed.

The 1.5 mm holes for the spokes were drilled out with my Dremel drill stand and I must say it was as steady as a rock.

The spokes were turned on my small bead lathe.


Dry fitted for sizing against the plans.

Spokes glued up.

The delicate job of cutting the wheels and drum free.


Still plenty of cleaning up to do but I'm satisfied with the result after so many failed attempts.
Happy New Year to all on SOS and may peace break out around the globe in 2023.
- Joined
- Apr 20, 2020
- Messages
- 6,245
- Points
- 738

Wow, wonderful workSo after breaking or rejecting 6 attempts to make a satisfactory double ship's wheel I think I've got it at last.....
Following the images by Lucius (Rüdiger) https://shipsofscale.com/sosforums/threads/hms-euryalus-1803-scale-1-48-completed-build.8335/page-16 I finally settled on what is probably the most difficult method but which helps to prevent the rims breaking when being drilled.
I can't hope to ever reach Rüdiger's skill level but his workmanship gives me ideas which I can practice with.
View attachment 348434View attachment 348435
The main barrel was done on the large lathe at our community workshop. Not ideal but I managed.
View attachment 348436
The 1.5 mm holes for the spokes were drilled out with my Dremel drill stand and I must say it was as steady as a rock.
View attachment 348437
The spokes were turned on my small bead lathe.
View attachment 348438
View attachment 348439
Dry fitted for sizing against the plans.
View attachment 348440
Spokes glued up.
View attachment 348441
The delicate job of cutting the wheels and drum free.
View attachment 348442View attachment 348446
View attachment 348447
View attachment 348448
View attachment 348449
View attachment 348450
Still plenty of cleaning up to do but I'm satisfied with the result after so many failed attempts.
Happy New Year to all on SOS and may peace break out around the globe in 2023.


