-

Win a Free Custom Engraved Brass Coin!!!
As a way to introduce our brass coins to the community, we will raffle off a free coin during the month of August. Follow link ABOVE for instructions for entering.
-

PRE-ORDER SHIPS IN SCALE TODAY!
The beloved Ships in Scale Magazine is back and charting a new course for 2026!
Discover new skills, new techniques, and new inspirations in every issue.
NOTE THAT OUR FIRST ISSUE WILL BE JAN/FEB 2026
You are using an out of date browser. It may not display this or other websites correctly.
You should upgrade or use an alternative browser.
You should upgrade or use an alternative browser.
HMS Medea (28) (1778) 1/48 scratch build
- Thread starter Masters Mate
- Start date
- Watchers 44
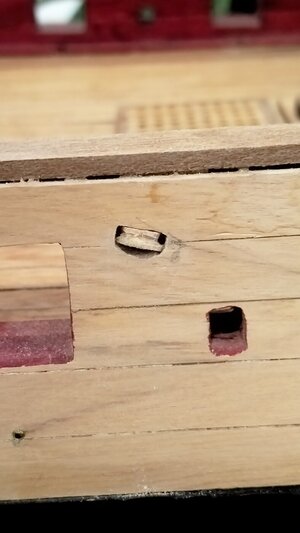
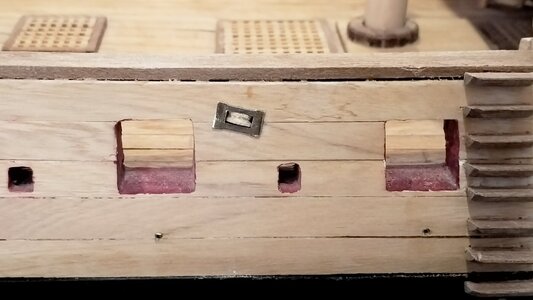
Hello Ian, a heroic effort in order to make that wall functional with doors and hinges. My respect.
Thanks Paul. My miniature work is pretty rough under the glare of the camera but doesn't look too shabby in reality. I'm still enjoying the challenges so that's the main thing.Hello Ian, a heroic effort in order to make that wall functional with doors and hinges. My respect.
Your work is so precise I am envious of your skill, so I take your respect very seriously.
The next project was the six carronades. For the guns themselves I chose some left over bookshelf brackets and some old electrical fittings I have had in a drawer since we re-wired out farmhouse in 1981 (I know....)
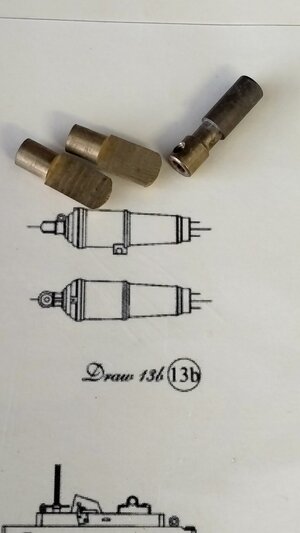
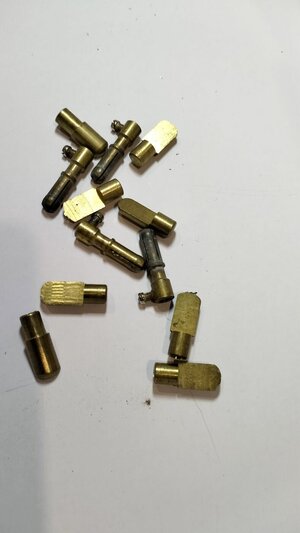
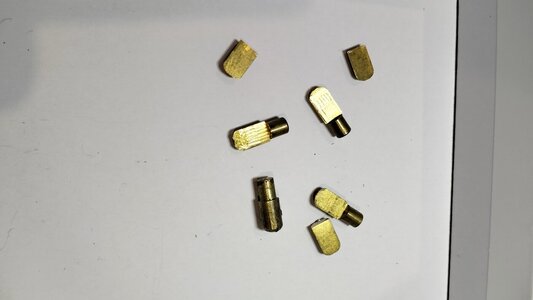
Some of the shelf brackets were cut in half to provide the other half of the round cannon. They were soldered together.
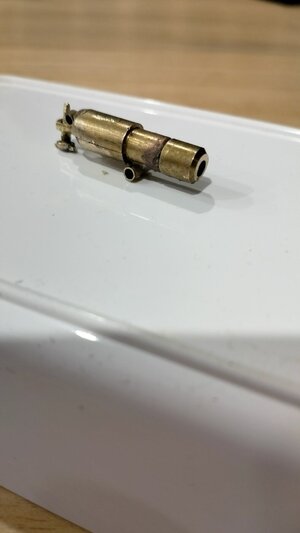
Part of the electrical fitting was soldered on the end for the muzzle and small brass rod cut to size for the mounting point underneath and ring on the breach.
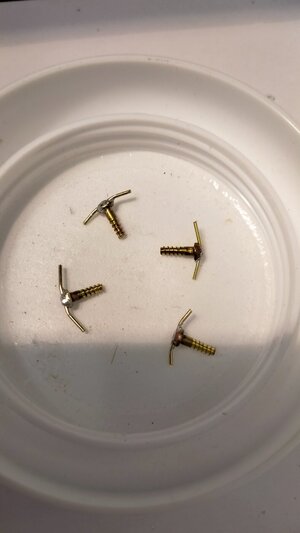
Small brass screws were reduced in diameter and I soldered a small brass handle on the end. These later had to be reduced further to fit the mounting bar and I lost most traces of the thread.
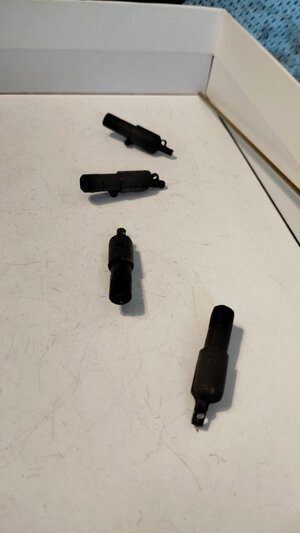
Finally they were blacked with Casey Black and touched up with matt black enamel.
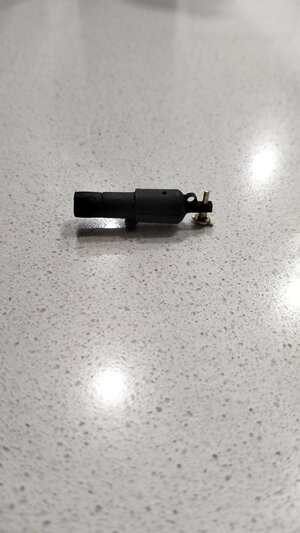
I'm now proceeding with the carriages, a combination of brass and wood.


Some of the shelf brackets were cut in half to provide the other half of the round cannon. They were soldered together.

Part of the electrical fitting was soldered on the end for the muzzle and small brass rod cut to size for the mounting point underneath and ring on the breach.
Small brass screws were reduced in diameter and I soldered a small brass handle on the end. These later had to be reduced further to fit the mounting bar and I lost most traces of the thread.

Finally they were blacked with Casey Black and touched up with matt black enamel.


I'm now proceeding with the carriages, a combination of brass and wood.
Last edited:
I love this sentence Ian...For the guns themselves I chose some left over bookshelf brackets and some old electrical fittings

It turns out a very good decision to source your old brass parts, your virtual envision pays off. Hint: use graphite powder and lightly brush the barrels to give that gun-metal look!
Thanks Jim. I'll give the graphite a go. I had trouble getting the brass clean enough for the Casey Black to be uniform. Too much solder residue I guess. I filed and sanded them but there were still patches which I needed to paint. I don't like the dull look so will keep working on them to get a more realistic finish.It turns out a very good decision to source your old brass parts, your virtual envision pays off. Hint: use graphite powder and lightly brush the barrels to give that gun-metal look!
After the soldering is done, give those parts a bath in the vinegar for some time. It should remove any oxidation while soldering. After that, rinse with cold water and clean parts with Windex. Then, you can use the steel wool to make them shine.Thanks Jim. I'll give the graphite a go. I had trouble getting the brass clean enough for the Casey Black to be uniform. Too much solder residue I guess. I filed and sanded them but there were still patches which I needed to paint. I don't like the dull look so will keep working on them to get a more realistic finish.
Sound advice again, Jim. Thanks. I still have two more guns to do so I will make them even better!After the soldering is done, give those parts a bath in the vinegar for some time. It should remove any oxidation while soldering. After that, rinse with cold water and clean parts with Windex. Then, you can use the steel wool to make them shine.
I had a win yesterday when I found some 2mm x 6 mm black bolts in a Hobby shop. They fit the job perfectly and I'll use them instead of the brass screws I started with.
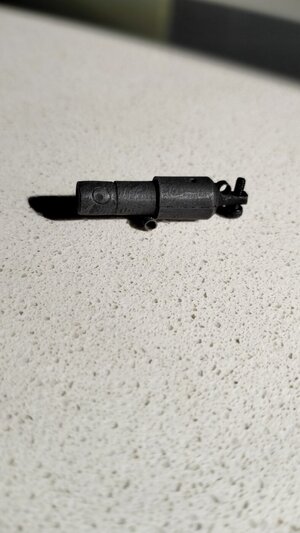
Now onto the carronade slide mounts. Bear with me, this is all scratch built with minimal tools so there is no fancy lathe work or the like.
The basic parts. I used the Dremel drill press for all drilling and machining.
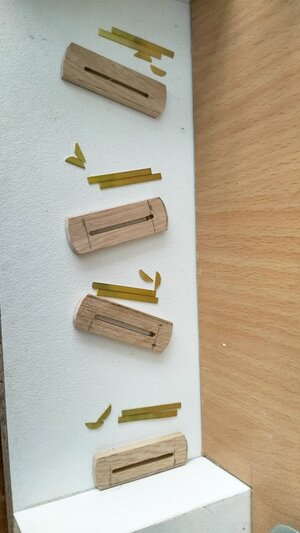
Beds assembled. Some were no good and I replaced the brass with a better fit.
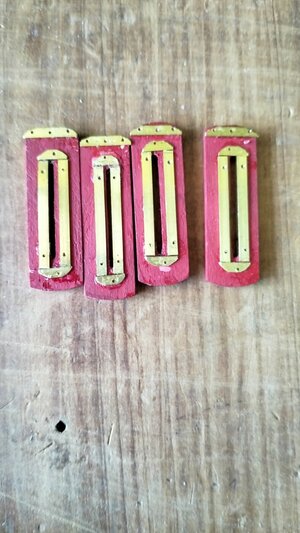
The wheels were made with 1.6 mm brass rod and .83mm brass wire.
They had to work as wheels (or rollers).
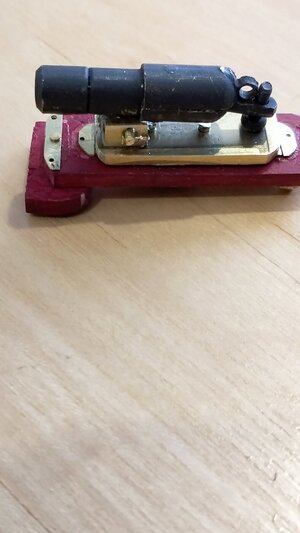
The first gun off the rank - still some work to do but getting there I think.
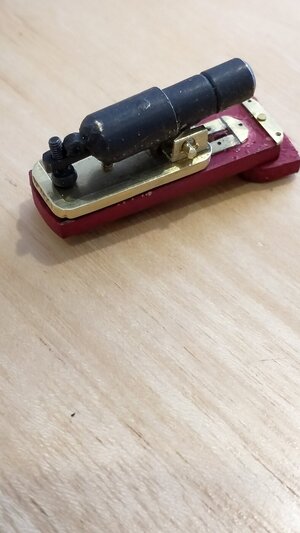
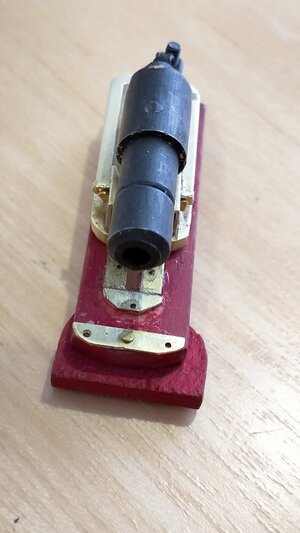
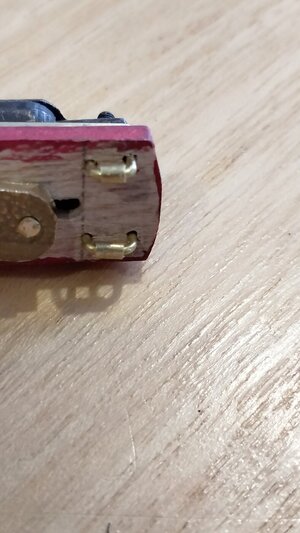
Detail of the locking pins on the axles - .07 mm nails fitted to holes drilled through 1.6mm axles.
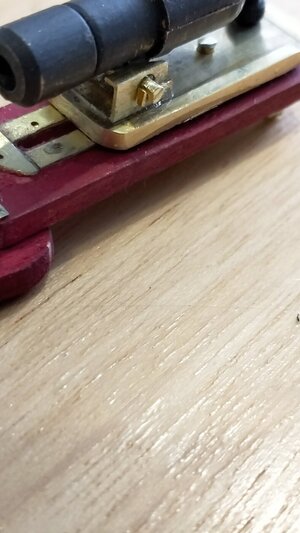
The wheels (rollers).
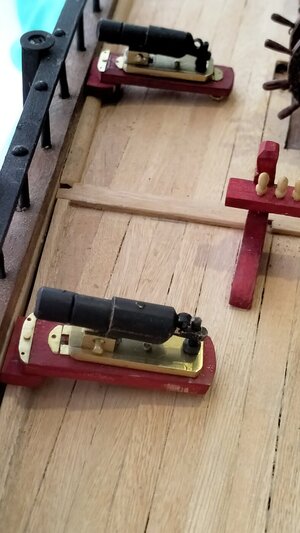
The first two guns on the deck. Still need to add rings and other fittings.
It isn't anywhere near perfection but as my first build I can live with the results. The main thing for me is to keep reaching goals and improving my skills.
My third slide mount turned out to be an OOPS! I attached the mounting block the wrong way around and didn't notice until I had burred the pins holding it together. More drilling to come before I can recover this one.
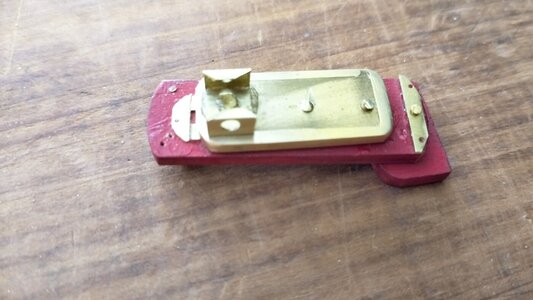
The basic parts. I used the Dremel drill press for all drilling and machining.

Beds assembled. Some were no good and I replaced the brass with a better fit.

The wheels were made with 1.6 mm brass rod and .83mm brass wire.

They had to work as wheels (or rollers).

The first gun off the rank - still some work to do but getting there I think.


Detail of the locking pins on the axles - .07 mm nails fitted to holes drilled through 1.6mm axles.

The wheels (rollers).

The first two guns on the deck. Still need to add rings and other fittings.

It isn't anywhere near perfection but as my first build I can live with the results. The main thing for me is to keep reaching goals and improving my skills.
My third slide mount turned out to be an OOPS! I attached the mounting block the wrong way around and didn't notice until I had burred the pins holding it together. More drilling to come before I can recover this one.

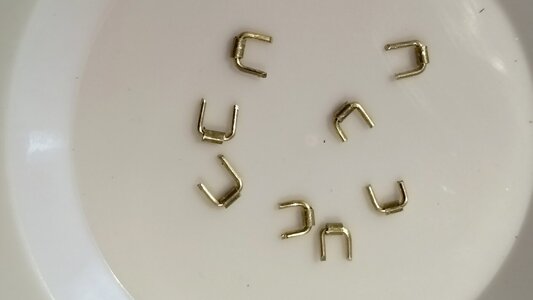
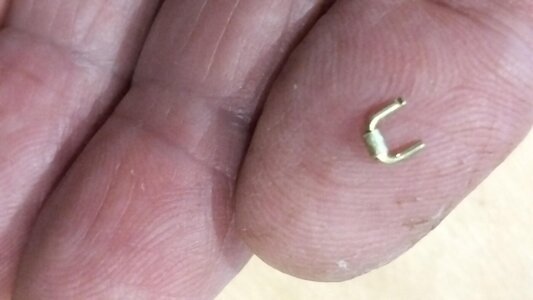
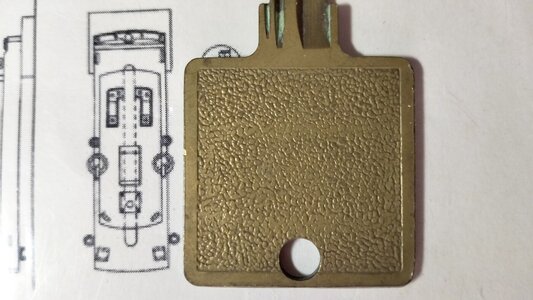
I forgot to mention that the brass sliding beds were formed from more of the brass keys I used earlier, and the bracket was purchased box section brass with a section cut out of the top just wide enough to support the gun.
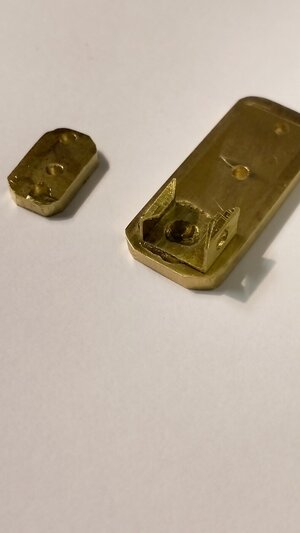
And a better shot of the gun mounting axle and pin.
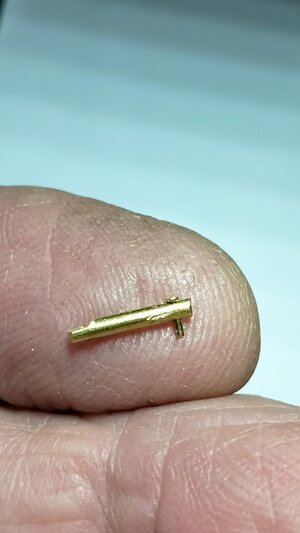
Next? Who knows. But it will be fun.


And a better shot of the gun mounting axle and pin.

Next? Who knows. But it will be fun.
Impressive!
Excellent decision and great execution! Well done, Bravo. What about various tackle eyelets and breeching rings? Are they next?
Thank you Paul for your encouragement, and everyone who has liked (even loved) my efforts.Impressive!
It still blows my mind sometimes to wake up to comments and likes from such a wide range of countries around the world.
Today :
USA, Austria, Norway, Italy, Netherlands & Israel. It's a privilege to share with such a great Forum.
Fantastic use of scrap brass parts in the production of your guns. I have found over many years of scratch building model ships that I have developed an eye for every piece of scrap brass, jewelry or what ever as to where it might come in useful for a ship fitting.
My wife despairs but I always find a use for these bits and pieces. When I saved the parts that went into the guns I had no idea I would start ship building in 2019, much less a scratch build.Fantastic use of scrap brass parts in the production of your guns. I have found over many years of scratch building model ships that I have developed an eye for every piece of scrap brass, jewelry or what ever as to where it might come in useful for a ship fitting.
Even after downsizing from our farm and bookbinding business I still found room to store some interesting bits and they gradually come into use.
Almost all the wood for my Medea build came from our farm and was milled initially by chain saw, then band saw, saw stop saw, small table saw and even scroll saw.
We stopped in at our old farm today for the first time since we sold. No-one home but a beautiful Queensland Maple we planted has been cut down into billets so I will go back and see if I can buy a bit one day soon.
A few updates to come over the next few days.
I finally decided how to cover the roof of the quarter galleries. I figured that, considering this ship had been severely hammered in several ship to ship encounters over a three year period, the gallery roofs would have required repair with what was available at sea.
I found a roll of lead about 1/4" diameter amongst my stuff so decided to use that as I know there was always lead on board these ships - used as ballast until required for other purposes.
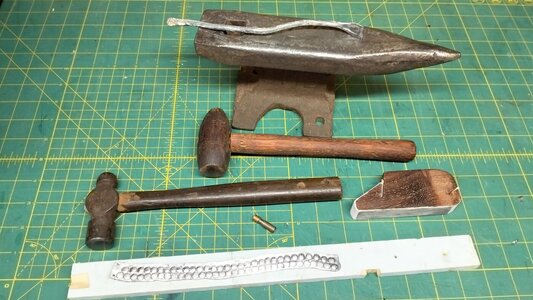
I flattened out the lead to less than 1/16" thick and embossed a 'tile' pattern with a hollow brass electrical fitting.
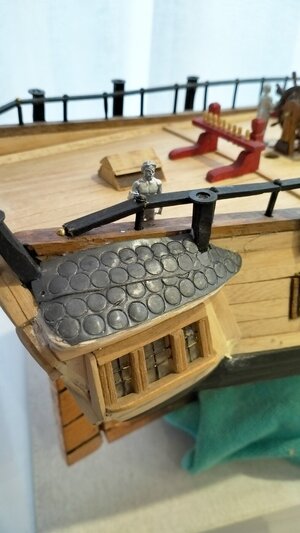
The camera is unkind again (it has better eyes than me ) but I'm quite satisfied with the result.
I finally decided how to cover the roof of the quarter galleries. I figured that, considering this ship had been severely hammered in several ship to ship encounters over a three year period, the gallery roofs would have required repair with what was available at sea.
I found a roll of lead about 1/4" diameter amongst my stuff so decided to use that as I know there was always lead on board these ships - used as ballast until required for other purposes.

I flattened out the lead to less than 1/16" thick and embossed a 'tile' pattern with a hollow brass electrical fitting.

The camera is unkind again (it has better eyes than me
Another little bit of progress made around New Year's Day. I had a lot of trouble finding a plan for this - the Enterprise kit models didn't show me much and my plans were less than helpful. In the end I took an uneducated guess and built it this way. At least it has enough belaying pins for any eventuality!
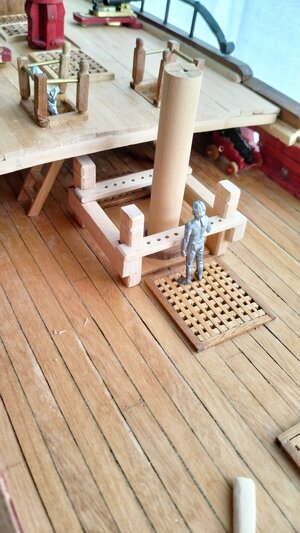
I note a drunken sailor has dislodged the handrail as he fell backwards on the stairs.
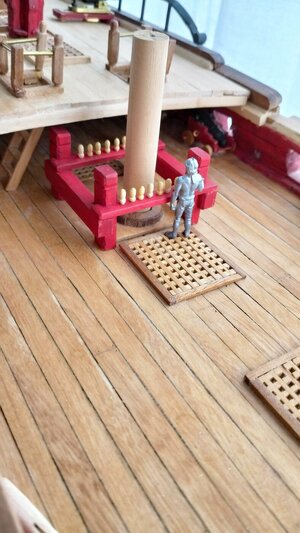
Next update, how I spent several weeks with my new toy.....

I note a drunken sailor has dislodged the handrail as he fell backwards on the stairs.

Next update, how I spent several weeks with my new toy.....
Excellent work on belaying pin bits, and quarter galleries, Ian. 


...a new toy? Umm...what is it? Waiting for your next update...Next update, how I spent several weeks with my new toy.....


