Boom! Way to go Ian. A very satisfying outcome!
-

Win a Free Custom Engraved Brass Coin!!!
As a way to introduce our brass coins to the community, we will raffle off a free coin during the month of August. Follow link ABOVE for instructions for entering.
-

PRE-ORDER SHIPS IN SCALE TODAY!
The beloved Ships in Scale Magazine is back and charting a new course for 2026!
Discover new skills, new techniques, and new inspirations in every issue.
NOTE THAT OUR FIRST ISSUE WILL BE JAN/FEB 2026
You are using an out of date browser. It may not display this or other websites correctly.
You should upgrade or use an alternative browser.
You should upgrade or use an alternative browser.
HMS Medea (28) (1778) 1/48 scratch build
- Thread starter Masters Mate
- Start date
- Watchers 44
I agree with Paul, the result speaks for itself. 
I know this is old but I did not see that anyone ever answered, but I think you were referring to timberheads which were an extension of frames above the rails.The next thing is to complete the posts along the railing (what are they called???)
The forward grating looks very nicely made.
Will you be tapering the knee of the head as was normally done? The upper part of the knee on a 28 gun ship is shown to be sided 11.5 inches at the stem then taper all the way down to 4 inches at the fore part where the figure head sits (from David Steel's The Elements and Practice of Naval Architecture, folio XLVIII). If nothing else it keeps the figure head from being bowlegged.
I like the canvas covers on the gratings that you were not pleased with.
Allan
Last edited:
Thanks Paul. I'm glad it's out of the way and I can get on with stuff I am more confident about.Boom! Way to go Ian. A very satisfying outcome!
Thanks Jim. Your encouragement has been important to me all along!I agree with Paul, the result speaks for itself.
Thanks for you input Allan. It is much appreciated.I know this is old but I did not see that anyone ever answered, but I think you were referring to timberheads which were an extension of frames above the rails.
The forward grating looks very nicely made.
Will you be tapering the knee of the head as was normally done? The upper part of the knee on a 28 gun ship is shown to be sided 11.5 inches at the stem then taper all the way down to 4 inches at the fore part where the figure head sits (from David Steel's The Elements and Practice of Naval Architecture, folio XLVIII). If nothing else it keeps the figure head from being bowlegged.
I like the canvas covers on the gratings that you were not pleased with.
Allan
I still have some timber edging, gilding, a step and the 4 pedestals to make to complete the head.
The basic plans I have don't show the detail you describe for the knee and the photo of the Hillhouse model in the Bristol Museum doesn't show it because the figurehead is installed, so it would be hidden. No doubt Mr Hillhouse tapered it on his model. I'll fix it to scale.
I can do better on the canvas covers. I stiffened the cloth too early and they would have worked better if properly shaped on the cords first and then stiffened on the hatch (dilute PVA).
The 'timber heads' will be addons because I cut the tops off the frames too low!
Just catching up on your build log Ian. Looking great. 
Me too, Ian. Well, I didn't cut them too low - but I did cut them off at the top of the bulwark. In my case because by the time I had faired the hull the top timbers were all manner of different shapes and sizes. I decided I would add faux ones that looked more respectable. If you keep my secret, I'll keep yours...The 'timber heads' will be addons because I cut the tops off the frames too low!
Your secret is safe with me, Paul.Me too, Ian. Well, I didn't cut them too low - but I did cut them off at the top of the bulwark. In my case because by the time I had faired the hull the top timbers were all manner of different shapes and sizes. I decided I would add faux ones that looked more respectable. If you keep my secret, I'll keep yours...
In my case I have no idea where the top of the frames were so I just have to wing it and place the 'top timbers' where they look right according to the sketchy plans.
It's not as though anyone will notice
Right. It's not like they are sitting on the top where everyone can see them...It's not as though anyone will notice
- Joined
- Apr 20, 2020
- Messages
- 6,224
- Points
- 738

Ian, great work it's looks beautifulNext came the grating for the head.
Support beams fitted.
View attachment 481393
I had some 'scraps' left over from some earlier gratings made with my CNC machine so worked with them.
View attachment 481394
View attachment 481395
I should have made a paper template because I made this triangle way too big and then had to waste time cutting and sanding it to the correct shape. The joys of having no instructions or prior experience...
A torch lit image taken at 2 am after I couldn't get to sleep....
View attachment 481396
Almost finished. Still a fair bit of gilding and woodwork to do.
View attachment 481398
View attachment 481397
So there's a couple of week's work and the worst of it is over. It doesn't seem so intimidating anymore .
Thanks, Bryian.Just catching up on your build log Ian. Looking great.
Thanks Shota.Ian, great work it's looks beautiful
This next step was of the greatest importance to the crew...
1/8" brass tube was cut off in quarter inch lengths and 1/4" brass washers soldered on top.
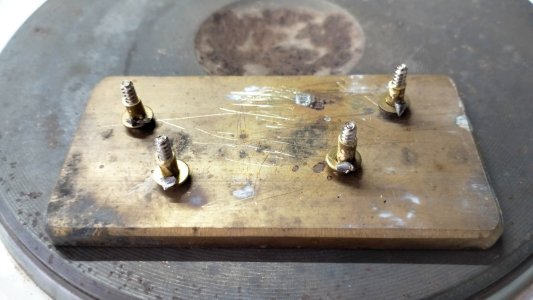
I inserted a screw into the rod to hold the brass in place, but to be brutally honest, my previously successful method of 'soldering' by placing a small amount of flux core solder on the part and heating on the hot plate did not work well and I resorted to using a soldering iron.
Brass cleaned and then blacked. A 1/8" hole sanded part way through the grating at the appropriate spacing and then the pedestals were mounted. Then one was quickly mounted by my 3D sailor, who looks very pale (perhaps scurvy and diarrhea), sitting and wistfully looking towards home. No bucket to clean up yet. That's on the list.....
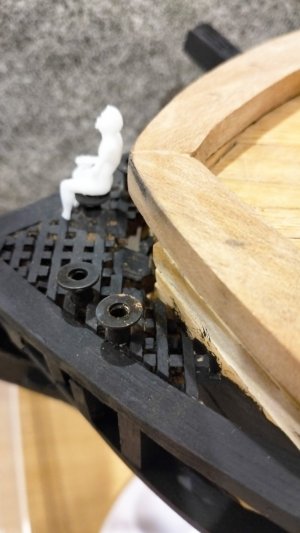
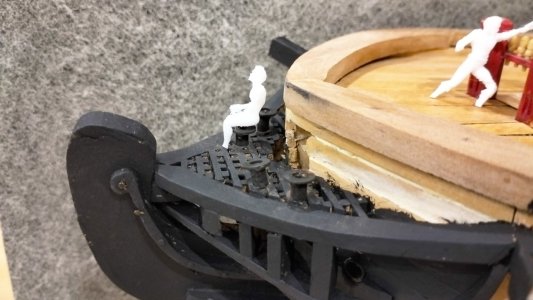
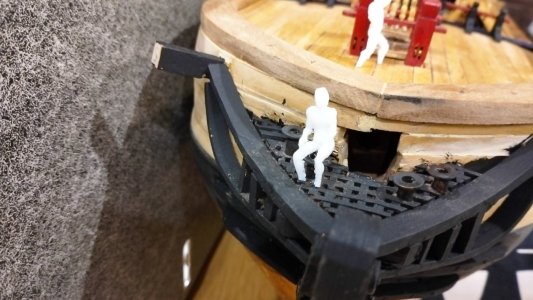
The pedestals still need to be glued in and pale men need to be painted. (I also have to sort out the 3D printing so I don't lose the feet of these poor guys. They've been through enough!)
1/8" brass tube was cut off in quarter inch lengths and 1/4" brass washers soldered on top.

I inserted a screw into the rod to hold the brass in place, but to be brutally honest, my previously successful method of 'soldering' by placing a small amount of flux core solder on the part and heating on the hot plate did not work well and I resorted to using a soldering iron.
Brass cleaned and then blacked. A 1/8" hole sanded part way through the grating at the appropriate spacing and then the pedestals were mounted. Then one was quickly mounted by my 3D sailor, who looks very pale (perhaps scurvy and diarrhea), sitting and wistfully looking towards home. No bucket to clean up yet. That's on the list.....


The pedestals still need to be glued in and pale men need to be painted. (I also have to sort out the 3D printing so I don't lose the feet of these poor guys. They've been through enough!)
So, over the last few days I realized I had once again jumped a step because of a lack of written instructions.
In my rush to provide toilet facilities for the crew, I failed to take into account the amount of work I needed to do to fit a collar and support for the bowsprit. So I had to remove the pedestals to work there.
For the collar I chose a piece of olive (still wood from our farm). It was just a pruned branch but it is beautiful wood and I already knew it can be worked down to fine dimensions without breaking, from the making of the ship's wheel.
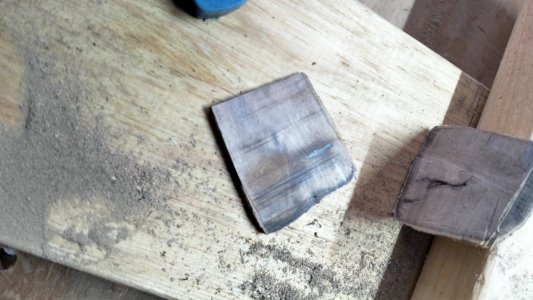
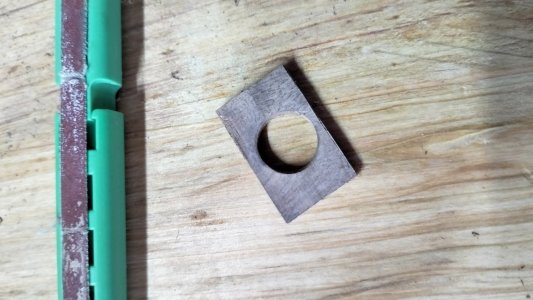
Fitted, with a support underneath the bowsprit.
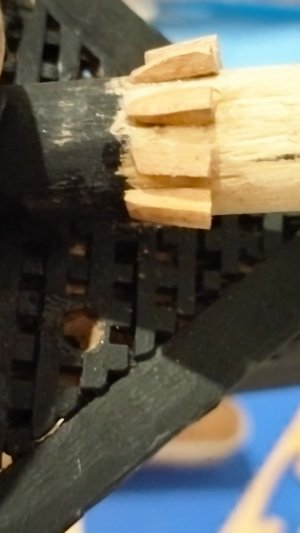
The 'chocks' fitted for the lashing rope.
Painted up to the next area for work over the next few days.
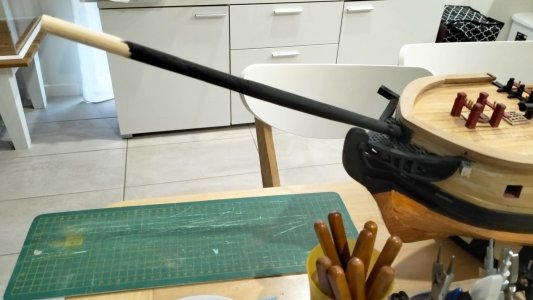
I must explain that I could have spent more time sanding and making the bowsprit perfect but for my upcoming diorama I will be representing Medea after losing her bowsprit when run down by an East Indiaman in Portsmouth, then having to make repairs mid Atlantic when it failed again, then suffering again during the capture of a) a French store ship off Cape of Good Hope, b) a French sloop of war (18 guns) carrying dispatches and c) a 64 gun Dutch warship which Medea captured after a one hour battle with the two ships anchored broadside to each other.
So part of my secret is out. Many of my learning mistakes with this scratch build might be explained by the above and more to come.
I'm starting to enjoy the work again now so I look forward to it each day. Life's good.
In my rush to provide toilet facilities for the crew, I failed to take into account the amount of work I needed to do to fit a collar and support for the bowsprit. So I had to remove the pedestals to work there.
For the collar I chose a piece of olive (still wood from our farm). It was just a pruned branch but it is beautiful wood and I already knew it can be worked down to fine dimensions without breaking, from the making of the ship's wheel.


Fitted, with a support underneath the bowsprit.

The 'chocks' fitted for the lashing rope.

Painted up to the next area for work over the next few days.

I must explain that I could have spent more time sanding and making the bowsprit perfect but for my upcoming diorama I will be representing Medea after losing her bowsprit when run down by an East Indiaman in Portsmouth, then having to make repairs mid Atlantic when it failed again, then suffering again during the capture of a) a French store ship off Cape of Good Hope, b) a French sloop of war (18 guns) carrying dispatches and c) a 64 gun Dutch warship which Medea captured after a one hour battle with the two ships anchored broadside to each other.
So part of my secret is out. Many of my learning mistakes with this scratch build might be explained by the above and more to come.
I'm starting to enjoy the work again now so I look forward to it each day. Life's good.
Last edited:
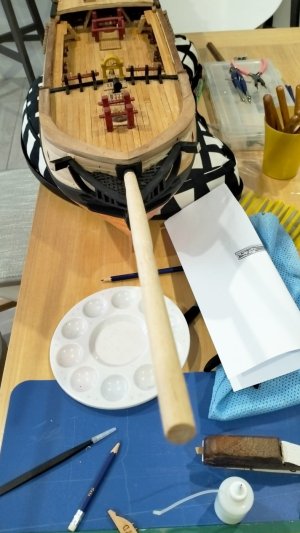
Another mistake corrected. I made the bowsprit too long and had to cut it shorter after it was glued into place. My problem was how to keep it still so the sawing motion didn't cause more damage to the ship. Having a farm for 40 years taught me to look around and I soon found the answer. Ugly but effective...
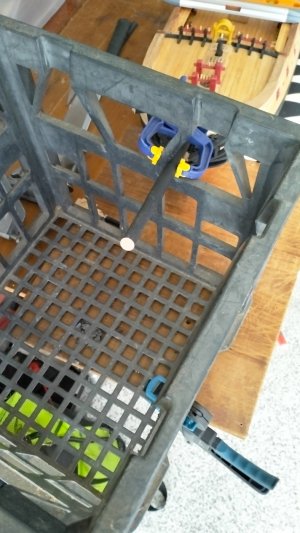
A milk crate was clamped to the bench and the bowsprit clamped near a hole in the crate. It was supported underneath with a piece of stock.
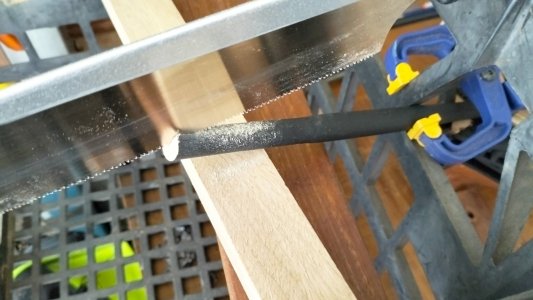
After cutting out the extra length I made a scarf joint to re-attach the completed cap section.
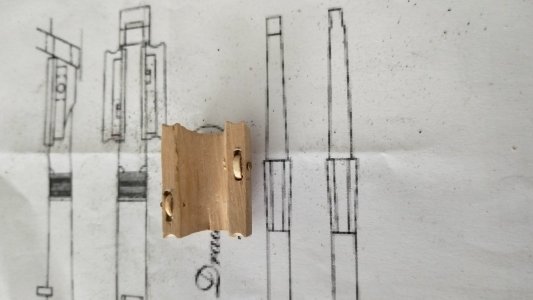
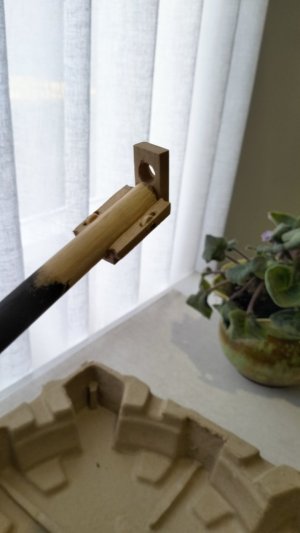
And with the jib-boom fitted. This also had to be moved forward after working out proportions.
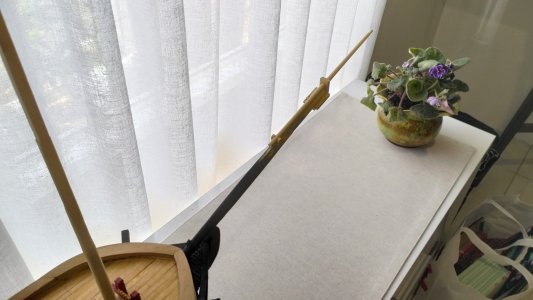
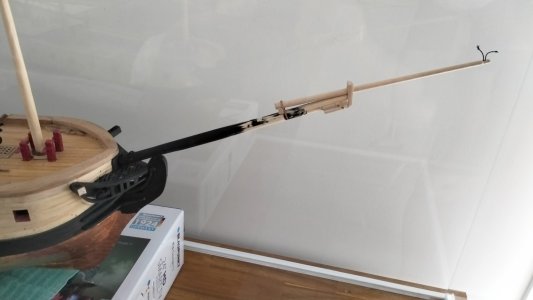
Dry fitted after moving forward. Test stay rope threaded through pulley.
I think I'm making so many mistakes because I want to get the foremast stepped and rigged but by doing so I have to back track all the time to place fittings which would be difficult later. This part of the build is really showing me my lack of build experience. The task I took on attempting to build Medea from scratch without kit building experience is sometimes overwhelming and every small part seems to take forever to complete.
Anyway, that's why I am charging ahead trying to step the foremast - just so I have something different to look at in the ship case.

A milk crate was clamped to the bench and the bowsprit clamped near a hole in the crate. It was supported underneath with a piece of stock.

After cutting out the extra length I made a scarf joint to re-attach the completed cap section.


And with the jib-boom fitted. This also had to be moved forward after working out proportions.


Dry fitted after moving forward. Test stay rope threaded through pulley.
I think I'm making so many mistakes because I want to get the foremast stepped and rigged but by doing so I have to back track all the time to place fittings which would be difficult later. This part of the build is really showing me my lack of build experience. The task I took on attempting to build Medea from scratch without kit building experience is sometimes overwhelming and every small part seems to take forever to complete.
Anyway, that's why I am charging ahead trying to step the foremast - just so I have something different to look at in the ship case.
A very nice recovery!
Back tracking a bit - I've been gradually putting together chains and dead-eyes for the foremast setup.
For the bottom plate I hammered out some round brass stock to the correct width and then flattened the ends with a punch to facilitate the holes.
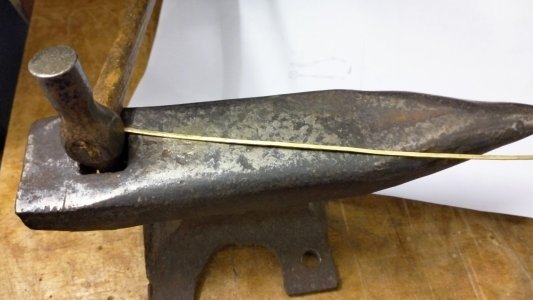
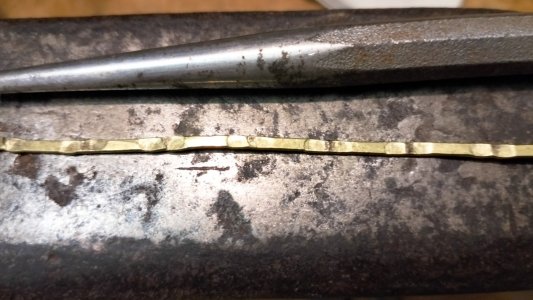
They were cut to length and drilled out, with a success rate of about 80%
No photos of a lot of the process and now have two sets completed. (The wood is jacaranda but the camera got confused by the green background and showed it as pink).
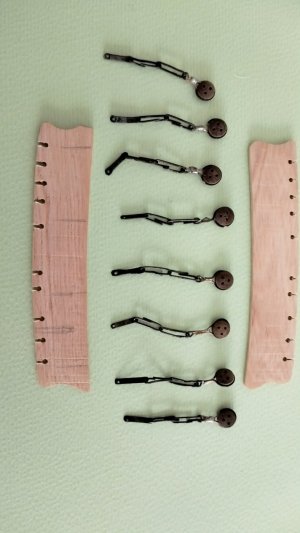
Dry fitted and work to do, but I enjoy this a lot.
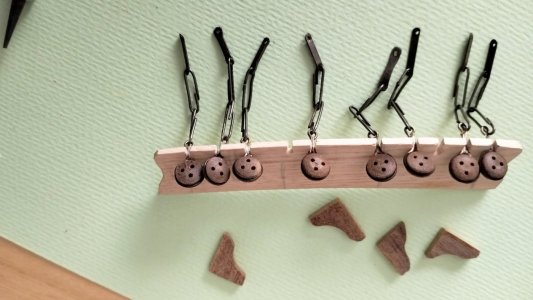
For the bottom plate I hammered out some round brass stock to the correct width and then flattened the ends with a punch to facilitate the holes.


They were cut to length and drilled out, with a success rate of about 80%
No photos of a lot of the process and now have two sets completed. (The wood is jacaranda but the camera got confused by the green background and showed it as pink).

Dry fitted and work to do, but I enjoy this a lot.

Seeing this on the big screen, I'll have to close up those chain links. I thought I could get away with only soldering the deadeye rings but the camera says otherwise.Back tracking a bit - I've been gradually putting together chains and dead-eyes for the foremast setup.
For the bottom plate I hammered out some round brass stock to the correct width and then flattened the ends with a punch to facilitate the holes.
View attachment 489186
View attachment 489187
They were cut to length and drilled out, with a success rate of about 80%
No photos of a lot of the process and now have two sets completed. (The wood is jacaranda but the camera got confused by the green background and showed it as pink).
View attachment 489188
Dry fitted and work to do, but I enjoy this a lot.
View attachment 489190
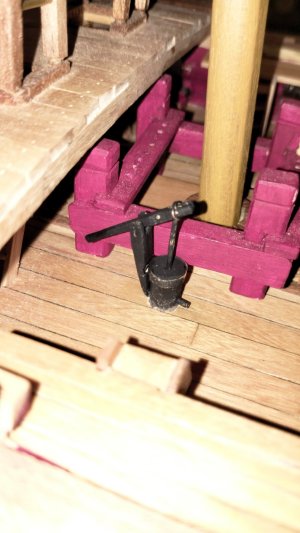
Some small progress. I made the two pumps for the gun deck using jacaranda, brass and copper wire.
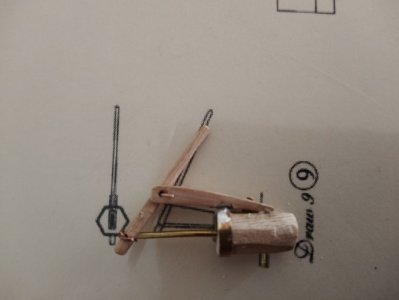
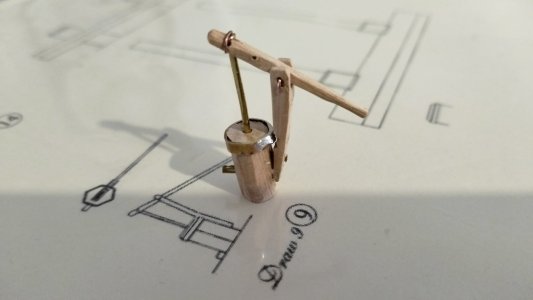
The 'extra hole in the pump arm was the first attempt to get the brass rod to line up. This is a 'working' model (only down to deck level).
Painted and fitted.
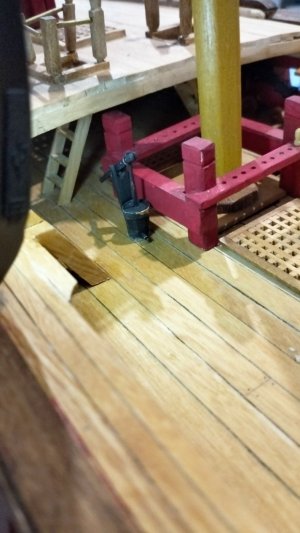
Flash camera view.
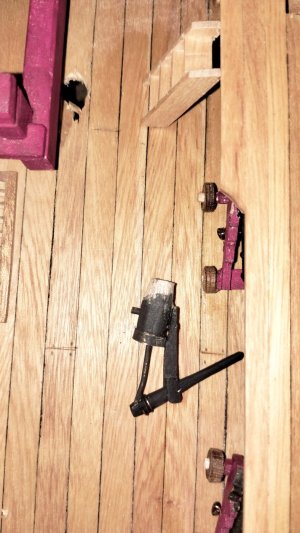
The port side installation ran into a problem where I drilled a particularly thin section of deck. So a repair to do there before the port pump is finished.
Not a lot happening otherwise but I am progressing with a store of chains and deadeyes.
Wishing all my followers and visitors a Happy Festive Season and plenty of time to relax with your modelling.
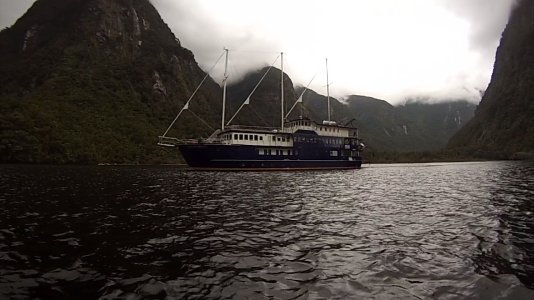
Doubtful Sound New Zealand 2016- my favourite place on earth.


The 'extra hole in the pump arm was the first attempt to get the brass rod to line up. This is a 'working' model (only down to deck level).
Painted and fitted.

Flash camera view.

The port side installation ran into a problem where I drilled a particularly thin section of deck. So a repair to do there before the port pump is finished.

Not a lot happening otherwise but I am progressing with a store of chains and deadeyes.
Wishing all my followers and visitors a Happy Festive Season and plenty of time to relax with your modelling.

Doubtful Sound New Zealand 2016- my favourite place on earth.


