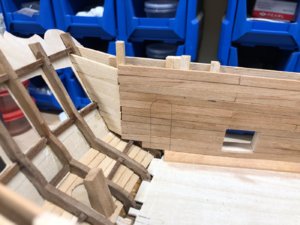
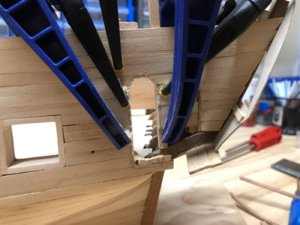
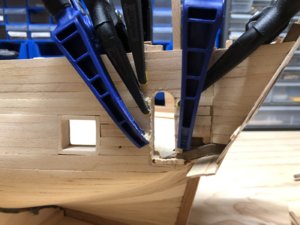
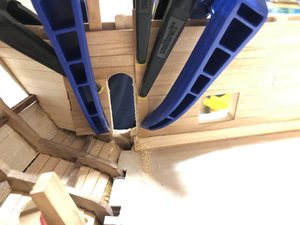
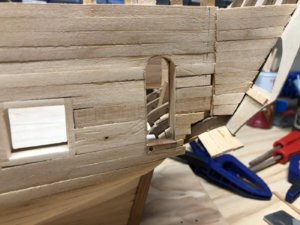
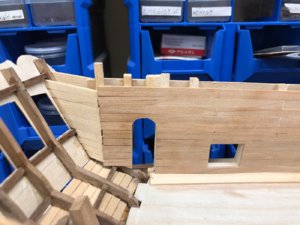
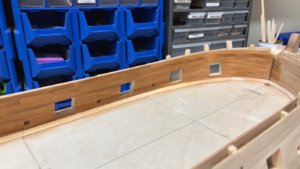
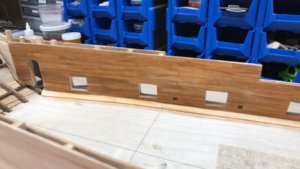
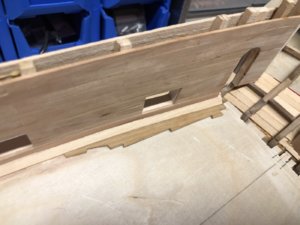
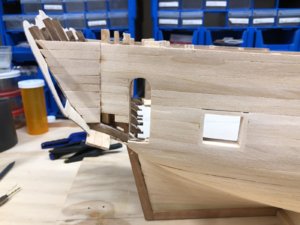
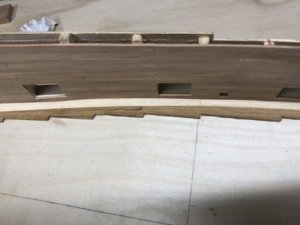
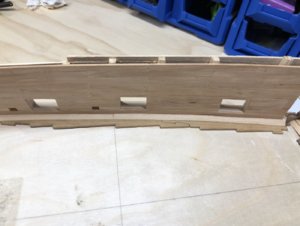
My concern is that the exit holes are not going to be lined up outside of the hull as maybe I won’t get the right angle for all the scuppers.Yes Zolly,shape a piece of scrap wood to sit on the deck and against the bulwark.Drill a hole through the block at the required angle.You can then drill from inside using the block as a drilling guide.This is all dependant on how much space/angle you have to get the drill in.You may have to use a pinvise.I certainly would try and go from the inside out as going the other way you are asking for misalignment in relation to the deck
Kind Regards
Nigel
-

Win a Free Custom Engraved Brass Coin!!!
As a way to introduce our brass coins to the community, we will raffle off a free coin during the month of August. Follow link ABOVE for instructions for entering.
-

PRE-ORDER SHIPS IN SCALE TODAY!
The beloved Ships in Scale Magazine is back and charting a new course for 2026!
Discover new skills, new techniques, and new inspirations in every issue.
NOTE THAT OUR FIRST ISSUE WILL BE JAN/FEB 2026
You are using an out of date browser. It may not display this or other websites correctly.
You should upgrade or use an alternative browser.
You should upgrade or use an alternative browser.
HMS Ontario 1780 scale 1:32 POB full version
- Thread starter zoly99sask
- Start date
- Watchers 81
-
- Tags
- ontario sloop-brig
I hear you Zoly..., then, using the jig Nigel describes in previous post, drill the hole inside the bulwark\waterway just half way thru, and another hole outside. I suspect you will use copper\brass tube for the scuppers?My concern is that the exit holes are not going to be lined up outside of the hull as maybe I won’t get the right angle for all the scuppers.
So a dummy holes both sides but not completely through and place blackened brass tubes in holes,not sure if they had tubes in thereI hear you Zoly..., then, using the jig Nigel describes in previous post, drill the hole inside the bulwark\waterway just half way thru, and another hole outside. I suspect you will use copper\brass tube for the scuppers?
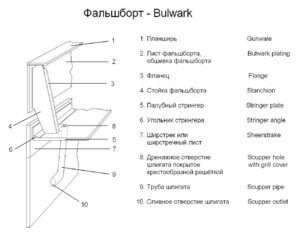
Well lets see what others saying about the scuppersIf it does have tubes, those were made from lead (i think), same as the Haws holes. Take a look the diagram below.
If it does have tubes, those were made from lead (i think), same as the Haws holes. Take a look the diagram below.
Jim this drawing is for a modern steel hulled vessel
Kind Regards
Nigel
Zolly. I will look at Godwin’s book when I get home.Many variations depending on nationality and period.I know what they are like on Saint Philippe but that is no good to you
Kind Regards
Nigel
Kind Regards
Nigel
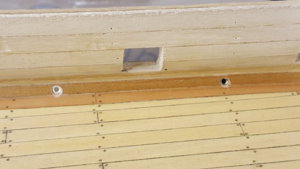
Thanks guys, I need to find an image how this hole looks like or covered outside
I think the dummy holes inboard and outboard are the way to go. No need to make sure they are exactly aligned. No one will know they aren't through and through.
Hi ZOLY, I HATE TO GIVE SOMEONE AS GOOD AS YOU SOME ADVICE, BUT BECAUSE AT MY SKILL LEVEL I HAVE TO REMOVE ITEMS A GREAT DEAL, MY METHOD FOR BOTH CA AND PVA GLUE IS THIS GET SOME NAIL POLISH REMOVER IT MUST BE 100% ACOTONE USE A COTTON SWAB RUB IT ON THE JOINT AND CAREFULY WITH AN XACTO BLADE START PRYING IT LOOSE, YOU MAY HAVE TO DO THIS A FEW TIMES UNTIL IT COMES LOOSE, IT WILL NOT DAMAGE THE WOOD OR DISCOLOR IT, TAKE IT FROM ME IT WORKS HAVE A LOT OF EXPERIENCE WITH THIS. Don TRY IT ON A PIECE OF SCRAP
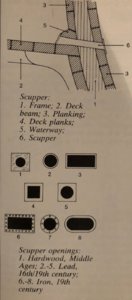
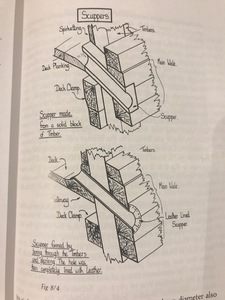
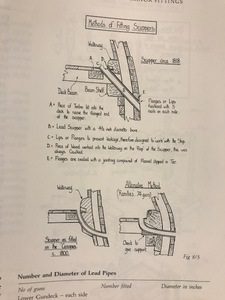
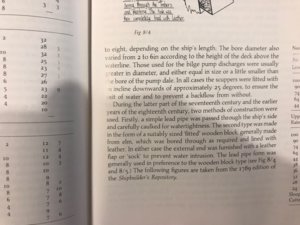
Great information, Nigel. Thanks for taking time and researching.A little later than promised due to a hectic week at work.From Peter Goodwin's book

Thank you Nigel!!Hi Zolly
A little later than promised due to a hectic week at work.From Peter Goodwin's book
Kind Regards
Nigel
View attachment 120452View attachment 120453View attachment 120454
This is the way I am going.I think the dummy holes inboard and outboard are the way to go. No need to make sure they are exactly aligned. No one will know they aren't through and through.
Last edited:
Hi Don,I have chosen not to remove the waterways ,I sanded it down to half thicknessHi ZOLY, I HATE TO GIVE SOMEONE AS GOOD AS YOU SOME ADVICE, BUT BECAUSE AT MY SKILL LEVEL I HAVE TO REMOVE ITEMS A GREAT DEAL, MY METHOD FOR BOTH CA AND PVA GLUE IS THIS GET SOME NAIL POLISH REMOVER IT MUST BE 100% ACOTONE USE A COTTON SWAB RUB IT ON THE JOINT AND CAREFULY WITH AN XACTO BLADE START PRYING IT LOOSE, YOU MAY HAVE TO DO THIS A FEW TIMES UNTIL IT COMES LOOSE, IT WILL NOT DAMAGE THE WOOD OR DISCOLOR IT, TAKE IT FROM ME IT WORKS HAVE A LOT OF EXPERIENCE WITH THIS. Don TRY IT ON A PIECE OF SCRAP


