


Hello all, here is my build log for the HMS Ontario another fine kit from kit from MarisStella.
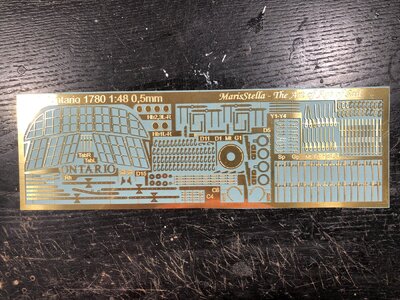
This kit is a first in many ways for MarisStella, the first being is that it is an English ship. MarisStella in the past has done has done kits primarily of Mediterranean origins so this kit is a bold new step for them. Another first for them is laser cut decks and planks and with this kit they offer 3D supplemental packages that include transom, stern windows, bow decorations and cannons. There is also a sail package available.
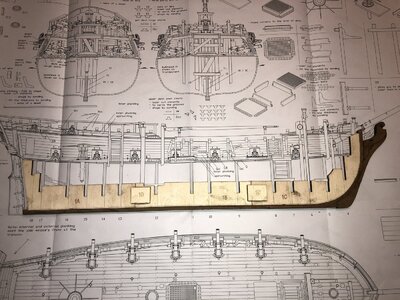
I should remark that this kit is NOT an entry level kit and although it does contain clearly written instructions the ability to read and understand plans is a must to guide you through the build. Included with the kit is a 128 page booklet that contains the instructions and parts list but for the most part it contains many 3d pictures to help with the construction of the ship. I will show this booklet throughout the log along with the detailed plans.
Unlike my last build I will try and make this log a little more detailed to help those who may wish to build this kit in the future.
So pull up a chair a cold beverage and whatever else you may need and let's get started:


The box contents, what I did forget was pictures of the 3D pieces, the booklet and the four sheets of plans. I should have hired @Heinrich for this part of my build! I promise I will get them to you later on.

The first billet containing the pieces for the keel former.

Glued and clamping on a piece of glass. No sanding or filing needed as all parts fit perfect.

Gluing on the four support pieces

Next the instructions call for putting together the keel. At this point I glued everything together, on a flat surface, but left off the stern piece as it just seemed too fragile to be glued on now.

The stern post is now glued on to the assembly and the false keel is about to be next. The addition of the false keel is not mentioned in the instructions but the plans do show it and there is material for it. This is where reading and understanding the plans is a must.
I'll stop here and let you guys finish your naps, I'm going for a coffee and will be right back
This kit is a first in many ways for MarisStella, the first being is that it is an English ship. MarisStella in the past has done has done kits primarily of Mediterranean origins so this kit is a bold new step for them. Another first for them is laser cut decks and planks and with this kit they offer 3D supplemental packages that include transom, stern windows, bow decorations and cannons. There is also a sail package available.
I should remark that this kit is NOT an entry level kit and although it does contain clearly written instructions the ability to read and understand plans is a must to guide you through the build. Included with the kit is a 128 page booklet that contains the instructions and parts list but for the most part it contains many 3d pictures to help with the construction of the ship. I will show this booklet throughout the log along with the detailed plans.
Unlike my last build I will try and make this log a little more detailed to help those who may wish to build this kit in the future.
So pull up a chair a cold beverage and whatever else you may need and let's get started:
The box contents, what I did forget was pictures of the 3D pieces, the booklet and the four sheets of plans. I should have hired @Heinrich for this part of my build!
I promise I will get them to you later on.The first billet containing the pieces for the keel former.
Glued and clamping on a piece of glass. No sanding or filing needed as all parts fit perfect.
Gluing on the four support pieces
Next the instructions call for putting together the keel. At this point I glued everything together, on a flat surface, but left off the stern piece as it just seemed too fragile to be glued on now.
The stern post is now glued on to the assembly and the false keel is about to be next. The addition of the false keel is not mentioned in the instructions but the plans do show it and there is material for it. This is where reading and understanding the plans is a must.
I'll stop here and let you guys finish your naps, I'm going for a coffee and will be right back


")
")


