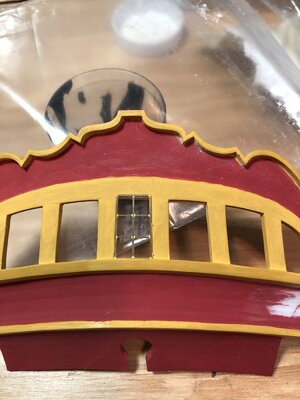
HMS Ontario - MarisStella 1:48 by Don Robinson

Hey everyone, Thanks to all of you who left comments, likes and just simply stopped in this is all so good.
The update today is rather small but at least it's going forward. :)
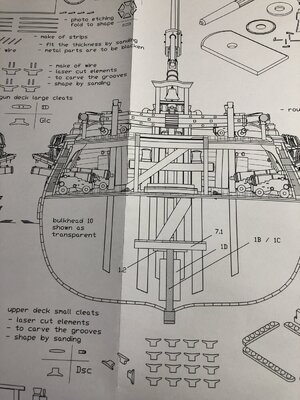
IMG_3694.JPG
So here pay attention to piece 7.1, take note of the planking that needs to be added to the top of it. I did not take note of this and had to plank it when it was glued into position.
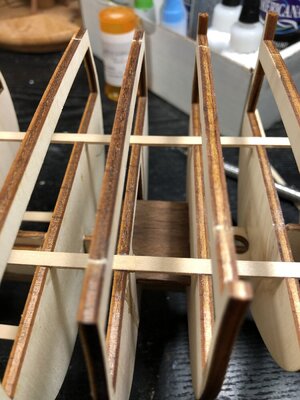
IMG_3691.JPG
And here it is planked and looking not too bad, right? NOT. It needs to be taken out and moved ahead one bulkhead further forward. Had I noticed this beforehand the planking would have been much easier!!!
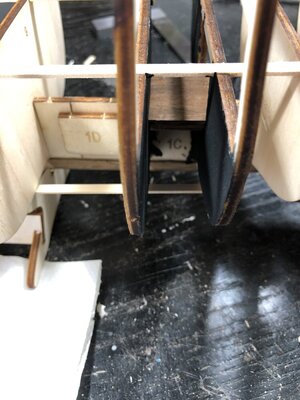
IMG_3700.JPG
Here it is in the proper place, at least now the future ladder will have a place to rest.
IMG_3676.JPG
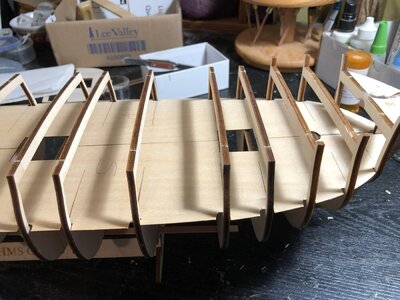
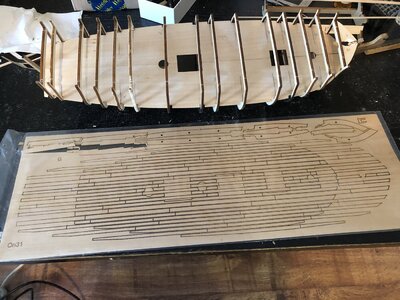
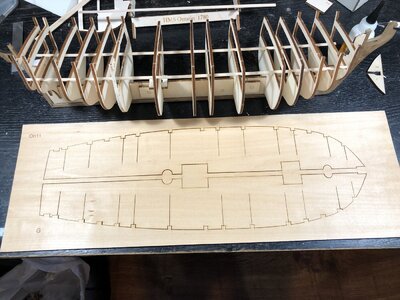
Next is the false floor, this is a sheet of solid wood that is pre-cut. I am not sure what the slits are for but I'm thinking it is to help with the bending required to get them into place.
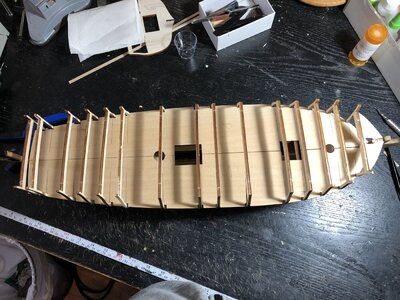
IMG_3697.JPGIMG_3698.JPGIMG_3699.JPG
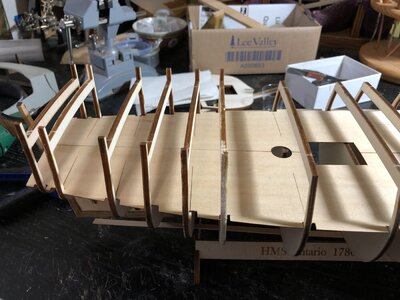
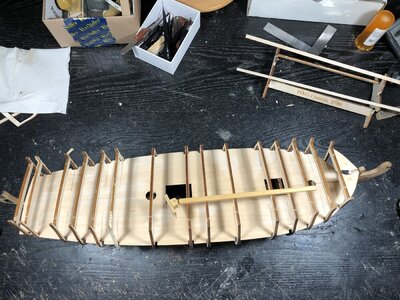
These last pictures are showing the dry fitting. The pieces need to be slid in from the rear, under all the bulkhead tops. A little fine tuning was required but nothing serious.
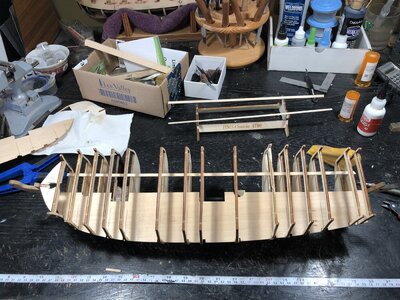
IMG_3701.JPG
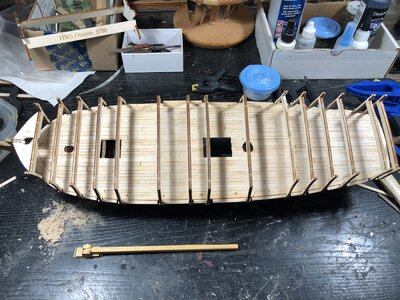
Port side installed

IMG_3702.JPG
Floor completed, there were just a couple of very small high spots that needed a little sanding. That's the homemade sanding tool I used to reach under the bulkhead tops.
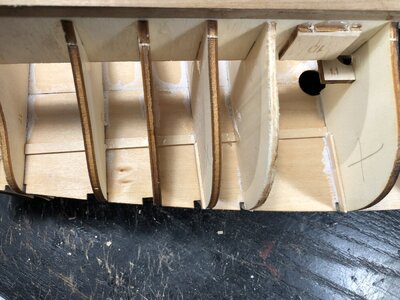
IMG_3704.JPG
Finally I wanted to show how I braced the floor. There were a couple of spots were the slits in the floor were just barely resting on the tops of the bulkheads so I reinforced these spots with some scrap pieces of planking. Not a big deal, I just thought it maybe worthy of showing.
Until next time Thanks Again for stopping in!
 
Hey All,Thanks for stopping in. This past week has been quite a test on the nerves and patients so much so that the liquor cabinet will be getting re-fuelled today! :D
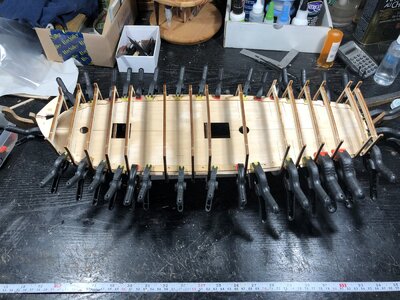
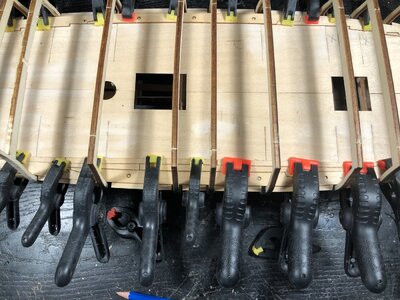
Planking the gun deck was a combination of basket weaving(trying to get planks under the bulkheads) and doing a jigsaw puzzle(trying to figure out what piece went where). As evident by the low volume of vodka remaining in the house all was not bad and some fun was had in the shipyard!:p

IMG_3706.JPG
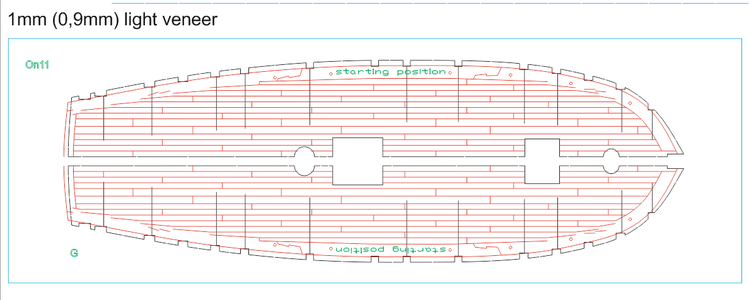
So here is the next operation, getting all of this under the bulkheads and onto the deck. Care has to be taken here as you just can't start cutting pieces from the billet and gluing into position. As you progress the planks are not necessarily in the right order on the billet, so you must cut a plank out then match it to the plans to be positive it is the right piece. Then after all the planks are cut out for that strake or row of planks dry fit them, remove, add glue and then install into position.

IMG_3707.JPG
Here the margin planks are being installed. These fit great and I had no problems whatsoever. I used Weldbond for all the decking. Ca glue will just not work with all the handling and positioning required.

IMG_3708.JPG
The actual planking has started! You must also remember that the laser cut planks are made specific for starboard and port sides. I will not mention this again as I just don't want to talk about it!:mad:ROTF And don't PM me either trying to find out why! HAHA
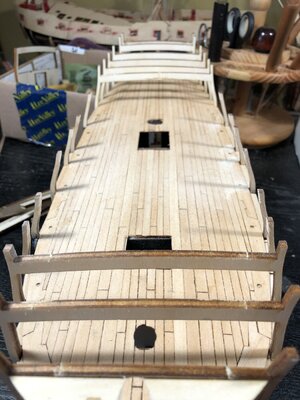
IMG_3710.JPG
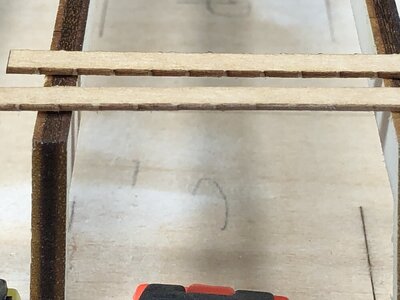
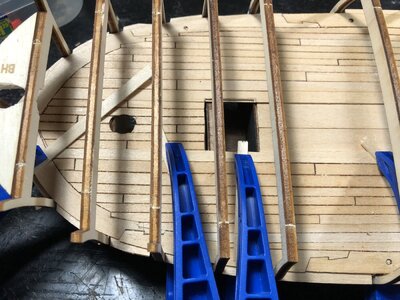
I wanted to show you the tiny tabs on the planks, do not over sand these, just sand until they feel smooth do not try and remove all the laser char.

IMG_3718.JPG
Another action shot. I had a problem here as the planking was not reaching the desired position, it was about 2 mm shy of reaching the place it should have been. I made a custom row of planks on both starboard and port sides to fill in the area properly. What occurred here is the planking is designed to have very small gaps left between them that are later filled in to simulate caulking. I was unaware of this so as in every other model I have done the planks were set tight up against each other. NOT RIGHT!(have drinks) This was not mentioned anywhere resulting in the custom made planks(more drinks). I quit for the night after this, working not drinking!

!cid_image005_png@01D6CF97.png
Now to remedy the problem MarisStella is laser etching the deck base showing the exact locations of all planks, this change will now be in any further kits. This little addition will save hours of work and guessing of what piece goes where and what spacing to leave. In addition to this all the planks will now have laser etched treenails which can be either used as is or as guides to put in real ones!! I get so stoked when someone actually listens to me, so yah, you guessed it MORE DRINKS!!:p:p

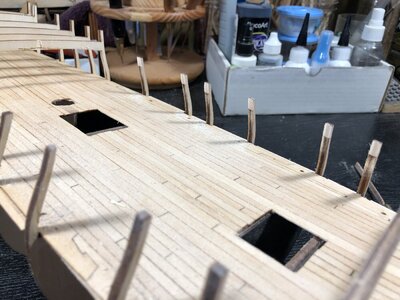
IMG_3726.JPG

Well the vodka blur and shakes wore off and look what can be accomplished. It is complete, not perfect but I am willing to share part of the blame with MarisStella! LOL

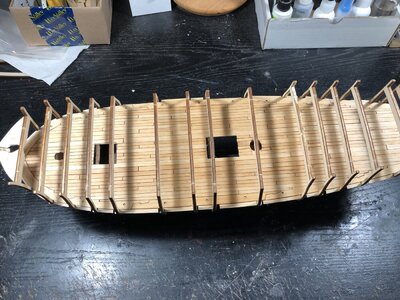
IMG_3727.JPG
And here it is with a coat of wipe on poly, it is a nice uniform colour but the lights are kind of ruining the effect.

Next is two side beams to be installed on the outer edges of the midships bulkheads. Then after that is the huge decision whether to leave the upper deck closed, which would hide 95% of the lower deck(including mistakes), or to go option two which is to cut the middle parts of the six amidships bulkheads off opening up a major part of the lower deck for viewing.
Alright then everyone time to clean up, go into town for re-supplying liquor cabinet and grab a couple of steaks for the girlfriend and I. A fun night planned here so I hope you all have a great Friday night as well.

As always Thanks for all the likes, comments and stopping in
 
Here the margin planks are being installed. These fit great and I had no problems whatsoever.
I like the fact that Maristella didn't 'cheat' and made the margin planks with scarph joint and joggling notches alone the lengths, even the areas wouldn't be seen, Great progress, Don!
 
Hello Don, You have a very interesting kit there and it is going together so easily, [Well All Most] , no seriously you are doing a great job on your Ontario. Do you save the Vodka for later or do you use it as a simulant during the build?
Regards Lawrence
 
Hello All, another update:

IMG_3730.JPG
The decision has been made to go with a open deck! The bulkheads were cut off using a dremel then filed smooth.

IMG_3731.JPG
With this decision @zoly99sask hooked me up with @Mike41 who then sent me some re-sized plans for the 1:48 deck plan. A huge thanks goes out to both you guys. With this some major kit bashing is now going to occur, I thinking all floor framing will be done using swiss pear.

IMG_3732.JPGIMG_3733.JPG
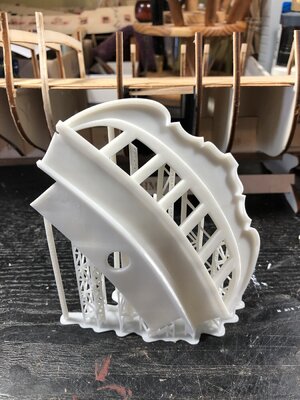
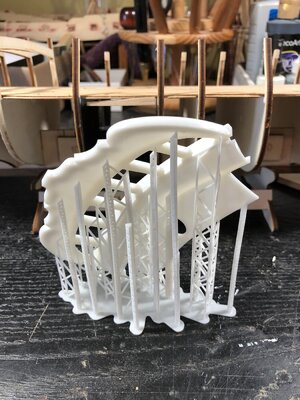
A couple shots of the 3D printed transom. This thing is so cool, I even wanted to save all the little upright thingeys.

IMG_3734.JPG
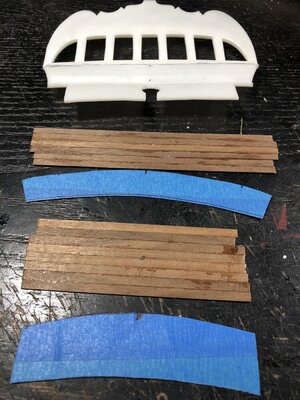
Here it is cleaned up, instructions call for planking it. You are supposed to use .5 mm planks then sand down to .2 mm! Thinking that would be a big hassle cutting and gluing all those planks then sanding, my idea was to laminate some planks together then put through thickness sander. This eventually failed, when I got own to about .35 mm the lamination started to break off. I then just sanded down a piece of wood to .3 mm and glued into place, as you will see.

IMG_3735.JPG
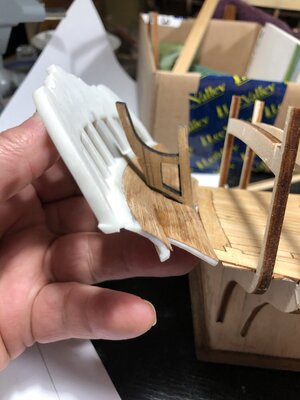
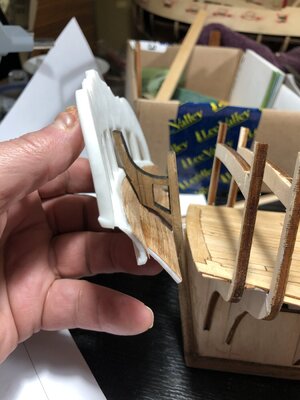
The first dry fit

IMG_3736.JPG
Nope not good

IMG_3738.JPG
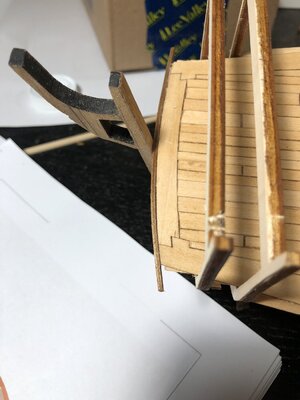
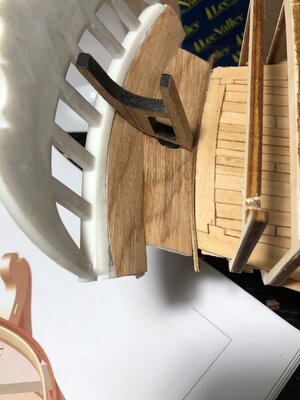
There was a small gap at the stern that was causing some problems, I filled it with a piece of 2 x 2 mm strip.

IMG_3739.JPG
And after a little refining of the bracket on the stern post here it is, it is actually supporting itself here with no glue.
Now the problem is the instructions want you to plank the entire interior and exterior of the hull without having the transom set in place. So you would do all the planking then set transom and try and trim planking to fit tight up against the transom. I just don't see how that would be possible without making a mess so I have decided to install the transom before planking starts.
In doing this I create another problem and that is there is no support for the transom until the planking is completed. The piece you see resting up against the transom is temporary and gets removed after planking is completed. So now I am in the middle of trying to figure out a support system that can be permanent and possibly look good at the same time, not that it will ever be seen.

IMG_3740.JPG
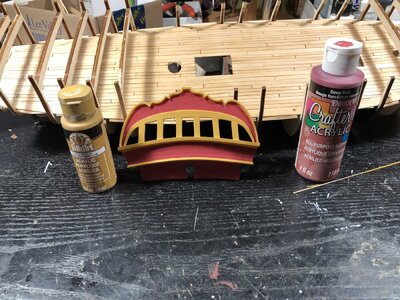
The transom with some paint, still needs more coats

IMG_3742.JPG
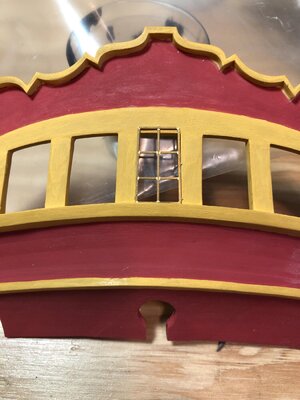
Getting bored with the many coats of paint I tried out some of the photo etch. looks good but the transom needs a little tweeking.
Don't look at the paint job, not done yet! :p

IMG_3743.JPG
After a little filing it fits perfect. The resin is really nice to work with, when it comes to sanding and filing, be safe and wear a mask.
I spotted a couple of flaws hence the sanding on the right hand corner.

Ok back to painting and will see you soon

Thanks to all of you for stopping in
 
Hello All, another update:

View attachment 199252
The decision has been made to go with a open deck! The bulkheads were cut off using a dremel then filed smooth.

View attachment 199253
With this decision @zoly99sask hooked me up with @Mike41 who then sent me some re-sized plans for the 1:48 deck plan. A huge thanks goes out to both you guys. With this some major kit bashing is now going to occur, I thinking all floor framing will be done using swiss pear.

View attachment 199254View attachment 199255
A couple shots of the 3D printed transom. This thing is so cool, I even wanted to save all the little upright thingeys.

View attachment 199256
Here it is cleaned up, instructions call for planking it. You are supposed to use .5 mm planks then sand down to .2 mm! Thinking that would be a big hassle cutting and gluing all those planks then sanding, my idea was to laminate some planks together then put through thickness sander. This eventually failed, when I got own to about .35 mm the lamination started to break off. I then just sanded down a piece of wood to .3 mm and glued into place, as you will see.

View attachment 199257
The first dry fit

View attachment 199258
Nope not good

View attachment 199259
There was a small gap at the stern that was causing some problems, I filled it with a piece of 2 x 2 mm strip.

View attachment 199260
And after a little refining of the bracket on the stern post here it is, it is actually supporting itself here with no glue.
Now the problem is the instructions want you to plank the entire interior and exterior of the hull without having the transom set in place. So you would do all the planking then set transom and try and trim planking to fit tight up against the transom. I just don't see how that would be possible without making a mess so I have decided to install the transom before planking starts.
In doing this I create another problem and that is there is no support for the transom until the planking is completed. The piece you see resting up against the transom is temporary and gets removed after planking is completed. So now I am in the middle of trying to figure out a support system that can be permanent and possibly look good at the same time, not that it will ever be seen.

View attachment 199261
The transom with some paint, still needs more coats

View attachment 199262
Getting bored with the many coats of paint I tried out some of the photo etch. looks good but the transom needs a little tweeking.
Don't look at the paint job, not done yet! :p

View attachment 199263
After a little filing it fits perfect. The resin is really nice to work with, when it comes to sanding and filing, be safe and wear a mask.
I spotted a couple of flaws hence the sanding on the right hand corner.

Ok back to painting and will see you soon

Thanks to all of you for stopping in
Way to go - high tech! Did you print stern yourself or did you have it commissioned? Perfect fit. I'm seriously tempted to get one of those 3-in- 1 machines. Thanks for sharing.
 
That stern looks amazing Don! How can you tell us not to look at the paint? That red/yellow colour combination of the Ontario is so distinctive. And, I fully agree with your decision on the open deck.
 
Its good to see how you are working around some of these problems. I look forward to seeing how you are going to handle the planking vs. transom stern part.
 
Hey Don, great start on this ship. Your open deck will add a great looking feature. I’m pondering a similar feature on a future build, but considering a removable section as opposed to fully open. Looking forward to seeing how this turns out. Thanks for providing your build details and techniques.
 
Hey Don, great start on this ship. Your open deck will add a great looking feature. I’m pondering a similar feature on a future build, but considering a removable section as opposed to fully open. Looking forward to seeing how this turns out. Thanks for providing your build details and techniques.
With those cans of spray paint I would say that you have masking mastered. Very sharp and precise. Rich (PT-2)
 
Back
Top