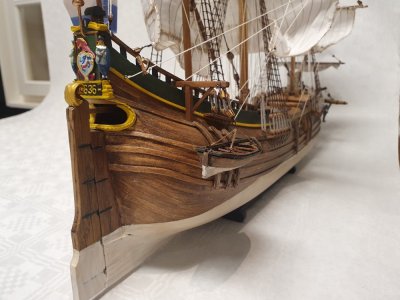
HMS PANDORA 1:72 - Modelship Dockyard

Johan, I think it is important to know that I do not view this build as my "pièce de résistance" so to speak. If I am building a ship on which I am happy to spend 3-5 years, I would probably not opt for one with resin parts. I also said earlier that if a modeler wants to learn how to plank a model, resin parts is not the correct option - it is a bit like driving a car with a manual or automatic gearbox. I have, however, done my fair bit of shaping bow and filler pieces (in fact you will remember that I boxed and shaped the whole hull of WB2) whilst all my planking has been single layered.

As far as "cheating" goes, the answer is simple. Cheat who - and secondly, why does that matter? As far as the difficulty of the build goes, I can tell you one thing. I have once built a model with pre-shaped and pre-cut planks and that was one of my most difficult builds - simply because there is zero room for error.

A last thing to consider is the availability of that model that you really want to build, and which has always been a dream to you. We so much like to categorize ourselves as POF or POB, scratch, plastic or cardstock builders, but what to do if I do not have the ability to build a scratch model and the model that I really want to is only available in a non-preferred medium? I can tell you one thing - the moment that a kit becomes available of the Brederode, I will buy it and build it, irrespective of the medium or means of construction.

I maintain - build what you love and love what you build!
When you announced this build, it was rather clear to me that this model is something like an intermezzo of sorts, just to keep yourself entertained, next to your demanding professional career. I still see kits with these printed parts as introductions into model ship building, especially for those who are wary of the complex compound surfaces at bow and stern. One could then, after building some confidence, go to the net step. Having witnessed your work on the WB, I am confident that you are more than capable of planking almost any curved surface.

With regards to my remark to cheating; that's personal. For any next build, I would not be able to convince myself to go ahead and build a kit with printed bow- and stern parts, regardless of how tempting that would be.
On the other hand, I will not be making any derogatory remarks (nor was it my intention to) about anyone who does.

With regards to your last statement: I fully concur!
 
You have put it brilliantly, Roger. The selection I chose are just some of my favorites - but there is a lot more to see in the other pics as well. Just have a squizz here:

Good morning Heinrich. I don’t get how people can model like that. It is almost too good to be true. Those guys depress me ROTF . I thought my ship looks cool and then……. :rolleyes:.
Brad came 2nd in the sprint race yesterday so I’m looking forward to the MotoGP later. Cheers Grant
 
Dear Friends

There seems to be a clampdown on VPNs in China which also seems to affect my overall internet connection, irrespective of whether the VPN is switched on or not. So, if my postings become erratic, you know the reason.

While planking was underway (more about that later), I was anxious to get a feel of working with some of the resin parts and try out the CA glue which was very kindly provided by @Modelship Dockyard. I thought it would be nice break to start on the main cabin's posts and window frames during the time I was waiting for the glue to dry while planking.

View attachment 434009
This was all on the agenda for yesterday except the upper bow resin piece, which can be seen in the lower, right-hand corner.

Please note that I am only referring to the rear transom piece that will be installed above the deckline. The clean-up of the openings and finish were reasonable, but the upper window frames’ edges were frayed and quite uneven. It is not an issue to file it smooth, but the question is always by how much. I was afraid that I might make the openings too large in which case the precut frames, sills and posts would fit too loosely and create gaps. The accuracy of the precut wooden parts that make up the frames was also reasonable – some fitted without or with only minor adjustment, but others required a considerable bit of filing/sanding to fit nicely. As most of this won’t be visible afterwards (it is mostly covered by the rest of the transom assembly), I was not too bothered by this.

I was, however, mightily impressed by the way that the opening for the rudder is created. Two separate pieces fit into a cutout provided for in the resin part at horizontal and vertical angles respectively. When first installing it, it looks ugly and cumbersome, once filed and sanded to the correct shape and – more importantly, the correct angle – it provides for a seamless fit into the transom construction and provides for a very neat and accurate opening.

The first two photographs show different angles of the rear transom piece as well as the unfinished construction that will make up the opening for the rudder.

View attachment 434006
Note that the beveling of the wooden strip underneath the rudder opening construction has only been partially beveled. I will review it when the planking which will cover the rudder opening, is done so as to ensure the best possible fit.

View attachment 434007
You can see what I mean by "frayed" when you look at the top part of the transom resin piece as well as the line directly above the wooden strip.

View attachment 434008
The completed rear transom resin piece with all window frames and posts installed, and the finished opening for the rudder.

View attachment 434010
Interior shot. I am toying with the idea of painting all the frames and posts black to create the maximum contrast with the white windows, but the jury is still out on that. I love the color of the Pear wood as shown on the cabin posts. Once the char was removed, it is highly reminiscent of the wood that Unicorn Models use for their sampan, which may suggest it is steamed Pear wood. Steamed Pear is known by its "pinkish/reddish" color as opposed to European/Swiss Pear which is more "orangy". On the subject of char removal, it is very easy - by far the easiest that I have ever removed char from kit-supplied wood. This means @Modelship Dockyard really has the operating temperatures of their laser-cutting machines dialed in.

The final note goes out to everyone who has been reading, commenting, pressing the "Like" button and following along. To have 430 members follow or view this log at some point, is unbelievable and very heartwarming to me. At the same time, it is also a very humbling experience. I will try my best not to disappoint you.
A very interesting part of the build, Heinrich. It gives modelbuilding new dimensions for different builders.
And about the categorizing of builds, then we perhaps have to make a new chapter: SOS Build logs from kits -Wood and Plastic.
No, just kidding. What about all the non-wood parts in a kit? And 3D printed parts? (When is it possible to print 3D with real wood?)
For the complex parts of a model, this a nice solution. And you can also use it as a mold to build it scratch in wood.;)
Regards, Peter
 
Very interesting discussion. Personally, I don't find the combination of wood with resin parts very attractive, whether it's bow and stern parts or whether it's a figurehead or other parts made from resin. Why are you wondering, they are two opposing materials that somehow don't fit together (just my personal opinion). But I also respect anyone who chooses this combination, like Heinrich, because he really wants to build Pandora. Or other model makers who would like to use the help of prefabricated parts. Be that as it may, the possibilities are there and if we can use them, we should. Others of us use lasers or engraving machines to make frames or other things, CNC controlled machines, milling machines, lathes or thickness grinders. Some use the photo-etching method, so why not resin parts, welcome to the age of technology. Each of us no longer uses modern techniques and work with the tools of 200 or 300 years ago. I like working with wood and building according to plans, try to make as much as possible by hand and am happy to be able to use various machines. Conclusion: just have fun making models, no matter what techniques you use.
 
When you announced this build, it was rather clear to me that this model is something like an intermezzo of sorts, just to keep yourself entertained, next to your demanding professional career. I still see kits with these printed parts as introductions into model ship building, especially for those who are wary of the complex compound surfaces at bow and stern. One could then, after building some confidence, go to the net step. Having witnessed your work on the WB, I am confident that you are more than capable of planking almost any curved surface.

With regards to my remark to cheating; that's personal. For any next build, I would not be able to convince myself to go ahead and build a kit with printed bow- and stern parts, regardless of how tempting that would be.
On the other hand, I will not be making any derogatory remarks (nor was it my intention to) about anyone who does.

With regards to your last statement: I fully concur!
An intermezzo while learning how to work with different materials and experiencing a different way of building a model, was the sum goal of this build.

I thoroughly enjoy planking (even though, I find that the planking of Pandora is more challenging than I would have anticipated), but to me the ultimate planking test still awaits - successfully planking a Kolderstok Fluyt. The person who can do that as neatly as Hans Groenenberg has done, can say that he can plank any ship model. :)

20230114_091402.jpg
That is what I call planking!
 
Good morning Heinrich. I don’t get how people can model like that. It is almost too good to be true. Those guys depress me ROTF . I thought my ship looks cool and then……. :rolleyes:.
Brad came 2nd in the sprint race yesterday so I’m looking forward to the MotoGP later. Cheers Grant
There are some truly talented people around, Grant! Don't be depressed, your Xebec (and Victory) are gems too. I will hold thumbs for Mr. Binder. By the way, you and I never even got to gloat about Back-to-Back, World Cup-winning Springboks! ROTF
 
A very interesting part of the build, Heinrich. It gives modelbuilding new dimensions for different builders.
And about the categorizing of builds, then we perhaps have to make a new chapter: SOS Build logs from kits -Wood and Plastic.
No, just kidding. What about all the non-wood parts in a kit? And 3D printed parts? (When is it possible to print 3D with real wood?)
For the complex parts of a model, this a nice solution. And you can also use it as a mold to build it scratch in wood.;)
Regards, Peter
Exactly, Peter. Looking at models like the YuanQing San Felipe, the Luhaiqinkong Royal Caroline, the Unicorn Bonhomme Richard - all of those have CNC decorations totaling in some cases 650 USD (more than the total price of some other very accomplished kits). Without those decorations, it is just not possible to create the work of art that those models potentially are. In some cases, they are resin-printed and in other, wood. Your current build is a case in point of exploiting different materials and learning to work in alternative media. Don't get me wrong - I am still very much of a traditional wooden ship builder but I will certainly look at different options offering different solutions.
 
Very interesting discussion. Personally, I don't find the combination of wood with resin parts very attractive, whether it's bow and stern parts or whether it's a figurehead or other parts made from resin. Why are you wondering, they are two opposing materials that somehow don't fit together (just my personal opinion). But I also respect anyone who chooses this combination, like Heinrich, because he really wants to build Pandora. Or other model makers who would like to use the help of prefabricated parts. Be that as it may, the possibilities are there and if we can use them, we should. Others of us use lasers or engraving machines to make frames or other things, CNC controlled machines, milling machines, lathes or thickness grinders. Some use the photo-etching method, so why not resin parts, welcome to the age of technology. Each of us no longer uses modern techniques and work with the tools of 200 or 300 years ago. I like working with wood and building according to plans, try to make as much as possible by hand and am happy to be able to use various machines. Conclusion: just have fun making models, no matter what techniques you use.
Dear Tobias, my friend, you raise many valid points. I think we need to draw a clear line between preference and feasibility. If we accept 3D printed parts, PE sheets, ready-made cannon barrels, resin ornamentation, etc., why not resin parts being applied elsewhere. Of course, it always remains your preference and choice whether to use them or not. Old school builders who had to saw out frames by hand, may well scoff at the current generation with our lasered-or CNC-cut frames.

The electric sanders, thickness sanders, milling machines, drill presses, lathes and what have you, also make for an interesting discussion. Personally, I don't use them, but it is because of practical reasons (I probably wouldn't even begin to know how to use them!) - not because of any moral conviction. ROTF

To me the resin parts offer the builder another option and that is good. "You pays your money and you takes your choice"!
 
The resin parts simplify the engineering side of the project - the manufacturer doesn't need to split complex surfaces into an array of flat parts. But the price for this is difficulty in assembling, imho.
I agree that the resin parts should theoretically make the construction easier. However, for me it brings two new challenges. I have never planked on resin surfaces before, and I have never used CA glue when planking. I still face a challenge, just two different ones.
 
We have no intention of causing controversy. The original intention of using 3D prints is simply to encourage more beginner builders to build simpler and enjoy the fun of production.

We respect this hobby very much, and as a manufacturer, we hope that more people can participate in it. This hobby circle needs fresh blood too much
At least to me it's no point of controversy; it's merely a personal view and I wouldn't fault anyone for choosing a hybrid kit.
And as has been pointed out, those beautifully (machined or printed) decorations that come with some kits or which can be purchased as after-market parts; I am just not capable of crafting these myself. Would I find myself in a build with these kind of decorations, I wouldn't hesitate even a single second and just buy them.
 
Dear Wuxi. Trust me, there is no controversy here - just a good, old discussion on how people perceive things. I think this is also valuable to @Modelship Dockyard to hear and see members' reaction. Remember, this is something that is new to the market and people are wary of things they don't know. Given time and personal experience, I am sure it will become part and parcel of model building. But, now you see, why I discussed the option with you of replacing the resin parts with wooden ones. ROTF
 
At least to me it's no point of controversy; it's merely a personal view and I wouldn't fault anyone for choosing a hybrid kit.
And as has been pointed out, those beautifully (machined or printed) decorations that come with some kits or which can be purchased as after-market parts; I am just not capable of crafting these myself. Would I find myself in a build with these kind of decorations, I wouldn't hesitate even a single second and just buy them.
Exactly, Johan. And as long as we don't say that we carved it ourselves, I also don't see any cheating in that. They are as much of the kit-supplied parts as anything else.
 
Carved vs resin etc. putting all that aside, Heinrich's biggest challenge is allowing CA in his workshop :)
This comes from his past writings on the subject.
Ron, my friend. You know me too well! ROTF I hate the stuff, but now I have no choice. I am even using it in some places during the first planking to get some practice. Modelship Dockyard kindly sent me the stuff they use, and I must say - it is by far the best CA glue I have used so far. For the final layer of planking, I will, however, look at something that is somewhat slower drying so that I can make adjustments if need be.

微信图片_20240310211555.jpg
For the first time I can read and pronounce the name of the glue I am using - 401! ROTF
 
Hello Heinrich, For me. this type of build combining resin with wood is similar to filling in the spaces between bulkheads of a standard POB ship which just adds a base for planking to secure to which better holds a ships shape or form. I assume you will still need to bend planking onto the resin which raises another question.
What is the best type of glue to use between the wood and resin? And do you use the same glue on the edges of the planking?
Dear Daniel - I agree that in essence, the two are similar. I suppose that one may argue that filling in the spaces between bulkheads (like I have done on WB2) has to be done by the builder himself, whereas here the bow and stern fillers are supplied and ready-made. But, that raises another caveat. If the fairing of the hull was not done perfectly and the planking was not accurate, the planking will not line up with the filler pieces. And if that happens, you're in trouble.

Glue wise, I will look at something that is a little slower drying than the CA and which allows some movement of parts if required. I will continue with PVA for edge gluing, but my thoughts are to use a waterproof PVA for this in case I need to wet the wood to facilitate easier bending. I am speculating here as I have no idea how pliable the wood is. All I do know is that there is also the Ebony wood which is notoriously difficult to bend.
 
Glue wise, I will look at something that is a little slower drying than the CA
I know here in the states we can buy CA in gel form which gives you a little more time and doesn't run and drip where you don't need it. Also, we have slow and fast dry CA's in standard liquid as well. Hope you have a small table fan close by to help keep the nasty fumes away.
 
I know here in the states we can buy CA in gel form which gives you a little more time and doesn't run and drip where you don't need it. Also, we have slow and fast dry CA's in standard liquid as well. Hope you have a small table fan close by to help keep the nasty fumes away.
Thank you, my friend. I do have some members who have suggested the gel as well and I will most certainly see if I can find it in China. Luckily, I still have some time before the final layer of planking will start. At the rate I am going now, it will be at least another weekend before the hull is even closed with the first layer.
 
Back
Top