Dear Friends
There seems to be a clampdown on VPNs in China which also seems to affect my overall internet connection, irrespective of whether the VPN is switched on or not. So, if my postings become erratic, you know the reason.
While planking was underway (more about that later), I was anxious to get a feel of working with some of the resin parts and try out the CA glue which was very kindly provided by
@Modelship Dockyard. I thought it would be nice break to start on the main cabin's posts and window frames during the time I was waiting for the glue to dry while planking.
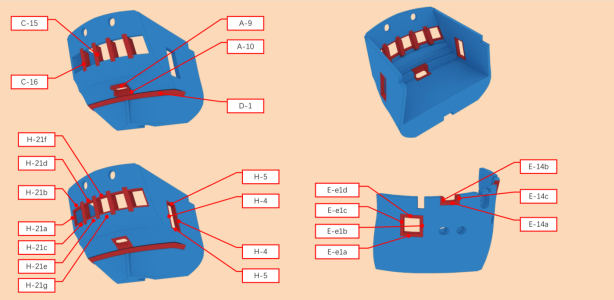
This was all on the agenda for yesterday except the upper bow resin piece, which can be seen in the lower, right-hand corner.
Please note that I am only referring to the rear transom piece that will be installed above the deckline. The clean-up of the openings and finish were reasonable, but the upper window frames’ edges were frayed and quite uneven. It is not an issue to file it smooth, but the question is always by how much. I was afraid that I might make the openings too large in which case the precut frames, sills and posts would fit too loosely and create gaps. The accuracy of the precut wooden parts that make up the frames was also reasonable – some fitted without or with only minor adjustment, but others required a considerable bit of filing/sanding to fit nicely. As most of this won’t be visible afterwards (it is mostly covered by the rest of the transom assembly), I was not too bothered by this.
I was, however, mightily impressed by the way that the opening for the rudder is created. Two separate pieces fit into a cutout provided for in the resin part at horizontal and vertical angles respectively. When first installing it, it looks ugly and cumbersome, once filed and sanded to the correct shape and – more importantly, the correct angle – it provides for a seamless fit into the transom construction and provides for a very neat and accurate opening.
The first two photographs show different angles of the rear transom piece as well as the unfinished construction that will make up the opening for the rudder.
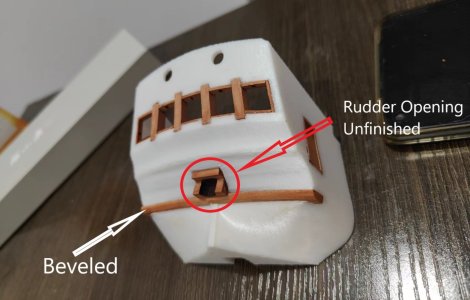
Note that the beveling of the wooden strip underneath the rudder opening construction has only been partially beveled. I will review it when the planking which will cover the rudder opening, is done so as to ensure the best possible fit.
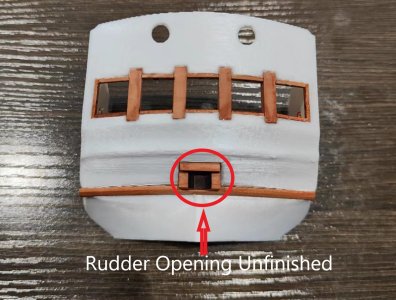
You can see what I mean by "frayed" when you look at the top part of the transom resin piece as well as the line directly above the wooden strip.
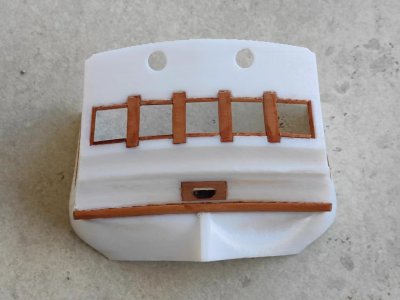
The completed rear transom resin piece with all window frames and posts installed, and the finished opening for the rudder.
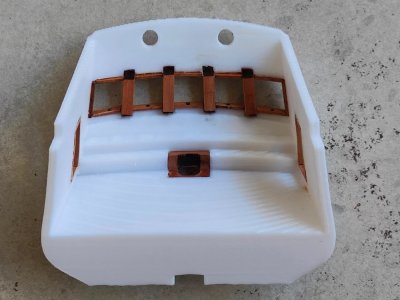
Interior shot. I am toying with the idea of painting all the frames and posts black to create the maximum contrast with the white windows, but the jury is still out on that. I love the color of the Pear wood as shown on the cabin posts. Once the char was removed, it is highly reminiscent of the wood that Unicorn Models use for their sampan, which may suggest it is steamed Pear wood. Steamed Pear is known by its "pinkish/reddish" color as opposed to European/Swiss Pear which is more "orangy". On the subject of char removal, it is very easy - by far the easiest that I have ever removed char from kit-supplied wood. This means
@Modelship Dockyard really has the operating temperatures of their laser-cutting machines dialed in.
The final note goes out to everyone who has been reading, commenting, pressing the "Like" button and following along. To have 430 members follow or view this log at some point, is unbelievable and very heartwarming to me. At the same time, it is also a very humbling experience. I will try my best not to disappoint you.


 The real answer is easy: for once, I decided to build a well-researched vessel of which there are actual plans and where the naval "historians" are not playing guessing games.