HMS PANDORA 1:72 - Modelship Dockyard

Your hullplanking is looking great my frind, but i do hope that your skinny horse wil get some fat on its bones,luckely with 2 mm of wood there is some sanding possible.
But, it can also be a fotografic mishap, and the light is just playing with our eyes in that case it is perfect
Have fun
 
Your hullplanking is looking great my frind, but i do hope that your skinny horse wil get some fat on its bones,luckely with 2 mm of wood there is some sanding possible.
But, it can also be a fotografic mishap, and the light is just playing with our eyes in that case it is perfect
Have fun
My friend, thank you for the kind words and concern. I am not too worried about the planking. Whether it is a photographic effect, I don't know. When I run my fingers over that portion, I don't feel a ridge. I haven't sanded it at all, so I am hopeful that I can achieve the desired effect. The main focus at this stage is to make sure that the ends are flush with the resin pieces and that they are. I am glad that you mentioned the "fun" part. That is very important and so far, I am having lots of fun.
 
Dear Friends

Welcome to my build log of the Modelship Dockyard HMS Pandora. This log will be very different from my past efforts as it will focus solely on the actual build process of the model. The fact that the model has been very thoroughly researched at the hand of very reputable and officially LICENSED sources, are more than good enough for me and as such I will not be conducting any further research on the subject; nor will there be any attempt on my part to modify the kit or alter its design. If I do change anything, it will be for aesthetic purposes only and not for the sake of historical accuracy.

Historical Background and Research

@Modelship Dockyard based their historical research of the Pandora on three types of resources:
Information on the Modelship Dockyard design process can be found here:
https://shipsofscale.com/sosforums/threads/pob-1-72-hms-pandora-1779-by-modelship-dockyard.10600/

Unboxing & Kit Review:

I will not do be doing an unboxing either – that has already been done by @Donnie.
https://shipsofscale.com/sosforums/threads/hms-pandora-1-72-by-modelship-dockyard.11731/

As the build progresses, I will obviously comment on the kit design, instructions, quality of the materials, fitment and the overall pleasure/frustration factor involved in building the model.

There is a ton of source material on the Pandora available on the internet, but if you want to know more, you can find additional information here:
https://www.bing.com/search?pglt=41...NIBCDUzODRqMGoxqAIAsAIA&FORM=ANNTA1&PC=SCOOBE

The Build

And with that, all the paraphernalia and pre-amble is out of the way, and I can start building.

The first step was to glue two platforms into two specially provided slots in the false keel. (See below)

View attachment 430367
View attachment 430368

I do know that they will later form the “floor” of two boxes that will be constructed around the bulkheads #6 and #10. I would assume that these two “boxes” are intended to simulate two compartments in the hold later on, but that is just speculation at this stage.

Next on the agenda is part the deck (or I suppose more accurately) false deck construction. This was new to me as it consists of two completely different-looking deck-parts which have to be glued together to form the false deck.

View attachment 430370

This picture shows the first one of the two false-deck components. Note the fairing lines which are clearly visible as they are on all of the bulkheads. Even though I have faired/beveled my fair share of hulls on gut feel alone, I really appreciate this touch as it expedites the fairing process and improves the overall accuracy.

At first glance, I thought it was going to be a nightmare to align these two pieces for gluing, but a quick look at the instructions, showed a very novel way adopted by @Modelship Dockyard to make this a walk in the park. Both parts contain 12 x 4mm square holes into which 12 x 4mm square pegs are driven. (see the instructions below)

View attachment 430371
Note the 12 pegs which fit into corresponding slots in the two separate deck pieces.

Care obviously has to be taken when inserting the first two pegs (I inserted one at either end of the deck diagonally opposite from each other), but after that, it probably took me a minute to hammer in the remaining 10. The result – two perfectly aligned deck pieces.

View attachment 430372

This picture shows the two false-deck components glued. The red circles indicate the positions of the 12 square pegs used to join the two sections.

Thereafter I faired the underside of the false deck and glued the false keel to the deck (upside down of course).

View attachment 430373

Close-ups of the faired deck-section (Above and Below)

View attachment 430374

View attachment 430381
False keel glued to false deck.

Next it was a case of finishing the two “boxes” by gluing the walls around the previously installed floor sections. Unfortunately, I only took photographs of the boxes after I started installing the bulkheads, but this is what they look like.

View attachment 430382

Now came a part I was really looking forward to: installing the bulkheads. Fairing the bulkheads was a breeze. As mentioned earlier, the bevel lines are clearly inscribed on the bulkheads and there was actually very little beveling that needed to be done. This obviously bears testimony to very accurately shaped bulkheads and I was duly impressed. NOTE to future builders: Care needs to be taken as to how the frames need to be placed. Bulkheads #1-3 are place with the sanding line facing the bow and bulkheads #8-12 with the sanding line facing the stern. How you place bulkheads #4-7 does not matter. This is all very clearly detailed in the instructions though.

View attachment 430383

But if I was impressed by the accuracy of the bulkheads, I was blown away by how they fitted onto the false keel and into the false deck. I am used to polishing the bulkheads’ slots a little, file a bit here, sand a bit there and so forth, but THIS!

I did not even take the sandpaper out of my tool drawer (I used my small files for all the fairing). It was simply a case of starting the bulkheads in their respective slots and lightly tapping them into position with my hammer. (A word on my hammer. Contrary to most model builders who use a small, light hammer, I use a full-sized, heavy hammer as I find I have more control over and a better feel of the exact force that I am exerting.) The tabs at the bottom of the bulkheads slotted fully home into the slots provided for them in the false deck while the tops are PERFECTLY level with the top of the false keel. No more lego blocks to ensure the bulkheads are square to the keel and no more squares to make sure they are perpendicular. Gotta love it!

And, before I knew it, I could start the planking!

View attachment 430384

I want to thank in advance each and every one of you who will visit this log. You are warmly invited to critique, comment, advise, give a thumbs-up when you like something, or, just pop in for a chat - exactly as per the Willem Barentsz log. So far, I am enjoying the kit a lot and I am looking forward to see what Pandora conjures up. Please join me for the ride.
A small statement on the reference part. The Anatomy of the Ship book was indeed part of the reference list, however, it's not the only source as for the books. Many other good pulications are used as reference as well, such as:
"The arming and fitting of English ships of war 1600-1815" by Brian Lavery
"The Sailing Frigate" by Robert Gardiner
"The construction and fitting of the English man of war 1650-1850" by Peter Goodwin
"Rigging Period Ship Models" by Lennarth Petersson
And so much more…

On RMG side, not only drawings of Pandora (and of the same class) are being used, we also refered to the drawings of other smaller things like the fitting and arming and such.

A wide range of other web sources are also being used as the ship was being excavated, there's a lot of useful information such as on queensland museum website and some other news sites.

We did first know this this from the AOTS book, but later as we done more and more reserach, we found that there are acturally many errors (this is normal as the book is a bit old, the ship was still in excavation when it published, and many other sources were not as accessible as they are now), which proves that single source reserach is way far than enough. So it kinda becomes The Ship of Theseus, but we think that we have delivered an impressive result for this kit. (although it didn't sell really well lol)
 
What you say about not copper plating your Pandora but instead showing good looking well finished second planking makes a lot of sense to me. Of course it also comes back to the choice of artistic freedom or a form of historical accuracy, which is a current discussion elsewhere. Plus, I know how fixing hundreds and hundreds of scaled copper plates is a time consuming exercise in sheer monotony.

Your Pandora is going to be a great build to follow.
 
A small statement on the reference part. The Anatomy of the Ship book was indeed part of the reference list, however, it's not the only source as for the books. Many other good pulications are used as reference as well, such as:
"The arming and fitting of English ships of war 1600-1815" by Brian Lavery
"The Sailing Frigate" by Robert Gardiner
"The construction and fitting of the English man of war 1650-1850" by Peter Goodwin
"Rigging Period Ship Models" by Lennarth Petersson
And so much more…

On RMG side, not only drawings of Pandora (and of the same class) are being used, we also refered to the drawings of other smaller things like the fitting and arming and such.

A wide range of other web sources are also being used as the ship was being excavated, there's a lot of useful information such as on queensland museum website and some other news sites.

We did first know this this from the AOTS book, but later as we done more and more reserach, we found that there are acturally many errors (this is normal as the book is a bit old, the ship was still in excavation when it published, and many other sources were not as accessible as they are now), which proves that single source reserach is way far than enough. So it kinda becomes The Ship of Theseus, but we think that we have delivered an impressive result for this kit. (although it didn't sell really well lol)
Thank you very much for the comprehensive glimpse of the research that has gone into the kit, Victor. You are right - single sourced research is simply not comprehensive enough to deliver the desired results - I can vouch for that through the lessons I learnt when researching the Ship of Barentsz. Of course, the most vital aspect when doing research is exactly the accessibility of sources - without them, there is only so much one can do. As to the kit not selling that well - I am actually surprised by that, to be honest. Generally speaking, British ships are very popular subjects (as you can see there are already 371 members reading this log which is phenomenal by SOS standards) and the HMS Pandora is widely regarded as a very pretty, smaller ship. And that may well be one of the explanations - as a Porcupine-Class "frigate", she is not a ship of the line with multiple gundecks and 70-plus cannons. Those have always been the popular subject choices for modelers. I also think modelers still have to wrap their heads around the use of the resin parts (I know I certainly had to) - generally speaking, we model builders are quite a traditional bunch. :)
 
What you say about not copper plating your Pandora but instead showing good looking well finished second planking makes a lot of sense to me. Of course it also comes back to the choice of artistic freedom or a form of historical accuracy, which is a current discussion elsewhere. Plus, I know how fixing hundreds and hundreds of scaled copper plates is a time consuming exercise in sheer monotony.

Your Pandora is going to be a great build to follow.
The copper plating is an interesting one, Roger. To be honest, when I bought the kit, I was unaware that the hull was copper-plated. If I had known that beforehand, I may not have chosen it. The two key reasons which you have highlighted so poignantly - being the monotony and time factor involved. The other reason is that Modelship Dockyard has really provided us with what can potentially be superbly detailed hull planking (provided that the modeler can deliver the goods, of course). On the other hand, your superbly copper-plated hull on the Syren is every bit as much of an art form. However, I did also say that I have chosen this model to learn new things and copper-plating a hull is certainly something new for me. So, I think I will just delay that decision for the time being and see where the build takes me.
 
I think you are wise reflecting on copper plating or not. I admire, with your expertise, that you are prepared to try out new build techniques. However, you have mentioned previously how you are/will enjoy a relaxed straightforward build with this kit. If the resin pieces are a means to short circuit the time and ease necessary for a build then why be concerned about copper plating, which may take many weekends of you limited build time.

To be honest I look forward to seeing your visible second hull planking and not so much a multitude of standard sized copper plates. As usual, just a thought :).
And it is a thought which is very much appreciated and will aid me in the final decision-making. Thank you for that, my friend.
 
Dear Friends

Welcome to my build log of the Modelship Dockyard HMS Pandora. This log will be very different from my past efforts as it will focus solely on the actual build process of the model. The fact that the model has been very thoroughly researched at the hand of very reputable and officially LICENSED sources, are more than good enough for me and as such I will not be conducting any further research on the subject; nor will there be any attempt on my part to modify the kit or alter its design. If I do change anything, it will be for aesthetic purposes only and not for the sake of historical accuracy.

Historical Background and Research

@Modelship Dockyard based their historical research of the Pandora on three types of resources:
Information on the Modelship Dockyard design process can be found here:
https://shipsofscale.com/sosforums/threads/pob-1-72-hms-pandora-1779-by-modelship-dockyard.10600/

Unboxing & Kit Review:

I will not do be doing an unboxing either – that has already been done by @Donnie.
https://shipsofscale.com/sosforums/threads/hms-pandora-1-72-by-modelship-dockyard.11731/

As the build progresses, I will obviously comment on the kit design, instructions, quality of the materials, fitment and the overall pleasure/frustration factor involved in building the model.

There is a ton of source material on the Pandora available on the internet, but if you want to know more, you can find additional information here:
https://www.bing.com/search?pglt=41...NIBCDUzODRqMGoxqAIAsAIA&FORM=ANNTA1&PC=SCOOBE

The Build

And with that, all the paraphernalia and pre-amble is out of the way, and I can start building.

The first step was to glue two platforms into two specially provided slots in the false keel. (See below)

View attachment 430367
View attachment 430368

I do know that they will later form the “floor” of two boxes that will be constructed around the bulkheads #6 and #10. I would assume that these two “boxes” are intended to simulate two compartments in the hold later on, but that is just speculation at this stage.

Next on the agenda is part the deck (or I suppose more accurately) false deck construction. This was new to me as it consists of two completely different-looking deck-parts which have to be glued together to form the false deck.

View attachment 430370

This picture shows the first one of the two false-deck components. Note the fairing lines which are clearly visible as they are on all of the bulkheads. Even though I have faired/beveled my fair share of hulls on gut feel alone, I really appreciate this touch as it expedites the fairing process and improves the overall accuracy.

At first glance, I thought it was going to be a nightmare to align these two pieces for gluing, but a quick look at the instructions, showed a very novel way adopted by @Modelship Dockyard to make this a walk in the park. Both parts contain 12 x 4mm square holes into which 12 x 4mm square pegs are driven. (see the instructions below)

View attachment 430371
Note the 12 pegs which fit into corresponding slots in the two separate deck pieces.

Care obviously has to be taken when inserting the first two pegs (I inserted one at either end of the deck diagonally opposite from each other), but after that, it probably took me a minute to hammer in the remaining 10. The result – two perfectly aligned deck pieces.

View attachment 430372

This picture shows the two false-deck components glued. The red circles indicate the positions of the 12 square pegs used to join the two sections.

Thereafter I faired the underside of the false deck and glued the false keel to the deck (upside down of course).

View attachment 430373

Close-ups of the faired deck-section (Above and Below)

View attachment 430374

View attachment 430381
False keel glued to false deck.

Next it was a case of finishing the two “boxes” by gluing the walls around the previously installed floor sections. Unfortunately, I only took photographs of the boxes after I started installing the bulkheads, but this is what they look like.

View attachment 430382

Now came a part I was really looking forward to: installing the bulkheads. Fairing the bulkheads was a breeze. As mentioned earlier, the bevel lines are clearly inscribed on the bulkheads and there was actually very little beveling that needed to be done. This obviously bears testimony to very accurately shaped bulkheads and I was duly impressed. NOTE to future builders: Care needs to be taken as to how the frames need to be placed. Bulkheads #1-3 are place with the sanding line facing the bow and bulkheads #8-12 with the sanding line facing the stern. How you place bulkheads #4-7 does not matter. This is all very clearly detailed in the instructions though.

View attachment 430383

But if I was impressed by the accuracy of the bulkheads, I was blown away by how they fitted onto the false keel and into the false deck. I am used to polishing the bulkheads’ slots a little, file a bit here, sand a bit there and so forth, but THIS!

I did not even take the sandpaper out of my tool drawer (I used my small files for all the fairing). It was simply a case of starting the bulkheads in their respective slots and lightly tapping them into position with my hammer. (A word on my hammer. Contrary to most model builders who use a small, light hammer, I use a full-sized, heavy hammer as I find I have more control over and a better feel of the exact force that I am exerting.) The tabs at the bottom of the bulkheads slotted fully home into the slots provided for them in the false deck while the tops are PERFECTLY level with the top of the false keel. No more lego blocks to ensure the bulkheads are square to the keel and no more squares to make sure they are perpendicular. Gotta love it!

And, before I knew it, I could start the planking!

View attachment 430384

I want to thank in advance each and every one of you who will visit this log. You are warmly invited to critique, comment, advise, give a thumbs-up when you like something, or, just pop in for a chat - exactly as per the Willem Barentsz log. So far, I am enjoying the kit a lot and I am looking forward to see what Pandora conjures up. Please join me for the ride.
I have liked the Pandora since I started modeling when I was six years old. Unfortunately, I was given the Constructo version as a gift, and I am trying to alter the kit for accuracy. My biggest peeve about the model is that the forecastle and the bow are too sharp. Many of the fittings are generic and not quite to scale. I will probably just scrap the kit and get this version. It seems much superior.

Bill
Welcome William. As you can see from Victor's (@Modelship Dockyard) post, this is a very well researched kit. It is available in both pear- and boxwood versions and with/without masts, rigging and sails. It is still early days in my build, but so far everything seems well-engineered, and the parts go together very accurately. The nice thing is that you can get the kit right here on SOS. https://shipsofscale.com/sosforums/pages/ModelShipDockyard3/
 
Oops, missed the memo on your new build, but I am on board now.
Already I can see you have progressed quickly and she is looking great, popcorn is getting ready as I pull up a chair.
 
Oops, missed the memo on your new build, but I am on board now.
Already I can see you have progressed quickly and she is looking great, popcorn is getting ready as I pull up a chair.
Welcome on board Richie; it is great to see you here! You and @dockattner Paul will have a relaxing time on this build as I will follow the instructions closely without too much artistic input from my side. :)
 
Dear Friends

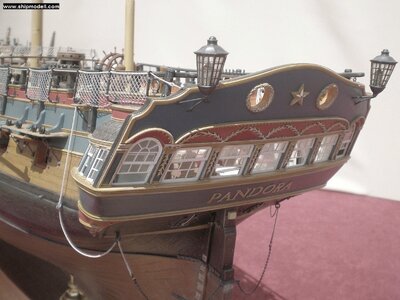
I think it was during his review of the Pandora Anatomy by McKay and other subsequent posts, that @Uwek Uwe mentioned the build of the Pandora by Gémes Atilla. He refers to it as "one of the most beautiful models he has ever seen", and boy-oh-boy, Uwe wasn't wrong.

1HMS_PANDORA.jpg
Scale & Manufacturer: 1:36 Scratch built
Ship Model Overall Length: 168,5 cm
Ship Model Overall Width: 62,5 cm
Ship Model Height: 119,6 cm
Ship Model Craftsman: Gémes Attila
☞ Built between 21.05.1995-05.10.2014 in approximately 20.000 work hours!
☞ Every piece of the model is handmade, scratch built.
☞ The rigging contains around 400 m (1 350 feet) of handmade spun ropes and more than 1000 pieces of shivers, pulleys, hooks and rings.
☞ There are kept the used stem reels, so based on this: have been used in total of 14 km (46 000 feet) of material for ropes and cords production
☞ Woods used: walnut, linden, redwood, pear, maple, cherry, oak
☞ Other materials: red copper, brass and photo etchings.
☞ Original plans and drawings: John McKay & Ron Coleman: The 24-gun Frigate Pandora (Anatomy of the ship series)

ENJOY!

_HMS_PANDORA_230.jpg
_HMS_PANDORA_231.jpg
_HMS_PANDORA_232.jpg
_HMS_PANDORA_234.jpg
_HMS_PANDORA_103.jpg
_HMS_PANDORA_111.jpg
_HMS_PANDORA_125.jpg
_HMS_PANDORA_398.jpg
 
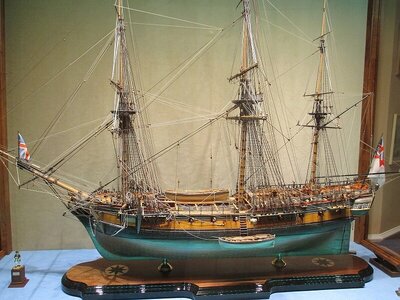
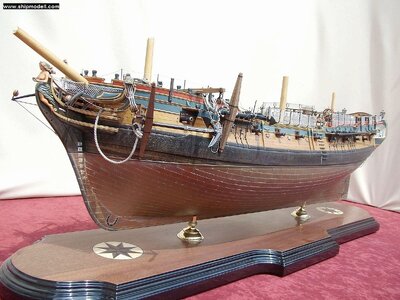
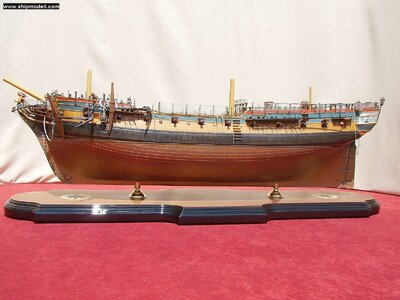
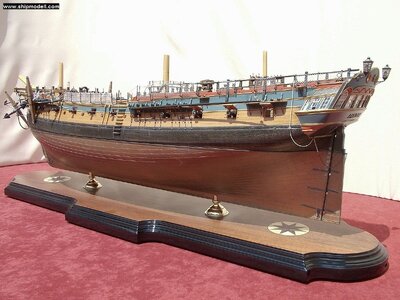
I am confused(not difficult), is the top rigged model image the same as the lower model images before rigging.
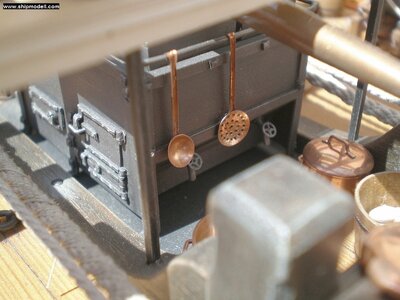
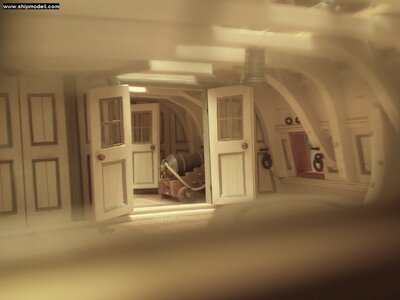
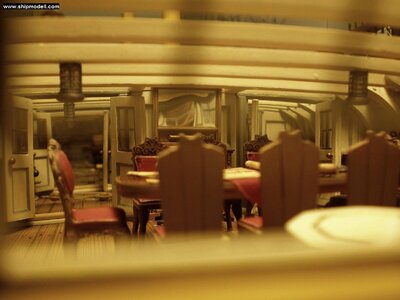
Wow those interior shots are fabulous, I can only admire as its many level beyond me.
 
I am confused(not difficult), is the top rigged model image the same as the lower model images before rigging.
Wow those interior shots are fabulous, I can only admire as its many level beyond me.
Richie, you are not the only who was baffled. My guesstimate is that the copper-plating was applied to the non-rigged model - still showing it in its early/original guise. By the time that the model was fully rigged, the copper plating had either acquired a natural patina or was treated to exude that green color. Those interior shots are also the ones that I find incredible - it's unfair that one modeler is bestowed with so much talent!
 
Back
Top