
Had I noticed the figurehead I would have done Pegasus as well.Thanks. Always appreciate comments. Almost did Fly but liked the horse figurehead better.")

You are using an out of date browser. It may not display this or other websites correctly.
You should upgrade or use an alternative browser.
You should upgrade or use an alternative browser.

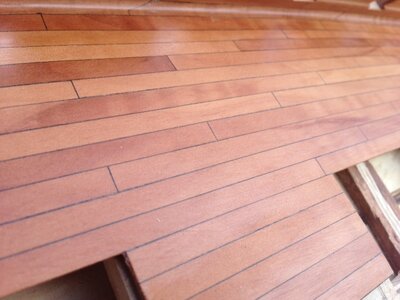
very well done. not many lay thr planks correctly as you- a BIG WELL DONEPort side first planking completed and starboard side nearly so. Some serious filling and sanding ahead.
View attachment 182375View attachment 182376
AGAIN WELL DONEI managed to cut the rabbit without too many slips, thank goodness for filler. Installed the first four rows of the second planking starting at the top of the gun ports then trimmed the them and the sweep ports. Will continue working my way down tomorrow. From here on in it will be necessary to taper the first 6" of each plank at the bow down to about 1/2 their width at the stem. The stern will be OK for a while.View attachment 183307View attachment 183304View attachment 183306
CORRECT PLANKET ON THE BOW HEAD.I managed to cut the rabbit without too many slips, thank goodness for filler. Installed the first four rows of the second planking starting at the top of the gun ports then trimmed the them and the sweep ports. Will continue working my way down tomorrow. From here on in it will be necessary to taper the first 6" of each plank at the bow down to about 1/2 their width at the stem. The stern will be OK for a while.View attachment 183307View attachment 183304View attachment 183306

- Joined
- Dec 1, 2020
- Messages
- 2
- Points
- 3
Seems a shame to have covered the wonderful planking that you did.Guess I'll just to struggle on and try my best to keep a nice looking hull. Copper plates are a big help in that regard. Thanks for the info.
- Joined
- Dec 1, 2020
- Messages
- 2
- Points
- 3
I'm still on the sidelines (just reading and mustering courage to try a build), but I've really enjoyed reading this thread. Well done, sir!
Looking forward to you comments. tack så mycket (My wife is from Helsinki)Hallo. Amati Pegasus will be my christmaspresent this year. I thinķ your log will be very usefull. Thank you from Sweden.
The wife demanded copper plate.Seems a shame to have covered the wonderful planking that you did.
The Bowsprit had a couple of tricky spots. Bob's compendium came in handy sorting out the single sheave blocks on the cap. I drilled 4 holes in the cap, two on each side which are visible in the side view below, for future eyebolts. When I get to the place where they are rigged I'll do it then. Easier to do the seizing off the ship than on. Not going to glue the bowsprit to the ship or the jib boom to the bowsprit until standing rigging is started. Will start on the masts tomorrow.


I completed the basic mizzen mast build. I'll leave the blocks and deadeyes until all the masts are done. Also nothing has been glued, only test fitted. The thick water based paint adds about .10mm to parts which necessitates some sanding and filing after it dries to get the mast into the mast cap again. The next step will be to build the tops for the main and fore masts. Don't want to drag out the compressor and spray gun for just the mizzen top alone. Will do all three tops at the same time when completed. The new Proxxon lathe really makes mast tapering a breeze. Beats the drill and a hand full of sandpaper. Need to find a source for 2mm to 6mm square stock for mast/spar building. Squaring off a 6mm dowel and building up to 6mm square is a paining the neck.


Absolutely no complaint here, more the opposite. The Bowpart is very solid. Can take big wawes without problems. In mmy Norske -my 1Th. build of warship, this parts was of a vert thin Plywood, -having taking copy .breaks very easely, so new ones verebuildt. Other Kit use a netal part here, which is in my opinion not correct -San Juan Nepusano -The bow was a challenge for me. Just trying to figure out how all the pieces fit together was hard enough, but the tight bending and twisting required on some parts was the real headache. After a lot of soaking and hot soldering iron use, then breaking a few and remaking them, I finally got something pretty acceptable. Now that I see it close up in a photo I'll have to go back and make a few small adjustments. View attachment 187607View attachment 187608View attachment 187609View attachment 187610
I have allready given my opinion about tour chalking, so no further comment here. The only things to me is that the nails are not alignedCompleted the installation of the cannons today. Now I can start working on the quarterdeck. I used 2.5mm blocks from Master Korabel for the gun tackle. As a mater of fact I replace all my kit blocks with Master Korabel blocks. Don't like the square kit blocks which usually have the holes drilled off center. The trunnion hinges are made from black construction paper. The rope coils are made by wrapping 5 turns of line around the shank of a 1/4" drill bit, a small drop of CA to hold it together, then sliding it off the bit directly onto the deck and CA it down. By rolling the bit between your fingers you can position the coil anywhere along the line. Be careful, too much glue and you're going to have trouble getting it off the drill bit. The cannon were cleaned by soaking in acetone, wiped dry making sure they were not touched with my fingers, the put in Jax blackening solution for about 1- 2 minutes. After a rinse in clean water and dried, a coat of clear matte poly was painted on.
View attachment 192187View attachment 192188View attachment 192189
Absolutly correct build and Drawings. Goes into my Database with more than 3000 drawings and imagesThe Bowsprit had a couple of tricky spots. Bob's compendium came in handy sorting out the single sheave blocks on the cap. I drilled 4 holes in the cap, two on each side which are visible in the side view below, for future eyebolts. When I get to the place where they are rigged I'll do it then. Easier to do the seizing off the ship than on. Not going to glue the bowsprit to the ship or the jib boom to the bowsprit until standing rigging is started. Will start on the masts tomorrow.
View attachment 198345View attachment 198346View attachment 198347
Well done STGCS. Some may complain about how your Deck is made. 1:2, !-4 etc. On the internet, there is an article about it. I forget these, as I generally has the chalking so thin, you can hardly see it, and no nails (1-70 some Scale) no Cretic, just a noteThe weather is still nasty so I spent another 6 hours in the shipyard. Not complaining though, really having a fun time with this one. Fo'c's'le done for the most part so moving on to the midships gun deck next. The distance between the deck and the cathead was insufficient to get it installed correctly so had to compromise. I was also surprised that the cathead/anchor tackle was not on the directions or plans so I drilled the holes at the end of the cathead and added a cleat so it can be added. I'll rig up a block to the anchor when it is installed. View attachment 192889View attachment 192890View attachment 192891
Attachments
only comment. the nails are somewhat out of line.Pretty much done with the hull and ready to start with the deadeyes. Need a few paint touchups here and there and I noticed on the midships photo the boarding ladder is out of alignment which is bugging me. Guess I'll have to rip it out and redo it correctly. Seems like studying the photos makes the errors really stand out and easier to see. Happy Thanksgiving to y'all.
View attachment 195300View attachment 195301View attachment 195302View attachment 195303View attachment 195304View attachment 195305View attachment 195306View attachment 195307View attachment 195308
Finished up most of the desk furniture then tackled the steering gear. I made a copy of the layout from the plans and taped it to a piece of plywood then drilled the holes for the eyebolts.View attachment 194517
After making up the blocks and eyebolts I placed them on the layout but no glue, just a tight fit.
View attachment 194518
Then I rigged the tackle and removed it from the jig.
View attachment 194519View attachment 194520
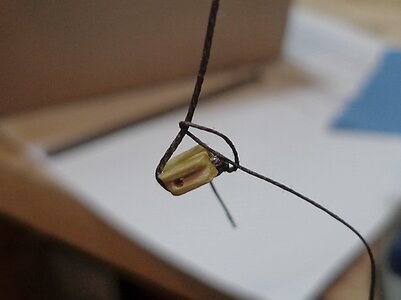
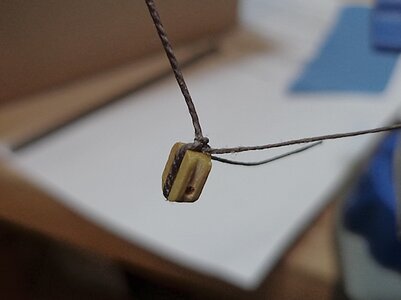
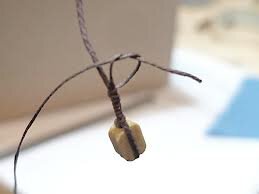
I use my fly tying vice for making up blocks and other small projects.
View attachment 194521
I removed the layout plan from the jig and moved it to the ship and taped it down in position and drilled the eyebolt holes. After removing the plan I installed the rigging and glued the eyebolts in place. Everything worked out great. Spent a lot of time laying awake at night mulling the provess over in my mind and it worked out well. I'll use this process on other projects too.
View attachment 194524View attachment 194523
The binnacle is from a third party vender. Liked it better than what came in the kit.
Attachments
Tried making a jig to align the planks and nails with no luck. Have a couple of ideas for the next build that will work better. Made a few adjustment when I did the fo'c's'le and that looks better but still not what I'm looking for. Still a beginner but gaining more confidents with every build.only comment. the nails are somewhat out of line.

My Black Pearl was tough too. I was supposed to attach braces to three different rails, but they didn’t fit. I wound up cutting the braces in half and gluing the parts on individually.Absolutely no complaint here, more the opposite. The Bowpart is very solid. Can take big wawes without problems. In mmy Norske -my 1Th. build of warship, this parts was of a vert thin Plywood, -having taking copy .breaks very easely, so new ones verebuildt. Other Kit use a netal part here, which is in my opinion not correct -San Juan Nepusano -
Beautiful deck. Hope I get to that level of skill you have reached.Well done STGCS. Some may complain about how your Deck is made. 1:2, !-4 etc. On the internet, there is an article about it. I forget these, as I generally has the chalking so thin, you can hardly see it, and no nails (1-70 some Scale) no Cretic, just a note
I like that you have added Spare Mast and Yards to the deck. It not very much seen, but they had to store these Spare parts somewhere outside the ship. Some are inserted behind the Deadeyes board ( Sorry forgot the name in UK )Well it took a while to get the two spare masts completed to my satisfaction. I'll permanently install them when the longboat is done. I have trouble squaring dowels. Got tired of drill and sandpaper routine to taper them so gave myself a Proxxon mini lathe for Christmas. Another learning curve. Will make lot s of shavings before I master it. Already found out walnut is soft and does not shape well. You need to finish the last .25mm with sandpaper to get the nicks and tool marks out. Didn't like the cast metal longboat the kit came with so bought the Master Korabel MK0101 kit. It was a pleasant surprise to find a set of english instructions in the kit this time. The last longboat I made for my Rattlesnake was all in Russian but I found a video on YouTube that showed the build and that was all I needed. The boat is 5mm shorter and 1mm narrower than the one supplied with the kit but will fit just fine. That's the next step in this build.View attachment 196842View attachment 196843View attachment 196844
This will my my last comments for some time. Hope that I have not made somebody angry etc-
i HAVEDURING MT 4O+nEVEN BLE TO DO IT WITHOUT MODEFICATION AND MAKE SOMETIMES 3 PIESES, SHAPE AND GLUEMy Black Pearl was tough too. I was supposed to attach braces to three different rails, but they didn’t fit. I wound up cutting the braces in half and gluing the parts on individually.
sorry for the capital letters.I like that you have added Spare Mast and Yards to the deck. It not very much seen, but they had to store these Spare parts somewhere outside the ship. Some are inserted behind the Deadeyes board ( Sorry forgot the name in UK )
This will my my last comments for some time. Hope that I have not made somebody angry etc-
i HAVEDURING MT 4O+nEVEN BLE TO DO IT WITHOUT MODEFICATION AND MAKE SOMETIMES 3 PIESES, SHAPE AND GLUE