-

Win a Free Custom Engraved Brass Coin!!!
As a way to introduce our brass coins to the community, we will raffle off a free coin during the month of August. Follow link ABOVE for instructions for entering.
-

PRE-ORDER SHIPS IN SCALE TODAY!
The beloved Ships in Scale Magazine is back and charting a new course for 2026!
Discover new skills, new techniques, and new inspirations in every issue.
NOTE THAT OUR FIRST ISSUE WILL BE JAN/FEB 2026
You are using an out of date browser. It may not display this or other websites correctly.
You should upgrade or use an alternative browser.
You should upgrade or use an alternative browser.
HMS Prince - Amati 1:64 by Vince P. Original 1978 Version
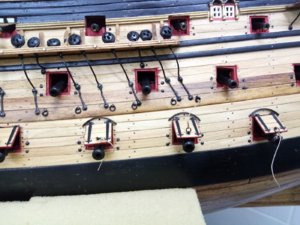
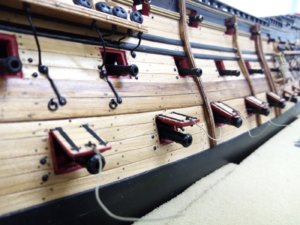
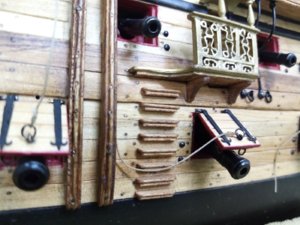
@Mr.Deep This build log dedicated to HMS Prince by Vince. We would love to see the build progress of your HMS Royal William in a separate build log . Please let us know if you need any help opening a build log.Then can be I in this topic will share their progress on Royal William.I glued the covers of the gun ports on the lower gun deck.Now you need to fix and paste lanyards .
translate by Jim
Эта страничка посвящена сборке HMS Prince которую ведёт Винс . Мы с удовольствием хотели бы видеть прогресс вашей сборки HMS Royal William на вашей собственной страничке. Пожалуйста, дайте нам знать, если вам нужен совет или помощь как создать свою страничку по сборке
с уважением,
Дмитрий (модератор)
- Joined
- Nov 26, 2018
- Messages
- 546
- Points
- 343

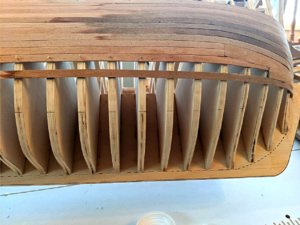
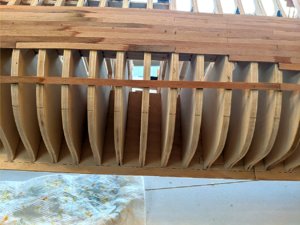
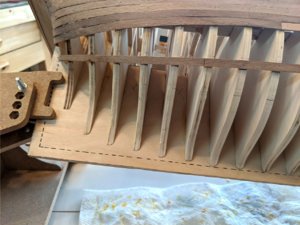
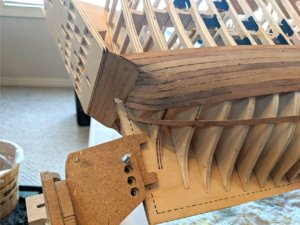
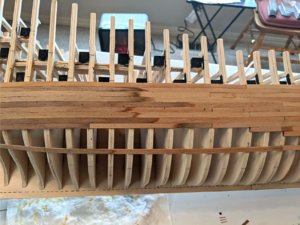
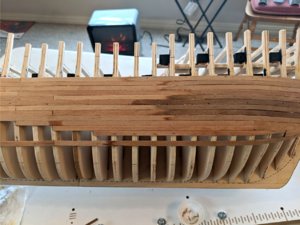
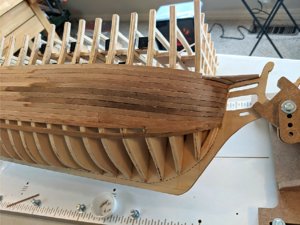
As promised, some more photos of the hull being planked. This is just the first (course) layer of planking. There will be a second (finish) layer added over this after the entire hull is planked.
This hull is a complex project because of the bluff bow and the curved and tucked stern. It requires bending, some severe, of the planks and is both concave and convex in nature. It also requires tapering the width of the planks at both ends. Because some planks require both tapering and bending at each end, I find it easier to cut the planks into sections so you only have to alter one end at a time.
I use a method for determining the tapering of each plank that I learned from a magazine series on planking many years ago. There are several other good methods, but this has served me well and I have planked several complex hulls over the years. Here is the explanation:
1. Start at the level of the main deck and lay one plank from bow to stern allowing the plank to flow naturally without any bending up or down. It is ok to allow some bending in or out to follow the curve of the hull.
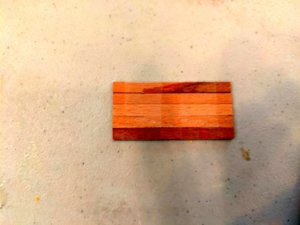
2. Create a jig consisting of 5 planks taped together across that span 4 bulkheads in length (See photo).
3. Starting midship, place this jig up against the bottom side of that first plank and draw pencil lines where the bottom of the jig crosses each bulkhead. Move the jig towards the bow and repeat. Move to the stern and repeat. This should give you pencil lines drawn along several bulkheads forward, midships, and aft.
4. Place another plank (something thin that can be bent easily and the exact width of the real planks) that spans the entire hull along the bottom of your pencil lines and temporarily nail it in place. Now allowing the plank to flow naturally as before in step 1 run it to the bow and mark the upper edge with a pencil at each bulkhead. Do the same towards the stern to the stern post. Remove the plank. You should now a pencil line running from stem to stern.
5. Repeat step 4 all of the way down the hull to the keel. You should now have several rows of pencil lines running lengthwise across the entire hull. You will notice that as you get closer to the bow or stern, the distance between any two of the lines may get closer together and even in some cases get further apart.
6. Divide the total distance between each pair of lines at every bulkhead by 5 and draw marks on each bulkhead at that distance. You should now have 5 equally spaced marks on each bulkhead from stem to stern all up and down the hull. The distance between these marks gives you the exact thickness of any plank where it crosses a bulkhead for tapering. In some cases the lines get so close together that 5 planks won't fit without tapering some to a sharp point. Planks should never be tapered to a point. In these cases, only 2 or three planks will come to the bow and these will be short sections that actually spread out in width to accommodate the ends of the 5 needed planks without tapering to a point anywhere. These short planks are called "joggle planks" and I will post photos when I get to that point. In those cases where the original lines actually got further apart, ( stern areas) do not taper the planks here. Leave them as is and run them naturally. This will cause a gap between some of the planks. These spaces will be filled in later with small pieces of planks called (steelers). I will post photos when I get that far.
7. Planking from the main deck up is usually relatively flat and will not require bending or tapering.
Vince P.


GREAT EXPLANATION, Don
- Joined
- Nov 26, 2018
- Messages
- 546
- Points
- 343

I posted a complete build log from start to finish for the Royal William. Consists of almost 5 years of building and hundreds of photos. Look it up on this forum.@Mr.Deep This build log dedicated to HMS Prince by Vince. We would love to see the build progress of your HMS Royal William in a separate build log . Please let us know if you need any help opening a build log.
translate by Jim
Эта страничка посвящена сборке HMS Prince которую ведёт Винс . Мы с удовольствием хотели бы видеть прогресс вашей сборки HMS Royal William на вашей собственной страничке. Пожалуйста, дайте нам знать, если вам нужен совет или помощь как создать свою страничку по сборке
с уважением,
Дмитрий (модератор)
Royal William Euromodel 1:72 by Vince P. -- FINISHED
I am a brand new member here and have decided to post my build log of the Royal William (RW). I have about 3 years into this build and have over 600 photos from the start to the present. She is about 75% completed as of now. The attached photos are what she looks like now. I will start posting...
shipsofscale.com
Vince P.

- Joined
- Nov 25, 2018
- Messages
- 635
- Points
- 403

Excuse me.Initially I wanted to write in the subject Royal William by Vince. .Made a mistake, began to edit, could not delete the record.If you do not hard delete the record.@Mr.Deep This build log dedicated to HMS Prince by Vince. We would love to see the build progress of your HMS Royal William in a separate build log . Please let us know if you need any help opening a build log.
translate by Jim
Эта страничка посвящена сборке HMS Prince которую ведёт Винс . Мы с удовольствием хотели бы видеть прогресс вашей сборки HMS Royal William на вашей собственной страничке. Пожалуйста, дайте нам знать, если вам нужен совет или помощь как создать свою страничку по сборке
с уважением,
Дмитрий (модератор)
Please start a new log on your build, we would be delighted to see your ship. We can move the post to your new blog when you started it.Excuse me.Initially I wanted to write in the subject Royal William by Vince. .Made a mistake, began to edit, could not delete the record.If you do not hard delete the record.
If you need any help let us know.
- Joined
- Nov 26, 2018
- Messages
- 546
- Points
- 343

Hi Mates,
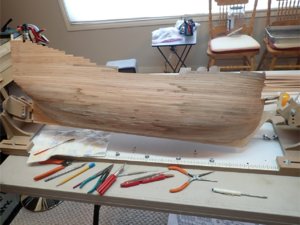
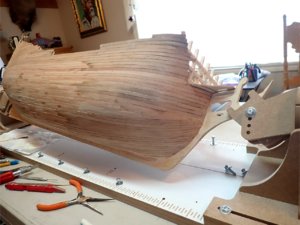
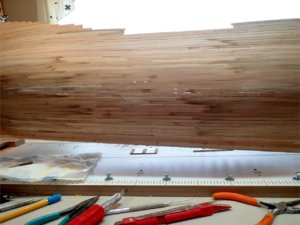
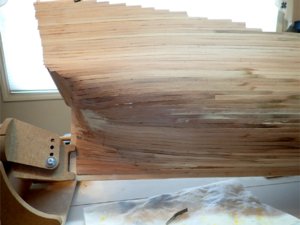
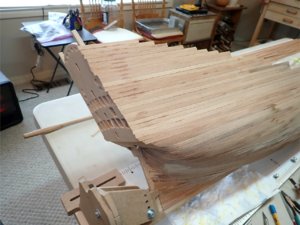
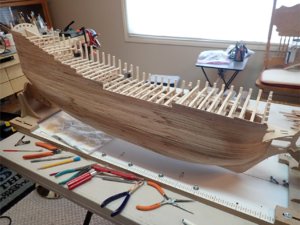
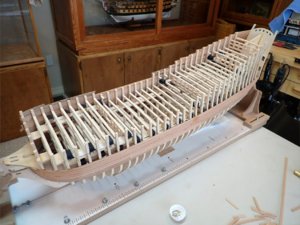
Long time no see. Now that I am pretty much confined to the house because of this Corona virus epidemic, I have been putting more time into my build. I have finally finished the starboard side of the first planking layer. It was a monstrous job. Besides being a very large hull, the enormous amount of bulkheads requires constant adjustments of just about every bulkhead to get a fairly even and smooth run of the strakes. Even so, there are a few rough spots that will have to be smoothed out when placing the second finish layer of planking. I used little nails throughout to hold the planks until the glue dried and then pulled them out. For the second layer I will not have to use them because there will be a solid layer underneath to glue them to. I used PVA glue for most of the planking, except where the curves in the hull required holding. In those places I used medium thick CA glue and fast drying spray. I did not cut off the ends of the planks that hang over because I might need some extra when placing the decorations and strips to the bow and stern. Although you can't them, I did mark the locations of the gunports with little holes for cutting them out later.
Hopefully I will post more quickly now.
Vince P.


Looking good Vince, glad to see you back.
I have always wanted the Amati kit but I have settled for the newer kit by Constructo. I will definitely follow along!
Bill
Bill
Thats coming along very nicely.
- Joined
- Nov 26, 2018
- Messages
- 546
- Points
- 343

Hi Mate,I like.Only I advise you to dress the skin symmetrically.2-3 boards on the right - 2-3 boards on the left.This way the hull won't move sideways.
Thanks for the advice. Normally I would do just that, but because there are so many bulkheads close together and the fact that I installed cross beams between each pair, the hull is completely rigid. It can't flex. Besides if you notice I did plank both sides around the main deck to start with just in case.
Hi Vince how is your build coming along?
- Joined
- Nov 26, 2018
- Messages
- 546
- Points
- 343

Hi Zoly,
I am about 2/3 of the way done with the first layer of hull planking. Sorry I have not posted in a while. I have been very busy with this virus thing, as my job in healthcare is frantic right now. Hopefully as things quiet down I can get back to putting in more hours and posting updates.
Vince
I am about 2/3 of the way done with the first layer of hull planking. Sorry I have not posted in a while. I have been very busy with this virus thing, as my job in healthcare is frantic right now. Hopefully as things quiet down I can get back to putting in more hours and posting updates.
Vince
Thank you Vince,stay safe!Hi Zoly,
I am about 2/3 of the way done with the first layer of hull planking. Sorry I have not posted in a while. I have been very busy with this virus thing, as my job in healthcare is frantic right now. Hopefully as things quiet down I can get back to putting in more hours and posting updates.
Vince
- Joined
- Nov 25, 2018
- Messages
- 635
- Points
- 403

thank you for your selfless work.Hi Zoly,
I am about 2/3 of the way done with the first layer of hull planking. Sorry I have not posted in a while. I have been very busy with this virus thing, as my job in healthcare is frantic right now. Hopefully as things quiet down I can get back to putting in more hours and posting updates.
Vince
Hi Vince,
I remember corresponding with you a few years ago on the other forum, and very happy to see you here. Keep up the great work.
I remember corresponding with you a few years ago on the other forum, and very happy to see you here. Keep up the great work.

