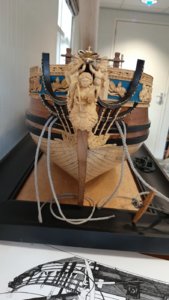
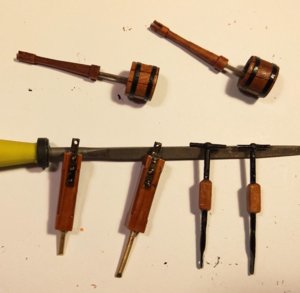
HMS Royal Caroline kit ZHL 1/30

Well, well, well,
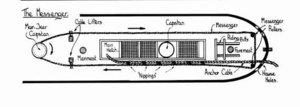
Do I get it right that you both agree that the RC did not have this Dutch invention?
I mean that I am thinking what to use/not use in my ship...
No thats not right. It is shown on the drawings of the AOTS book about the royal caroline. And the drawing above shows it was used in the royal navy.
So I keep it on.
 
No thats not right. It is shown on the drawings of the AOTS book about the royal caroline. And the drawing above shows it was used in the royal navy.
So I keep it on.
Well, well, well,
Do I get it right that you both agree that the RC did not have this Dutch invention?
I mean that I am thinking what to use/not use in my ship...


Page_155.jpg
G'day Alex, I am still not convinced that the knot was used on English messenger ropes that were nipped ( tied ) to a cable, when tied to a cable they were tied with short lengths of rope, see pic above, so this is the way I will be showing it tied,


20200323_213644.jpg
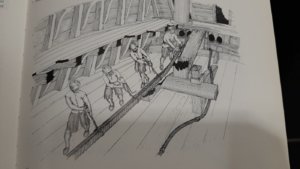
where as in the pic above it shows the rope is only looped around the cable and the men are holding it tight and it looks like the Knot or woolding is helping to hold the rope in place,


Screenshot_20200324-162502_Drive.jpg
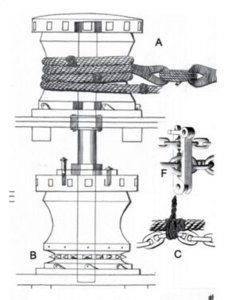
and in this pic it shows a chain cable that is being held with ropes just like the Dutch method, this is an entirely different type of Capstan and it is showing the transition to iron, when they were trying different ways to hold the messenger to the Cable or in this case the chain,

Maybe someone else can shed some light on the subject,

best regards John,
 
The ropewalk basis is Domanoff s vertical VR ropewalk.

I have modified this in a horizontal ropewalk by fitting this to a 2,75 mtr long beam. The beams can be used to produve every lenght of rope, laid down next to eachother or in lenght of eachother.
The rope walk can turn left or right enabling to create rope (t = in Dutch touw) or cable (k = in Dutch kabel)
View attachment 139945
View attachment 139944

On the other end of the rope walk I have a second 2,75 mtr beam on this I have installed a rail system of some simple sliding doors. On top of this a block of wood with a ball bearing with the outer race mounted in the block and in the inner race a hook to connect the other side of the rope.
View attachment 139947
View attachment 139946
On top of the block the spool with thread is placed.

On the other side of the wooden block a rope is fitted which goes through a block and on which weight is providing tension on block. The tension is depending on the finall rope size, for my 3,6 mm anchor cable I added extra weight.
View attachment 139948

When running the ropewalk the end of the rope on the hook in the ball bearing is blocked from spinning with some simple tweezers, the rope is running over a gearwheel on a standard to separate them from each other.
View attachment 139949

On top of the beam a cm scale is written, when spinning the ropewalk the rope is getting shorter by twisting the individual ropes. When a rope is reduced by 15 to 20% in length then the ropewalk is stopped.
View attachment 139950

At last the tweezers are removed from the hook and the rope starts spinning releasing the provided tension. While spinning the gear wheel is moved towards the other side along the beam creating a rope which is perfectly shaped. When the hook stops spinning you manually rotate it until you have a satifying rope which is not curling when the tension is removed.

With these as a result.
View attachment 139951
As I work with synthetic thread, Gutermann Mara, I use a heatgun to finish my rope. Heating it up makes it softer and less sensitive to untwining after cutting the rope. On the ends I put some CA to seal it.

Have fun making your own ropes
Hi Maarten,

I do have Domanoff's Server machine and become proficient with it after many tasks. I was thinking about expanding my own self reliance by making my own rope/cables by purchasing his Endless Rope Walking Machine. I've always used cotton or linen threads as I never liked the "shiny" or artificial look of synthetic threads. However, as usual, I learn some new things every time I read your posts and this is no exception.

Your synthetic thread looks QUITE Organic. Very natural looking. You mention it is Gutermann Mara. Is there anything else I need to know when I purchase my thread that I will run tests on? Are there different kinds of threads within the class of "Gutermann Mara" or is that just a brand type.

As always, thank you in advance.
Ken
 
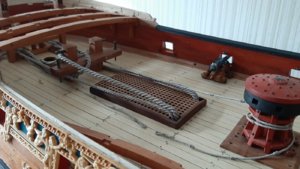
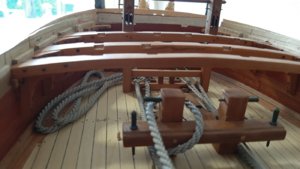
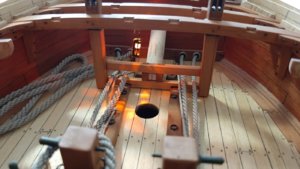
This week I have finished the other anchor cables.
I need to fit these cables before I can fit the deck beams and finish the bullwark.
There are 4 different sizes of anchors on board and all with there own cable size.
The biggest bower anchor cable is 3,6 mm diameter, the best bower cable of 3,1 mm and 2 for the smaller anchors of 2,6 mm.
Here all 4 cables are dry fitted.
20200327_173900.jpg
20200327_174013.jpg
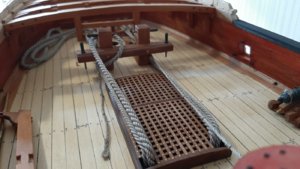
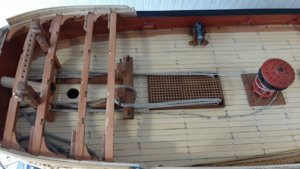
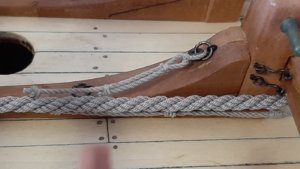
The two largest anchors the bower and the best bower ( which was the most commonly used and carried on the SB side) are fed throug the inner hawser holes and were used the most. The bower, ps side, I will hang in the cat head ready for release on the thickest anchor cable which is belayed on the bitt and fixed to stoppers with slack cable drapped next to the bitt on the deck. The best bower will be displayed fitted to the messenger. The two lighter anchor will be stowed on the side with the cables fitted on deck by stoppers.
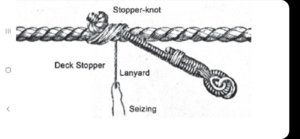
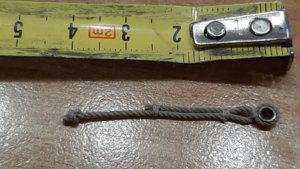
The stoppers are pieces of 1 fathom of rope 1/3 in diameter to the anchor cable, which were used to secure the anchor cable on the deck.
Screenshot_20200327-234117_Drive.jpg
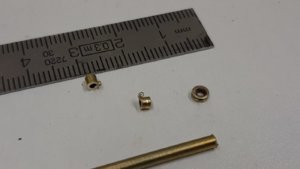
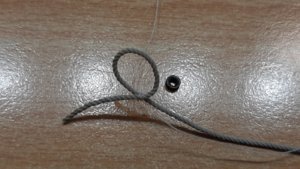
For these I made 1,2 mm rope and a brass rings for the eye in the rope.
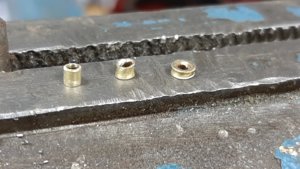
The ring I made from brass tube.
20200326_203003.jpg
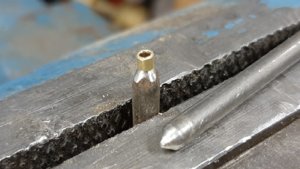
This brass tube I put between two points of nails and with a hammer you tap them tappered on both sides.
20200326_204000.jpg
Then you remove the ring between the two nails and directly hammer on the ring till you have the shape you need.
See the three stages below.
20200326_204201.jpg
The last step is burnishing it and fit it in the rope.
20200327_092741.jpg
With some thread you tight it up to a nice stopper.
20200327_094357.jpg
And fitted on the ring of the bitt.
20200327_094848.jpg
5 more to go on the bitt, and 6 more on the deck.

This is how it now looks, all cables can be fitted to stoppers and messenger next week.
20200327_173808.jpg
20200327_173918.jpg
20200327_174224.jpg
20200327_174051.jpg
 
Last edited:
Nice work with the ropes Maarten, they look excellent, I think that I will only be attaching the cables to the two Bower anchors and just have the other two tied up on the channels,

best regards john,
 
Nice work with the ropes Maarten, they look excellent, I think that I will only be attaching the cables to the two Bower anchors and just have the other two tied up on the channels,

best regards john,
Hi John, do you have an example of that?
My idea was to connect them to the anchors and clog the hawser holes with tarred cloth.
 
Hello Maarten, If I would have a chance to describe your work in a few words, I would say -Simply Amazing!! I am sure you don't require encouragement, but sometimes simple techniques worth expensive pieces of machinery. Your rope walk and ropes are great! Many thanks for sharing!
 
Hi John, do you have an example of that?
My idea was to connect them to the anchors and clog the hawser holes with tarred cloth.

G'day Maarten, first I would like to say Thank you, you are a good friend, I like that we can exchange idea's and thoughts, a lot of folk would'nt like me questioning their methods, but it is the way we learn, I usually get in trouble because I say what I think not what others want to hear.

I have had a look at Anchors and the methods of stowing etc, there are a lot of conflicting theories, some say that the the Bower and Best Bower are always rigged ready for dropping, which is what you say and I agree, some say that both the Bower Anchors were the same size and weight, others say one was slightly smaller, also some say that only the two Bowers were rigged with the others tied to the channels, and also there are photos showing all the anchors rigged, so unless you have a Time machine you cannot say for definite, I am going to rig both Bowers at the Cat Heads and just lash the other two to the channels, I am still trying to find out the best way to do it, I was thinking of having one anchor just waiting to be dropped and the other with the flukes still being held up to the channels, I'm looking for photos on how they had them ready to drop.
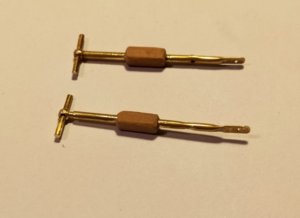
Also with the pumps I always thought they were made up from separate pieces, so when I read what Alex mentioned I did some research and yes you are both right they were made up from the elm tree has it had a greater resistance to salt water, they said bore from a trunk or sometimes made up from two parts of the trunk, but in both ways they were reinforced with rope wooldings and metal bands,
so now I have to decide whether to go with the kit and what i have built, see below,

1094.jpg


1095.jpg
or scrap these and go with the tall elm tree pump with the spigot that discharged the water onto the deck, have you
any thoughts on this,

PS if you build the kit pumps watch out for the the little brackets that hold the pump arm, they are very delicate,
if I was to build them again i would bend my own brass strip, looking forward to hearing from you,


Best regards John,
 
Last edited:
Hi John,

Being Dutch I am used to saying what we think. :)

Most research I have is about Dutch ships but most probably there isn t major difference between these practices.

The info I have is of 4 different size anchors, all rigged up, with the small ones on the channels and the big ones on the catheads. The anchor cables are rigged for the smaller ones too and the cable is held by ropes along the side. As these anchors are not ready to use the hawser holes are plugged around the cable. On long voyages the cables were removed, but this being a yacht I expect this wasn t the case here. She was more like a bus service for the royal family sailing a lot from the UK to Hellevoetsluis here in the Netherlands when the family visited their family in Germany.

My info on the pump is 17th century and indeed elm or popular wood which was tide up with rope and cloth. The pumps on rc are a different design and maybe they were build of segments with steel rungs like a barrel. I see what I can find on this.
 
Back
Top