HMS Sovereign of the Seas - Bashing DeAgostini Beyond Believable Boundaries

Kurt, I’ve fallen out on yours and many other logs I follow because - for some reason that I don’t understand - I do not receive email updates as they happen. It doesn’t matter whether I unwatch/re-watch; I may receive a few updates, thereafter, and then nothing. So, I apologize that I am so far behind. Your log is particularly dense with fascinating information about the ship, so it may take me a little while to get up to date.

What a scathing and, apparently, justified critique by Frank Fox! It is so interesting to have real context for that VDV, the elder drawing.

In any case, my quick scan of your current progress shows just how emphatically your efforts are living up to your build log title. Your ship has wonderful lines, and I look forward to reading up on how you arrived there. Excellent work!
Hello HH!

Don't rely on the email notifications, shipmates! I just log in and click "What's new" and get everything cool.

Nice that you found me again. If you have any questions or advice, please speak out. The actually amount of bashing of this kit is still a bit less than the models built by Nigel and Uwe, and I am using both of their builds as a guide for making changes. I am HUGELY disappointed in McKay's book, not because of the inaccuracies, but because I have no means of utilizing the expertise of Frank Fox to get the hull framing even remotely accurate. I can see why he used Deane's Doctrine on Naval Architecture (c.1670) as the basis for hull shape, because that is the greatest source for information on hull design, albeit over 40 years later. However I don't agree that it should be followed under the assumption that nothing had changed in 40 years, especially since Peter Pett also left some information on how the hull shape was made, and HE built the ship! I think the hardest part of modelling isn't building the model, it's piecing together the myriad of source material and information, interpreting it, and coming up with the design based on your own semi-informed decisions.

As for the design of my hull thus far, several changes have been made to accurize it to the information available, but I fear that the metal ornaments provided with the kit will not longer fit on the hull properly as a result, particularly those that define the cells into which the carvings are placed and the edge pieces. Most of the kits parts, detailed as they are, will probably be replaced. I bought a low cost resin 3-D printer and will be teaching myself Blender to make 3-D models of the decorations, in an attempt to make them as close as I can to the ones on Roland Röler's model. Unlike the carvings on Paul's (Dockattner's) WASA, I can save myself LOTS of work and just paint them all gold. Even so, I can't catch up with Dockattner because he works fast, and he had a head start. :D
 
Last edited:
Kurt,
Painting all the bits gold would be ok -- You might, instead, consider using gold foil sheets that are available through Amazon or at Blick's. A friend who built the
Corel Vasa covered all of the metal bits using gold foil. Came out real nice. And given that the Sovereign actually used gold leaf to cover the many wood carvings...The resin 3D printer solution is excellent.
Eventually many commercial kits will probably turn to that solution to increase accuracy, and let the buyers figure out the "gold" part.

Just a thought.......
 
Yes, Kurt, I can empathize with that feeling of disappointment, when you spend a fair amount of money on a book that you hope will really catapult you toward understanding, only to discover numerous errors of fact and disregard for common sense.

I agree that most of the struggle in building the model is just ascertaining what your reliable sources are. But, you are making a fabulous job of it.

I often wonder why more POB builders don’t fully in-fill between bulkheads with balsa, as you have done. I would say that is 90% of the task of ensuring a fair hull.
 
Kurt,
Painting all the bits gold would be ok -- You might, instead, consider using gold foil sheets that are available through Amazon or at Blick's. A friend who built the
Corel Vasa covered all of the metal bits using gold foil. Came out real nice. And given that the Sovereign actually used gold leaf to cover the many wood carvings...The resin 3D printer solution is excellent.
Eventually many commercial kits will probably turn to that solution to increase accuracy, and let the buyers figure out the "gold" part.

Just a thought.......
Are you sure the Sovereign's decorations were covered with gold leaf? The old meaning of "gilding" could mean covered with gold leaf or simply painted.
 
Yes, Kurt, I can empathize with that feeling of disappointment, when you spend a fair amount of money on a book that you hope will really catapult you toward understanding, only to discover numerous errors of fact and disregard for common sense.

I agree that most of the struggle in building the model is just ascertaining what your reliable sources are. But, you are making a fabulous job of it.

I often wonder why more POB builders don’t fully in-fill between bulkheads with balsa, as you have done. I would say that is 90% of the task of ensuring a fair hull.
It is possible to avoid hard bends of the planking as they pass over the frames if the frames are spaced properly and there are enough of them. Flatter areas in the hull curvature can have frames spaced farther apart and areas of sharper and more complex curves require frames to be close together in order for planking to be smooth. You want to avoid completely flat areas near midships and hard folds that betray the location of individual frames underneath the planking. The upper hull on many older galleons had flat surfaces, but flat areas on the lower hull just aren't right. The two model hulls I have worked on so far seem to have just enough frames to ensure that the planking follows a smooth, even hull curvature. However, the DeAgostini SotS model has frame spacing much farther apart than Corel's La Couronne. Part of that is because the hull is 20% larger, but the spacing still seemed to large in my estimation for smooth transitions in the hull curvature. So, I opted to do a complete balsa fill on the lower hull, just to reduce the amount of flat areas that require filling prior to the final planking layer. The improvement won't be sizeable, but on this ship I wanted to put my best effort into it for every detail. It will fall short of some of the master builders like Roland Röler, who spent lots more time than I will probably spend on my model, but I will be more than satisfied with the end result.
 
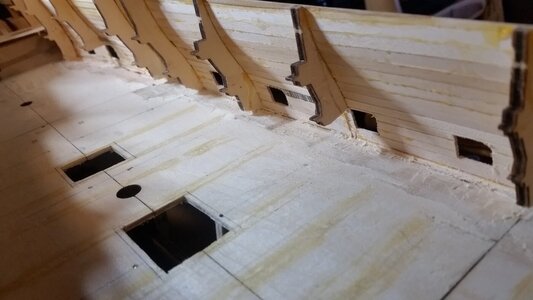
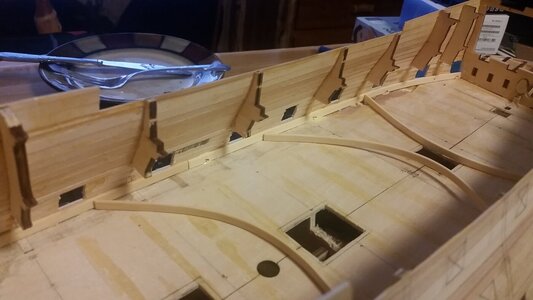
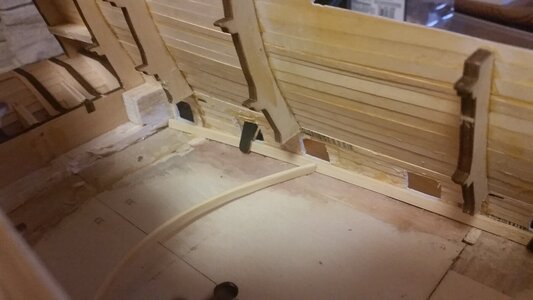
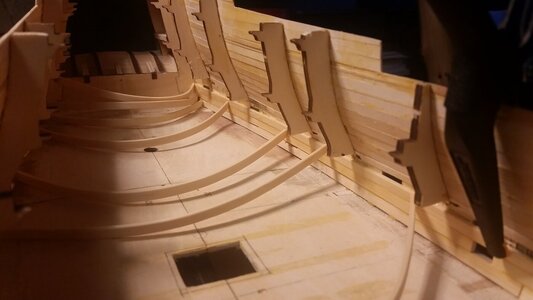
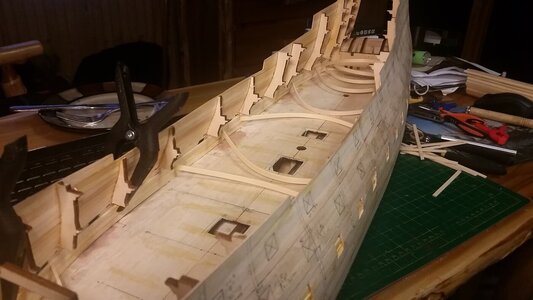
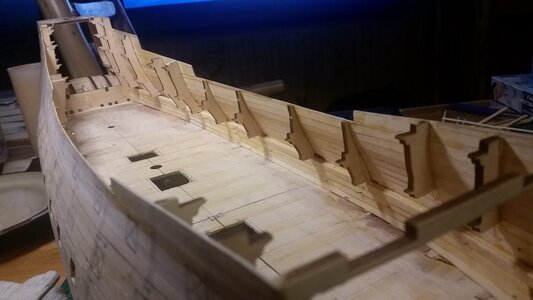
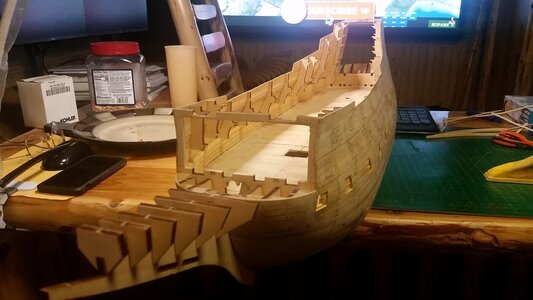
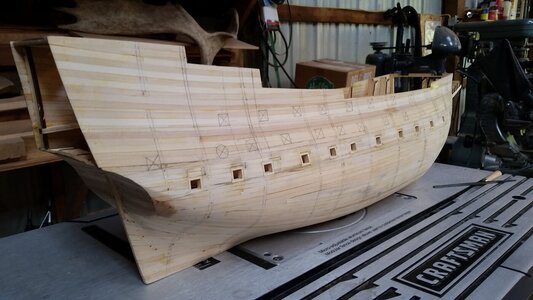
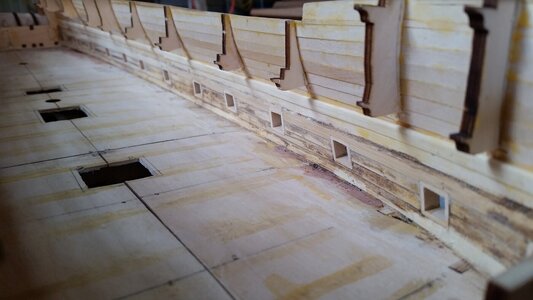
The ports for the lower gun deck were cut. Their position relative to the deck has forced me to make a compromise. The cambered ribs and decking were abandoned because the gun carriages would be too high relative to the ports. Instead, the deck plywood was carefully cut with some camber close to the bulwark using the Dremel Multi-Max oscillating cutter and smoothed with a chisel point razor knife. The deck was made to match the position of the ports, and will be covered with 4mm tanganyika planking, so various holes that opened up near the bulwark will be covered. Also, the interior bulwark planks and ribs will cover up the rest of the ugliness. Installation of the deck fittings like the anchor handling gear and gratings will be easier without a second layer of wood on this deck. The camber will not be as deep as I want, but cutting the entire deck at this point is not practical because of lack of access due to the hull planking and frame interferences. As you can see from the picture below, frame interferences with the cannon carriages are being dealt with by removal of sections of the frames as work moves upwards in the build.

265 Cut Deck to Creat Some Camber and Align Cannons Vertically.jpg
 
Are you sure the Sovereign's decorations were covered with gold leaf? The old meaning of "gilding" could mean covered with gold leaf or simply painted.
Kurt,

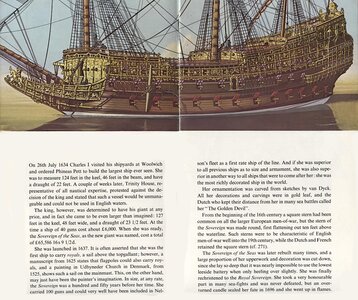
According to James Sephton’s Sovereign of the Seas, Charles approved ornamentation carved in oak and gilded in gold. Something that surpassed anything seen before. This book, for me, is somewhat overly technical for my needs, but lots of good learning……

The image below – I believe is from the book. Mine was downloaded into my iPad from Amazon and images are mostly at the back section of the digital edition. Note second paragraph on the right column.

hnghgn.jpeg
 
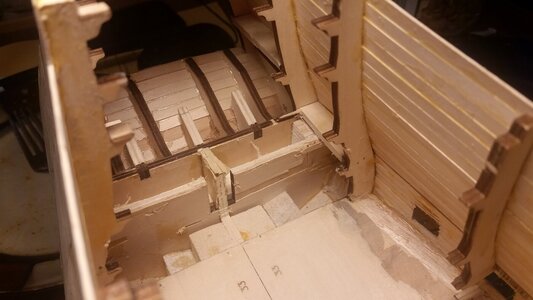
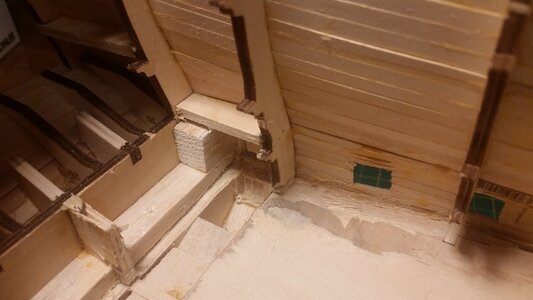
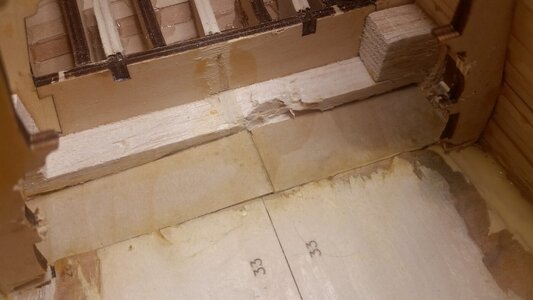
Using the Dremel cutting tool, more of the stern support structure was removed. The wood remaining underneath was cut with some camber to act as a foundation for the thin birch plywood which was glued over the opening. The height of the deck was checked by placing a finished cannon in the gun port. Looked good.

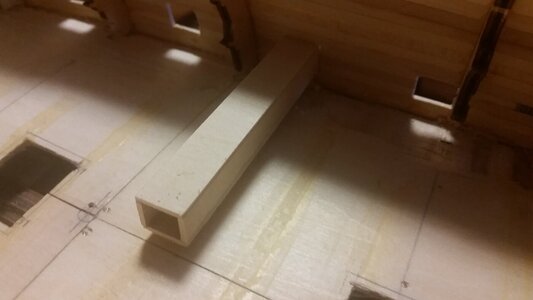
The next step is to make the gun port linings. Probably the best way to do that consistently is to make a square tube of assembled strips of wood, and carefully cut sections with the band saw. Each lining would then be glued onto the inside surface of the hull at each port. The mating surface of each lining would require custom shaping by sanding to fit to the hull curvature at each port, and would have to be painted red before being attached. Hull frames will be removed in sections, starting with the bottom deck, to make room for installation of the interior bulwark planking. Then the deck planking will be laid.

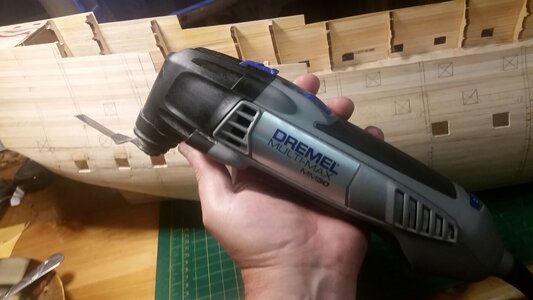
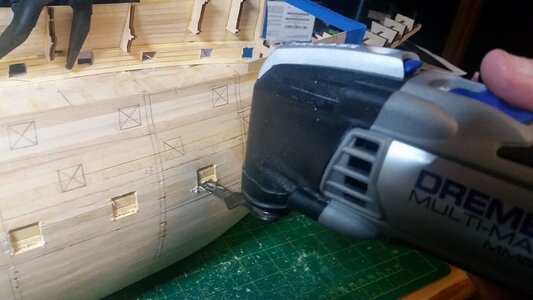
This tool is great for cutting in hard to reach areas.
266 Dremel Cutting Tool.jpg

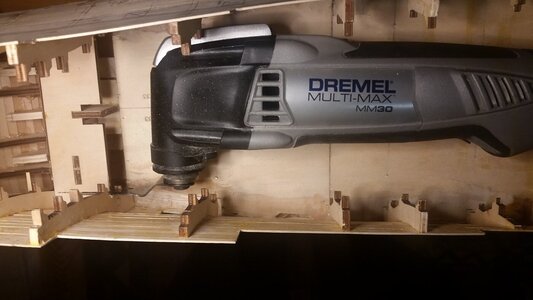
It cuts through thick plywood edge on with ease.
267 Cutting Stern Support.jpg

Part of the support structure is cut away.
267 Stern Support Partially Removed.jpg

The edge of the vertical bulkhead support is cut with a cambered top edge to accept the deck plywood.
268 Support Wood Under Deck Cambered.jpg

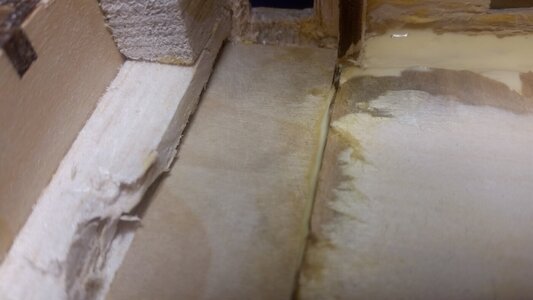
The plywood pieces are very thin and curve slightly downward at the bulwark. A chunk of the balsa was broken out, but that's okay.
269 Thin Plywood False Deck Installed.jpg

There is more room in the stern now, enough to set the last pair of cannon of VII.
270 Stern False Deck Done.jpg
 
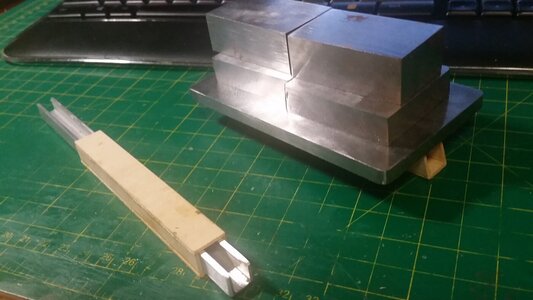
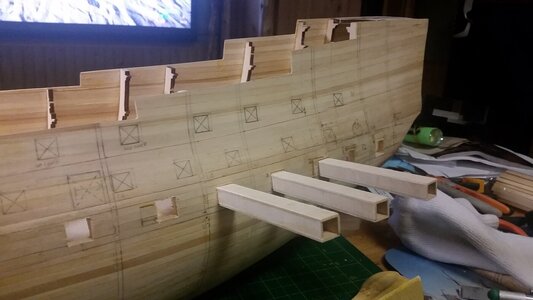
The gun port linings will be made from wooden square tube made from basswood. A piece of aluminum channel was sized on the mill to act as a form, and steel blocks were used to hold the lining pieces until they dried.

The frames supporting the hull of the lower gun deck were surgically removed after being cut from the upper section of the frames by the Dremel oscillating cutter. Sections of the frames will be removed as work progresses upward, since the frames are important in holding the shape of the thin hull planking. Some balsa block was chiseled out of the hull at the stern, making more room for the last row of guns. Before laying the deck planks on the lower gun deck, it occurred to me that it would be better to install the bulwarks and line the gun ports, since these need to be painted or stained, and on drop of paint would ruin the appearance of the deck. So, following Uwe's example, I started layering material on the bulwarks to make them thicker. Uwe used one layer of 2mm bamboo followed by a 3mm layer of balsa, but I figured it was time to use up all this bamboo since it was not good enough for the outside hull planking. Instead of bamboo and balsa, two layers of 2mm bamboo were used. On the middle and upper gun decks, one layer of bamboo will be used.

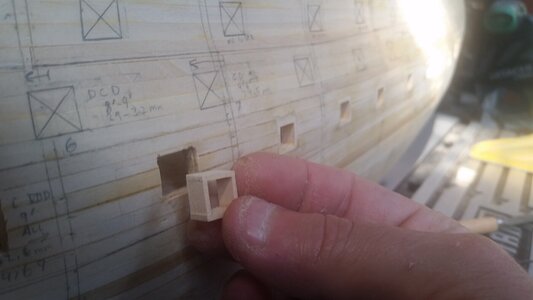
Once all the layers were installed and the glue was dry enough, the Dremel tool was used again to re-cut the gun portals. The portals were final shaped using a razor knife, and the pieces which will be the gun port linings were test fitted. Later those pieces will be cut into sections and glued into the portals. The linings must be installed such that they upper and lower sills are parallel with the water, not angled to be perpendicular with the hull planking. Making the square tubes makes it easier to be consistent with the size of each lining and ensure they are angled correctly on each gun deck.

The linings will be painted red, but what should the bulwark interior surfaces be painted? White, or left as natural stained wood? The weather decks may be red, but what of the lower decks? Any suggestions you have based on examples from ships from this period would be greatly appreciated, because I have no idea. I imagine they may be white to brighten these dark decks, but that was known to be on ships 200 years later.

271 Make Wooden Tubes for Gun Port Linings.jpg

Test fit the gun port lining pieces.
272 Test Fit.jpg

273 Test Fit 2.jpg

Cut away section of the frames.
274 Cut Frames Away.jpg

Thicken the bulwarks with two layers of 2mm bamboo. Some bamboo strips are bent to hold bulwark pieces until they dry. Pins and clamps are also used.
275 Begin Filling Bulwark with 2mm Bamboo.jpg

276 Continue Filling With Bamboo Strips.jpg

277 Continue Filling Bulwarks.jpg

278 Two Layers Bamboo Added to Buulwarks.jpg

279 Two Layers Bamboo Added to Buulwarks.jpg

280 Pins Removed from Bulwarks.jpg

Re-cut the gun ports.
281 Recut Gun Ports.jpg

Trim the gun ports to that the lining pieces fit in each gun port. Ensure they are angled horizontally.
282 Test Fit Gun Port Linings.jpg

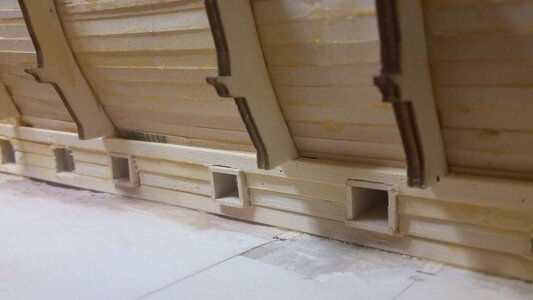
The interior of the bulwarks. The lining will be trimmed to match the bulwark. A final layer of planking will cover the edges of the linings on the interior side of the hull. The lining edges will be exposed and visible on the exterior side.
283 Gun Port Linings Fit Well.jpg
 
This is a massive amount of difficult work that you have done! I can only imagine the planning that has gone into this whole process - the results of which, I am sure, will be well worth it. I wish I could offer advice on the inner bulwarks colour, but other than to say that on must Dutch ships of the era they were painted black, I can't help you. I have no idea what color they have used on the British ships.
 
This is a massive amount of difficult work that you have done! I can only imagine the planning that has gone into this whole process - the results of which, I am sure, will be well worth it. I wish I could offer advice on the inner bulwarks colour, but other than to say that on must Dutch ships of the era they were painted black, I can't help you. I have no idea what color they have used on the British ships.
Black is the last color I would have guessed anyone would paint the lower deck bulkheads and hull. The Dutch must have has some pretty good lanterns!
 
I had a relook now. I scr***d that one up! In most cases, they were just left unpainted as the reconstruction of the Batavia replica in Lelystadt in the Netherlands shows! The upper bulwarks were painted black. Sorry, my bad!
 
Amazing work with all the changes, what you are doing is probably way more than my ability would venture away from the kit plans.
 
I just jumped in this build today. Love this ship to with al these carvings. Will follow your interesting build.
 
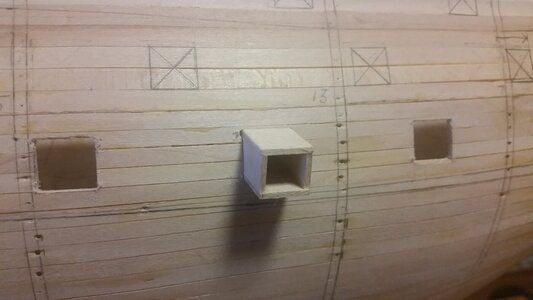
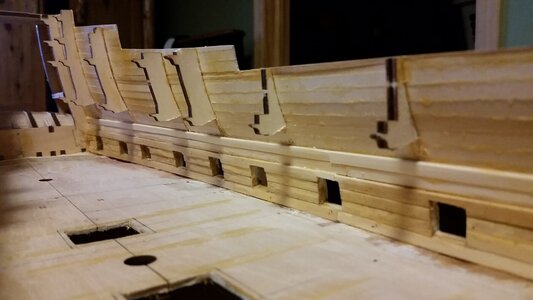
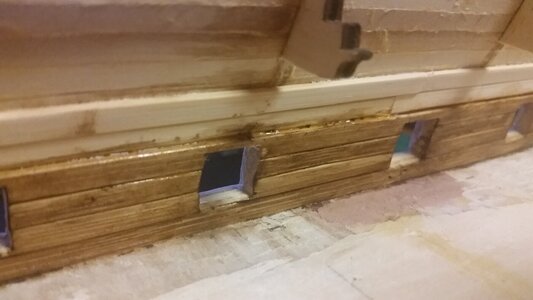
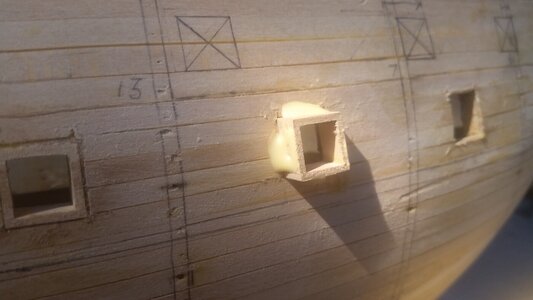
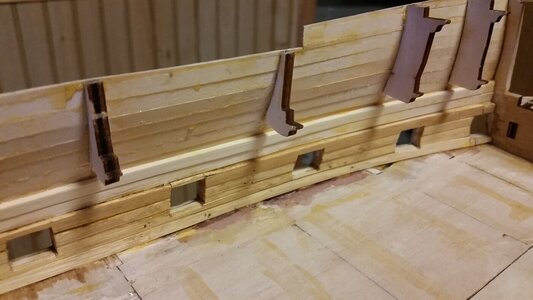
The gun port linings were installed on the lower gun deck today. A band saw was used to cut the square basswood tubes that were made for the linings. The cut were not perpendicular to the tube, but angled to match each gun port's angle due to the tumble home of the hull. That way, the lower and upper sills of the linings are in the horizontal plane, not perpendicular to the hull's outer surface. This is a small detail for ports this small, since it is barely noticeable, but it is the correct design. The interior and exterior edges of the linings were sanded with a small sanding block to be flush with the bulwark and hull. Next, the longitudinal timbers which support the middle gun deck will be designed, the lower gun deck bulwarks planked, bulwarks painted, deck planked, and lower gun deck anchor gear, capstans, guns, and other furnishings will be made. The order of these will be thought out such that no step will interfere with later steps.

297 Installing Gun Port Linings.jpg

Insert the lining part way, apply glue, then push it into the hull.
298 Apply Glue.jpg

299 Lower Gun Deck Port Linings.jpg

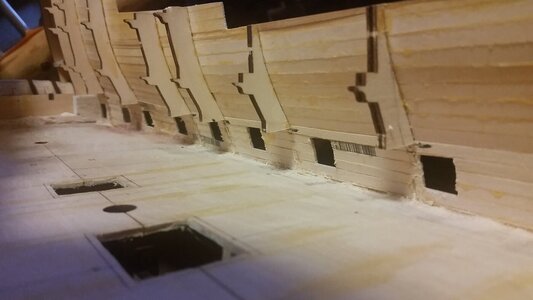
After sanding both sides, the gun port linings are flush with the hull.
300 Lower Gun Deck Port Linings.jpg
 
Last edited:
Back
Top