HMS Sovereign of the Seas - Bashing DeAgostini Beyond Believable Boundaries

Hi Kurt,

You are achieving better blackening than I am. Would you share your technique / product selection with me please?
Actually, you can see the blackening wearing off the rings, leaving a reddish area that does a fair job simulating rust! You have to let the oxides harden overnight, like you do when acid bluing guns. I didn't do that... cuz I'm impatient. I wanna see the cannon of VII drake completed, because it's cool. I use Birchwood Casey "Brass Black". The trick with blackening is that the parts must be clean. That means no microscopic oil film from anything, especially your fingers. Buy some denatured alcohol and wash the brass parts in that, then while wearing gloves, move the parts to the brass blackening acid. In about 5-10 minutes, they should be done. Rinse the parts in cold water and try not to move them around and rub them on anything. After drying and a day of sitting, the black shouldn't just flake off leaving a dull copper surface, but stay on the part pretty well. It's not perfect, but it works. Bending the part or using metal tools to hold or clamp it will rub off the black, and at that point I don't bother trying to use the acid to touch it up, I just use paint, especially if the part is already on the model.

Now, if you want to darken brass or copper cannon barrels to simulate bronze, you want "Brass Darkening Solution". Here is a link: Brass Darkening Solution on Amazon

This stuff is GREAT. Instead of black, you get brown bronze. Perfect for us guys who make truly elegant ships from the time when they were floating art palaces, not like later when all they did was just blow shit up. :D
 
Last edited:
Hey Doc, while we are waiting for Kurt to respond on his method, I would like to share mine. I think the most crucial part of any type of blackening is a very clean surface.
  • I really recommend using something like isopropyl alcohol, methyl ethyl ketone (MEK), Clean the brass\metal thoroughly with a degreaser and remove any rust. Make sure there’s no residue left on the metal. If this is a rod or tube, first use emery paper or steelwool 1000 grit to remove the top layer.
  • Fabricated parts submerge in the vinegar for a few hours. Rinse with cold water
  • I prefer the 'Brass black' solution. Delute it with water 50/50. Actually, you will need to experiment the amount of blackened solution and water. 50/50 works well for me.
  • The time your parts should take the 'blakened'bath is also experimental. I usually leave them for 10 minutes and check. Also take a soft painting brash and 'paint' those parts from time to time if blakened color adhere to parts, it most likely will stick to the parts.
  • Rince with cold water and let them completely dry.
@dockattner: WHAT HE SAID. (Good point about the vinegar, Jimsky, since it etches the surface making the black oxides stick much better!)
 
I have been reading an learning about the Naval ships build in England during the periord that King Charles I and then King Charles II were on the throne. There are some excellent books on the subject but most appropriate to The Sovereign of the Seas is a book entitles "Sovereign of the Seas 1637" written by John McKay, a profesional sreuctural draughtsman for BC Canada. It offers much details of the build, and decoration of the hull, the masts and all rigging with rope specifications and the ships boats. Published in England by Seaforth Publishing the ISBNs are as follows:
Hardback Book ISBN 978 1 5267 6629 8
ePublication ISBN 978 1 5267 6630 4
Kindle ISBN 978 1 5267 6631 1
I prefer hardback books and bought my copy from Amazon a few days ago.

The drawings of the hull, views of each deck with full interior details, all comapnionways, and much more. Exterior details of all decorations. All masts and yards with fullsized dimentsions, sail plan, and all standing and running rigging. Finally detailed drawings of all armaments and gun carriages are given.
If you are building the Sovereign of the Seas or any other ship of the Line be it 3 decks or even two decks from the early 1600s then this book is most valuable and an excellent read in it's own right.
I hope I have not repeated what others have explained previously, and hope that I am "not teaching granny to suck eggs".
If you are interested in naval ships for the latter part of the 17th Centuray in the reign of Charles II there is another series of books that detail the history and design of these ships primarily two deck third Rate ships of the Line by Richard Endsor.

Derek Payne, Stafford, England
Using McKay as your single source is DANGEROUS if you are building a model. So much of it is incorrect that you better do your research so you can pick out the usable information. You can read lots of discussion about McKay's book on this forum.
 
Last edited:
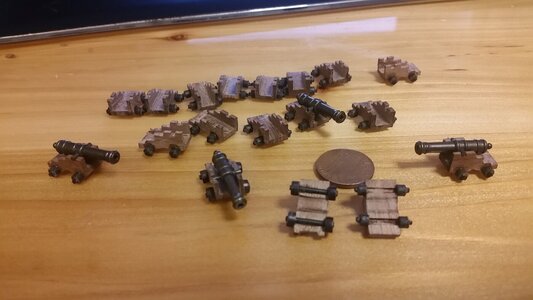
The long process of cannon carriage production has begun for the 24 cannon of VII drakes for the lower gun deck. Having done the first carriage as a test subject, building the others will be to the same level of detail, even though that may be wasted effort since you won't see most if not all of it. It's all hand tool work after making the bottom pieces and modifying the cheekplates. Thanks to Dave again for providing such quality parts to work with.

255 Begin Mass Production of Cannon of VII Drake Carriages..jpg
 
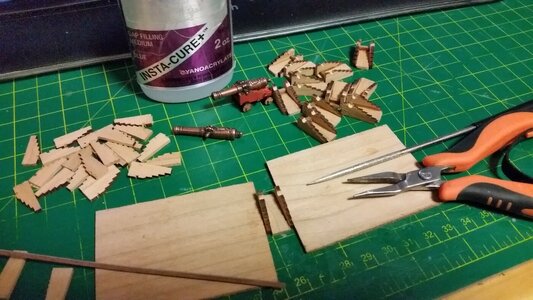
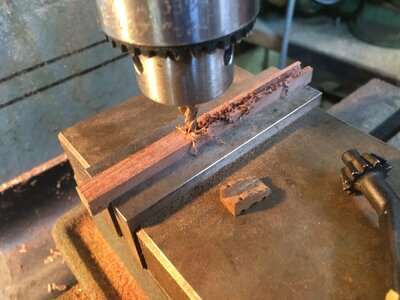
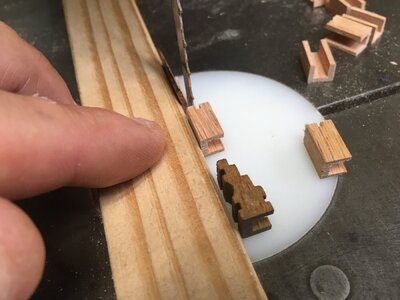
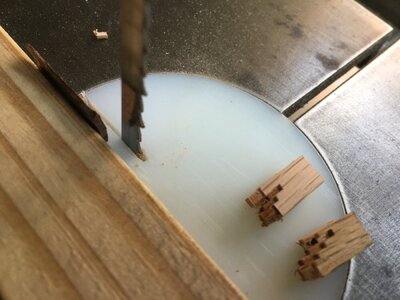
I am making cannon carriage parts in a sort of semi-mass production. For the carriage side plates (name?) and for the bottom pieces (name?) I start with a solid piece of Costello and then mill the shape all the way through alongside the length of this piece (the same can be done with files), then the individual pieces will be cut on the circular saw with a thin sawblade. Even if the pieces are already made but have to be corrected to size (as in David's case) the same procedure can be done, but first the existing side plates or bottom ones have to be temporarily glued together to form that column with a drop of super glue between them. After the machining/filing the parts can easily be separated with a razor blade or with a scalpel.
János
That is precisely how I made cannon carriages on my previous ship, La Couronne. In this case, the bottom parts and the cheeks (side parts) are separate, and the carriages are a 16% larger have much more detail, and are made from pear wood instead of red oak, which is too coarse in grain and subject to breakage.

La Couronne cannon carriage production from scratch:
018 Mill Carriages for 9# & 18# Cannon Stock.JPG

020 Cut 6# Oak Carriages.JPG

021 Continue Cutting Oak 6# Carriages.JPG

024 Kit Supplied and Scratch 18# Carriages.jpg
 
Well, I made it somewhat differently but it is difficult to explain without pictures (at least for me) so I will post a few photos as I am making it next time. The main difference is that the cheeks (I memorised it now) are in the reality not parallel to each other, so the main body of the carriage must be made of 3 different pieces (2 cheeks and one base) and glued together.
János
That's another reason to assembly them instead of mill them out.
 
I am making cannon carriage parts in a sort of semi-mass production. For the carriage side plates (name?) and for the bottom pieces (name?)
The sides part of the carriage called Brackets and the bottom part called Bed. Sometime around 1725, it was discovered that the Bed of the carriage was not really necessary. The brackets were extended lover down, the axles were fixed by a more complex joint to give greater strength, and a separate surface, known as the Stool Bed, was provided for the sole purpose of supporting the wedge or quoin used for the barrel elevation. The Bed was dispensed with, and the cartridge made slightly lighter.
While the carriages with the Bed were still in use, some drawings of the same period show the cartridge without the Bed. A drawing of 1732 clearly shows the new type of carriage. It is not clear whether a new type of carriage develop first in the sea, where saving weight was more important than in a fortress. It is also known, that spending was really restricted at that time, and it may have taken some time to replace all old (with a Bed) carriages.
 
That's another reason to assembly them instead of mill them out.
I hope you don't mind, Kurt, just recently, a month back, I made a post about the way I am making carriages and trucks. I am in no way claiming it is the correct and\or the best\only the way, but it does work for me. I believe @janos talking about productions of Brackets similarity, You may check it out,

 
I hope you don't mind, Kurt, just recently, a month back, I made a post about the way I am making carriages and trucks. I am in no way claiming it is the correct and\or the best\only the way, but it does work for me. I believe @janos talking about productions of Brackets similarity, You may check it out,

Will certainly look at it, and no I don't mind at all. I get tips and learn every time someone posts on this thread! Many thanks.

-just finished looking at your carriage method. Very precise!
 
Last edited:
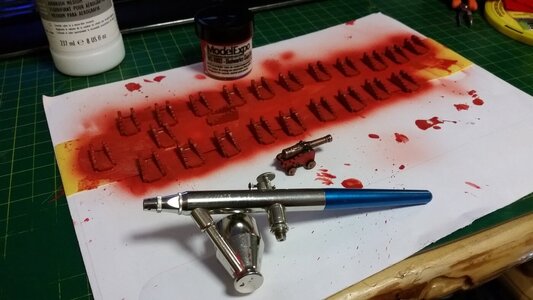
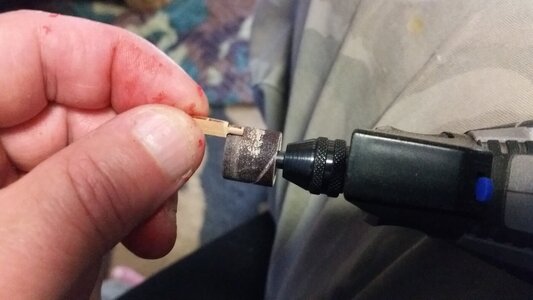
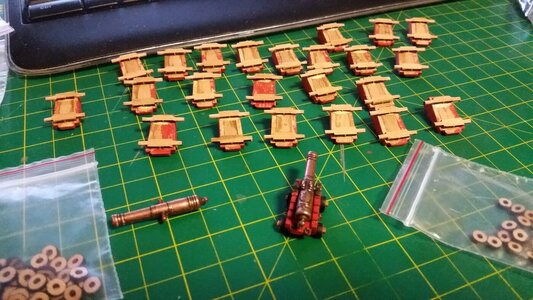
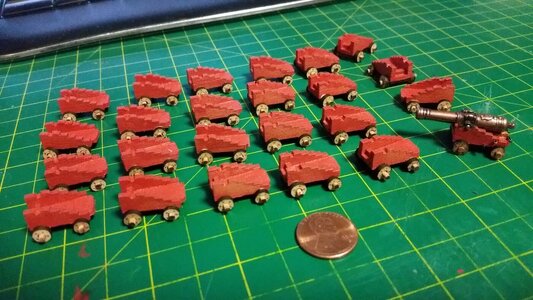
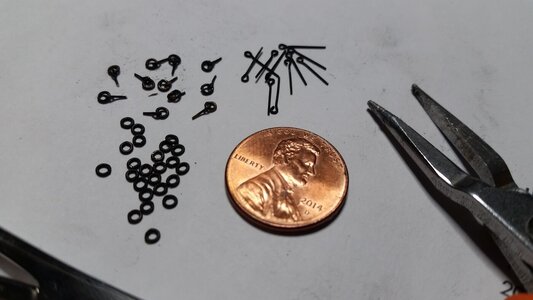
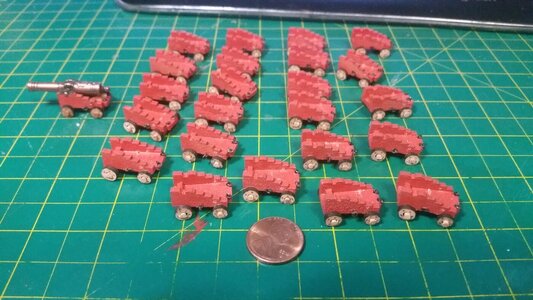
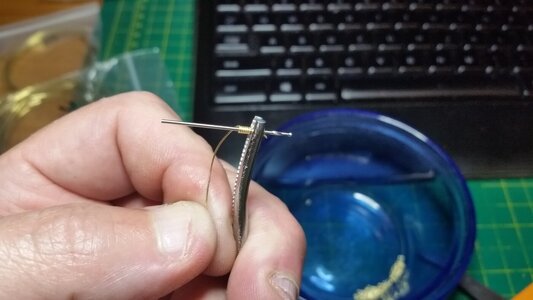
More work was done on the lower gun deck carriages (24) for the cannon of VII drake guns. Carriages were painted, axles made round using a Dremel tool and sanding drum, axels were attached to the carriage bottoms, and the bottoms and axles were painted. The trucks (wheels) were prepared by using a black Sharpie pen to paint stain the rims to simulate iron tires, and a mechanical pencil was used to draw the bolt heads on the trucks. The trucks were then glued on the axles. 1.3mm rings were prepared by opening the rings up and closing them onto 1.5mm eyebolts. I have to make a lot of these, and a locking forceps to hold the ring makes it possible to use a small needle nose pliers to open the ring, place the eyebolt onto it, and close it without dropping any parts, all while using a 4x magnification headset. Tiny stuff. The eyebolts were bought as jackstay eyebolts, but I'm going to run out of these soon, so to instead Caldercraft etched eyebolts will be used from then on, Caldercraft 1.3mm outer diameter x 7mm long, Part# 83505. They are laser etched and you get about 150 of them in a pack. I Highly recommend them. The rings come from an unmarked source, and I am trying to find more. The ring and eyebolt assemblies are for the breech line rings and train tackle rings on the carriages, four per carriage.

256 Paint Carriages for Lower Gun Deck.jpg

257 Sand the Axels Round.jpg

258 Install Axels on Carriages.jpg

259 Paint Carraiges and Assemble Trucks.jpg

260 Prepare Carriage Breechline and Train Tackle Rings.jpg
 
May I ask where did you order these 1,5mm eyebolts?
 
Those carriage eyebolts which have rings were made and installed on the lower gun deck carriages. That's a lot of tiny rings. The carriages still need two eyebolts each, above the rear trucks. After that, capsquares for the barrel trunnions need to be made from flat brass strip. Installing the barrels with the capsquares will make it much more difficult to secure the gun tackles to the bulwarks and the carriages, so I may attach the gun barrels with the breech lines to the bulwarks first, then, position the carriages on the deck and attach the gun tackles to the bulwarks, and then lay the barrels on top of the carriages and lock them down by gluing the capsquares as the last step. That's the order of steps I used on the guns for La Couronne, and it worked pretty well. No matter what the order is, it will be difficult to work in the tight space installing the guns. Before installing the gun carriages, spray lacquer will be applied to them, which will protect and seal the paint and darken the natural wood trucks and axles.

261 Lower Gun Deck Carriage Bolts Installed.jpg
 
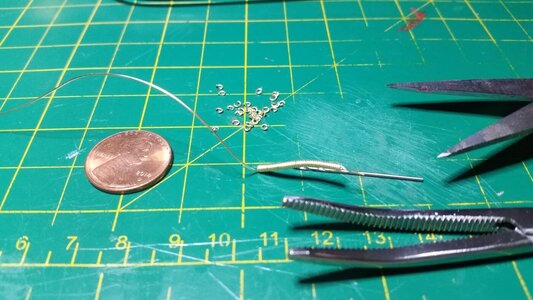
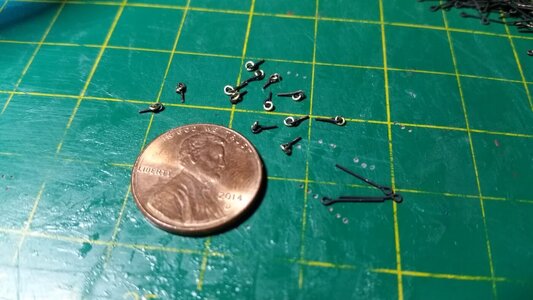
Since I ran out of 1.5mm rings for the gun tackle, train tackle, and breaching rings for cannon carriages, it was necessary to make them out of 26 gauge brass wire. Forceps hold the end of the wire as a length of it is wrapped by hand around a 1mm drill bit. Sharp Fiskars scissors were used to snip off individual rings and forceps were then used to hold a ring by one side while the eyelet was placed over the other, and needle nosed pliers were used with the forceps to close the ring. Magnification headset and good lighting is a must when working with parts this small. I've made entire suits of maille armour before using the same method, just larger. Let's see... four rings on eyelets per carriage, times 102 carriages...I'm going to be doing this for a while...

262 Making Wire Rings for Cannon Tackle and Breaching Rings.jpg

263 Cut Brass Coils into Rings.jpg

264 Assemble Rings onto Eyelets.jpg
 
Kurt, I’ve fallen out on yours and many other logs I follow because - for some reason that I don’t understand - I do not receive email updates as they happen. It doesn’t matter whether I unwatch/re-watch; I may receive a few updates, thereafter, and then nothing. So, I apologize that I am so far behind. Your log is particularly dense with fascinating information about the ship, so it may take me a little while to get up to date.

What a scathing and, apparently, justified critique by Frank Fox! It is so interesting to have real context for that VDV, the elder drawing.

In any case, my quick scan of your current progress shows just how emphatically your efforts are living up to your build log title. Your ship has wonderful lines, and I look forward to reading up on how you arrived there. Excellent work!
 
Kurt,

Same for me - I almost get NO email updates even after I click unfollow and then follow Hmmm???
And I'm following quite a few here.

Nice update
 
Back
Top