Tanganyika is a tan brown, and looks pretty good I liked the way it looked on La Couronne, so am using it on HMS Sovereign of the Seas also. What is foam wood? Balsa?I like that planking material. It looks very rustic and realistic. It could easily pass for oak. Looks much better than the 'foam' wood I used from the kit.
-

Win a Free Custom Engraved Brass Coin!!!
As a way to introduce our brass coins to the community, we will raffle off a free coin during the month of August. Follow link ABOVE for instructions for entering.
-

PRE-ORDER SHIPS IN SCALE TODAY!
The beloved Ships in Scale Magazine is back and charting a new course for 2026!
Discover new skills, new techniques, and new inspirations in every issue.
NOTE THAT OUR FIRST ISSUE WILL BE JAN/FEB 2026
You are using an out of date browser. It may not display this or other websites correctly.
You should upgrade or use an alternative browser.
You should upgrade or use an alternative browser.
HMS Sovereign of the Seas - Bashing DeAgostini Beyond Believable Boundaries
- Thread starter DARIVS ARCHITECTVS
- Start date
- Watchers 105
I was dismissively referring to whatever was provided in my kit. Maybe bamboo? Maybe some other soft "white" wood. I was supposed to build the whole thing from it and then paint all exposed surfaces (per the kit instructions) but at some point along the way I changed directions. I am really happy with my "orange" pear wood and think what you are using would have been a nice choice for my decking in order to introduce a color contrast.Tanganyika is a tan brown, and looks pretty good I liked the way it looked on La Couronne, so am using it on HMS Sovereign of the Seas also. What is foam wood? Balsa?
Keep up the good work! I like your style.
Oh, THAT stuff. Yuck. Yeah, the white wood that is often provided is bass wood, obtainable in any home improvement store. Linden wood is better. It has the same color as bass wood but a much finer grain and great strength. One of the reasons I like the Corel kit was the excellent hardwoods they provided. All the DeAgostini structural wood is cheap, particularly the bamboo, but at least they use mahogany or Sapele for much of the final hull covering. Your choice of pear wood is one heck of an upgrade.I was dismissively referring to whatever was provided in my kit. Maybe bamboo? Maybe some other soft "white" wood. I was supposed to build the whole thing from it and then paint all exposed surfaces (per the kit instructions) but at some point along the way I changed directions. I am really happy with my "orange" pear wood and think what you are using would have been a nice choice for my decking in order to introduce a color contrast.
Keep up the good work! I like your style.
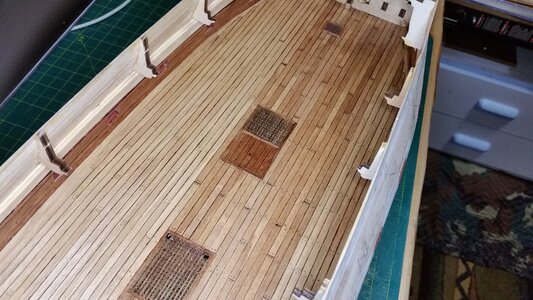
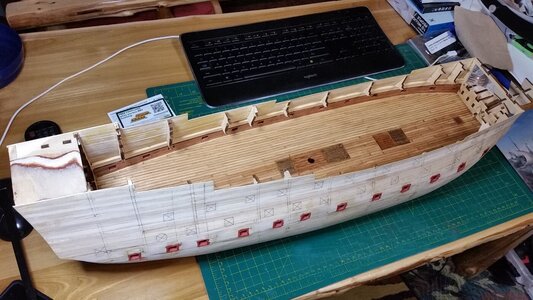
More progress on laying the deck planks on the starboard side of the lower gun deck, including marking the trenails. As these planks approached the bulwark, some thought was given to how to install the margin plank, and how to fit the peripheral planks that fit into it. I'm going all out on the detail of this deck mostly for practice since no one will probably see it since it is buried within the ship. I am still considering the use of micro cameras on borescopes to allow people to look inside the ship using a cell phone, which adds complications to the build.
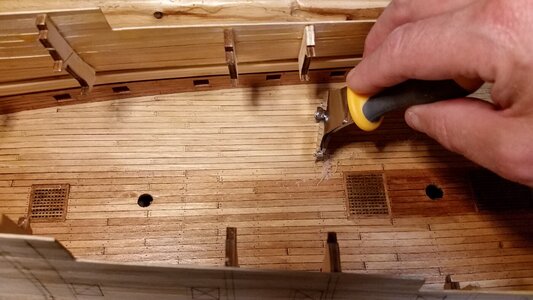
The margin planks were laid first, using a long strip of the Tanganyika deck wood that was soaked in water, bent laterally by hand, and glued on each side using CA glue to make attaching it faster. As the deck planks began to intersect the margin plank, the end of the deck plank was beveled, and a notch was cut into the margin plank to fit the deck plank in place, using a chisel blade razor knife and a standard razor knife to cut out the notch after making some light pencil marks using the deck plank itself as a pattern. The rest of the trenails were marked using a 0.5mm mechanical pencil. The deck was then scraped smooth using a scraper containing a razor blade. After all the planks were done on the starboard side, a piece of 1.5mm x 1.5mm basswood strip was shaped using the shaping tool to give it a triangular cross section instead of a square one. The strip was cut to length, stained, and then glued in position as the waterway plank where the deck meets the bulwark. Some Krylon Satin spray varnish was applied to bring out the color of the wood and seal the trenail marks as well as darken them somewhat. Next, the planks on the port side will be completed.
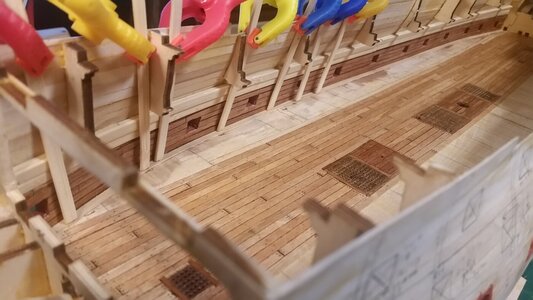
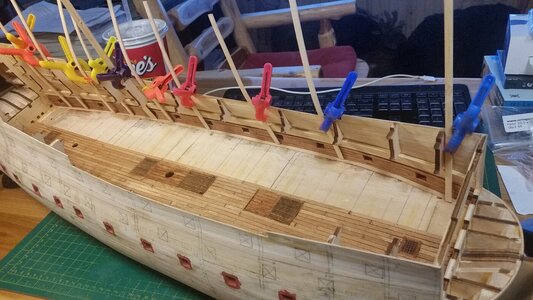
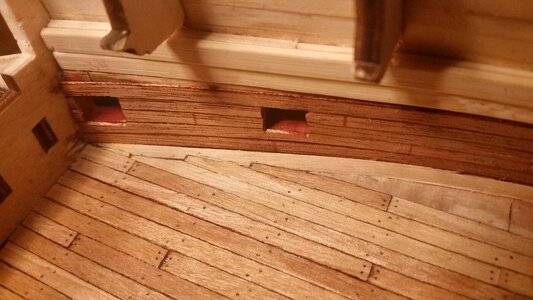
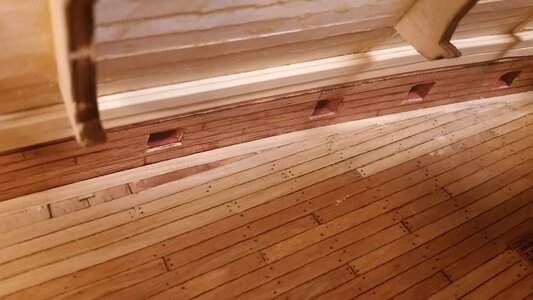
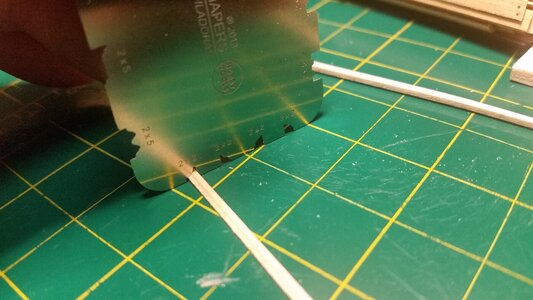
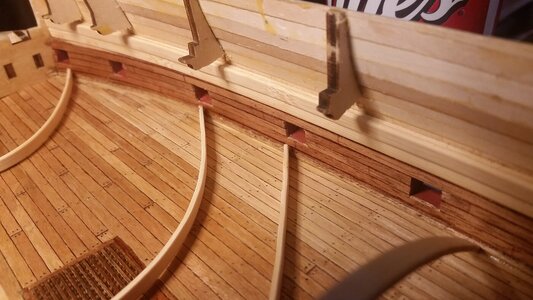
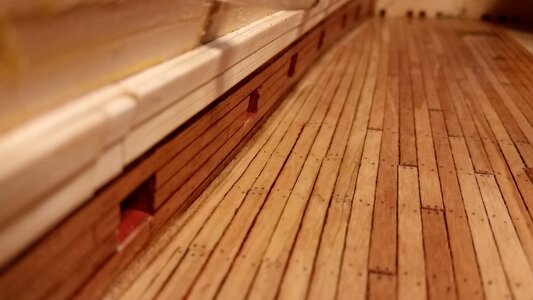
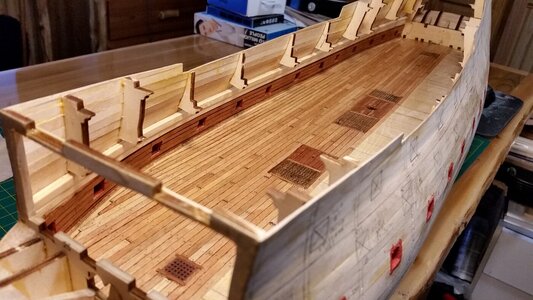
The margin planks were laid first, using a long strip of the Tanganyika deck wood that was soaked in water, bent laterally by hand, and glued on each side using CA glue to make attaching it faster. As the deck planks began to intersect the margin plank, the end of the deck plank was beveled, and a notch was cut into the margin plank to fit the deck plank in place, using a chisel blade razor knife and a standard razor knife to cut out the notch after making some light pencil marks using the deck plank itself as a pattern. The rest of the trenails were marked using a 0.5mm mechanical pencil. The deck was then scraped smooth using a scraper containing a razor blade. After all the planks were done on the starboard side, a piece of 1.5mm x 1.5mm basswood strip was shaped using the shaping tool to give it a triangular cross section instead of a square one. The strip was cut to length, stained, and then glued in position as the waterway plank where the deck meets the bulwark. Some Krylon Satin spray varnish was applied to bring out the color of the wood and seal the trenail marks as well as darken them somewhat. Next, the planks on the port side will be completed.


Looking good Kurt. I admire your attention to detail even when it will be hard to see the product of your work.
Yes, that is the sort of thing I was thinking of. There are cheap borescopes like this one for $13.09 that you can hook up to your cell phone. They are only 640x480 pixels in resolution but work surprisingly well. Two could be used, one for the lower gun deck and one for the middle gun deck. The tricky thing would be to install them and run their cables through the bottom of the ship in an inconspicuous manner. Also, you would have to two plugs, one for each camera, that would hang down from the display case for you to attached your cell phone to. This is not an elegant thing, but it does work. I also looked at Wifi spy cameras, but burying them in the ship model would make it impossible to change the batteries in them.
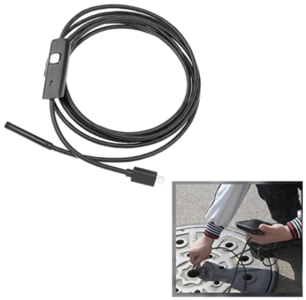
Pe

Perhaps just making a video after finishing the ship, that can be viewed on the display stand would be a nice option? I have also considered keeping a scrap book of all the build pictures next to the ship. I have created Word docs of all my ships thus far, with build pictures that I can print out for a scrap book. That way someone can actually see the kind of work that went into building it.Yes, that is the sort of thing I was thinking of. There are cheap borescopes like this one for $13.09 that you can hook up to your cell phone. They are only 640x480 pixels in resolution but work surprisingly well. Two could be used, one for the lower gun deck and one for the middle gun deck. The tricky thing would be to install them and run their cables through the bottom of the ship in an inconspicuous manner. Also, you would have to two plugs, one for each camera, that would hang down from the display case for you to attached your cell phone to. This is not an elegant thing, but it does work. I also looked at Wifi spy cameras, but burying them in the ship model would make it impossible to change the batteries in them.
View attachment 250786
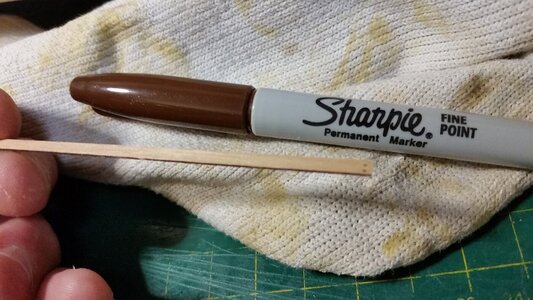
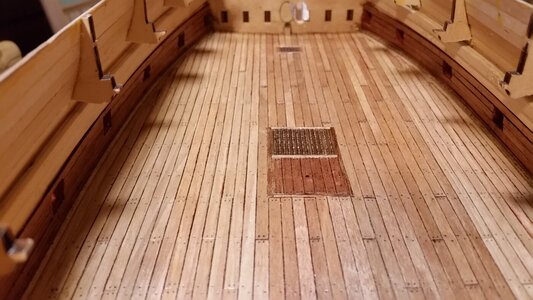
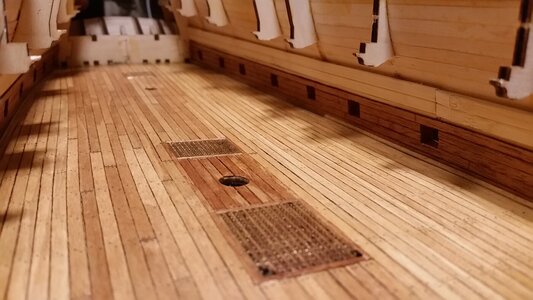
I found that darkening all sides of the thin plank strips with black Sharpie marker causes the ink to bleed into the ends of the plank, and the lines to be too dark and coarse. That was noticeable on my last ship. To reduce that effect, four things were changed. The marker used was switched from black to brown, only one long edge was darkened, the ends were not darkened, and the deck was scraped smooth with a razor scraper. This deck may not be as smooth as decks to follow, because of access limitations, but it's smoother than leaving it unscraped like on my last model. The port side looks a little lighter in color, but I hope it will age and darken to match the rest of the deck.
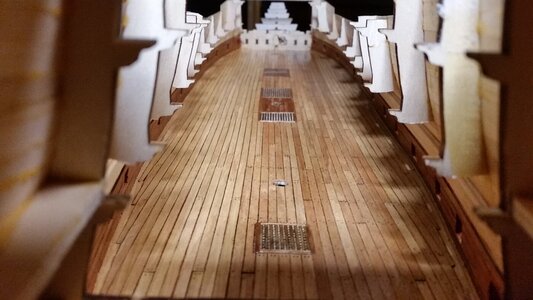
The deck planking for the lower gun deck is finished, except for the waterway strip on the port side, which I need to get more 1.5 x 1.5 mm strip to complete. Did ships this early have a spirketting plank above the waterway?
The deck was coated with Krylon Satin spray lacquer. It adds a small amount of shine without making the wood look like it was dipped in glass, which looks terrible in my opinion.
CRAP. I forgot to do the midplank trenails again.
I'll get them later.


Making a video and a scrap book is a great idea, Dean. This build log itself serves as the best scrap book, being a step-by-step record of the ship's construction. Before the deck is closed over, recording some video with narration would be good too.Pe
Perhaps just making a video after finishing the ship, that can be viewed on the display stand would be a nice option? I have also considered keeping a scrap book of all the build pictures next to the ship. I have created Word docs of all my ships thus far, with build pictures that I can print out for a scrap book. That way someone can actually see the kind of work that went into building it.
O k a y ! Marked the last trenails with mechanical pencil, using the planking marking jig as a straight edge when it could fit in the hull. The port side waterway plank was installed. The overall effect looks detailed enough, overkill for a deck you'll never see. A final layer of spray lacquer to protect the trenail marks and the deck is ready for outfitting.
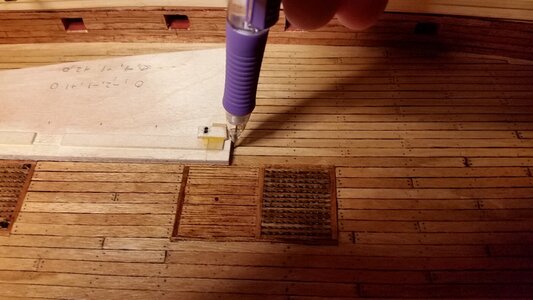
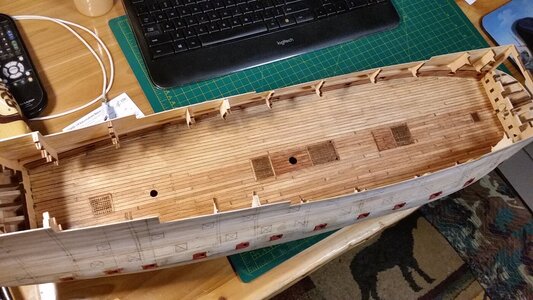


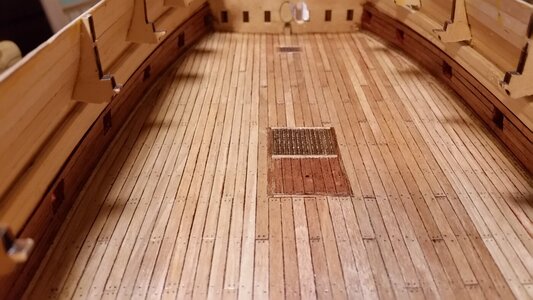
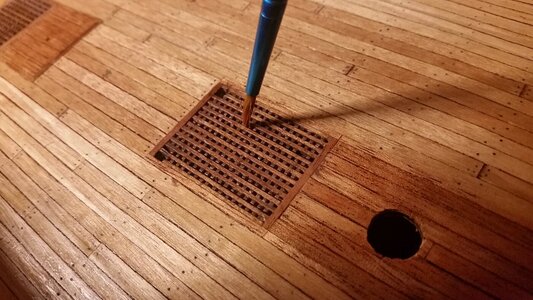
Details, details... Time to fix a small eyesore than was bothering me. The grates did not have the right appearance, since the holes were lighter in color than the top surfaces of the grates. This color difference is most visible when viewing the gratings at an angle, and less so from viewing from the top down. You can see the speckled appearance in the first photo below. So, brown paint was applied and forced into the holes with the tip of a paintbrush, and a rag was used to the wet paint off the top surfaces of the grating. Since the gratings were lacquered, the excess paint came off easily. This evened out the appearance of the grating substantially. These details will not be visible on this deck, but it allows me to sharpen my techniques before the upper decks are constructed.
Before touching up the holes...
After painting the holes and wiping away the paint on grating top surface. The clean paint brush shows how the paint was previously applied.
Before touching up the holes...

After painting the holes and wiping away the paint on grating top surface. The clean paint brush shows how the paint was previously applied.

Definitely an improvement!Details, details... Time to fix a small eyesore than was bothering me. The grates did not have the right appearance, since the holes were lighter in color than the top surfaces of the grates. This color difference is most visible when viewing the gratings at an angle, and less so from viewing from the top down. You can see the speckled appearance in the first photo below. So, brown paint was applied and forced into the holes with the tip of a paintbrush, and a rag was used to the wet paint off the top surfaces of the grating. Since the gratings were lacquered, the excess paint came off easily. This evened out the appearance of the grating substantially. These details will not be visible on this deck, but it allows me to sharpen my techniques before the upper decks are constructed.
Before touching up the holes...
View attachment 253238
After painting the holes and wiping away the paint on grating top surface. The clean paint brush shows how the paint was previously applied.
View attachment 253239
Indeed, a nice improvement. It's funny what our eyes see (and don't see)...Definitely an improvement!
I'm still deciding what the next step should be for the lower deck. In the meantime, the broadside guns and carriages were completed. Breaching ropes and gun tackles are next. Interior features of the lower deck including beams, frames, anchor handling gear, stanchions and capstans need to be designed, fabricated, and installed. Also, when the deck beams overhead are made, provision for lighting and all the wiring that ensues needs to be figured out.
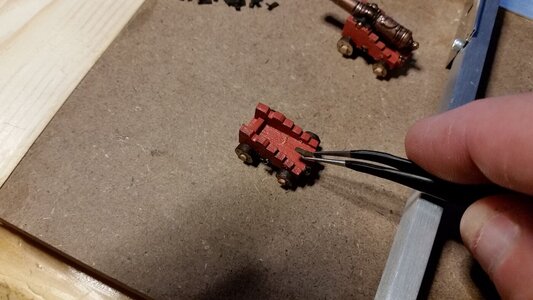
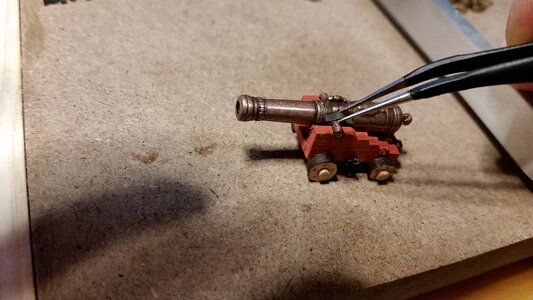
Two demi-culverin drakes and twenty-two cannon of VII drakes... and I'm just getting started.
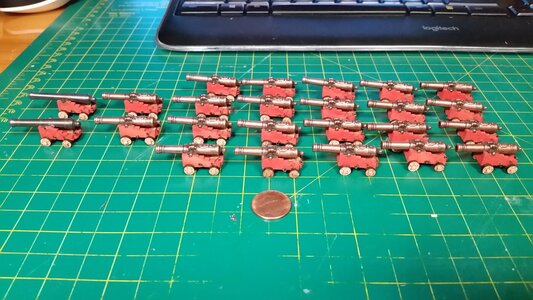
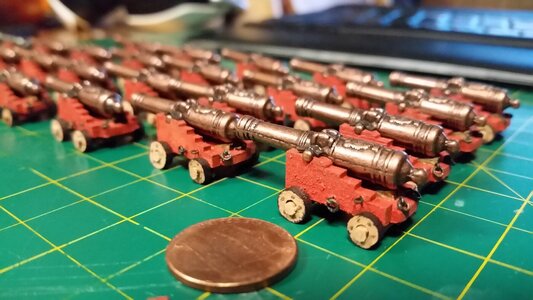


Two demi-culverin drakes and twenty-two cannon of VII drakes... and I'm just getting started.


Looking good Kurt. 
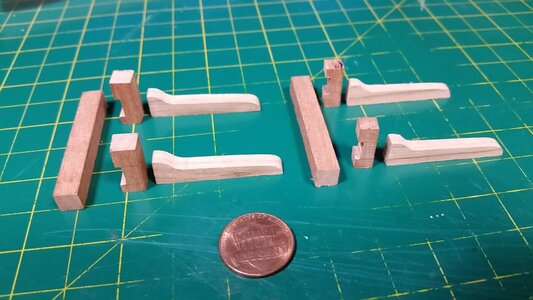
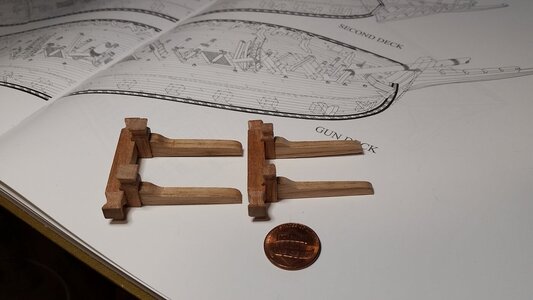
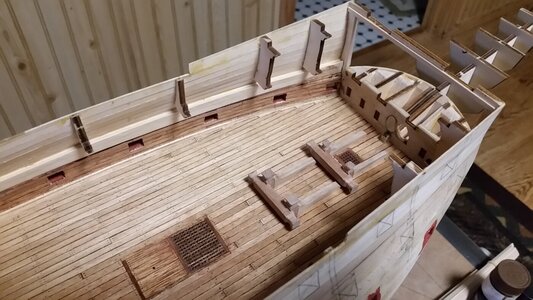
Time for some simple scratch building. Using McKay's diagram of the anchor hawser handling bitts, simple measurements were calculated to make parts for the anchor handling bitts. 6mm sticks of mahogany and other timber scraps were cut and shaped using a band saw and sanded. The bitt assemblies were glued with PVA and will be set aside until the cannons are rigged so they don't interfere with their rigging. The assemblies were test fitted by placing them on the deck to see if they are the correct proportions relative to McKay's drawings of the lower gun deck. They will be stained with Danish Oil later.
