Good morning Kurt. Really fine detail. I am curious - did you treat the walnut prior to cutting and drilling on such thin and small pieces? When I attempted to work on thin, tiny pieces it split time and time again (knees for my boats) I shifted to birch scrap to make these. Cheers GrantI spend the whole day making the railing and balusters for the aft ladder, just forward of the mizzen mast. This looks much better than the chain railing which was previously made.
2mm x 2mm walnut was scraped into a "T" cross section to make the railing. Railing sections were mitered and glued end to end. Holes are drilled part way into the bottom for the balusters. The bottom of the railing is shown below.
View attachment 342517
11mm wooden belaying pins were cut to length and glued into the holes.
View attachment 342514
The railing is glued to the deck and a section of the railing is painted black.
View attachment 342515
Progress so far.
View attachment 342516
-

Win a Free Custom Engraved Brass Coin!!!
As a way to introduce our brass coins to the community, we will raffle off a free coin during the month of August. Follow link ABOVE for instructions for entering.
-

PRE-ORDER SHIPS IN SCALE TODAY!
The beloved Ships in Scale Magazine is back and charting a new course for 2026!
Discover new skills, new techniques, and new inspirations in every issue.
NOTE THAT OUR FIRST ISSUE WILL BE JAN/FEB 2026
You are using an out of date browser. It may not display this or other websites correctly.
You should upgrade or use an alternative browser.
You should upgrade or use an alternative browser.
HMS Sovereign of the Seas - Bashing DeAgostini Beyond Believable Boundaries
- Thread starter DARIVS ARCHITECTVS
- Start date
- Watchers 105
The walnut was scraped without any treatment and drilled using the battery powered Dremel and a 0.9mm drill bit. When drilling where the mitered glue joints were, it occasional broke the CA joint, and it had to be glued again before another attempt was made. While using a 4x magnified headset and steady firm hold on the part against the table and with a firm hand holding the Dremel, each of the holes was drilled where they were pencil marked. It got easier the longer I worked. The third and final rail set for the forecastle is 80% finished, but worked stopped when I ran out of belaying pins to use for the balusters. More are in the mail from Crafty Sailor in Canada. In 20 short years, I won't have hands this steady, so I better get moving! Walnut likes to split, so you have to drill slowly, but the real problem was preventing the tip of the drill bit from walking all over the place. The railings were done using crude methods, and they aren't the neatest when viewed under magnification, but they are good enough and you do get better once you've done a couple of them. The important thing to me is that they are much closer to scale than any kit parts would provide.Good morning Kurt. Really fine detail. I am curious - did you treat the walnut prior to cutting and drilling on such thin and small pieces? When I attempted to work on thin, tiny pieces it split time and time again (knees for my boats) I shifted to birch scrap to make these. Cheers Grant

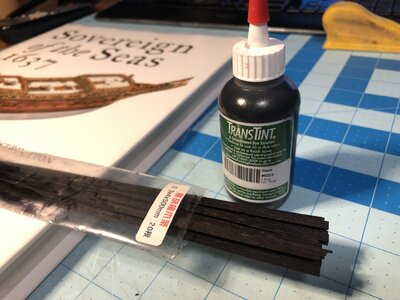
In preparation for finish planking the upper hull, side galleries, and transom, 0.3x4x500mm planks of wood were stained black using TransTint black wood dye. These are "walnut" strips bought from China on eBay. They have the correct color and grain, so they may actually be walnut. Some of the Chinese wood strips may be come other wood only stained to resemble the wood species as labeled but these look okay. Tinting looks much better than painting, since to retain all the fine wood grain detail. In order not to make a huge mess, I opened the plastic sleeve from one end, tested it by blowing in it ensure it had no holes, and simple dribbled the dye onto the cluster of wood strips and into the bag. Moving the strips around to get them all thoroughly covered with dye, the strips are then removed and transferred one at a time to another empty sleeve after being wiped with a rag. They will dry there and be ready to use in a day. One more wipe-down with a rag should remove aby excess dye, but you don't want to wiped them too much or flecks of brown begin to peek through the black.

- Joined
- Oct 17, 2020
- Messages
- 1,691
- Points
- 488

Hi Darivs, have you tried with "little ring" to color the wood? It is a product that is diluted with water and used by carpenters.In preparation for finish planking the upper hull, side galleries, and transom, 0.3x4x500mm planks of wood were stained black using TransTint black wood dye. These are "walnut" strips bought from China on eBay. They have the correct color and grain, so they may actually be walnut. Some of the Chinese wood strips may be come other wood only stained to resemble the wood species as labeled but these look okay. Tinting looks much better than painting, since to retain all the fine wood grain detail. In order not to make a huge mess, I opened the plastic sleeve from one end, tested it by blowing in it ensure it had no holes, and simple dribbled the dye onto the cluster of wood strips and into the bag. Moving the strips around to get them all thoroughly covered with dye, the strips are then removed and transferred one at a time to another empty sleeve after being wiped with a rag. They will dry there and be ready to use in a day. One more wipe-down with a rag should remove aby excess dye, but you don't want to wiped them too much or flecks of brown begin to peek through the black.
View attachment 342716
I search Google for piccolo anello and could not find any stain. Incorrect name perhaps?Hi Darivs, have you tried with "little ring" to color the wood? It is a product that is diluted with water and used by carpenters.
- Joined
- Oct 17, 2020
- Messages
- 1,691
- Points
- 488

it is a granular product that dissolves in water, see this link https://www.amazon.it/Lienzos-Levan.../B0187NWNZG/ref=sr_1_8?__mk_it_IT=%C3%85M%C3% 85%C5%BD%C3%95%C3%91&crid=3SBZ9ANZ2Q61X&keywords=anilina%2Bcolorante%2Bper%2Blegno&qid=1669541423&qu=eyJxc2MiOiIyLjA3IiwicXNhIjoiMS40NiIsInFzcCI6IjAuMDAifQ%3D%3D&sprefix=anilina%2Bcolorante%2Bper%2Blegno%2Caps%2C95&sr=8-8&th=1# :~:text=Send-,Lienzos%20Levante%200210122012%20%2D%20Pigment%20Pure%20in%20Jar%20of%20250%20ml%2C%2012%2C%20Colour%20Earth%20of%20Siena%20Natural,-Brand %3A%20Lienzos%20LevanteI search Google for piccolo anello and could not find any stain. Incorrect name perhaps?
Thanks Frank48. I have never used mixed pigments. They have some similar product at the local woodworker's store. I've had great success with TruTint dye. It penetrates wood deep and the color is vibrant.it is a granular product that dissolves in water, see this link https://www.amazon.it/Lienzos-Levan.../B0187NWNZG/ref=sr_1_8?__mk_it_IT=%C3%85M%C3% 85%C5%BD%C3%95%C3%91&crid=3SBZ9ANZ2Q61X&keywords=anilina%2Bcolorante%2Bper%2Blegno&qid=1669541423&qu=eyJxc2MiOiIyLjA3IiwicXNhIjoiMS40NiIsInFzcCI6IjAuMDAifQ%3D%3D&sprefix=anilina%2Bcolorante%2Bper%2Blegno%2Caps%2C95&sr=8-8&th=1# :~:text=Send-,Lienzos%20Levante%200210122012%20%2D%20Pigment%20Pure%20in%20Jar%20of%20250%20ml%2C%2012%2C%20Colour%20Earth%20of%20Siena%20Natural,-Brand %3A%20Lienzos%20Levante
Some more progress was made today.
Using weights to bend the wetted side galleries to form some curvature.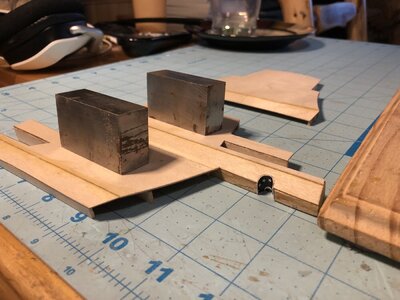
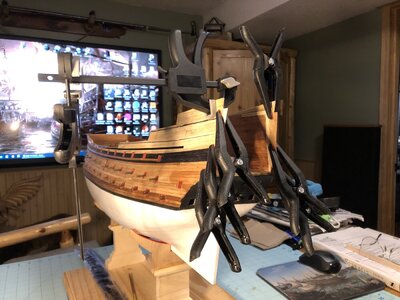
Extending stern interior sides to meet the transom. The hanging clamp is bending the side of the stern castle to match the shape of the starboard side for symmetry,
Applying Danish Oil.
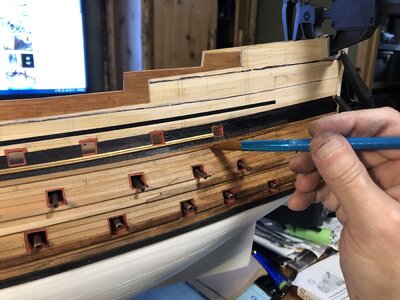
Appearance after oiling hull planks.
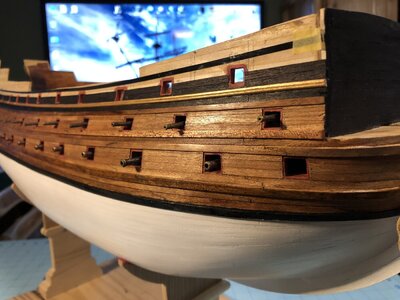
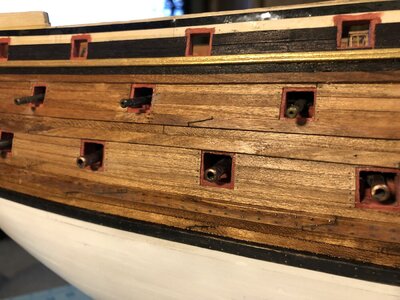
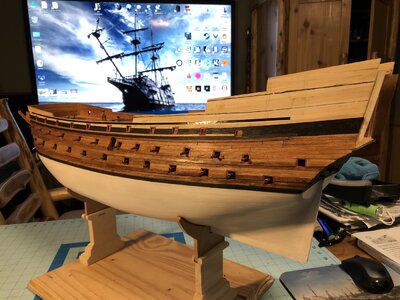
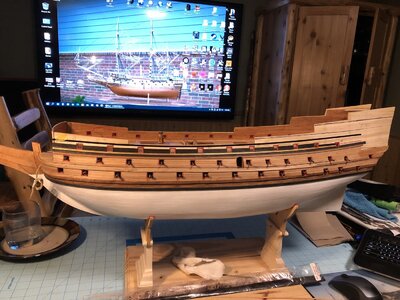
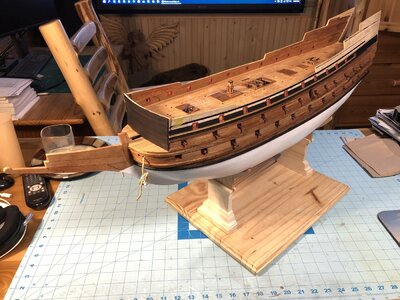
Progress so far. This is a first glimpse at how the overall hull colors will appear.
Using weights to bend the wetted side galleries to form some curvature.

Extending stern interior sides to meet the transom. The hanging clamp is bending the side of the stern castle to match the shape of the starboard side for symmetry,

Applying Danish Oil.

Appearance after oiling hull planks.


Progress so far. This is a first glimpse at how the overall hull colors will appear.

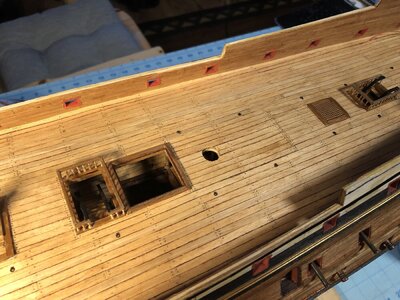
Oops.  It appeared that the grating behind the main mast was not supposed to be there, and it intersected with the halfdeck bulkhead, so it had to go. Weren't we just talking about redo's in that other thread? Well, here's one.
The grating and planking forward of that was removed with a chisel edged razor knife. One of the underlying lantern wires was broken in the process.
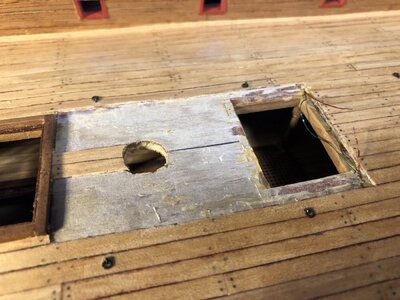
The repair area was leveled and cleaned up.
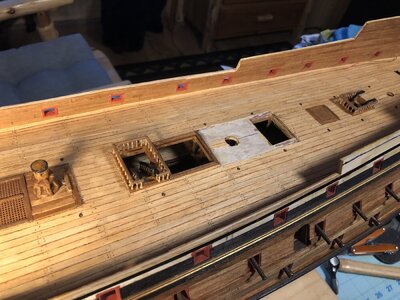
The broken wire was reconnected by soldering.
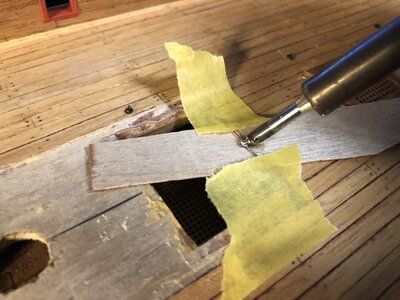
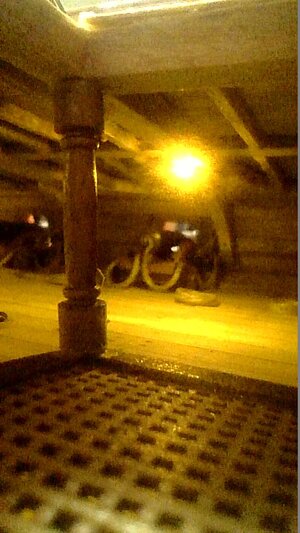
A borescope was used to check if the light is working. Looks good.
Two ledges were inserted into the hatch hole and the entire repair area was planked over. It's as if it never happened. . .
The grating and planking forward of that was removed with a chisel edged razor knife. One of the underlying lantern wires was broken in the process.

The repair area was leveled and cleaned up.

The broken wire was reconnected by soldering.

A borescope was used to check if the light is working. Looks good.

Two ledges were inserted into the hatch hole and the entire repair area was planked over. It's as if it never happened. . .

Last edited:
Nice recovery!Oops.It appeared that the grating behind the main mast was not supposed to be there, and it intersected with the halfdeck bulkhead, so it had to go. Weren't we just talking about redo's in that other thread? Well, here's one.
The grating and planking forward of that was removed with a chisel edged razor knife. One of the underlying lantern wires was broken in the process.
View attachment 343110
The repair area was leveled and cleaned up.
View attachment 343111
The broken wire was reconnected by soldering.
View attachment 343112
A borescope was used to check if the light is working. Looks good.
View attachment 343113
Two ledges were inserted into the hatch hole and the entire repair area was planked over. It's as if it never happened. . .
View attachment 343114
They overflowed long ago... My nine-year-old son charges me a quarter every time he hears me swear. The college fun is growing fast.And the swear jars, filled to capacity...
As for redo's, if you're afraid to rip it apart and fix it, you probably shouldn't be building it in the first place.
Hi Kurt, have you adjusted the stern, it looks more rounded than the original kit?, looking great, I can see you have replaced the majority of the kit timbers. Have you adjusted the deck heights quarter deck, poop deck and upper deck, as on the original kit these are not correct, scale is all wrong.The final strips of planking on the hull were laid on the starboard side today. The hull was sanded with medium grit to remove plank edges, and then fine grit to produce a smooth finish. I tried a spot on the hull with some white spray paint, but that covered all the plank like except for seams that has slight gaps, which appeared unsightly. So, I use xylene to remove the paint. I would like to allow the plank lines to peek through the paint, so a fine, thin coat of white will be attempted next. I don't think there is a stain that can remove the yellow color from the wood without covering the seams. Any ideas?
This was a measuring tool used to estimate how many planks would be required to fill the planking gap on the hull. After bridging the remaining gap, you can estimate how much you need to reduce the average width of the remaining wood strips to close the gap such that those last few planks are about even in width.
View attachment 341306
View attachment 341307
View attachment 341308
View attachment 341309
View attachment 341310
View attachment 341311
If you go back in the build log, you'll see how the entire stern was reshaped and scratch built. Also, over half of the original hull frame bulkheads were reshaped prior to first layer planking. Everything from there is scratch built with better wood, hence the name of this thread. The heights of the upper decks have not yet been determined, The lower, middle, and upper gun decks are complete and were assembled as on a real ship. I believe the scale of the model is close to 1:78 based on keel length. What can you tell me about how to reposition the upper decks in the fore and stern castles? Jano's model increased the height of the stern castle quite a bit more than I expected.Hi Kurt, have you adjusted the stern, it looks more rounded than the original kit?, looking great, I can see you have replaced the majority of the kit timbers. Have you adjusted the deck heights quarter deck, poop deck and upper deck, as on the original kit these are not correct, scale is all wrong.
Hello Kurt,
Your hull color looks great with the Danish Oil.
Bill
Your hull color looks great with the Danish Oil.
Bill
Thanks Bill. The cherry wood was an inexpensive way to go on the final planking. It's nice to see some changes on the outside of the model after being so busy with the interior and details.Hello Kurt,
Your hull color looks great with the Danish Oil.
Bill
Your cat is smartly catching a ride on a following wind! Is WW1 taxidermy also a hobby of yours? - I joke, I kidd
Progress on the exterior is astounding, and now she's really coming to life. Your planking is superb and all of the colors are working harmoniously. Nice, recovery on the deck grating!
That's a mannequin with a Wehrmacht uniform and k98. I have a few WWII German rifles, pistols and a couple machine guns (all legal and working) in my collection and did several years a historical reenactor. Even joined a half-track squad in a Sd. Kfz 151. I like military history.Your cat is smartly catching a ride on a following wind! Is WW1 taxidermy also a hobby of yours? - I joke, I kiddWho's the intriguing character standing guard?


