Smooth!Planking continues. Planking on the hull bottom was completed and sanded on the port side. A gap remains to be planked on the starboard side.
View attachment 340988
The gaps are narrowing.
View attachment 340989
Final plank on the port side.
View attachment 340990
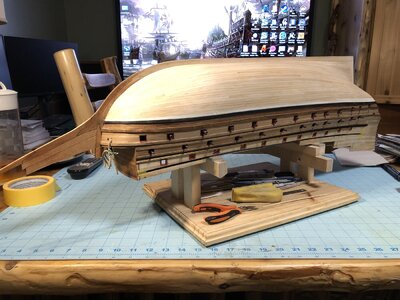
Port side after sanding.
View attachment 340991
View attachment 340992
View attachment 340993
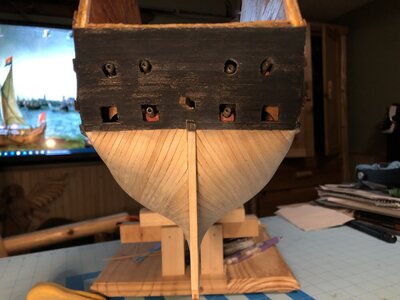
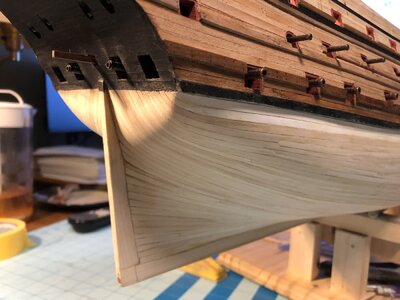
The buttocks have much better shape than the original DeAgostini design. This is fairly close to the shape in Lely's Portrait of Peter Pett.
View attachment 340994
-

Win a Free Custom Engraved Brass Coin!!!
As a way to introduce our brass coins to the community, we will raffle off a free coin during the month of August. Follow link ABOVE for instructions for entering.
-

PRE-ORDER SHIPS IN SCALE TODAY!
The beloved Ships in Scale Magazine is back and charting a new course for 2026!
Discover new skills, new techniques, and new inspirations in every issue.
NOTE THAT OUR FIRST ISSUE WILL BE JAN/FEB 2026
You are using an out of date browser. It may not display this or other websites correctly.
You should upgrade or use an alternative browser.
You should upgrade or use an alternative browser.
HMS Sovereign of the Seas - Bashing DeAgostini Beyond Believable Boundaries
- Thread starter DARIVS ARCHITECTVS
- Start date
- Watchers 105
Like a baby's butt.Smooth!
True story.Like a baby's butt.
Very nice work Kurt!
Where on earth did Paul find Kraken Cake ?


Kind Regards
Nigel

Where on earth did Paul find Kraken Cake ?


Kind Regards
Nigel
Great visual impact Kurt. Among the best hull planking I've seen.
Some of your very best work here Kurt! I know this stern tuck was a major feature you were shooting for - congratulations!
Very good work my friend - Bravo
Crossing the fingers, that the other side will look the same but mirrored
Crossing the fingers, that the other side will look the same but mirrored
It's like watching an episode of Nip-Tuck, a series about plastic surgeons. A very good gluteal augmentation, Kurt!Some of your very best work here Kurt! I know this stern tuck was a major feature you were shooting for - congratulations!
Beautiful planking job. Well done.
No idea, but it looks awesome!Very nice work Kurt!
Where on earth did Paul find Kraken Cake ?
Kind Regards
Nigel


It should, and very precisely. Only 6 strakes left on that side.Very good work my friend - Bravo
Crossing the fingers, that the other side will look the same but mirrored
The final strips of planking on the hull were laid on the starboard side today. The hull was sanded with medium grit to remove plank edges, and then fine grit to produce a smooth finish. I tried a spot on the hull with some white spray paint, but that covered all the plank like except for seams that has slight gaps, which appeared unsightly. So, I use xylene to remove the paint. I would like to allow the plank lines to peek through the paint, so a fine, thin coat of white will be attempted next. I don't think there is a stain that can remove the yellow color from the wood without covering the seams. Any ideas?
This was a measuring tool used to estimate how many planks would be required to fill the planking gap on the hull. After bridging the remaining gap, you can estimate how much you need to reduce the average width of the remaining wood strips to close the gap such that those last few planks are about even in width.
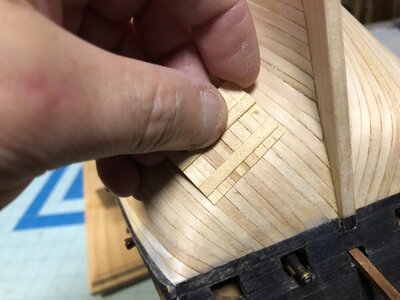
This was a measuring tool used to estimate how many planks would be required to fill the planking gap on the hull. After bridging the remaining gap, you can estimate how much you need to reduce the average width of the remaining wood strips to close the gap such that those last few planks are about even in width.


Would MinWax simply white stain work, or would that be too light?
I don't know. Perhap airbrushing a thin coat of white might work? Time for some experimentation. . .Would MinWax simply white stain work, or would that be too light?
Very thin washes or maybe watercoloursaw? I don't really like paint but I thought I might try this on the Discovery. Just very thin coats to hint at the color rather than a solid colour.
- Joined
- Dec 9, 2019
- Messages
- 968
- Points
- 403

The final strips of planking on the hull were laid on the starboard side today. The hull was sanded with medium grit to remove plank edges, and then fine grit to produce a smooth finish. I tried a spot on the hull with some white spray paint, but that covered all the plank like except for seams that has slight gaps, which appeared unsightly. So, I use xylene to remove the paint. I would like to allow the plank lines to peek through the paint, so a fine, thin coat of white will be attempted next. I don't think there is a stain that can remove the yellow color from the wood without covering the seams. Any ideas?
Było to narzędzie pomiarowe używane do oszacowania, ile desek będzie wymaganych do wypełnienia szczeliny w poszyciu kadłuba. Po wypełnieniu pozostałej szczeliny możesz oszacować, o ile trzeba zmniejszyć średnią szerokość pozostałych pasków drewna, aby zamknąć szczelinę, tak aby kilka ostatnich desek miało mniej więcej taką samą szerokość.
View attachment 341306
View attachment 341307
View attachment 341308
View attachment 341309
View attachment 341310
View attachment 341311Witaj . Pięknie wykonane pozycie ,moje gratulacje . Pozdrawiam Mirek
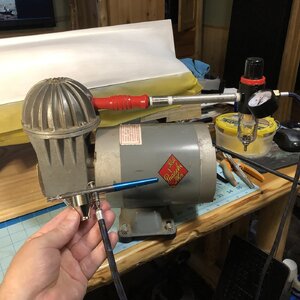
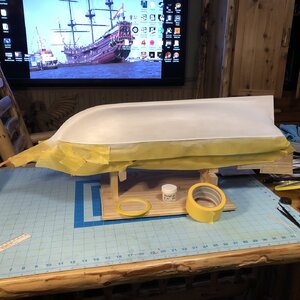
Well, it was time to try using the air brush again. Mine is an airbrush from 1987, given to me by a close friend along with an equally old compressor. The bottom of the hull was painted and lacquered. Then, the saddles were reinstalled on the baseboard and the model placed on them upright.
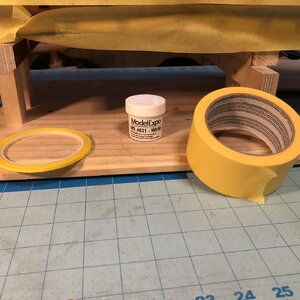
Materials for masking off the lower hull. The paint was mixed with airbrush medium to thin it out to the proper viscosity for the airbrush.
After masking, the hull is painted with a thin coat, allowing the plank seams to show.
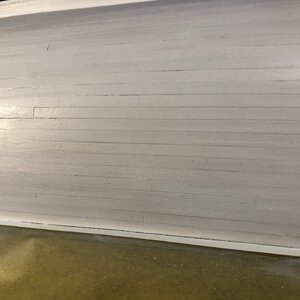
Seams still visible. The airbrush applied paint in a much thinner coat than spray paint directly from a spray can. This will work.
Krylon Satin Finish is the lacquer I used to protect the paint. It adds a small amount of satin sheen to the hull.
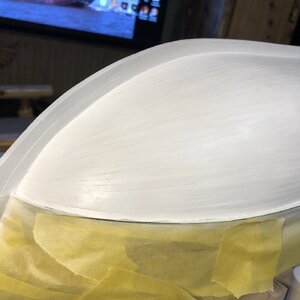
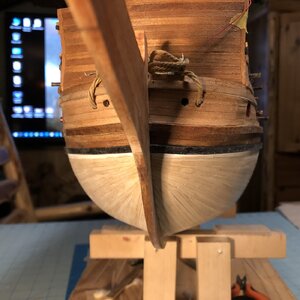
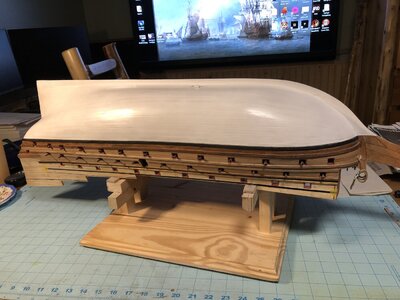
Buttocks after laquering.
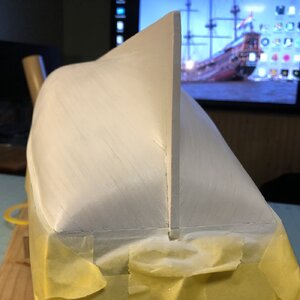
Letting the lacquer dry.
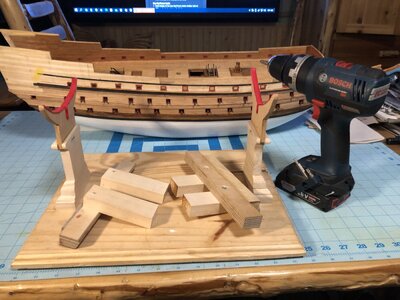
Preparing to reinstall the saddles so the model can sit upright again.
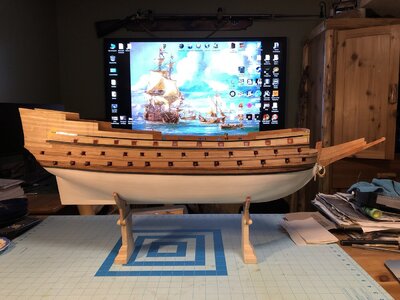
The saddles are reinstalled on the baseboard.
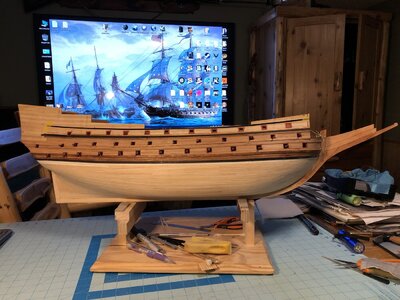
Progress so far.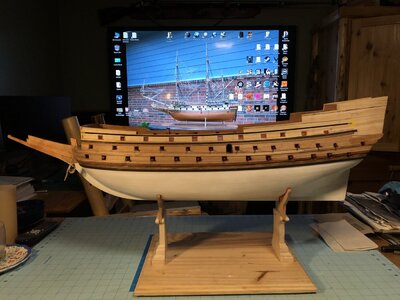

Materials for masking off the lower hull. The paint was mixed with airbrush medium to thin it out to the proper viscosity for the airbrush.

After masking, the hull is painted with a thin coat, allowing the plank seams to show.

Seams still visible. The airbrush applied paint in a much thinner coat than spray paint directly from a spray can. This will work.

Krylon Satin Finish is the lacquer I used to protect the paint. It adds a small amount of satin sheen to the hull.

Buttocks after laquering.

Letting the lacquer dry.

Preparing to reinstall the saddles so the model can sit upright again.

The saddles are reinstalled on the baseboard.

Progress so far.

Last edited:
Sounds like a weekend in Vegas...Buttocks after laquering.


