-

Win a Free Custom Engraved Brass Coin!!!
As a way to introduce our brass coins to the community, we will raffle off a free coin during the month of August. Follow link ABOVE for instructions for entering.
-

PRE-ORDER SHIPS IN SCALE TODAY!
The beloved Ships in Scale Magazine is back and charting a new course for 2026!
Discover new skills, new techniques, and new inspirations in every issue.
NOTE THAT OUR FIRST ISSUE WILL BE JAN/FEB 2026
You are using an out of date browser. It may not display this or other websites correctly.
You should upgrade or use an alternative browser.
You should upgrade or use an alternative browser.
HMS Sovereign of the Seas - Bashing DeAgostini Beyond Believable Boundaries
- Thread starter DARIVS ARCHITECTVS
- Start date
- Watchers 105
Happy Birthday Kurt

Kind Regards
Nigel


Kind Regards
Nigel
Happy birthday, Kurt! And now you’re going to paint all that intricate planking so no one will ever see it except in this forum? Thanks for sharing this with us.
Happy Birthday Kurt.
Your planking is coming out great. I love your thought process.
Bill
Your planking is coming out great. I love your thought process.
Bill
And a very happy birthday from me also Kurt, have a great day
Happy Birthday Kurt. Have a “kraken” good day. Cheers Grant
Dood! I wanna piece of THAT!!!!Happy birthday Kurt! I hope you have a great day celebrating with family and friends!
View attachment 340673
RE: your build. At least you'll have mastered a technique for drop planks when this is all done...

I'm hungry . . .
Last edited:
Thanks everyone!
Happy birthday Kurt!
Happy Birthday Kurt!
Since we got 3" of snow today, aside from running the store for some groceries for the family, more work was done on the Sovereign. The gap on the hull planking is slowly narrowing and the end is in sight. After gluing on every couple of planks, the planks are lightly sanded to remove glue and smooth rough edges. I can't wait to see how smooth the final sanding will turn out.
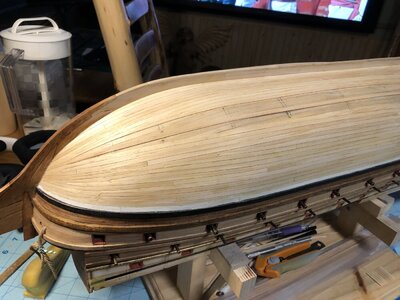
The gap at the stern has parallel sides, ensuring and easy finish for covering the buttocks with planks that require little shaping. I finally got smart enough to cover the stern chase gun ports with tape to prevent sawdust from entering.
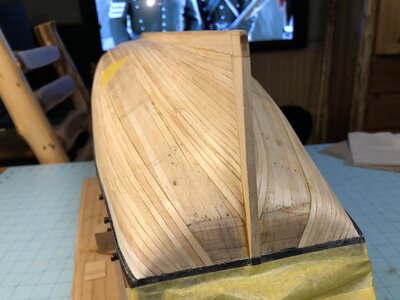

The gap at the stern has parallel sides, ensuring and easy finish for covering the buttocks with planks that require little shaping. I finally got smart enough to cover the stern chase gun ports with tape to prevent sawdust from entering.

Good morning Kurt. I have been super impressed with your work from the start. How you get such beautiful planking with such symmetry without a predetermined planking chart is beyond me. This is great work. Cheers GrantSince we got 3" of snow today, aside from running the store for some groceries for the family, more work was done on the Sovereign. The gap on the hull planking is slowly narrowing and the end is in sight. After gluing on every couple of planks, the planks are lightly sanded to remove glue and smooth rough edges. I can't wait to see how smooth the final sanding will turn out.
View attachment 340738
The gap at the stern has parallel sides, ensuring and easy finish for covering the buttocks with planks that require little shaping. I finally got smart enough to cover the stern chase gun ports with tape to prevent sawdust from entering.
View attachment 340739
Thanks for the compliment! As the builder, I can tell you where all the flaws are. This is true for all builders. Two of the planks today are not symmetrical because of mistakes. Not a big deal though. It's like trying to pick out one tree in a forest.Good morning Kurt. I have been super impressed with your work from the start. How you get such beautiful planking with such symmetry without a predetermined planking chart is beyond me. This is great work. Cheers Grant
As you can see, I add planks starting at both the keel and at the bottom wale, and the process is such that the gap between the planked area shrinks, until the planks meet somewhere near the turn of the bilge, where the curvature of the hull in cross section is sharpest. I use a small set of Fiskars scissors to cut and shape the planks along with a small hand sanding block to straighten the cut edges and do subtle trimming
How to get them both symmetrical? Do one or two planks on one side, the do the other side with mirror copies. Don't do one whole side of the ship, then try to duplicate the pattern on the other. You pay attention to where the tip of the drop plank is, and try to make the tapers on each plank about the same. Where planks end at the stem or stern, step back every so often and use some dividers to see if one side's planks are resulting in faster growth and coverage measured from the edge of the planking to the keel, or from the edge of the planking to the bottom wale. After a long series of planks, one side may cover 1mm more that the other, so you make the next two planks on that side a hair less wide and rebalance the plank coverage.
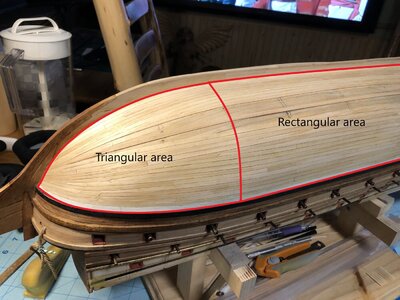
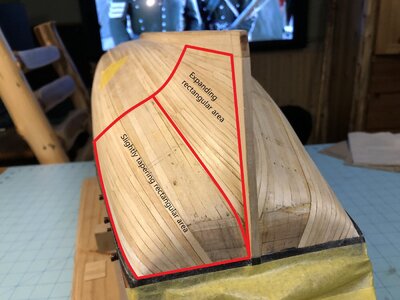
Where to insert drop planks was a free-form decision process, where I can imagine the effect of a particular drop plank on the shape of the line of advancing planks as the gap closes. On this model, the area to be planked on one side formed a triangle near the bow, then straightened out as you moved aft, changing for a very subtle taper as you approach the stern, below the expanding are of the deadwood, as seen below. Filling the triangular area was the hardest, judging where to place drop planks and how to position their points to crate the right amount of planking expansion as you move aft.
Last edited:
Kurt, did you concern yourself with where bulkheads were? I tried to get my drop planks and butt planks to end where the treenails would go. I’m not sure that’s where they were supposed to end, but I’ve seen it that way on other models.Thanks for the compliment! As the builder, I can tell you where all the flaws are. This is true for all builders. Two of the planks today are not symmetrical because of mistakes. Not a big deal though. It's like trying to pick out one tree in a forest.
As you can see, I add planks starting at both the keel and at the bottom wale, and the process is such that the gap between the planked area shrinks, until the planks meet somewhere near the turn of the bilge, where the curvature of the hull in cross section is sharpest. I use a small set of Fiskars scissors to cut and shape the planks along with a small hand sanding block to straighten the cut edges and do subtle trimming
How to get them both symmetrical? Do one or two planks on one side, the do the other side with mirror copies. Don't do one whole side of the ship, then try to duplicate the pattern on the other. You pay attention to where the tip of the drop plank is, and try to make the tapers on each plank about the same. Where planks end at the stem or stern, step back every so often and use some dividers to see if one side's planks are resulting in faster growth and coverage measured from the edge of the planking to the keel, or from the edge of the planking to the bottom wale. After a long series of planks, one side may cover 1mm more that the other, so you make the next two planks on that side a hair less wide and rebalance the plank coverage.
Where to insert drop planks was a free-form decision process, where I can imagine the effect of a particular drop plan on the shape of the line of advancing planks as the gap closes. On this model, the area to be planked on one side formed a triangle near the bow, then straightened out as you moved aft, changing for a very subtle taper as you approach the stern, below the expanding are of the deadwood, as seen below. Filling the triangular area was the hardest, judging where to place drop planks and how to position their points to crate the right amount of planking expansion as you move aft.
View attachment 340766
View attachment 340767
Yes. Assuming that a frame would be at the same of each bulkhead on the model, that's where the planks usually end. I penciled the bulkhead locations onto the first planking layer earlier in the build. Of course, the locations of the bulkheads may not line up with a frame on the real ship, but since there are so many frames, chances are that they do. The location of any plank end which does not terminate on a bulkhead is completely arbitrary, but if two plank ends terminate close to each other horizontally, I make sure they line up with each other vertically, so that they appear to be on the same frame. There are many frames located close to one another, so choosing a place to terminate a plank is not going to be way off the mark no matter what. If they do not land on a bulkhead, the ends at least are not totally random in location. If this were a POF model, you'd know where all the frames were, and thus where to terminate the planks.Kurt, did you concern yourself with where bulkheads were? I tried to get my drop planks and butt planks to end where the treenails would go. I’m not sure that’s where they were supposed to end, but I’ve seen it that way on other models.
So, yeah... I put some thought into this.
There is space in the gap for 6-1/2 planks to fill it in near the stern. So, if you take a little material off the wide of each of those remaining planks, all judged by eye, the planks will fill the space nice and even. I added enough stealers in the deadwood above to ensure that the two edges of the gap are as even as possible for the last few rows of planks. Fitting drop planks in the right locations and the required quantity for fill the triangular area at the bow was a lot more difficult because it was harder to guess how much the angle of the gap would change with each drop plank. Of course, I could have measured, I tend to free-form these sorts of problems by feel. Usually, the results are good enough.
When painted, most of the plank seam lines will be drastically downplayed in appearance, with many disappearing altogether. I am wondering if adding heavily dilated paint, acting line plastic model panel liner, will improve the appearance by making the lines stand out better, or ruin the appearance by have some line stand out proudly and other not take the color and remain invisible. An experiment will be required, and if it doesn't look good, I can just paint it all over. To color the lines, I am thinking a diluted brown or perhaps grey might suffice. If this works, all that plank work will be visible.
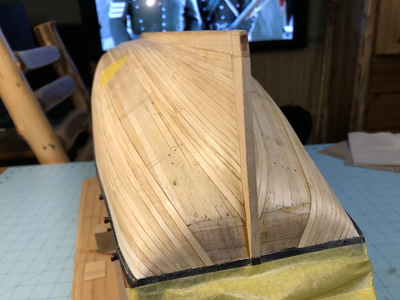
When painted, most of the plank seam lines will be drastically downplayed in appearance, with many disappearing altogether. I am wondering if adding heavily dilated paint, acting line plastic model panel liner, will improve the appearance by making the lines stand out better, or ruin the appearance by have some line stand out proudly and other not take the color and remain invisible. An experiment will be required, and if it doesn't look good, I can just paint it all over. To color the lines, I am thinking a diluted brown or perhaps grey might suffice. If this works, all that plank work will be visible.

Last edited:
Planking continues. Planking on the hull bottom was completed and sanded on the port side. A gap remains to be planked on the starboard side.
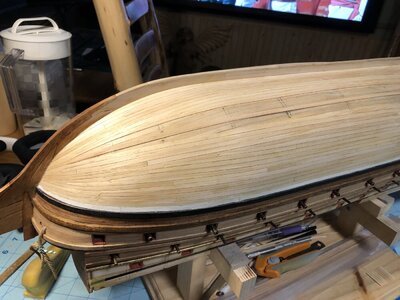
The gaps are narrowing.
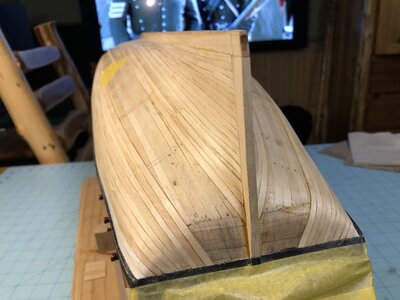
Final plank on the port side.
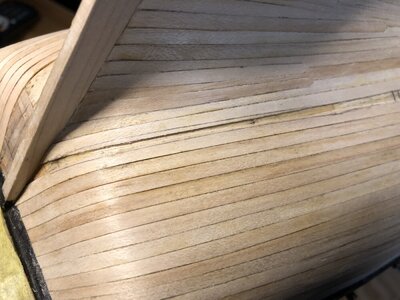
Port side after sanding.
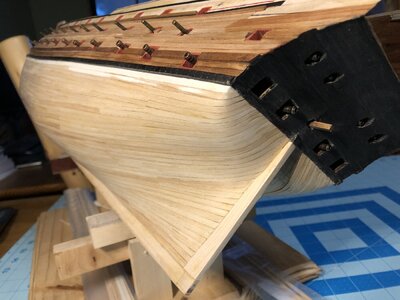
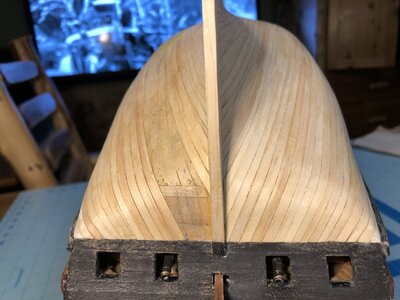
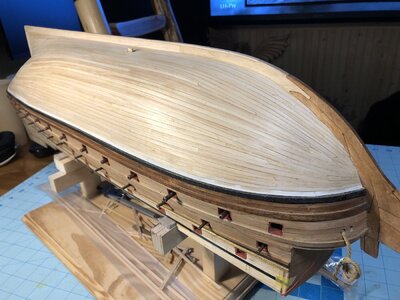
The buttocks have much better shape than the original DeAgostini design. This is fairly close to the shape in Lely's Portrait of Peter Pett.
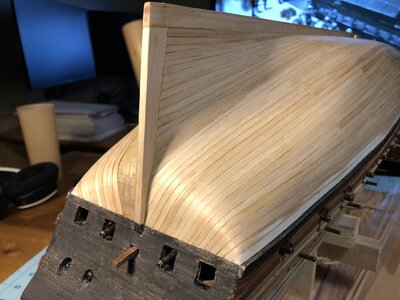

The gaps are narrowing.

Final plank on the port side.

Port side after sanding.


The buttocks have much better shape than the original DeAgostini design. This is fairly close to the shape in Lely's Portrait of Peter Pett.


