WOW! That looks like FUN. Your bikes were styled not too different from my 1944 DMW NZ-350/1.All-Japan Motocross, Sapporo, Japan, 1967 (#1)View attachment 337032

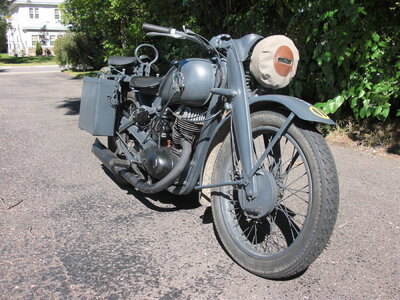
 |
As a way to introduce our brass coins to the community, we will raffle off a free coin during the month of August. Follow link ABOVE for instructions for entering. |
 |
 |
The beloved Ships in Scale Magazine is back and charting a new course for 2026! Discover new skills, new techniques, and new inspirations in every issue. NOTE THAT OUR FIRST ISSUE WILL BE JAN/FEB 2026 |
 |
WOW! That looks like FUN. Your bikes were styled not too different from my 1944 DMW NZ-350/1.All-Japan Motocross, Sapporo, Japan, 1967 (#1)View attachment 337032


Actually, consider my age now, you ARE talking about the rider!There are 150kg difference - and I am not talking about the biker ......

2 stroke?WOW! That looks like FUN. Your bikes were styled not too different from my 1944 DMW NZ-350/1.
View attachment 337105
View attachment 337106
Yes, and single cylinder, 349cc.2 stroke?
Those are the best times Kurt. I love adventure riding. PS your planking is very well done I set. Cheers GrantThat's from trying to stop my motorcycle from falling after trying to get it off the center stand just after getting out bed. It kinda got away from me and fell over. It's a heavy BMW R1150GS Adventure with full panniers and top box. It's not the first time I had an accident and it won't be the last, the price of fun. This is what happened on my first off road adventure. I got a little stuck...
View attachment 337027
I take occasional measurements from the lowest wale to the creeping edge of the planking and adjust planking width very slightly if things get out of balance in symmetry. It's not required to to this often, especially if you add planks in pairs, mirroring each plank as you build. It's slow, but the symmetry is preserved.Kurt, I love your planking and stealers. I also note that you did a great job of tucking the stern. I had a hard time getting the two sides symmetrical on my Connie.
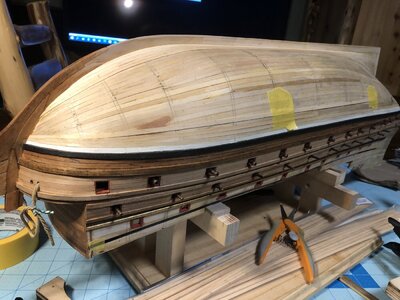
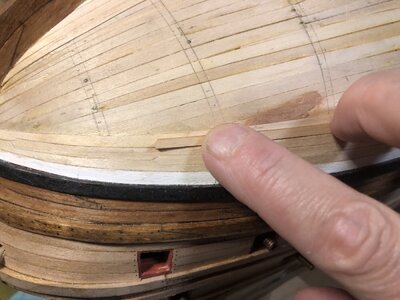
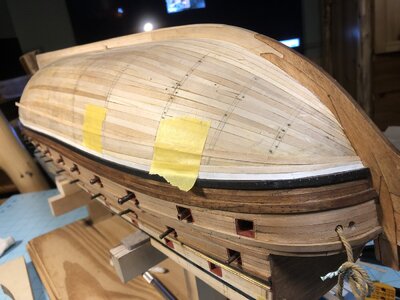
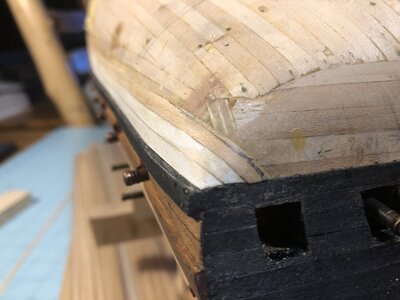
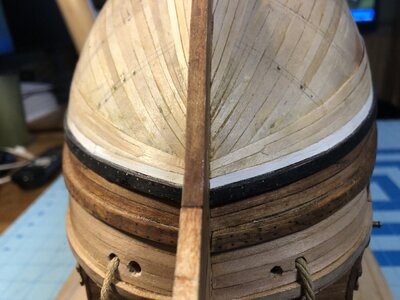
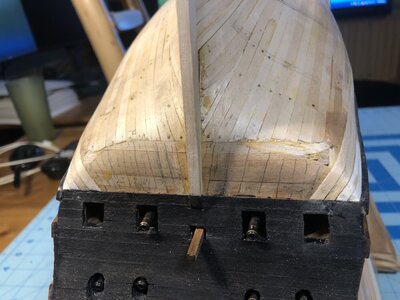
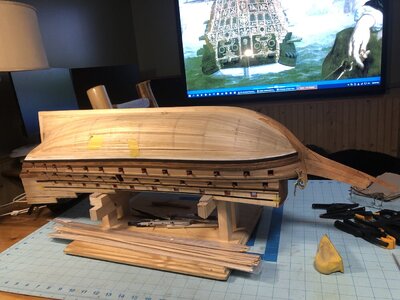
Good morning Kurt. Boy that is a unique planking style and method- well to me. You have skills for sure as it is coming out beautifully. Cheers GrantMore planking was done today. Progress is slow and careful. My style of planking is free form. That is, I don't use any measurements. I just wing it with a few pencil lines to guide the overall direction of the planks. It's also how I hammer out custom fitted suits of armor, and it works for me.
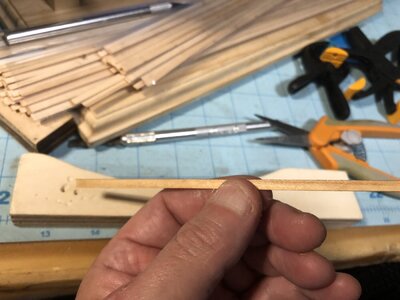
First, I need to bend some planks sideways. Here is how that was done. Take a thin maple plank, dip in it water, and wet it thoroughly.
View attachment 338550
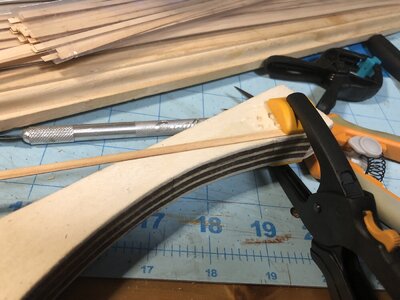
Clamp one end to a block of wood.
View attachment 338551
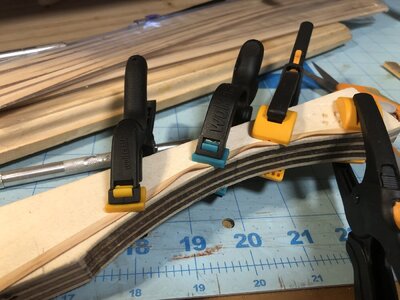
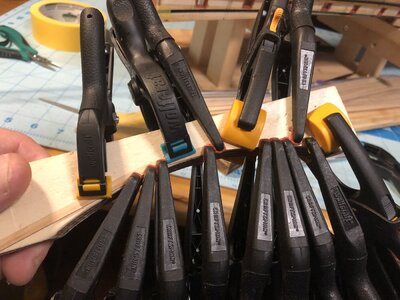
Curve the plank around the edge of the block and clamp it with space between the clamps, allowing the strip to pucker.
View attachment 338552
Add more clamps, pressing the center of each pucker flat, until the entire strip is covered.
View attachment 338553
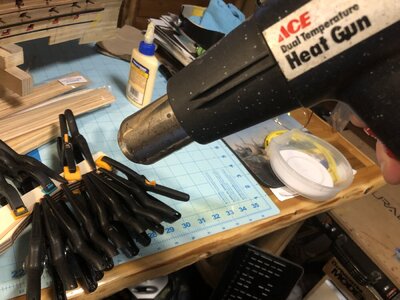
Gently apply hot air and dry the clamp thoroughly.
View attachment 338554
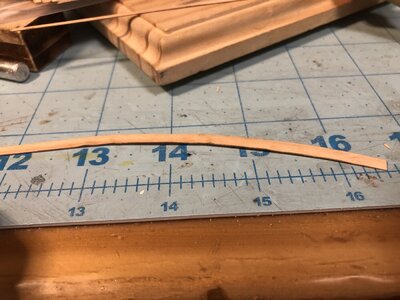
Take the clamps off and check the curvature. There will be shallow puckers, but these are remove by dipping the plank back in the water and clamping all the puckers flat with clamps and allow the strip to dry. Massage the plank with gently with your finger to remove sharp bends, until the plank has a nice, even curvature.
View attachment 338555
This plank was glued to the hull for first 10cm starting at the bow. The rest of the strip hangs free and will be glued down later once the number of drop planks you need is determined.
View attachment 338556
A razor knife is used to carv out the gap where drop plank ends are inserted between two planks that are already on the hull.
View attachment 338557
Placing the new drop clamp over the gap between planks already fastened to the hull at the bow, a pencil is used to mark where wood needs to be trimmed from the fixed plank to allow the new drop plank to be inlaid between them. Removing parts of a strip previously glued is not that hard because they were glued down with PVA, not CA glue.
View attachment 338558
Moving to the port side, the same planks were applied to the hull, taking care to preserve symmetry by transferring measurements from the other side.
View attachment 338559
Because the stern narrows, the strips at the counter are each narrowed by trimming them with a sharp razor knife after they are glued to the hull. The cut is made on one side of the plank and the excess wood trimmings are lifted off the hull with a knife.
View attachment 338560
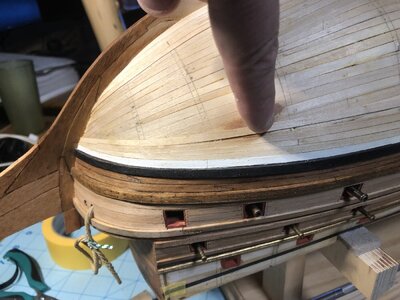
Progress so far at the bow.
View attachment 338561
Progress so far at the stern. Pencil lines were drawn to serve as guides.
View attachment 338562
Overall progress.
View attachment 338563
Yes, they taper to 50% width at the bow. Otherwise, they would not fit. Because of the hull shape and narrow planks (4mm), there will be lots of drop planks. The planks are 0.3mm thick, and when wet they soften just enough to make gentle curves using the simple method described earlier, but you have to get a feel for where their breaking point is. A lot of curvature is not required, just enough to follow the lines of the hull.Looks great, Kurt! I did mine the same way, only different. You’re a lot more precise and consistent. The drop planks are like stealers? I’ll have to try your method of bending planks. Mine tend to break. Do you taper them at the bow?
Thanks Grant. Some things come easier than others. Carving is still something that isn't easy for me. That's quite an obstacle considering this particular ship model!Good morning Kurt. Boy that is a unique planking style and method- well to me. You have skills for sure as it is coming out beautifully. Cheers Grant
Hello. Beautifully made sheathing. Regards Mirek
Dziękuję Mirek!Witaj. Pięknie robione poszycie poszycie. Pozdrawiam Mirek
Thanks, Paul. It's going particularly slow. Any gaps between planks will be reduced when the hull is painted. My question is, at this scale, and with white stuff on the hull, would trenails or bolts be visible at all? I'm thinking probably not, but I don't want to pass up on a chance to add realistic details, especially since I'm working on the exterior of the model now. Your Wasa has high contrast trenails and bolts because the style is "fresh wood", with details exaggerated to show the workmanship. I'm going more for a realistic appearance, with enough detail to pull you in when to get closer to the model. Small details would tend to blend in. The trick for me is to make those details visible when you get close to the model.Some of your best work here Kurt!
I would say that if the gaps between planks will be reduced with painting then trunnels would not be visible at all???Thanks, Paul. It's going particularly slow. Any gaps between planks will be reduced when the hull is painted. My question is, at this scale, and with white stuff on the hull, would trenails or bolts be visible at all? I'm thinking probably not, but I don't want to pass up on a chance to add realistic details, especially since I'm working on the exterior of the model now. Your Wasa has high contrast trenails and bolts because the style is "fresh wood", with details exaggerated to show the workmanship. I'm going more for a realistic appearance, with enough detail to pull you in when to get closer to the model. Small details would tend to blend in. The trick for me is to make those details visible when you get close to the model.
I think so.I would say that if the gaps between planks will be reduced with painting then trunnels would not be visible at all???
