Every day I learn something new!Hi Paul
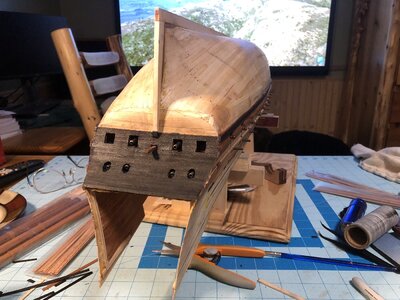
As far as I am aware, the eyebolts were clenched before the external planking was fitted on English ships so are hidden from view.French externally clenched.
Kind Regards
Nigel
-

Win a Free Custom Engraved Brass Coin!!!
As a way to introduce our brass coins to the community, we will raffle off a free coin during the month of August. Follow link ABOVE for instructions for entering.
-

PRE-ORDER SHIPS IN SCALE TODAY!
The beloved Ships in Scale Magazine is back and charting a new course for 2026!
Discover new skills, new techniques, and new inspirations in every issue.
NOTE THAT OUR FIRST ISSUE WILL BE JAN/FEB 2026
You are using an out of date browser. It may not display this or other websites correctly.
You should upgrade or use an alternative browser.
You should upgrade or use an alternative browser.
HMS Sovereign of the Seas - Bashing DeAgostini Beyond Believable Boundaries
- Thread starter DARIVS ARCHITECTVS
- Start date
- Watchers 105
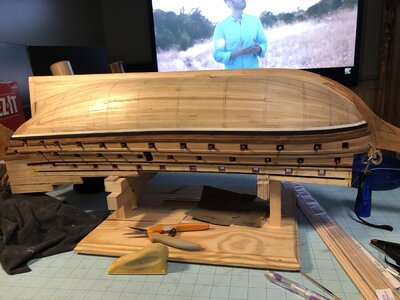
No, for the reason Nigel said. It looks like I need to drill holes for the breaching rope and gun tackle eyebolts in the hull now and install those before planking any higher up the sides.Have you considered adding bolts (four at each gun port) that would correspond to the rigging of the guns?
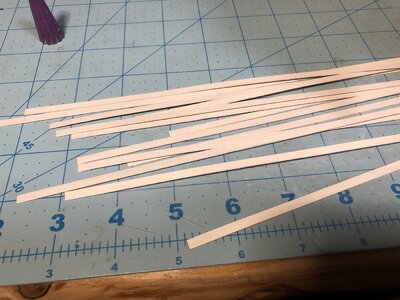
Maple strips were painted white and the first white stuff coated planks were installed below the lowest wale on both sides of the hull. The 4mm strips had barely enough flexibility to allow them to be glued down with CA without puckering at the lower edge as they pass around the curve of the bow. However, they put up quite a fight. It appears that the next planks will either need to be soaked in water and stretched into a curve or the planks need to be splined, being cut as curved strips from wider strips of wood.
Painted wood strips.
The end of the strip is anchored to the counter with CA glue. After it sets, the it is pressed over the sharp bend and then the rest of the strip is glued to the side of the hull.
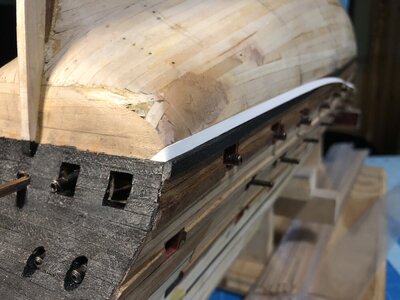
Port side strip completed.
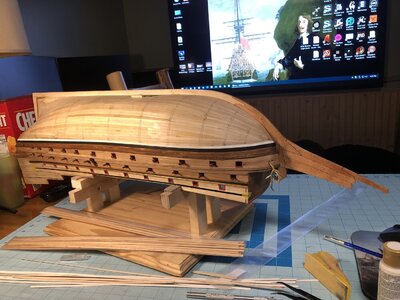
The bow curvature requires that the strip be curved along its minor access, but stretching the strip tight and gluing down puckers was barely accomplished after anchoring the end to the bow. The first strip is short, reducing the pucker to a manageable size. The second strip segment was glued at the forward end first and allowed to dry, then drawn across the hull and glued down, with two more puckers pressed out after the stern end was firmly attached. This is slow and delicate work using this method instead of splining.
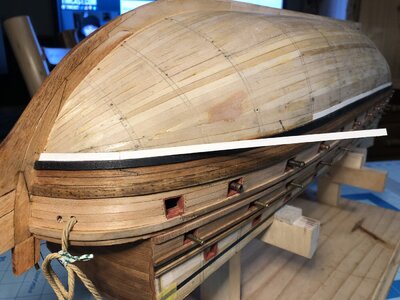
View of the completed strake of planking on starboard side.
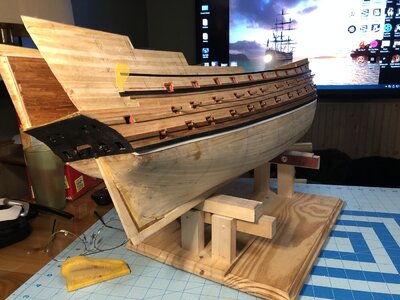
Progress so far. I was careful to prevent flat spots bumps in the curves of the wales, which is usually hard to avoid making these models. When you look down the hull from one end, the wales all flow in gentle and even curves.
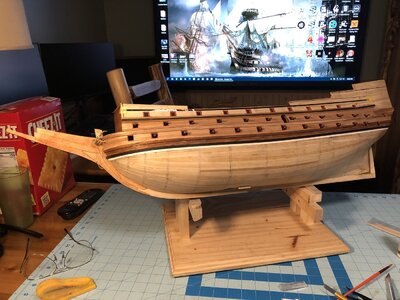
Painted wood strips.

The end of the strip is anchored to the counter with CA glue. After it sets, the it is pressed over the sharp bend and then the rest of the strip is glued to the side of the hull.

Port side strip completed.

The bow curvature requires that the strip be curved along its minor access, but stretching the strip tight and gluing down puckers was barely accomplished after anchoring the end to the bow. The first strip is short, reducing the pucker to a manageable size. The second strip segment was glued at the forward end first and allowed to dry, then drawn across the hull and glued down, with two more puckers pressed out after the stern end was firmly attached. This is slow and delicate work using this method instead of splining.

View of the completed strake of planking on starboard side.

Progress so far. I was careful to prevent flat spots bumps in the curves of the wales, which is usually hard to avoid making these models. When you look down the hull from one end, the wales all flow in gentle and even curves.

I happen to like the color contrast very much. But are you sure the waterline is aligned with the wale in this precise way? Of course, you know I'm completely ignorant when it comes to stuff like this - but I think I have seen the waterline often represented without regard to the lay of the wale...or maybe the 'whitestuff' doesn't need to be restricted to the waterline?
Please be patient with my ignorance!
Please be patient with my ignorance!
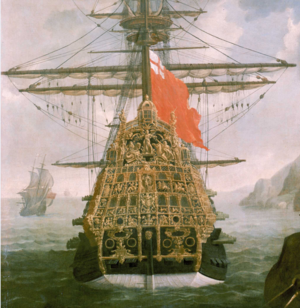
Yeah! I noticed that too. The contrast is nice. Don't get the waterline confused with the line where the white stuff stops and the bare wood begins. The white stuff line does not follow the waterline on these ships. Look below and see. On modern boats and ships, we typically see the waterline is where the color changes on the hull. (Oh, and you must think me quite impatient if you think I would get hysterical over one simple question, Paul!I happen to like the color contrast very much. But are you sure the waterline is aligned with the wale in this precise way? Of course, you know I'm completely ignorant when it comes to stuff like this - but I think I have seen the waterline often represented without regard to the lay of the wale...or maybe the 'whitestuff' doesn't need to be restricted to the waterline?
Please be patient with my ignorance!
 )
)
Good morning Kurt. That looks awesome. Are going to paint the lower hull? The white waterline when done will look so cool. Cheers GrantMaple strips were painted white and the first white stuff coated planks were installed below the lowest wale on both sides of the hull. The 4mm strips had barely enough flexibility to allow them to be glued down with CA without puckering at the lower edge as they pass around the curve of the bow. However, they put up quite a fight. It appears that the next planks will either need to be soaked in water and stretched into a curve or the planks need to be splined, being cut as curved strips from wider strips of wood.
Painted wood strips.
View attachment 336486
The end of the strip is anchored to the counter with CA glue. After it sets, the it is pressed over the sharp bend and then the rest of the strip is glued to the side of the hull.
View attachment 336487
Port side strip completed.
View attachment 336488
The bow curvature requires that the strip be curved along its minor access, but stretching the strip tight and gluing down puckers was barely accomplished after anchoring the end to the bow. The first strip is short, reducing the pucker to a manageable size. The second strip segment was glued at the forward end first and allowed to dry, then drawn across the hull and glued down, with two more puckers pressed out after the stern end was firmly attached. This is slow and delicate work using this method instead of splining.
View attachment 336489
View of the completed strake of planking on starboard side.
View attachment 336490
Progress so far. I was careful to prevent flat spots bumps in the curves of the wales, which is usually hard to avoid making these models. When you look down the hull from one end, the wales all flow in gentle and even curves.
View attachment 336491
Ha! No one who starts and completes a tiny ship can afford to be overly impatient. Love your work, Kurt. Thanks for the explanation.Yeah! I noticed that too. The contrast is nice. Don't get the waterline confused with the line where the white stuff stops and the bare wood begins. The white stuff line does not follow the waterline on these ships. Look below and see. On modern boats and ships, we typically see the waterline is where the color changes on the hull. (Oh, and you must think me quite impatient if you think I would get hysterical over one simple question, Paul!)
View attachment 336493
On this model, I will paint the lower hull with white stuff. All of the hull bottom has to be planked in maple because it is very light in color.Good morning Kurt. That looks awesome. Are going to paint the lower hull? The white waterline when done will look so cool. Cheers Grant
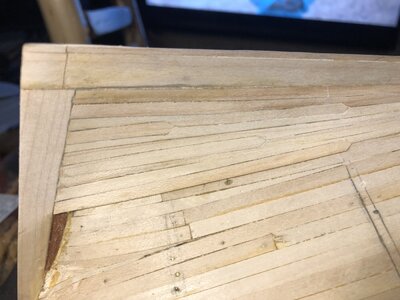
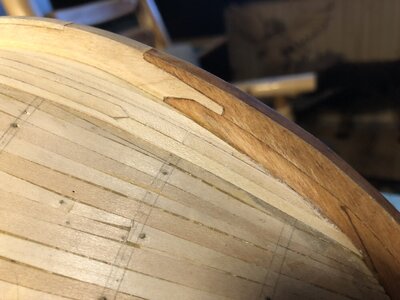
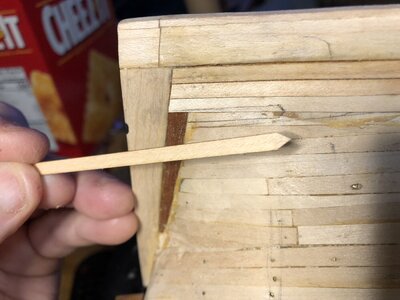
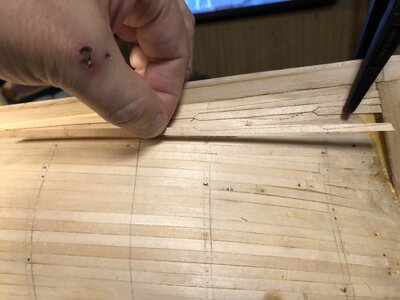
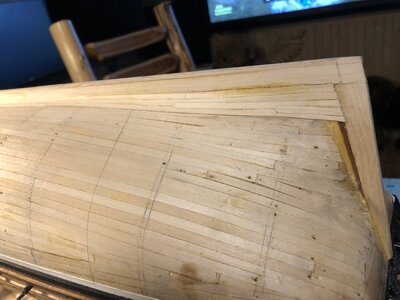
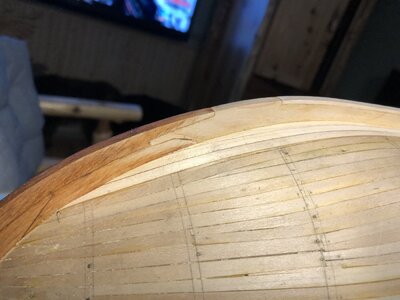
Planking of the garboards and planking strakes was started using 4mm wide maple strips. Using the lines of the first layer of planking as a rough guide as to the placement of the final planks, stealer planked were plotted in pencil and added to the port side, then the starboard, taking care to make all plank seams port and starboard. Because of the narrow width of the planks (4mm), more stealers will be needed to "spread" the wood at across the deadwood at the stern. The strakes of planks were tapered into the stem. It would be easy to lay planks all the way along the stem, but then plank widths would be terribly squeezed at the bow as planks fill the gap, and lots of drop planks would be necessary. So, steps were taken early in laying planks such that distance between the keel/stem and the lowest wale are maximized as you approach the bow. Planks were mostly glued done with CA glue, but the narrowly pointed ends at the bow were glued down with PVA glue since it seemed to soften the wood to help it form to the hull bend, and some heat with a hot air gun locked the plank down and reduced drying time to mere seconds.



Very carefully done Kurt. I appreciate the precision of the 'joinery'. The level of care you are taking will produce a fine result if you can stay patient.
- Joined
- Aug 8, 2019
- Messages
- 5,582
- Points
- 738

Not quite, look at the holes in the fingers.Very carefully done
That s more the fingers you expect by the stapler methodeNot quite, look at the holes in the fingers.
Really beautiful and precise plank work all-around, Kurt! I’m a little confused about the white painted planking below the lower main wales; is that merely a “boot-topping” that will be spliced into the maple lower hull planking? Forgive me, if I’m being dense about this. I blame it on COVID.
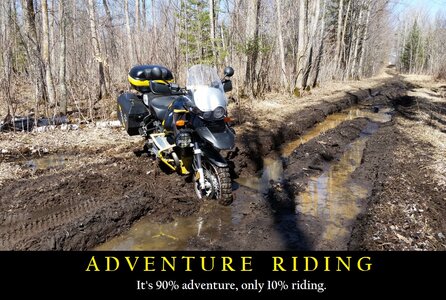
That's from trying to stop my motorcycle from falling after trying to get it off the center stand just after getting out bed. It kinda got away from me and fell over. It's a heavy BMW R1150GS Adventure with full panniers and top box. It's not the first time I had an accident and it won't be the last, the price of fun. This is what happened on my first off road adventure. I got a little stuck...That s more the fingers you expect by the stapler methode
Last edited:
That first white plank was painted by hand, so what I mask off the wale, there's a buffer between the painted bottom and the wale, and I won't accidentally get pain on the wale. Every plank below that wale will be white because... white stuff!Really beautiful and precise plank work all-around, Kurt! I’m a little confused about the white painted planking below the lower main wales; is that merely a “boot-topping” that will be spliced into the maple lower hull planking? Forgive me, if I’m being dense about this. I blame it on COVID.
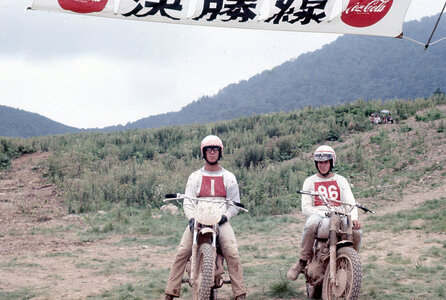
Reminds me of the days I used to race motocross and enduros!That's from trying to stop my motorcycle from falling after trying to get it off the center stand just after getting out bed. It kinda got away from me and fell over. It's a heavy BMW R1150GS Adventure with full panniers and top box. It's not the first time I had an accident and it won't be the last, the price of fun. This is what happened on my first off road adventure. I got a little stuck...
View attachment 337027
There are 150kg difference - and I am not talking about the biker ......All-Japan Motocross, Sapporo, Japan, 1967 (#1)View attachment 337032

