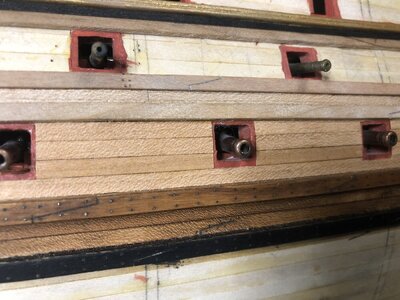
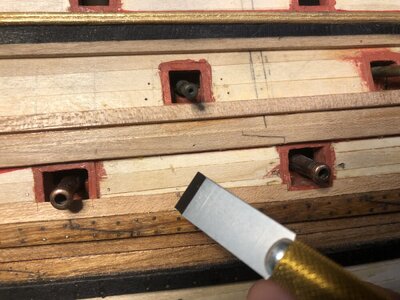
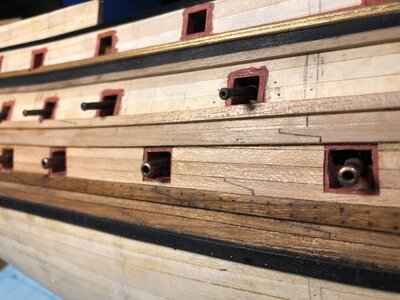
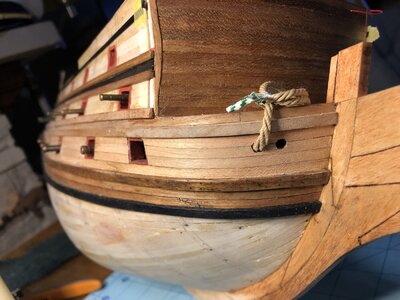
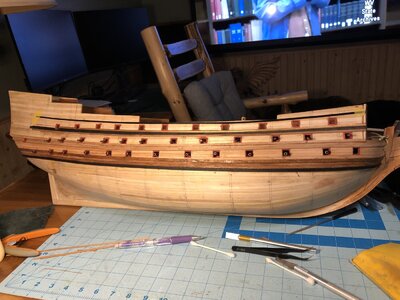
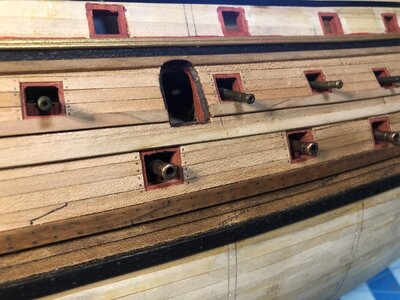
Good morning Kurt. The cherry wood is stunning. The colour contrasts are subtle and I really like it. Cheers GrantThe cherry wood strips came in the mail today, so I wasted no time and started planking the outer hull on the port side. Each plank was fitted around the lower gun deck ports. Adding trenails will come later.
View attachment 335247
View attachment 335248
View attachment 335249
-

Win a Free Custom Engraved Brass Coin!!!
As a way to introduce our brass coins to the community, we will raffle off a free coin during the month of August. Follow link ABOVE for instructions for entering.
-

PRE-ORDER SHIPS IN SCALE TODAY!
The beloved Ships in Scale Magazine is back and charting a new course for 2026!
Discover new skills, new techniques, and new inspirations in every issue.
NOTE THAT OUR FIRST ISSUE WILL BE JAN/FEB 2026
You are using an out of date browser. It may not display this or other websites correctly.
You should upgrade or use an alternative browser.
You should upgrade or use an alternative browser.
HMS Sovereign of the Seas - Bashing DeAgostini Beyond Believable Boundaries
- Thread starter DARIVS ARCHITECTVS
- Start date
- Watchers 105
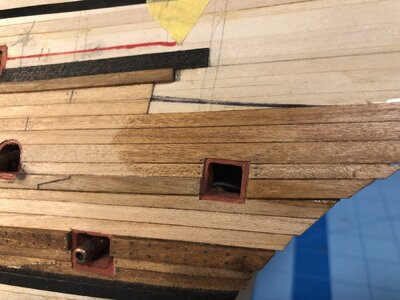
Thanks Grant! Not bad for cheap Chinese wood strips from eBay. I sorted out the best strips, using those that had the least freckled or cross striped grain. The planks between the lowest set of wales are stained with dark walnut Danish Oil, and the strips I added today are bare wood. These new strips will be stained with light walnut Danish Oil to make them a golden brown instead of the tan brown of the bare wood. There is band of darker wood between wales just above waterline, just to creat some contrast. My model won't have the red stripe above the waterline like others, and I suspect that may have been added later in the ship's life, because it doesn't appear in the Lely painting. This is to be expected given the King's order that only black and gold be used to adorn the ship. I don't know about the red on the gunwale railings yet. Most models have that.Good morning Kurt. The cherry wood is stunning. The colour contrasts are subtle and I really like it. Cheers Grant
Hi Kurt, the cherry wood is beautiful. I have wondered what it looks like on a model. You mentioned the crosscut grain, is that the standard way these wood strips are cut? Do you know if cutting with the grain produces a different look, I have been considering purchase of cherry for future builds.
- Joined
- Aug 8, 2019
- Messages
- 5,582
- Points
- 738

Post in thread 'VOC ship The Prins Willem (scale 1:75) Year 1651' https://shipsofscale.com/sosforums/...-willem-scale-1-75-year-1651.6761/post-150376Hi Kurt, the cherry wood is beautiful. I have wondered what it looks like on a model. You mentioned the crosscut grain, is that the standard way these wood strips are cut? Do you know if cutting with the grain produces a different look, I have been considering purchase of cherry for future builds.
The last 3 pictures of the deck show cherry wood (with Danish Oil) cut with the grain
The strips were not cut cross grain, but there are stripes on color variations, and these stripes run cross grain. It has to with the coloration. Whatever wood the Chinese are using, you see a similarity between the cherry and their mahogany (sapele) veneer strips. It makes me wonder if they are just using the terms "cherry" and "mahogany" to denote the color, and not the actual tree species. Their strips have a lot of freckled texture color to them as well. Cherry wood can vary in overall color considerably, from a tan brown to a deep red brown, and the color between sap wood and heart wood can have a lot of contrast in shade. The post @Steef66 mentioned above shows a cherry deck with a orangish brown hue, but with no freckling and no striping, and consistent color. Cherry has a fine grain, and look a lot better that cheap bass wood used in some kits, which requires painting to improve its appearance.Hi Kurt, the cherry wood is beautiful. I have wondered what it looks like on a model. You mentioned the crosscut grain, is that the standard way these wood strips are cut? Do you know if cutting with the grain produces a different look, I have been considering purchase of cherry for future builds.
I happen to agree with your theory Kurt. That surely doesn't look like the cherry we are familiar with.It makes me wonder if they are just using the terms "cherry" and "mahogany" to denote the color, and not the actual tree species.
Yes, that is prominent and got me to wondering about it.Their strips have a lot of freckled texture color to them as well.
It's MYSTERY WOOD!Yes, that is prominent and got me to wondering about it.
Looking very nice Kurt. I think the color contrasts will result in a beautiful hull.
You haven't ripped apart anything for a while now...everything OK?
You haven't ripped apart anything for a while now...everything OK?
Just wait until I get to the stern castle. There you shall have your fill of model ship carnage.Looking very nice Kurt. I think the color contrasts will result in a beautiful hull.
You haven't ripped apart anything for a while now...everything OK?
More planking on the starboard side was installed at the middle gun deck level. Practice is making the work come out neater with each plank. Using a brown mechanical pencil, I added some of the super-detailing in the form of trenails bracketing the gun ports and at the ends of the hull planks. At this scale, the simple pencil dots look okay. I am considering adding all the trenails in vertical rows like Nigel did, but am concerned that it may be too much, with the dots overpowering the appearance of the hull as a whole. Leaving the ones already made, which would be the largest trenails, may be enough. What do you guys think?
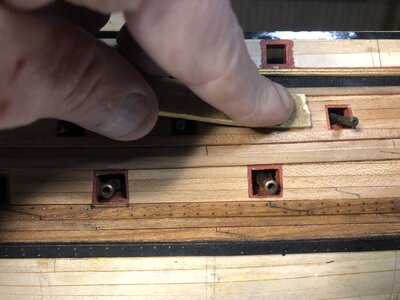
Lightly sanding the planking lightly removes any edges you can feel and any glue left behind. When oiled with Danish oil, the wood will look nice and be a shade darker.
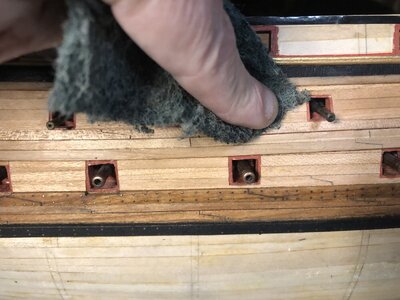
Then, polishing the wood with a Scotchbrite pad polishes the wood, making the color come out a small bit.
A close-up near the bow.
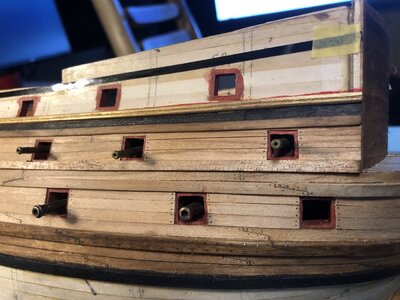
At this magnification, you can see every mistake, but when you move out, everything looks fine.
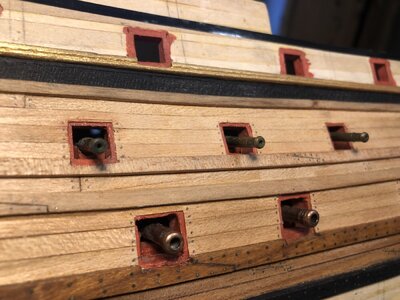
Progress so far. Now, to do the same on the port side...

Lightly sanding the planking lightly removes any edges you can feel and any glue left behind. When oiled with Danish oil, the wood will look nice and be a shade darker.

Then, polishing the wood with a Scotchbrite pad polishes the wood, making the color come out a small bit.

A close-up near the bow.

At this magnification, you can see every mistake, but when you move out, everything looks fine.

Progress so far. Now, to do the same on the port side...

Hi Kurt
Regarding the treenails, if I built the model again, I would not show them.I have now confined treenails to models 1/48 and larger.Sometimes less IS more
Kind Regards
Nigel
Regarding the treenails, if I built the model again, I would not show them.I have now confined treenails to models 1/48 and larger.Sometimes less IS more
Kind Regards
Nigel
Hello Kurt,
At your scale tree nails and or wire nails are just showing as an artistic representation. I really like the wire nails in your whalers, and I would do the same at the gun port and planking butt joints. The colored marker dots do not present very well in my opinion.
At your scale tree nails and or wire nails are just showing as an artistic representation. I really like the wire nails in your whalers, and I would do the same at the gun port and planking butt joints. The colored marker dots do not present very well in my opinion.
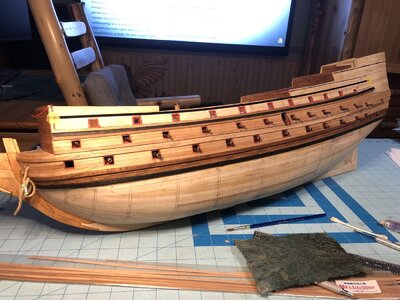
Planking in the hull for the middle gun deck level was completed for the port side. Little by little the hull is getting covered. It's starting to look like a ship.
THANK YOU NIGEL! I treasure the few bits of advice you and some of the other guys provide. It helps me decide which features will look good on the model. I wish other would provide comments and opinions more often.Hi Kurt
Regarding the treenails, if I built the model again, I would not show them.I have now confined treenails to models 1/48 and larger.Sometimes less IS more
Kind Regards
Nigel
The large ones on the lowest two wales are actually 24 gauge brass wire blackened with acid. The rest are simply made using a 0.5mm mechanical pencil with brown tinted lead (brown or black makes no difference). Nigel said the model would probably be better off without making the zillions of trenails he made on his hull, so I'm going to only place the largest ones on the hull just as I did on La Couronne. If I built the model at 1:48, then making all the trenails would be in proper scale and worth doing. I'm trying to go with more realism, less idealism on the appearance, which is good, because my staining finishes are rather messy looking, like a ship that's been beaten up a few decades in service. However, skills are improving as they are wont to do when you practice and learn from others. I'm considering sanding the lowest wales and plank strakes to a finer finish and re-staining to see if I can improve the appearance. That will mean re-doing the trenails. See the next port for details on how the smaller trenails were marked.Hello Kurt,
At your scale tree nails and or wire nails are just showing as an artistic representation. I really like the wire nails in your whalers, and I would do the same at the gun port and planking butt joints. The colored marker dots do not present very well in my opinion.
Last edited:
More planking was made on the port side at the middle gun deck level. The planking is getting neater with practice. Making the plank end seams with the razor knife has created very neat seams.
Port side planking.
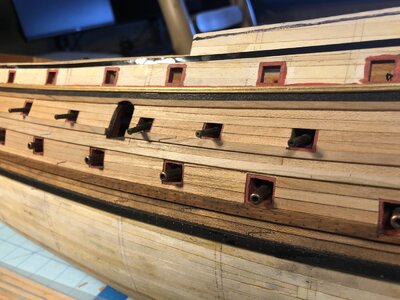
Marking trenails. Pressing and rotating the pencil makes a nice circular mark.
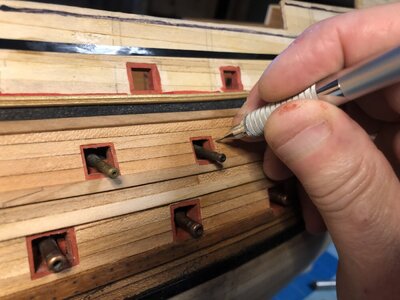
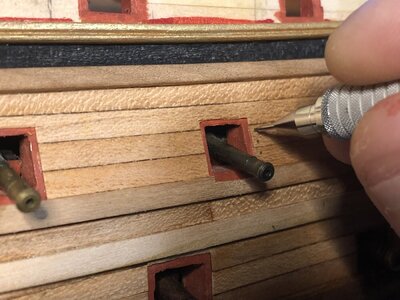
The trenails add some nice detail. Here is the royal boarding portal, which will be super-detailed later in the decoration stages of the build.
A portion of the planking was test finished with light walnut Danish Oil. The color is a nice medium brown. The rest of the hull will be oiled after the remaining planking detailed are sorted out.
Progress so far.
Port side planking.

Marking trenails. Pressing and rotating the pencil makes a nice circular mark.


The trenails add some nice detail. Here is the royal boarding portal, which will be super-detailed later in the decoration stages of the build.

A portion of the planking was test finished with light walnut Danish Oil. The color is a nice medium brown. The rest of the hull will be oiled after the remaining planking detailed are sorted out.

Progress so far.

Have you considered adding bolts (four at each gun port) that would correspond to the rigging of the guns?I wish other would provide comments and opinions more often.
Have you considered adding bolts (four at each gun port) that would correspond to the rigging of the guns?
Hi Paul
As far as I am aware, the eyebolts were clenched before the external planking was fitted on English ships so are hidden from view.French externally clenched.
Kind Regards
Nigel


 it's looks beautiful model that you are creating