HMS Sovereign of the Seas - Bashing DeAgostini Beyond Believable Boundaries

Kurt your last sentence says it all.The better you get the more the laws of diminishing returns apply.The room for improvement starts to become smaller vs the amount of time expended.This is a hobby and I do remind myself that those I aspire to do this as a day job!

I already have a day job and I know model making would soon loose it's appeal if I were to do it professionally.

Yes your model is a good interpretation.There are numerous subtle differences between Payne and VdV artwork of this ship.Payne is your main inspiration whereas VDV was mine so our models will differ.The lack of major historical reference for this ship is something that allows the modeller to put their own personal touch to the model.This is something purists hate, but something I love with vessels like these, you end up with a model that is very personal to you.

Kind Regards

Nigel
 
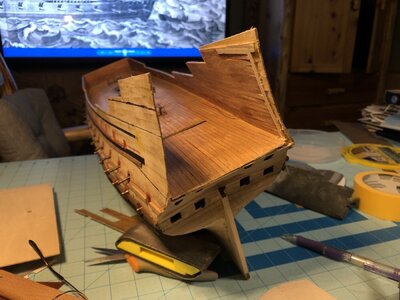
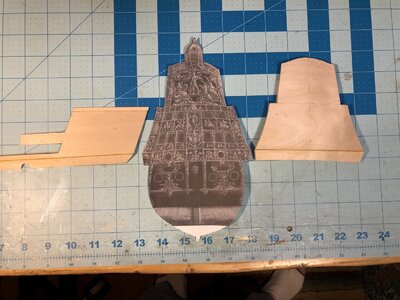
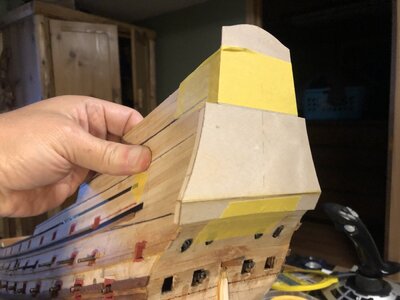
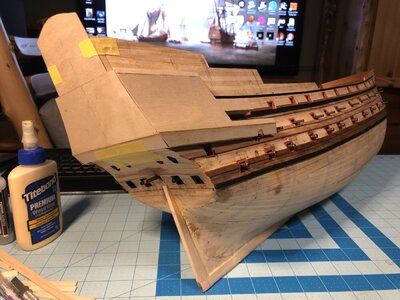
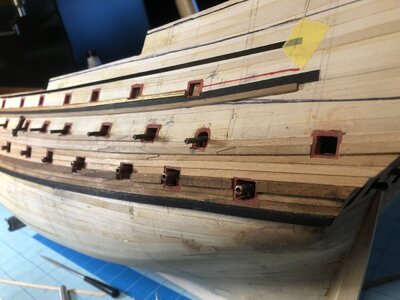
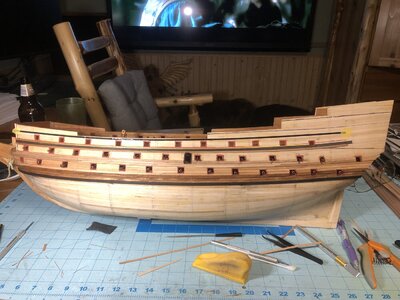
Now the fun parts begins. After way too much time thinking about how to do it, work has started on the gallery parts. A printout of the stern from the Lely portrait of Peter Pett scaled to the size of the model was used to determine the shape. The printout was surprising close to the proportions of the stern of the ship. Sometimes you get lucky. But first, the poop deck needed to be removed. It was misaligned, and I'm glad it's gone and will be eventually be replaced with a properly structured deck.

1153 Remove Poop Deck.JPG

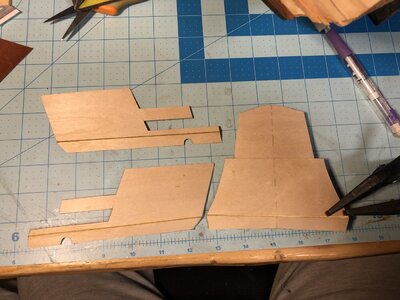
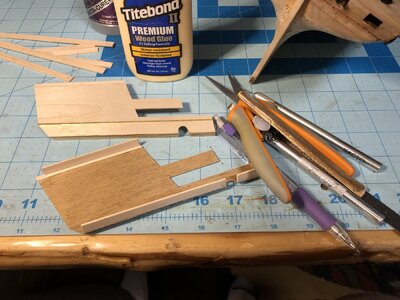
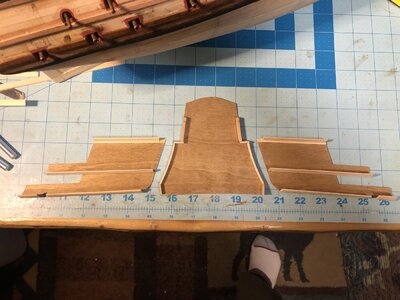
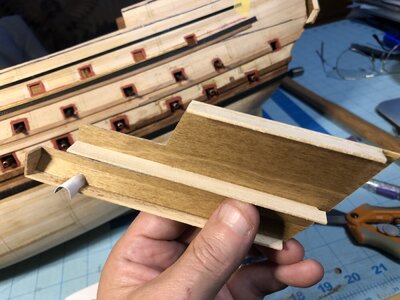
The folds in the plywood were made by cutting the wood halfway through, bending it at the cut, and filling the seam with PVA glue.
1154 Making Gallery Parts.JPG

The glue is drying in the bend seam of the transom.
1155 Making Gallery Parts.JPG

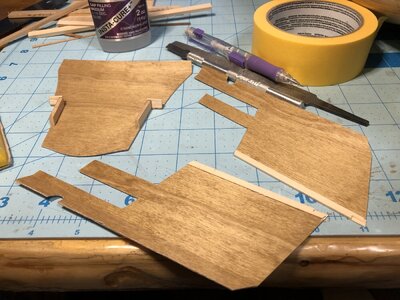
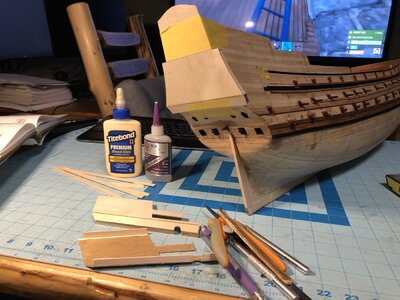
On the side gallery pieces, 4mm was taken off the bottom and added to the top to match the transom. This made the parts look even close to the side gallery proportions in Payne's engraving. Pieces of craft basswood are added to the sides of the transom, and these will be extensions of the existing hull. More basswood pieces will be used to reinforce the edges where the transom meets the side gallery parts, making these corners strong. Then more basswood will be used to make the side gallery walkway decks and bulkheads. When the structure is done, everything will be overlaid with veneer planking strips and details added. Internal details will then be designed, and sections of the hull under the side galleries will be cut way to allow the interior decks and rooms to be constructed and detailed with LED lit internal scenery visible through the windows.
1156 Making Gallery Parts.JPG
 
Last edited:
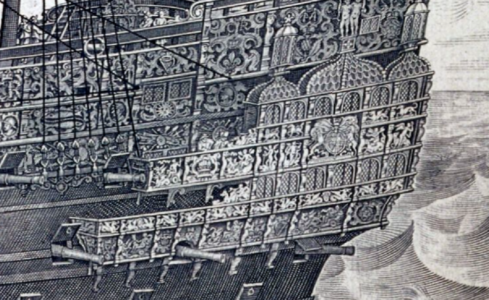
Today was a really fun day! Good progress was made designing the basic structure of the stern and side galleries. Using Payne's engraving as a guide, all the parts were trimmed and fitted until they matched the dimensions and proportions of the engraving.

Test fitting the transom. Measurements taken from the surface of the hull to the outer edge of the side galleries provided the width of the horizontal strips for the top, bottom, and upper side balcony decks.
1157 Test Fit Transom.JPG

The top and bottom strips turned out to be 7mm wide, and the upper balcony deck strip was 11mm wide.
1158 Add Top & Bottom Deck Strips To Side Galleries.JPG

Time to make the upper balcony decks.
1159 Progress So Far.JPG

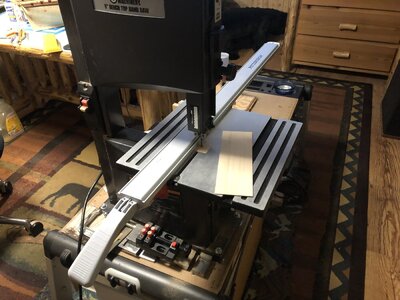
Strips of basswood were used. These were cut on the small bandsaw.
1160 Cut More Basswood Strips for Side Galleries.JPG

A razor knife was used to shape the ends of the deck strips so they intersect properly with the extension strips on the transom.
1161 Gallery Pieces So Far.JPG

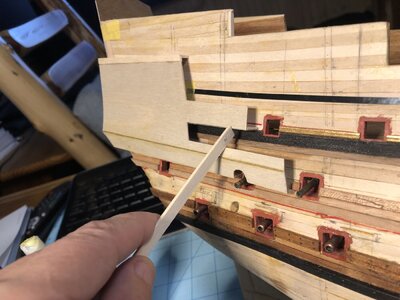
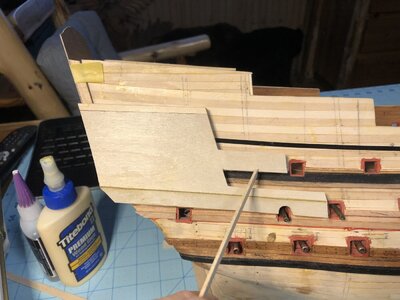
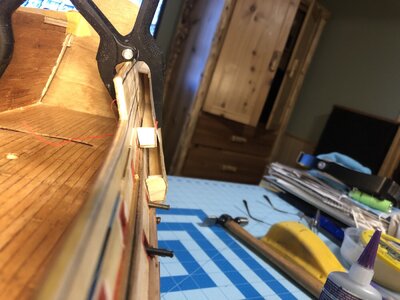
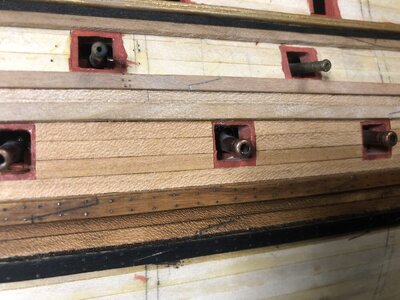
Since the side gallery parts are concave, a stick was used to push the upper gallery deck in contact with the hull surface. Trimming of the ends of the balcony walls to the proper length so they do not overlap any gun ports was done. They were cut to the length shown in the engraving. Vertical bulkheads need to be measured and fabricated.
1162 Test Fit Gallery Parts.JPG

The proportions look good.
1163 Test Fit Gallery Parts.JPG

1664591442941.png

Test fit of all the parts. Nothing is glued yet. The entire gallery assembly will be put together, but not attached to the hull yet. The stern assembly will be covered in planking, with doors and window openings added. As in Uwe's build of the Sovereign, the entire gallery assembly will be left separate until all internal decks and furnishings are complete, much later in the build. The stern assembly will help establish where the internal decks go. Because of the angle of the galleries relative to the more horizontal internal decks, it appears that access to the lower balcony will be accessed near the stern from the upper gun deck, and the upper balcony will accessed near the stern from the quarterdeck.
1164 Test Fit Gallery Parts.JPG
 
Last edited:
Kurt, to use an old term "that looks ace". I can already envisage how this is gonna look and it is GOOD Thumbsup

Kind Regards

Nigel
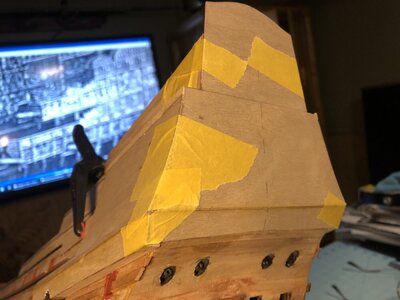
Getting the gallery shape and the curves formed. It will really look good when planked. Getting the shapes right at this stage is critical, and mistakes now would forever show in the model. This is like making cardboard sculptures in art class back in grade school. :D

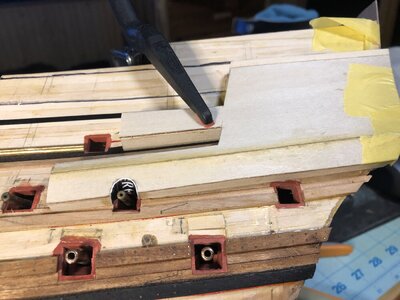
More test fitting. I couldn't make a curved thin piece of wood small enough for the gun port dome, so I used paper. Veneer planks will be added later to cover that up. Look at other areas looking for gaps. Nothing had to be perfectly gap free at this point, but things seem to be tight enough for glue joints to hold the galleries to the hull eventually.
1165 Paper Gun Port Dome ini Gallery.JPG

1166 Test Fit.JPG

1167 Test Fit.JPG

1168 Test Fit.JPG
 
Suddenly the stern work gives so much depth to the model, plenty of admiration watching someone craft something that is beond my skill level.
 
Suddenly the stern work gives so much depth to the model, plenty of admiration watching someone craft something that is beond my skill level.
Thanks Richie. I don't think it's beyond you skill level, because it's a matter of technique. Learning to do this comes from practice, so if you fear making mistakes, you stop yourself then and there. If you start with paper, you won't loose valuable wood to mistakes, and paper is easy to trim and add areas to with tape. The stern structure was broken down into several polygons which were transferred to thin plywood after you finish editing the paper pattern.

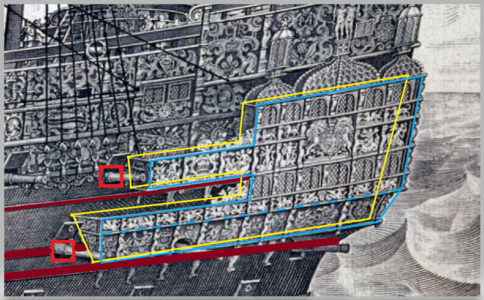
After figuring out the transom shape as viewed from the stern, copied from the Lely portrait, the side gallery parts are made starting with and estimated paper pattern, the sides were trimmed until the corner points matched positions that you locate by looking at certain landmarks on Payne's engraving such as gun ports and wales (red and brown). You then match those points on your model hull (yellow). Then, the side gallery is projected out from the side of the hull to the blue outline, with a fold at the dashed blue line.

1664677401830.png

Once the paper model looks right, then you cut it out of thin plywood, and establish how to connect the edged of the side gallery to the transom piece. Always take a complex shape and break it down into a set of simple shapes, then construct the basic structure. After that, you change parts of that structure to add the smaller shapes and features. The model becomes more complicated in appearance. After you add all the planking, windows, wooden trim and decorations, you will amaze yourself at the final result, but you have to start simple.

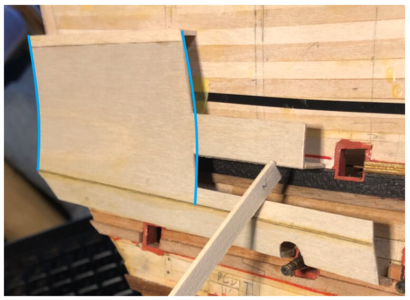
An example of how you change the shape of the side gallery pieces to match the complexity of the real ship's gallery is the curve you bend in the side gallery piece. As an example of editing the side piece, look at the wood strip that was glued to the top edge to adjust the shape to match the transom piece.
1664677973052.png
 
Last edited:
Thanks Richie. I don't think it's beyond you skill level, because it's a matter of technique. Learning to do this comes from practice, so if you fear making mistakes, you stop yourself then and there. If you start with paper, you won't loose valuable wood to mistakes, and paper is easy to trim and add areas to with tape. The stern structure was broken down into several polygons which were transferred to thin plywood after you finish editing the paper pattern.

After figuring out the transom shape as viewed from the stern, copied from the Lely portrait, the side gallery parts are made starting with and estimated paper pattern, the sides were trimmed until the corner points matched positions that you locate by looking at certain landmarks on Payne's engraving such as gun ports and wales (red and brown). You then match those points on your model hull (yellow). Then, the side gallery is projected out from the side of the hull to the blue outline, with a fold at the dashed blue line.

View attachment 331777

Once the paper model looks right, then you cut it out of thin plywood, and establish how to connect the edged of the side gallery to the transom piece. Always take a complex shape and break it down into a set of simple shapes, then construct the basic structure. After that, you change parts of that structure to add the smaller shapes and features. The model becomes more complicated in appearance. After you add all the planking, windows, wooden trim and decorations, you will amaze yourself at the final result, but you have to start simple.

An example of how you change the shape of the side gallery pieces to match the complexity of the real ship's gallery is the curve you bend in the side gallery piece. As an example of editing the side piece, look at the wood strip that was glued to the top edge to adjust the shape to match the transom piece.
View attachment 331778
Thank you for taking the time to explain the thought process it was very informative. I like the starting simple idea but as you point out the fear of stuffing up is there.Redface
 
She really looks great Kurt, now you also see the nice shape of the round tuck which is emphazised by the upper transom.

I still have the question if the upper transom of the ship was flat as drawn by McKay.
In Dutch ships the upper transom was a rounded shape and I can imagine that this wasn t the case on English ships.
A flat surfaced transom would give the visual appearence of being hollow.

Hope with all your research you have an answer to this as I will also give this magnificant ship a try in the far future :-).
 
Getting the gallery shape and the curves formed. It will really look good when planked. Getting the shapes right at this stage is critical, and mistakes now would forever show in the model. This is like making cardboard sculptures in art class back in grade school. :D

More test fitting. I couldn't make a curved thin piece of wood small enough for the gun port dome, so I used paper. Veneer planks will be added later to cover that up. Look at other areas looking for gaps. Nothing had to be perfectly gap free at this point, but things seem to be tight enough for glue joints to hold the galleries to the hull eventually.
View attachment 331665

View attachment 331666

View attachment 331667

View attachment 331668
I had to cover my gallery with bling to ameliorate the effects of the mistakes of the galleries.
 
I had to cover my gallery with bling to ameliorate the effects of the mistakes of the galleries.
As long as the bling looks good, you can cover up a lot of flaws. There will ALWAYS be flaws. It is said that experts are very good at hiding them. Since this is my second model, some will be visible no matter what, but at this stage in my learning of this art form, I and more than satisfied with how things are turning out. I certainly did not originally plan on modelling three internal decks and rooms inside the stern castle when I started. My goal was originally far shorter than that, being just a better made external model than La Couronne only. I just got carried away. :D I'm really going to enjoy peering in the gallery windows with the LED's on when the model is finished! Like I said before, I still stop and look at La Couronne in the case every time I walk past it on the way to my room each day and smile at the result. I re-live the joy of seeing the man of war daily. If only it didn't take several years to make these models, I'd make a lot more of them! Unfortunately my son has more Pokemon cards than I'll ever have ship models...
 
She really looks great Kurt, now you also see the nice shape of the round tuck which is emphazised by the upper transom.

I still have the question if the upper transom of the ship was flat as drawn by McKay.
In Dutch ships the upper transom was a rounded shape and I can imagine that this wasn t the case on English ships.
A flat surfaced transom would give the visual appearence of being hollow.

Hope with all your research you have an answer to this as I will also give this magnificant ship a try in the far future :).
I'm going to try putting some curvature into the upper transom. Since the structure is complex in shape, simply bending the transom will not work, but adding strips in gaps formed when the transom is bent. I saw another model that has a slightly curved transom, and it looks much better. There are subtle clues in the horizontal lines of decorations in the Lely painting which hit at some curvature, but only a subtle curve.
 
Really nice progress, Kurt.
I am happy that there are no 3D milled decorations on the market in 1/48 or 1/64 available. So I will not try to build a model of this beautyful ship.
If there were ACCURATE decorations from any source for this ship, I would save my pennies and buy them. Unfortunately, they do not exist. All model kit companies have made serious simplifications or massive substitutions for the symbols and decorations that adorn this vessel, mostly because of cost cutting in both material, development and design, and production. The Chinese came closest with their CNC carved set which is no longer available, but the style of some of the human figure carvings was profoundly Chinese, not old English. The sad truth is, we have to carve or 3-D print our own to get them correct and accurate.
 
Back
Top