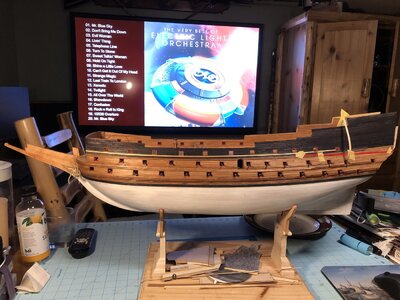
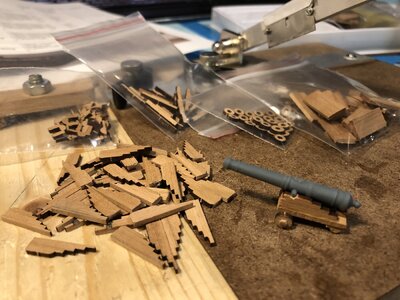
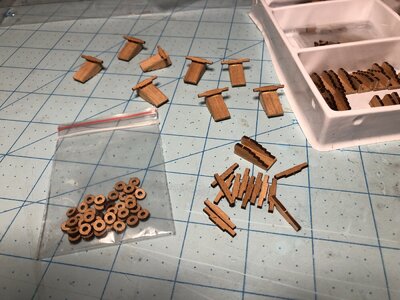
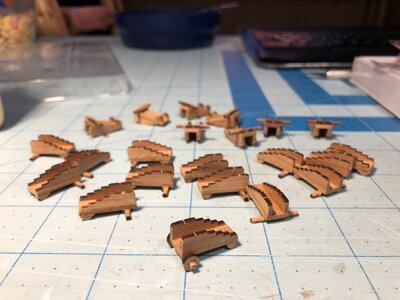
It really is the same ship.I really like the tone of white in the first two pics of your post. The second two shots however seem to be much whiter?
-

Win a Free Custom Engraved Brass Coin!!!
As a way to introduce our brass coins to the community, we will raffle off a free coin during the month of August. Follow link ABOVE for instructions for entering.
-

PRE-ORDER SHIPS IN SCALE TODAY!
The beloved Ships in Scale Magazine is back and charting a new course for 2026!
Discover new skills, new techniques, and new inspirations in every issue.
NOTE THAT OUR FIRST ISSUE WILL BE JAN/FEB 2026
You are using an out of date browser. It may not display this or other websites correctly.
You should upgrade or use an alternative browser.
You should upgrade or use an alternative browser.
HMS Sovereign of the Seas - Bashing DeAgostini Beyond Believable Boundaries
- Thread starter DARIVS ARCHITECTVS
- Start date
- Watchers 105
I do washes with a brush, more control on where you want to concentrate the darker areas. Consistency is not realistic.
On another note. I am familiar with drop planks at the bow, but have never seen more than one drop plank intersecting another plank. You had a plank that looked like a lightning bolt because it had multiple drop planks intersecting it. I am not sure this is correct? However I really like the end result, and painted it kind of disappears.
On another note. I am familiar with drop planks at the bow, but have never seen more than one drop plank intersecting another plank. You had a plank that looked like a lightning bolt because it had multiple drop planks intersecting it. I am not sure this is correct? However I really like the end result, and painted it kind of disappears.
I used a foam brush, and mix some black and some white enamel paint in paint thinner. After application, the grey paint congealed in seconds into a fine, spotty texture pattern. The remaining paint in the foam was squeezed out into a rag, then the texture was smeared along the plank lines with the moist foam until it began to dry, leaving the grey stained effect you saw in the photos. Basically, I was making it up as I went. Any attempts to add color to light areas after the wash was almost to dry cleaned all the grey off. After a few redo's (yeah, several redo's), the grey wash was consistent enough to be acceptable. What made it really difficult was that the painted surface was sealed with Krylon Satin Finish, so there were no pores left to hold the grey, so the grey sat on top of the finish and seeped into some plank seams that were still unfilled. Anyhow, it's as good as it's going to be.I do washes with a brush, more control on where you want to concentrate the darker areas. Consistency is not realistic.
On another note. I am familiar with drop planks at the bow, but have never seen more than one drop plank intersecting another plank. You had a plank that looked like a lightning bolt because it had multiple drop planks intersecting it. I am not sure this is correct? However I really like the end result, and painted it kind of disappears.
As for the drop planks, yes the expansion of the hull surface from bow going aft combined with the narrow 4mm planks made it necessary to splice in drop planks in close proximity. Hey.. it's only my second hull after all.
Well I think you did a great job on all accounts! Keep up the good work.I used a foam brush, and mix some black and some white enamel paint in paint thinner. After application, the grey paint congealed in seconds into a fine, spotty texture pattern. The remaining paint in the foam was squeezed out into a rag, then the texture was smeared along the plank lines with the moist foam until it began to dry, leaving the grey stained effect you saw in the photos. Basically, I was making it up as I went. Any attempts to add color to light areas after the wash was almost to dry cleaned all the grey off. After a few redo's (yeah, several redo's), the grey wash was consistent enough to be acceptable. What made it really difficult was that the painted surface was sealed with Krylon Satin Finish, so there were no pores left to hold the grey, so the grey sat on top of the finish and seeped into some plank seams that were still unfilled. Anyhow, it's as good as it's going to be.
As for the drop planks, yes the expansion of the hull surface from bow going aft combined with the narrow 4mm planks made it necessary to splice in drop planks in close proximity. Hey.. it's only my second hull after all.
Thanks buddy!Well I think you did a great job on all accounts! Keep up the good work.
The first set of barrels came in the mail today many days after the post office messaged up that they were delivered. WTF!  I asked Kris (@SZKUTNIK) not to send the second set of barrels if he hasn't started 3-D print them yet. Imagine how screwed up the post office will be come Christmas time. THANK YOU KRIS! These barrels are accurate to HMS Sovereign of the Seas in markings and size, and will going the following locations:
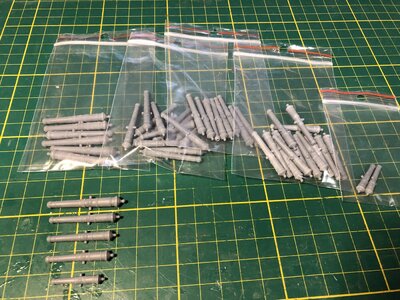
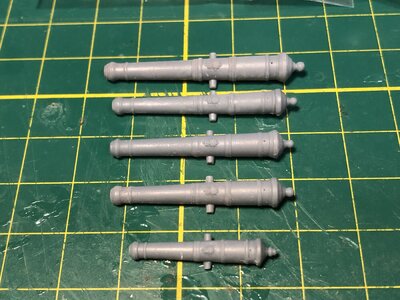
Look at the detail! Even the touchholes are there! I hope I can paint them without blurring any details. The grid is in cm.
 I asked Kris (@SZKUTNIK) not to send the second set of barrels if he hasn't started 3-D print them yet. Imagine how screwed up the post office will be come Christmas time. THANK YOU KRIS! These barrels are accurate to HMS Sovereign of the Seas in markings and size, and will going the following locations:
| Quantity | Location from Bow | Gun Type | Actual Length | Desired Barrel Length 1:84 Scale (not including cascable) |
| feet | mm | |||
| Upper Deck | ||||
| 4 | Bow Chase | Fortified Demi Culverin | 10 | 36.2 |
| 6 | 1-3 Broadside | Demi-culverin Drake | 8 | 29 |
| 8 | 4-7 Broadside | Demi-culverin Drake | 9 | 32.6 |
| 4 | 8-9 Broadside | Demi-culverin Drake | 8.5 | 30.7 |
| 4 | 10-11 Broadside | Demi-culverin Drake | 8 | 29 |
| 2 | Stern Chase | Fortified Demi Culverin | 10 | 36.2 |
| Forecastle | ||||
| 4 | Bow Chase | Demi-culverin Drake | 9 | 32.6 |
| 2 | 1 Broadside | Demi-culverin Drake | 8 | 29 |
| 2 | 2 Broadside | Demi-culverin Drake | 8.5 | 30.7 |
| Quarterdeck | ||||
| 2 | 1 Broadside | Demi-culverin Drake | 9 | 32.6 |
| 2 | 2 Broadside | Demi-culverin Drake | 8.5 | 30.7 |
| 2 | 3 Broadside | Demi-culverin Drake | 8 | 29 |
| Poop deck | ||||
| 2 | Broadside | Demi-culverin Drake Cutt | 6 | 21.7 |
| Total = 44 guns |

Look at the detail! Even the touchholes are there! I hope I can paint them without blurring any details. The grid is in cm.

I would airbrush the base color, and then dry brush the highlights. You shouldn’t lose any detail that way. 
Sorry you had to do that extra work, Kris. Hope you had a good lunch, though!Ahoy!
The second set of barrels has been printed. If somebody needs...... in shipping price.
On the private order we can print hull (3D Print) for the model Sovereign of The Seas in every scale :--)
Holes for the eyebolts for gun tackles and breaching ropes for gun carriages on the upper gun deck were drilled through the bulwarks. A jig was made to drill the holes on either side of each gun port. Then black, finish planks were applied to the starboard side of the hull all the way up to the poop deck.
Jigs for the lower and middle gun deck and the upper gun deck.
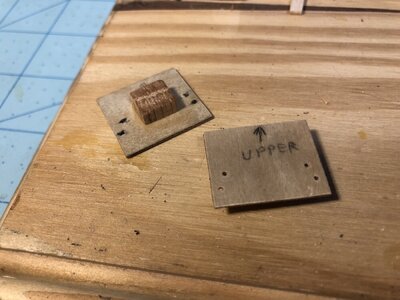
The jig can be used from inside or outside the bulwark. Some holes had to be drilled from the inside using an Archimedes drill to avoid the gold decorative strip on the outside of the hull.
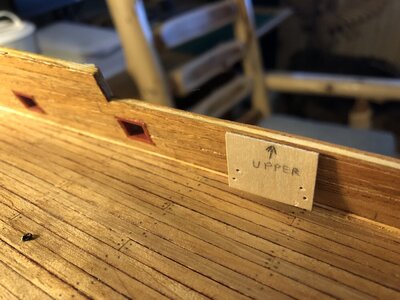
Finish planking on the starboard side.
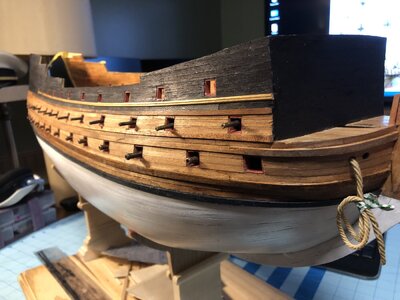
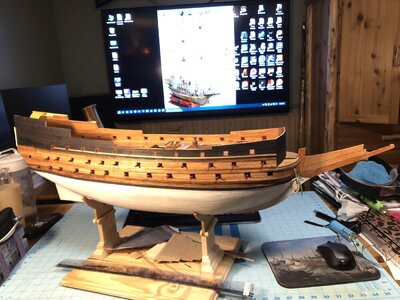
Jigs for the lower and middle gun deck and the upper gun deck.

The jig can be used from inside or outside the bulwark. Some holes had to be drilled from the inside using an Archimedes drill to avoid the gold decorative strip on the outside of the hull.

Finish planking on the starboard side.


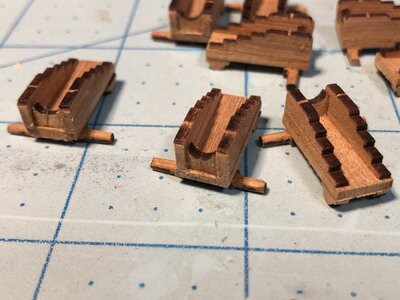
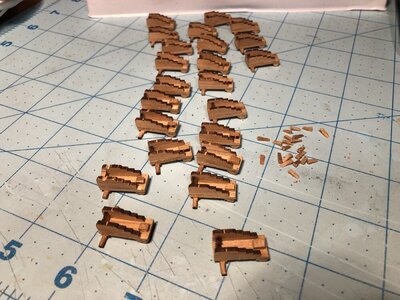
Today I planned the carriage types and locations for the upper gun deck, top deck of the forecastle, halfdeck, and quarterdeck.
Placement of Gun Barrels
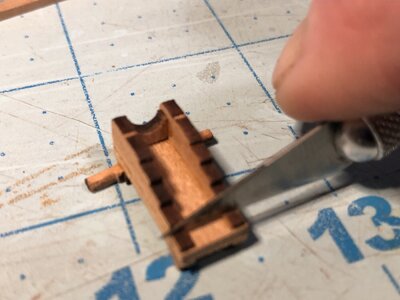
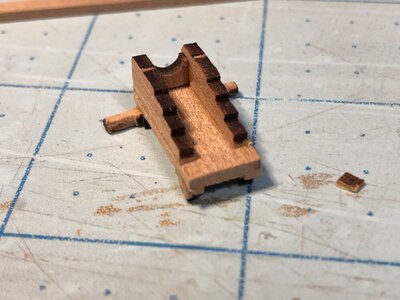
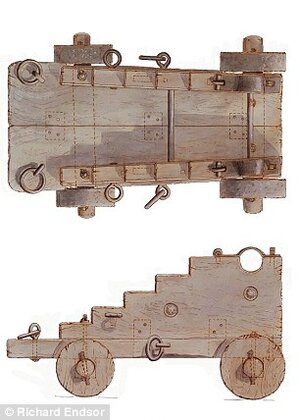
Carriages are two types, a standard marine carriage with four trucks and one with a skid on the rear. A dolly with two separate wheels would have been placed under the skid of the guns needed to be moved to other gun ports on the deck. Next is to design and make more carriages in three basic sizes for the barrels listed above.
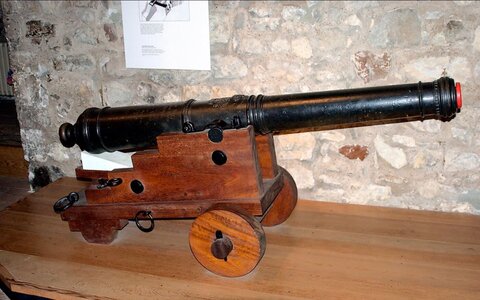
Placement of Gun Barrels
| Quantity | Location from Bow | Gun Type | Actual Length ft. | Barrel Length (mm) 1:84 Scale (not including cascabel) | Parts Storage Bin | Number of Carriage Trucks |
| Upper Gun Deck | ||||||
| 4 | Bow Chase | Fortified Demi-Culverin | 10 | 36.2 | 1 | 2 |
| 6 | 1-3 Broadside | Demi-culverin Drake | 8 | 29 | 4 | 2 |
| 8 | 4-7 Broadside | Demi-culverin Drake | 9 | 32.6 | 2 | 2 |
| 4 | 8-9 Broadside | Demi-culverin Drake | 8.5 | 30.7 | 3 | 2 |
| 4 | 10-11 Broadside | Demi-culverin Drake | 8 | 29 | 4 | 2 |
| 2 | Stern Chase | Fortified Demi-Culverin | 10 | 36.2 | 1 | 2 |
| Top Forecastle | | |||||
| 4 | Bow Chase | Demi-culverin Drake | 9 | 32.6 | 2 | 2 |
| 2 | 1 Broadside | Demi-culverin Drake | 8 | 29 | 4 | 2 |
| 2 | 2 Broadside | Demi-culverin Drake | 8.5 | 30.7 | 3 | 2 |
| 2 | Inboard Facing Aft | Culverin Cutt | 6 | 21.7 | Kit | 4 |
| Halfdeck | | |||||
| 2 | 1 Broadside | Demi-culverin Drake | 9 | 32.6 | 2 | 2 |
| 2 | 2 Broadside | Demi-culverin Drake | 8.5 | 30.7 | 3 | 2 |
| 2 | 3 Broadside | Demi-culverin Drake | 8 | 29 | 4 | 2 |
| 4 | Inboard Facing Forward | Culverin Cutt | 6 | 21.7 | Kit | 4 |
| Quarterdeck | | |||||
| 2 | Broadside | Demi-culverin DrakeCutt | 6 | 21.7 | 1 | 2 |
| 2 | Inboard Facing Forward | Culverin Cutt | 6 | 21.7 | Kit | 4 |
Carriages are two types, a standard marine carriage with four trucks and one with a skid on the rear. A dolly with two separate wheels would have been placed under the skid of the guns needed to be moved to other gun ports on the deck. Next is to design and make more carriages in three basic sizes for the barrels listed above.


Last edited:
What's your plan for finishing the gun barrels? Were they bronze?
Yes, I have to prime and paint them bronze.What's your plan for finishing the gun barrels? Were they bronze?
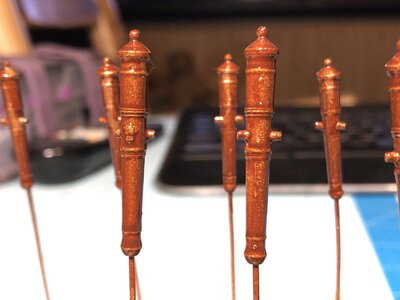
I'm not a painting professional, and this work proves it. I was just making it up as I went along, but the results are good enough. I had three types of bronze spray paint to work with. After priming the barrels with acrylic primer using the air brush, I selected the paint can on the right since it seemed to have the best coverage and was dark enough. The one on the left had more clear varnish in it that pigment, and the one in the center was closer to gold than red bronze, but had good coverage. After spray painting 22 barrels of various sizes for the upper gun deck, a wash of brown and black diluted with thinner was used to further darken the barrels and bring out the details a bit.
Test sample each paint. I liked the one one the right the best. The center and right ones had visible metallic glitter in them, and the one on the left was drab and not very metallic, and had poor coverage with pigment compared to the others..
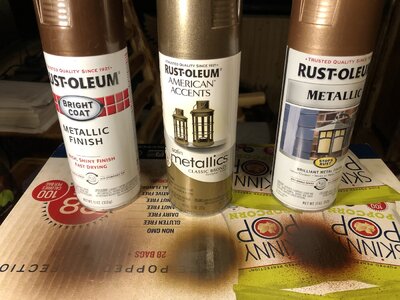
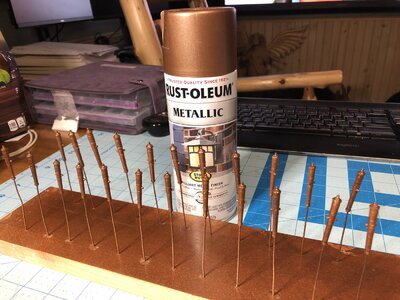
I already had some thinner polluted with brown paint, So I added two drops of black enamel and went with it for a wash.
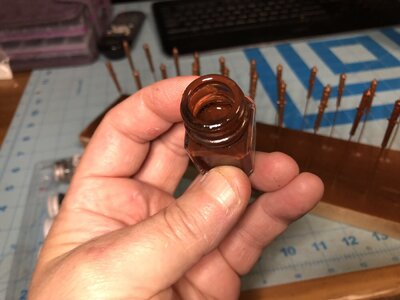
Two barrels on the right have wash applied.
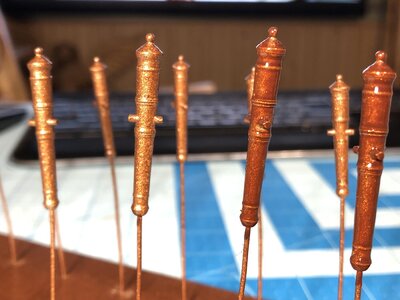
The barrels appear glossy, perhaps too much, but they'll work. The paint is still wet here, so the details look gloopy. After the paint dried, however, the paint coating thinned and the details became sharper.
Test sample each paint. I liked the one one the right the best. The center and right ones had visible metallic glitter in them, and the one on the left was drab and not very metallic, and had poor coverage with pigment compared to the others..


I already had some thinner polluted with brown paint, So I added two drops of black enamel and went with it for a wash.

Two barrels on the right have wash applied.

The barrels appear glossy, perhaps too much, but they'll work. The paint is still wet here, so the details look gloopy. After the paint dried, however, the paint coating thinned and the details became sharper.

Last edited:
Looks good to me Kurt.I'm not a painting professional, and this work proves it. I was just making it up as I went along, but the results are good enough. I had three types of bronze spray paint to work with. After priming the barrels with acrylic primer using the air brush, I selected the paint can on the right since it seemed to have the best coverage and was dark enough. The one on the left had more clear varnish in it that pigment, and the one in the center was closer to gold than red bronze, but had good coverage. After spray painting 22 barrels of various sizes for the upper gun deck, a wash of brown and black diluted with thinner was used to further darken the barrels and bring out the details a bit.
Test sample each paint. I liked the one one the right the best. The center and right ones had visible metallic glitter in them, and the one on the left was drab and not very metallic, and had poor coverage with pigment compared to the others..
View attachment 346000
View attachment 346001
I already had some thinner polluted with brown paint, So I added two drops of black enamel and went with it for a wash.
View attachment 346002
Two barrels on the right have wash applied.
View attachment 346003
The barrels appear glossy, perhaps too much, but they'll work. The paint is still wet here, so the details look gloopy. After the paint dried, however, the paint coating thinned and the details became sharper.
View attachment 346004
You can always dry brush a lighter color to bring out the detail more, or give them an aged look. Mainly just to highlight any areas you want to stand out more.
Not sure if you are familiar with the technique? I normally put paint on the brush and wipe it off on a paper towel until it’s almost dry, then lightly hit the high edges with the brush. It requires multiple applications to get the desired accents. It’s a technique that requires patience and care. If you have too much paint on the brush it will get on more than the high surfaces. So make sure the brush is almost dry. I sometimes use a sacrificial piece to test on. But you can get a feel for when you have enough paint after a while. You don’t want to thin your paint too much or it will be harder to accomplish. Hope that helps.
Last edited:


