HMS Sovereign of the Seas - Bashing DeAgostini Beyond Believable Boundaries

Well, the paint on the barrels never dried and remained sticky. So, I stripped it all off with xylene and repainted them. Perhaps the diluted paint with thinner prevented curing of the paint. Staring over, the barrels look more like speckled glittery dark copper now. Lets see if these dry properly.
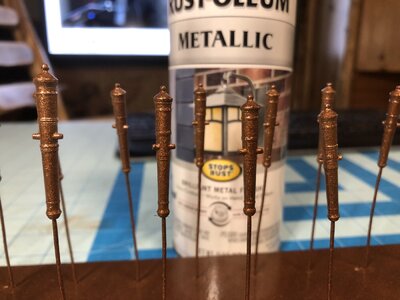
1325 Barrels Repainted Because First Paint did not Cure.JPG

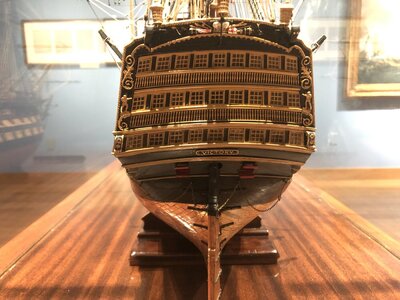
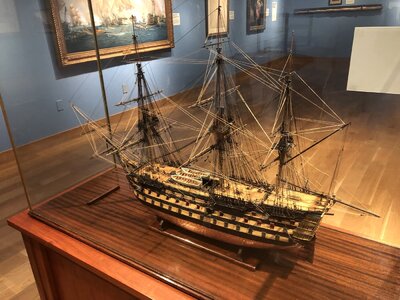
A friend and I visited the Minnesota Marine Art Museum in Winona, MN today, hoping to see lots of ship models. But, we were disappointed to find that aside from some maritime related paintings and ONE SHIP MODEL of HMS Victory, all there was on display was a bunch of abstract "art somehow related to the topic of water" as they put it. WTF. Pretty disappointing after a three hour long drive. I did take pictures of all the objects of interest to us here.

The most interesting thing, was that someone stole Lord Admiral Nelson's washing sink and put it here.
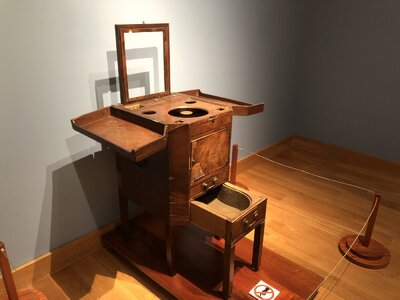
IMG_2011.JPG

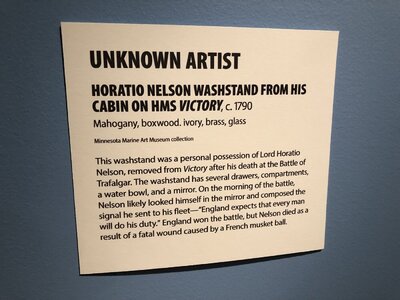
Don't tell the Brits or they may want it back...
IMG_2010.JPG

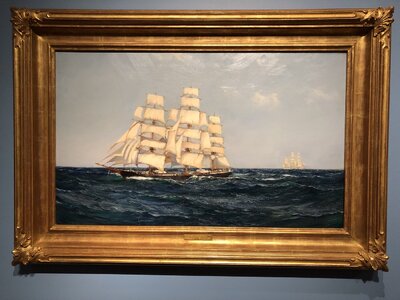
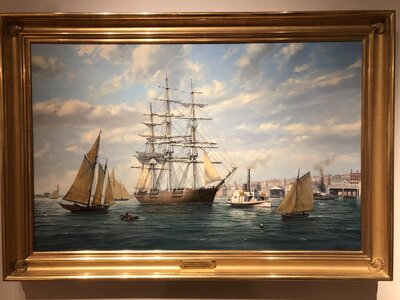
Here are some nice paintings.
IMG_2007.JPG

IMG_2005.JPG

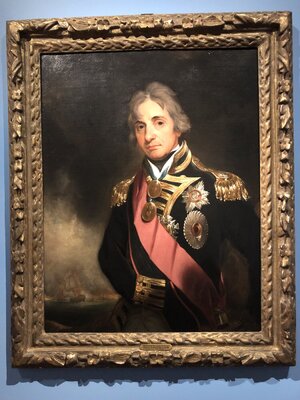
Lord Nelson.
IMG_2008.JPG

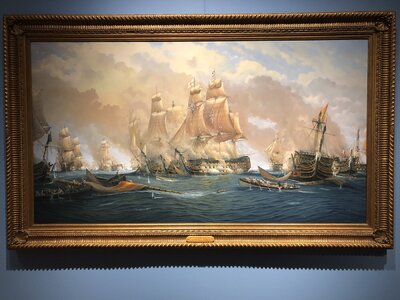
Battle of Trafalgar.
IMG_2009.JPG

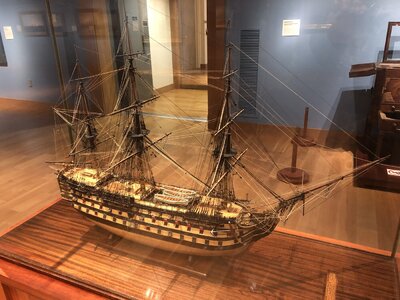
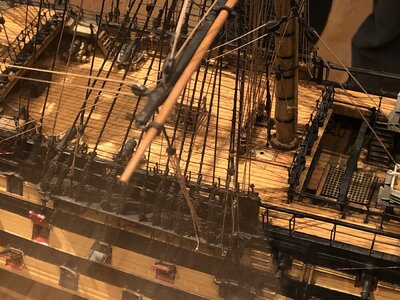
The only model they had. Several gun port lids were broken and there were no gun port lanyards or gun tackles. Copper sheathed on only one half of the hull. Unfinished model perhaps?
IMG_2013.JPG

IMG_2014.JPG

IMG_2015.JPG

IMG_2016.JPG
 
Well, the paint on the barrels never dried and remained sticky. So, I stripped it all off with xylene and repainted them. Perhaps the diluted paint with thinner prevented curing of the paint. Staring over, the barrels look more like speckled glittery dark copper now. Lets see if these dry properly.
View attachment 346220

A friend and I visited the Minnesota Marine Art Museum in Winona, MN today, hoping to see lots of ship models. But, we were disappointed to find that aside from some maritime related paintings and ONE SHIP MODEL of HMS Victory, all there was on display was a bunch of abstract "art somehow related to the topic of water" as they put it. WTF. Pretty disappointing after a three hour long drive. I did take pictures of all the objects of interest to us here.

The most interesting thing, was that someone stole Lord Admiral Nelson's washing sink and put it here.
View attachment 346221

Don't tell the Brits or they may want it back...
View attachment 346222

Here are some nice paintings.
View attachment 346223

View attachment 346225

Lord Nelson.
View attachment 346226

Battle of Trafalgar.
View attachment 346227

The only model they had. Several gun port lids were broken and there were no gun port lanyards or gun tackles. Copper sheathed on only one half of the hull. Unfinished model perhaps?
View attachment 346228

View attachment 346229

View attachment 346230

View attachment 346231
Good morning Kurt. So that where Nelson’s washing basin went…ROTF. I must say it is a sad rendition of the Victory for a museum model. I use the rustoleum paint for some metal anpplications and I have noticed that if there is a primer first or any thinning process they take fore ever to dry and the white remains almost tacky. Cheers Grant
 
Good morning Kurt. So that where Nelson’s washing basin went…ROTF. I must say it is a sad rendition of the Victory for a museum model. I use the rustoleum paint for some metal anpplications and I have noticed that if there is a primer first or any thinning process they take fore ever to dry and the white remains almost tacky. Cheers Grant
That seems to be my current problem, Grant. I wonder how long it will take for the tackiness to go away?
 
I don’t think oil based paint on plastic cures as fast as water based paint. Some plastics or vinyls will prevent the oil base from curing. In addition the thickness of the paint factors in.
I recommended airbrushing with water based paints made for an airbrush. And then dry brushing with water based paints. After which you can clear coat with satin or matte water based clear.
These days I avoid oil based paints due to fumes and needing thinner to clean equipment and brushes. In addition, a spray can puts paint on thick, too thick for tiny parts with detail. An airbrush can put a very thin coat of paint, even a fine mist. This is why camouflage is typically done with an airbrush. Just some things to consider.
The primer was water based acrylic. Maybe I made the coat too thick. Remember, I posted earlier that I am not a professional at painting...
I am still experimenting. I do have some Tamiya bronze enamel in a small jar instead of a spray can. I could try using an air brush with that, and clean the airbrush with xylene after that. Enamel is very hard stuff once it cures.
 
The paint has lots of gloss as a base, and it's taking a lot time to harden. It is harder than yesterday, but still a bit tacky to the touch.
Good morning Kurt. I use the ones with the “Flat” colouring (e.g Flat Black ir Flat white) these come out more Matt . They do include a priming agent in them so I don’t put any primer on first. I only use these on my metal parts. Do stick to brass too well unless you scuff the brass first
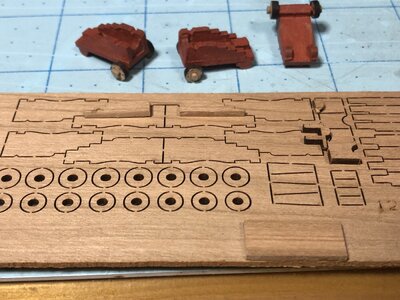
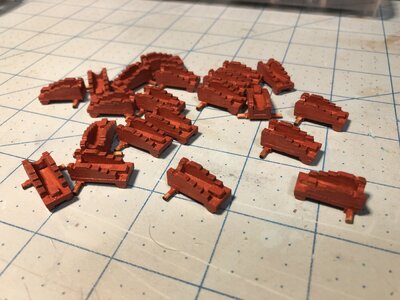
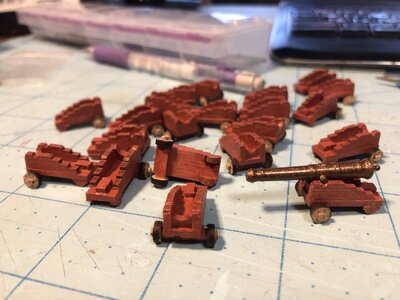
Some more work was done on the 22 gun carriages for the upper gun deck. The carriages were painted.
View attachment 346403

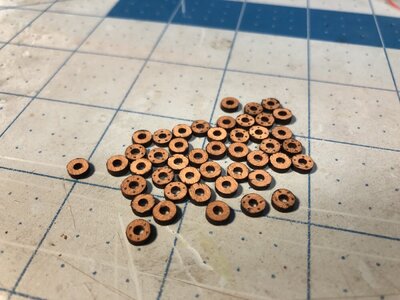
Bolt heads were marked on the trucks with mechanical pencil, and the rims were blacked with Sharpie pen to simulate iron.
View attachment 346404

The trucks were then glued to the axles. and the axles ends were sanded to proper length.
View attachment 346405
Question : those trucks. How did you cut them all so even? I’m going to make cannon carriages on my next model and when I practice one comes out 2mm the next 1.5mm. ? Cheers Grant
 
Good morning Kurt. I use the ones with the “Flat” colouring (e.g Flat Black ir Flat white) these come out more Matt . They do include a priming agent in them so I don’t put any primer on first. I only use these on my metal parts. Do stick to brass too well unless you scuff the brass first

Question : those trucks. How did you cut them all so even? I’m going to make cannon carriages on my next model and when I practice one comes out 2mm the next 1.5mm. ? Cheers Grant
Answer: I cheated. Long ago, I bought a huge pile of laser cut cannon carriages from Dave at The Lumberyard. He sent me samples, and I picked the sizes required to outfit this model and the Panart San Felipe. The last time, I used a different process, which is shown in the La Couronne build log HERE. Since no one makes 17th century style carriages, these 19th century ones were used as raw material for scratch building them. A different method was used to make carriages for HMS Sovereign of the Seas. Take a look below for how that was done.

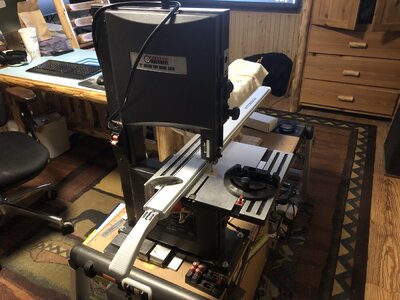
Because my shop outside in the pole shed is currently 0 degrees F. (-17 C), I use this cheap little band saw for all my ship work in Winter, right here where is sits on the bench next to my desk. A portable battery powered hand vacuum cleans up the mess after I'm done cutting. The saw is from Harbor Freight (China). You don't need a super expensive band saw if you know how to tune one, and this one cuts planks thinner, shapes small parts, and is accurate enough for cutting multiple pieces the same every time. You have to make the slotted part that the blade moves through in the table from wood, so small the blade slot is small and the saw doesn't eat tiny delicate parts.
1331 Band Saw for Model Work.jpg

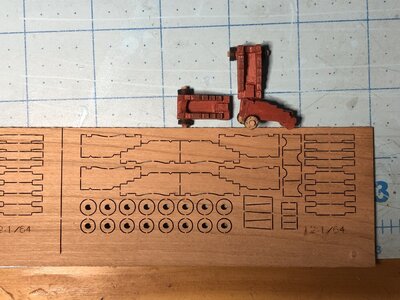
Dave's cannon kits are made from high quality fine grained hardwood.
1329 Original Laser Cut Carriages next to Modified Ones.jpg

You can see the modified parts and where they were taken from the carriage kit. Parts were also made from wood you would normally scrap, including the rear truck skids and the bolster, shown at the bottom. The cheeks were batch cut in the band saw to reduce length and height. Because the stepped sections were already part of the kit, a lot of time scratch building the cheeks was saved. I scratched built over have the carriages on my previous model, so I can tell you that time savings was worth it. The smaller trucks, usually used at the rear of the carriage, were selected for these half truck carriages for the front trucks. The transoms were sanded down to reduce their width, and chopped with a razor chopper to reduce their height, and the wood that was chopped away from the transom became the traversing plate, which is under the quoin. Waste not, want not. All parts were assembled with PVA. The next steps are to install eyelets and rings for the breech lines, gun tackles, and train tackles, install the gun barrels, quoins and caps, and rig breeching lines and gun tackles.
1330 Modified Carriage Parts from Laser Cut Kits.jpg
 
Last edited:
I have always found metallic spray and model paints to be too out of scale, unless you want to go full monty using ALCLAD, which is arguably the best way to get a perfect metallic finish. I recommend a buffable paste like AK Interactive's True Metal. Inexpensive, easy to apply and easy to cleanup. Should have no trouble getting a good finish on primed resin.
 
Well Kurt the carriages are great and the canons, while being very sparkly and pretty seem to have overshot what a bronze canon would look like in my mind's eye.
I'm no paint expert, in fact I hate painting anything, but it seems the lacquer finish could be the culprit. Sorry just being honest.
 
I have always found metallic spray and model paints to be too out of scale, unless you want to go full monty using ALCLAD, which is arguably the best way to get a perfect metallic finish. I recommend a buffable paste like AK Interactive's True Metal. Inexpensive, easy to apply and easy to cleanup. Should have no trouble getting a good finish on primed resin.
A local hobby store owner also recommended ALCLAD, so I ordered some cold and copper ALCLAD 2. I'm eager to try it out with the airbrush!
 
Well Kurt the carriages are great and the canons, while being very sparkly and pretty seem to have overshot what a bronze canon would look like in my mind's eye.
I'm no paint expert, in fact I hate painting anything, but it seems the lacquer finish could be the culprit. Sorry just being honest.
Yeah, I'm going to change the paint and improve it. No sense in having an eyesore on a ship that has so much work into it. Thanks for providing honest, useful advice. It's a rare thing. People don't want to sound critical, even after you tell them that's what you NEED to improve your project! :D Thumbsup Thanks Dan!
 
A local hobby store owner also recommended ALCLAD, so I ordered some cold and copper ALCLAD 2. I'm eager to try it out with the air brush.
when Air brushing use light applications, never try to achieve full cover in one coat. Allow adequate drying time between coatings. So several thin applications will give better over-all finish. I know it sounds like time wasting + cleaning time but the end result will be perfect. Gold and Bronze should be fairly translucent perhaps a solid colour base coat (thin) would assist. Personally, and I don't mean to lecture an experienced person like yourself or contradict other inputs and given advice, but after washing off the previous paint job I'd thoroughly wash the cannons with hot soapy water, let dry then shade the cannons with black, Sand off as much as possible using very worn out 400/600 grit sand paper or 000/0000 Steel wool to emphasise and highlight the insignia etc "then apply the Gold/Bronze in very thin applications. Thin layers and minimal micron thickness. - Not saying that's what you need/have to do but that's what my method would be and a suggestion only to you. Cheers
 
ConsNZ, like I posted earlier, I am a rank amateur at spray painting. So, please.. don't hesitate to offer advice. I welcome it. Hell, I was begging for it. Each of us are skilled in different ways, and also have areas that need improvement. People's methods will be different, and one may think them contradictory, but they all work for them. I'll get some black primer, try your method out, and go with thin coats, because that's one thing I know I need to improve on, being admittedly impatient when it comes to painting. I'm sure the results will be better. Thanks for being brave enough to offer your advice. When other members like yourself do, that's when I truly learn. It sure beats all the redo's. The barrels can be stripped of paint easily and redone. For this step, getting the right paint and the right technique are key for someone who has no idea how to paint or use an airbrush. Thanks again! :D Thumbsup
 
Back
Top