
There are but I have not seen the inhaul presented in the ships before my stolling of builds. RIchYeah but isn't there an in-haul and out-haul on every cannon?

-

SUBSCRIBE TO SHIPS IN SCALE TODAY!
The beloved Ships in Scale Magazine is back and charting a new course for 2026!
Discover new skills, new techniques, and new inspirations in every issue.
NOTE THAT OUR NEXT ISSUE WILL BE July/August 2026 -

Win a Free Custom Engraved Brass Coin!!!
As a way to introduce our brass coins to the community, we will raffle off a free coin during the month of August. Follow link ABOVE for instructions for entering.
You are using an out of date browser. It may not display this or other websites correctly.
You should upgrade or use an alternative browser.
You should upgrade or use an alternative browser.


- Joined
- Mar 27, 2019
- Messages
- 831
- Points
- 403

There are but I have not seen the inhaul presented in the ships before my stolling of builds. RIch
Check out my Rattlesnake build. It was quite the cramped deck but I have both in-haul and out-haul tackle as well as the breech rope. Maybe I over did it?
I will have to keep scrolling up in my two days of alerts to see those guns. RichCheck out my Rattlesnake build. It was quite the cramped deck but I have both in-haul and out-haul tackle as well as the breech rope. Maybe I over did it?
- Joined
- Mar 27, 2019
- Messages
- 831
- Points
- 403
I will have to keep scrolling up in my two days of alerts to see those guns. Rich
Hahahaha, I'm a prolific poster for sure. Rattlesnake is up to 29 pages with several masts to go. Just click on the hyperlink under my signature.
That’s a very good idea, I will keep this in mind for future builds. I found the cat heads on my Bluenose got mangled too frequently until I removed them as well. Leaving them and anchors off until I’ve finished the rigging.Proper cannon mounted on all larboard side gun ports. For now I'm not mounting the gun port covers, I've found that they get in the way and I always end up knocking most of them off as I'm working on the rest of the ship. For now I only have the lanyards mounted and at some point I'll mount the already completed gun port covers.
View attachment 198148
- Joined
- Mar 27, 2019
- Messages
- 831
- Points
- 403
That’s a very good idea, I will keep this in mind for future builds. I found the cat heads on my Bluenose got mangled too frequently until I removed them as well. Leaving them and anchors off until I’ve finished the rigging.
I did one of the open gun ports to completion, just not adding any glue. It's what NASA calls a "proof of concept". Now I know that when I do decide to install the completed gun port covers there exists a method to get it done properly.
The top hole is the secured lanyard that will attach to the center rope attached to both sides of the gun port cover. The other two holes are for pins sunk into the edge of the gun port cover that will be glued to the side of the ship. The pins strengthen the bond.
The other pic is the completed gun port cover. Obviously I need to do some additional work as under magnification it looks uneven and sloppy. I'm working this out to but this is it, just use your imagination on an improved cover much more even on both ends.


hi from Spain. Yes, you are right, that nearly all kits manufacturers in their manuals say "INSERT THE DECKS " which in my point of view is wrong, as the close the hull, so no re-forsment and other things cannot be done on the inside. I have a filling, that is for trying to hold the bulkheads square, but today there are others and better ways for that. You, yourselves is adding square wooden blocks. I used -when building - some square pieces bought in my local shop- absolutely 90º square o plastic. Can be glued in place with carpenter glue /for easy take out later, if needed) or each side has two holes, so a screw can be inserted and later unscrewed. the build looks well into nowFalse deck installed for the gun deck. There will be another false deck for the quarterdeck and one for the forecastle as well. These laser cut basswood plywood false decks are cut almost perfect. Just a little trimming around a few of the bulkheads. Now that it's installed the whole structure feels very solid. I used carpenter's glue and some small nails driven halfway in at strategic locations. Now that the glue is dry they nails came right out. Next step, believe it or not, according to the plans is to install deck planks for the gun deck.
View attachment 169086
if this is your 1Th build I am extremely surprised. As we said in the Navy- WELL DONE MATE:Yeah as it was my first ship it never occurred to me to bash the kit in any way. If I had to do it over again I'd at the very least go with premium blocks. But by and large I really like the quality of Mamoli quality.
I used the Model Shipways Prussian Blue, which they don't sell anymore. It should have been the medium blue but I liked the darker shade.
clever guy. inserting the rope for the gunports from inside, and not as many iI did one of the open gun ports to completion, just not adding any glue. It's what NASA calls a "proof of concept". Now I know that when I do decide to install the completed gun port covers there exists a method to get it done properly.
The top hole is the secured lanyard that will attach to the center rope attached to both sides of the gun port cover. The other two holes are for pins sunk into the edge of the gun port cover that will be glued to the side of the ship. The pins strengthen the bond.
The other pic is the completed gun port cover. Obviously I need to do some additional work as under magnification it looks uneven and sloppy. I'm working this out to but this is it, just use your imagination on an improved cover much more even on both ends. View attachment 198430
View attachment 198428
I hahe seen glue to the hull from outside.
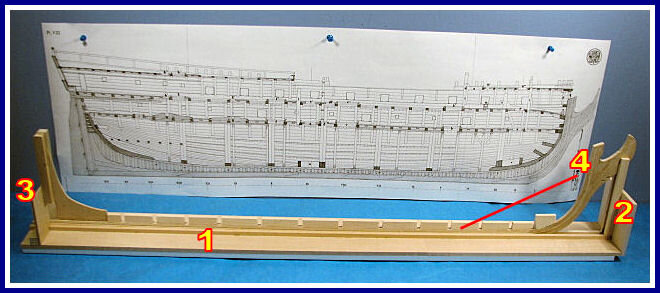
I went to the wrong page. This is the Start and looks well untill now - I am missing the Bow, Stern parts and the KEEL- to be glued onto the false keel before adding the bulkheads, and do not forget to make the garboard.All bulkheads installed and square. I stock piece of square basswood on either side of each bulkhead glued with CA after sliding the bulkheads into place with carpenter's glue will ensure the squareness. Good quality plywood nice and thick.
View attachment 167465View attachment 167466View attachment 167467
Attachments
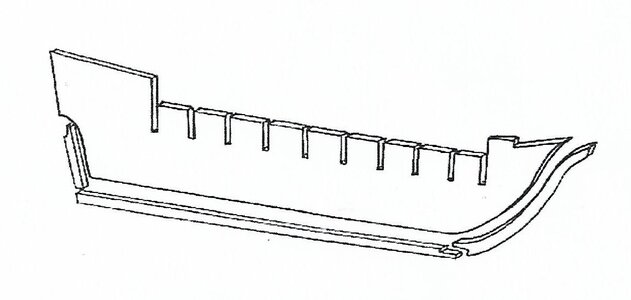
False deck installed for the gun deck. There will be another false deck for the quarterdeck and one for the forecastle as well. These laser cut basswood plywood false decks are cut almost perfect. Just a little trimming around a few of the bulkheads. Now that it's installed the whole structure feels very solid. I used carpenter's glue and some small nails driven halfway in at strategic locations. Now that the glue is dry they nails came right out. Next step, believe it or not, according to the plans is to install deck planks for the gun deck.
View attachment 169086
Inserting the Deck(s) at this early point can only give your problems later - especially info to all those using Dummy Gums. if one gets loose no way to recover later. I know, that ball KITs are in their instructions books are recommending it. The only REASON I can see why is that the DEck is inserted to avoid the Bulkheads to go wrong. Today there is many better tools on the market for that.
Attachments
- Joined
- Mar 27, 2019
- Messages
- 831
- Points
- 403
hi from Spain. Yes, you are right, that nearly all kits manufacturers in their manuals say "INSERT THE DECKS " which in my point of view is wrong, as the close the hull, so no re-forsment and other things cannot be done on the inside. I have a filling, that is for trying to hold the bulkheads square, but today there are others and better ways for that. You, yourselves is adding square wooden blocks. I used -when building - some square pieces bought in my local shop- absolutely 90º square o plastic. Can be glued in place with carpenter glue /for easy take out later, if needed) or each side has two holes, so a screw can be inserted and later unscrewed. the build looks well into now
if this is your 1Th build I am extremely surprised. As we said in the Navy- WELL DONE MATE:
Syren was my first build and I'm glad it was. It's officially a medium to expert build but what really makes the difference is the detailed practicum by the designer of the model Chuck Passaro. Over a hundred full color pages, plus his build log is also available as he goes about building the prototype. Without the practicum and the build log and its details my Syren would have came out differently for sure.
- Joined
- Mar 27, 2019
- Messages
- 831
- Points
- 403
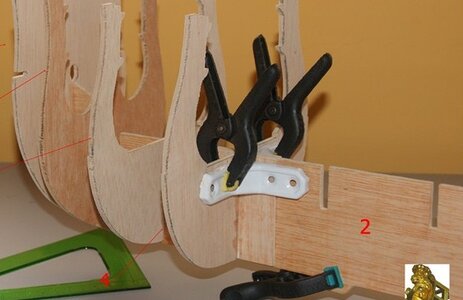
The bulkhead extensions that allowed hull planking now need to be cut off.

The instructions didn't show this but I installed and stained ceiling planks (on the forecastle for now, on the quarterdeck as I move aft). Only now can I start deck planking.

The instructions didn't show this but I installed and stained ceiling planks (on the forecastle for now, on the quarterdeck as I move aft). Only now can I start deck planking.
WELL PREPAREDAll bulkheads installed and square. I stock piece of square basswood on either side of each bulkhead glued with CA after sliding the bulkheads into place with carpenter's glue will ensure the squareness. Good quality plywood nice and thick.
View attachment 167465View attachment 167466View attachment 167467
Here there is a point, where disagree -NOT only with you, but over 90% of Kit builders are doing also - It is inserted the deck, before planking. I know it is in all manuals.False deck installed for the gun deck. There will be another false deck for the quarterdeck and one for the forecastle as well. These laser cut basswood plywood false decks are cut almost perfect. Just a little trimming around a few of the bulkheads. Now that it's installed the whole structure feels very solid. I used carpenter's glue and some small nails driven halfway in at strategic locations. Now that the glue is dry they nails came right out. Next step, believe it or not, according to the plans is to install deck planks for the gun deck.
View attachment 169086
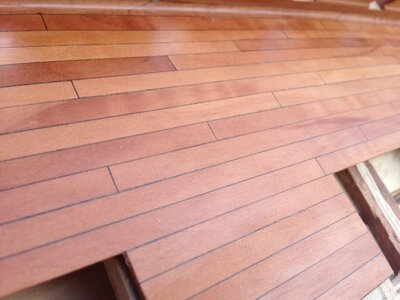
In MY point of you, your chalkink is a bit out of Scale, as well the nails- which I never used in a 1-70 something.Most of the gun deck planking is complete. I must confess that deck planking is one of my favorite parts of building a model ship. Of course there is effort involved but the payoff in the finished product is huge compared to the effort expended. There is of course huge satisfaction on fabricating something difficult that takes much time and effort that pays off, that's not what I'm talking about. This is at the other end of the spectrum of time consuming fabrication and as important it isn't something that just requires days and weeks on end of repetition (like rat lining - yuch!).
I went ahead and planked the entire gun deck despite only about 1/3 will ever be seen. An additional tiny peek might, and I stress the word "might", be seen by someone peeking into the gun port, especially if I choose not to install electric lighting. But just the knowledge of the decking being from stem to stern is warm and fuzzy. I did not however go overboard and space out planks and blacken the edges and simulate tree nails of all those planks under deck. I will of course have to obtain more of the lathes from either Mamoli or MS because I've used almost half the provided supply to plank all that decking that will never be viewed.
View attachment 169552View attachment 169553View attachment 169554View attachment 169555
this what i used to get bulkheads square. it cost a few cents. using carpenter glue, it can easily be taken away later on if it disturbed. The deck (s) I took all out and planked the outside the ship. Sealed off with a mix of carpenter Glue and a black color Just before settling down the Glue on the surface, I cleaned up. Finally, when DRY, I used a Razor blade or a piece of Cristal, to shave the planks from bow to stern-allways same direction, later with sandpaper until totally smooth, the sealed off. It will give you a perfect deck, without all the inside parts of the ship to disturb.False deck installed for the gun deck. There will be another false deck for the quarterdeck and one for the forecastle as well. These laser cut basswood plywood false decks are cut almost perfect. Just a little trimming around a few of the bulkheads. Now that it's installed the whole structure feels very solid. I used carpenter's glue and some small nails driven halfway in at strategic locations. Now that the glue is dry they nails came right out. Next step, believe it or not, according to the plans is to install deck planks for the gun deck.
View attachment 169086
Attachments
it can be seen, that this model is a quality model. 1Th time I seee so early the curved on the deck. Most- and mean most- have all decks vertically, with water ways to run out. bravoI finished up the three gratings that go on the gun deck underneath the longboat as well at the longboat cradle. All these pieces are made from Walnut so even with a neutral clear stain they are of a very dark hue. When placed on top of the gun deck the starkness in colors between the deck planking and the gratings was extreme and I didn't like it one bit. So I "watered down" some Minwax Golden Oak and applied another coat on the deck planking. I sure Forrest Gumped my way through this part of the project, the end result I really like. I also added some shot racks along the side of each large grating, this feature is not on the plans. I'll install the cannon balls after planking the hull and Surprise is right side up again.
The second picture is the kit provided cast longboat which I won't use. I just ordered another Falconet longboat that I just finished for my Rattlesnake build, this is picture three. It's 5mm longer than the kit provided boat but it'll fit just perfect in the longboat cradle.
The last picture is an example of the supports for the deck immediately above the gundeck, forecastle up front and quarterdeck in the rear, notice the camber that the false deck and then deck planks will follow. The plans call for the center pillar being 21.5mm long. I found the camber to be very pronounced and so I shaved a bit off that central pillar, it's more like 20mm long now.
View attachment 170088View attachment 170089View attachment 170091View attachment 170092
greeting and service boat after some change -not the metal one.I finished up the three gratings that go on the gun deck underneath the longboat as well at the longboat cradle. All these pieces are made from Walnut so even with a neutral clear stain they are of a very dark hue. When placed on top of the gun deck the starkness in colors between the deck planking and the gratings was extreme and I didn't like it one bit. So I "watered down" some Minwax Golden Oak and applied another coat on the deck planking. I sure Forrest Gumped my way through this part of the project, the end result I really like. I also added some shot racks along the side of each large grating, this feature is not on the plans. I'll install the cannon balls after planking the hull and Surprise is right side up again.
The second picture is the kit provided cast longboat which I won't use. I just ordered another Falconet longboat that I just finished for my Rattlesnake build, this is picture three. It's 5mm longer than the kit provided boat but it'll fit just perfect in the longboat cradle.
The last picture is an example of the supports for the deck immediately above the gundeck, forecastle up front and quarterdeck in the rear, notice the camber that the false deck and then deck planks will follow. The plans call for the center pillar being 21.5mm long. I found the camber to be very pronounced and so I shaved a bit off that central pillar, it's more like 20mm long now.
View attachment 170088View attachment 170089View attachment 170091View attachment 170092