-

Win a Free Custom Engraved Brass Coin!!!
As a way to introduce our brass coins to the community, we will raffle off a free coin during the month of August. Follow link ABOVE for instructions for entering.
-

PRE-ORDER SHIPS IN SCALE TODAY!
The beloved Ships in Scale Magazine is back and charting a new course for 2026!
Discover new skills, new techniques, and new inspirations in every issue.
NOTE THAT OUR FIRST ISSUE WILL BE JAN/FEB 2026
You are using an out of date browser. It may not display this or other websites correctly.
You should upgrade or use an alternative browser.
You should upgrade or use an alternative browser.
HMS Victory 1:78 by Mantua ,Panart - Build log
Now, having finally managed to complete the sanding and grouting of the hull, I began to drill the holes for the gun ports in the first planking
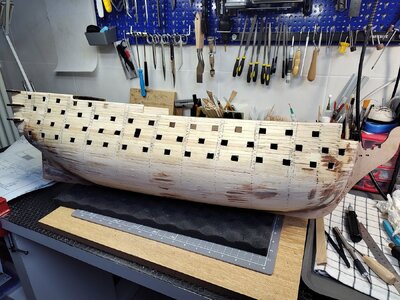
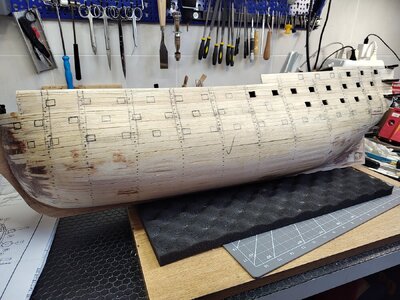
As you can see from the photos, I had no difficulty marking the holes with the template provided in the package.
Naturally I had the foresight to mark the points of intersection with the bulkhead in advance, in order to ensure that there was no significant interference.
After thinking about it for a long time, I decided to drill the holes in the first planking, before gluing the second one.
By doing so I think I can more easily obtain precise holes in which to install the port frames. We'll see.
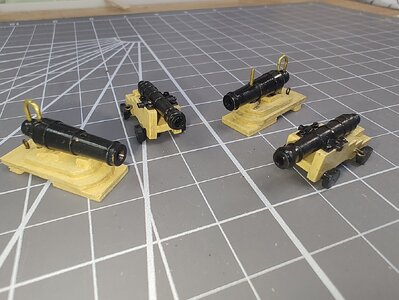
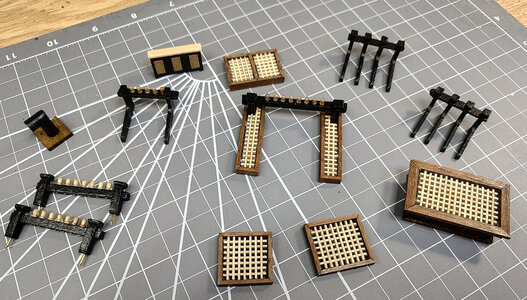
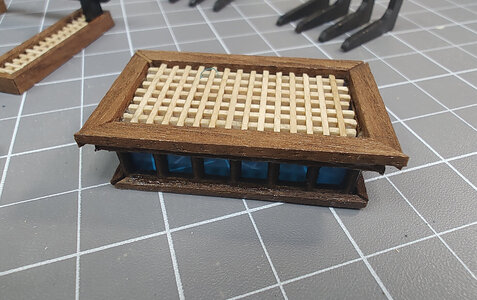
Good evening Ismaele. Looking very good indeed. Yep the template works if lined up correctly. I remember a tiny shaving of one or two of the bulkheads up front. Your gratings, belay pin racks/knightheads etc also look great. It is a fun build enjoy. Cheers GrantNow, having finally managed to complete the sanding and grouting of the hull, I began to drill the holes for the gun ports in the first planking
View attachment 443668
View attachment 443669
As you can see from the photos, I had no difficulty marking the holes with the template provided in the package.
Naturally I had the foresight to mark the points of intersection with the bulkhead in advance, in order to ensure that there was no significant interference.
After thinking about it for a long time, I decided to drill the holes in the first planking, before gluing the second one.
By doing so I think I can more easily obtain precise holes in which to install the port frames. We'll see.
I completed laying the second planking on the hull and finishing the gun ports.
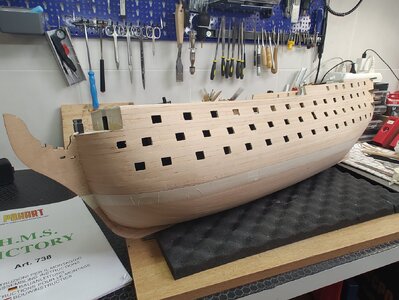
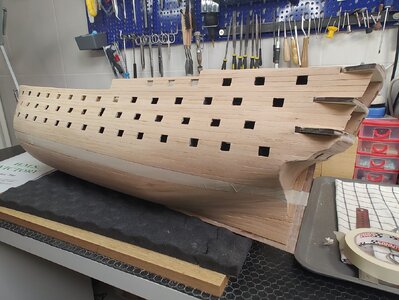
I have an observation that I hope will help those who try their hand at this model: the quality of the strips of the first planking (hard balsa) is quite poor and if on the one hand it allows the strips to be worked more easily, on the other hand it provides a base not too solid for laying the second planking, also given the presence of numerous holes for the cannons.
This must have been taken into account by the manufacturer, who supplies strips with a thickness of 1 mm. for the second plating. In this way, however, the strips of the second plating are less workable than the usual 0.5 mm walnut strips.
In other words, I am not completely satisfied with the final outcome, unlike the models I created previously and which were by Occre, Artesania Latina and Amati.
Fortunately, part of the hull must be covered in copper and the remaining part must all be painted in two colors and therefore the small defects that I was unable to avoid in the end should not be seen.
But I advise everyone to pay close attention especially to the installation of the first planking, in order to obtain the most solid base possible.
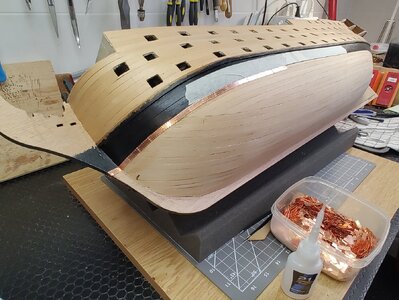
As you can see I masked the waterline and now I intend to give a coat of fixative paint and then to paint a strip of black to use as a line below which to begin gluing the copper plates.
I've already seen in the forum that this is going to be a hard job...
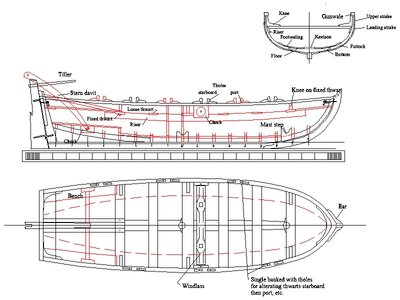
Nice build! Are the boats from the kit? The reason I ask is that all the boats appear to be double banked. I think some were single banked. The launch was likely over 32 feet long and double banked. That being the case she would have about 8 or nine thwarts rather than 2. The pinnace would have been in the neighborhood of 28 feet with 7 or 8 thwarts for rowers and single banked. The cutters were almost all single banked. There are high resolution drawings of many boats in the WikiCommons site.
An example of a 34 foot double banked launch and 28 foot 8 oared single banked pinnace follow. Note that for the pinnace the tholes shown are only for the starboard side. The ones for the port side alternate for every other thwart.
Allan
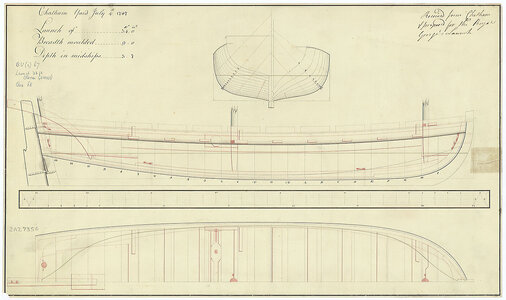
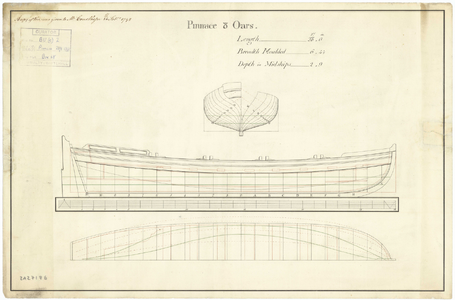
An example of a 34 foot double banked launch and 28 foot 8 oared single banked pinnace follow. Note that for the pinnace the tholes shown are only for the starboard side. The ones for the port side alternate for every other thwart.
Allan


The boats are included in the kit.
I am Italian, so I have a bit of trouble following your complex technical descriptions.
However, kit instructions are very poor in general and in particular for the construction of the four boats. I did the best I could, inventing oars that are not included in the instructions, but which I made inspired by previous built models, especially a New Bedford whaleboat.
Honestly, I didn't bother to evaluate whether individual boats had one or two rowers per bench.
Finally, the measurements you report for the launch are reproduced substantially correctly, the model being approximately 13 cm long. (5.2 in.), on a 1:78 scale.
I hope I have been clear enough, thank you for your appreciation!
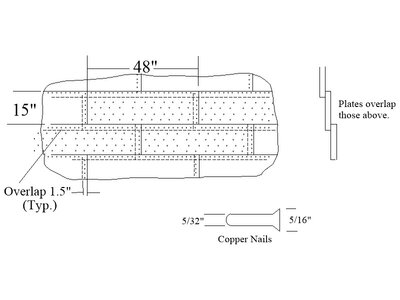
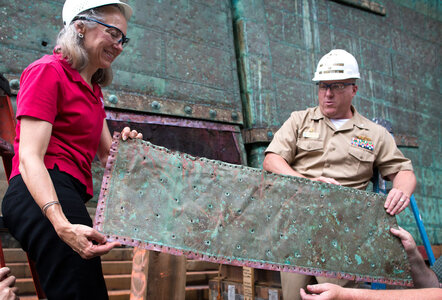
If you have not gone any farther, maybe consider using other plates or consider for future builds. The ones in the photo above look like the commonly used kit plates that appear to be riveted. The plate were nailed with small nails so had dents, they did not protrude. The below pics may help. The first is transcribed from Goodwin's Construction and Fitting of English Men of War. The second is the real thing.


Dear Allan,
without a doubt you are incredibly thorough and deeply prepared when it comes to shipbuilding! I really appreciate your remarks and suggestions, but I cannot help but point out to you:
1. The dimensions of the plates seen in the illustrations, transformed into millimeters and reduced to a scale of 1:78, are perfectly similar to those of the copper plates supplied in the kit (15x5 mm)
2. Consequently, the size of the nail holes should be 0.1 mm, which is clearly impossible to reproduce
3. Furthermore, I fully understand that even the reproduction of rivets, both in size and number, is incorrect, but I can't understand how to remedy it
4. I searched the web, but I couldn't find any alternative to the plates supplied in the Panart kit, which vice versa are supplied with the same characteristics by other manufacturers
So, I would be happy to consider more realistic alternatives and therefore I would ask you if you have any indication of where to get them.
Thanks so much anyway!
Enea
One somewhat popular system is to cut copper tape to size and install. You can buy or make a punch wheel to make the tiny indentations, no need to drill holes.
At 1:78, copper paint may be a better way to go. Hope this helps. In the end, most model builders are unaware of this detail and I would venture to say 99.999% of casual observers would not know the difference or care. Whether any given detail is important or not is up to the individual builder such as yourself.
At 1:78, copper paint may be a better way to go. Hope this helps. In the end, most model builders are unaware of this detail and I would venture to say 99.999% of casual observers would not know the difference or care. Whether any given detail is important or not is up to the individual builder such as yourself.
Many thanks for your advice. Considering this is the first copper coating I need to make, I think this time I will continue with the kit plates, but on the next try I will definitely take your suggestions into consideration.
Finally, I completely agree with your last statement.
Finally, I completely agree with your last statement.
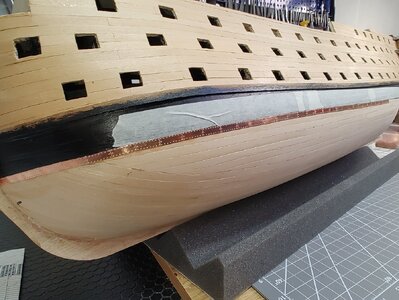
I think I'm about a third of the way through the job. Since it's not easy to fit copper plates perfectly when you need to cut them, I thought I'd paint the keel area with some copper paint.
In this way I think that the small gaps between the plates should be noticed less, given that the underlying surface has a very similar color.
We'll see the result...
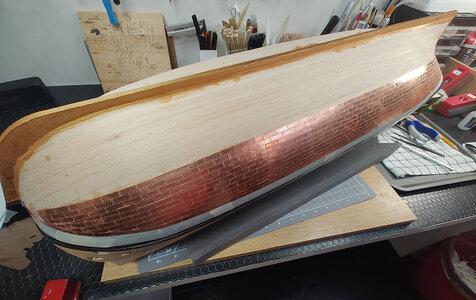
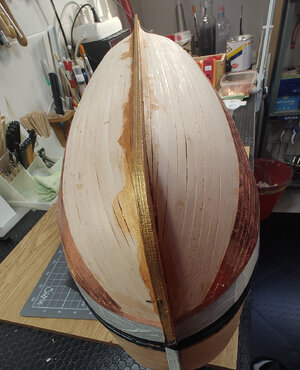
In this way I think that the small gaps between the plates should be noticed less, given that the underlying surface has a very similar color.
We'll see the result...


After more than a month and a half of hard work (!), I finally managed to complete the copper cladding of the hull...
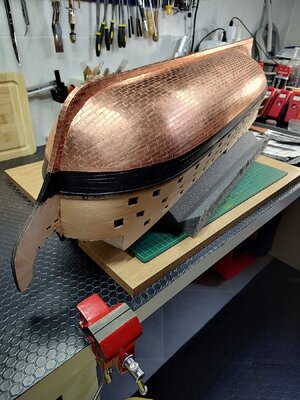
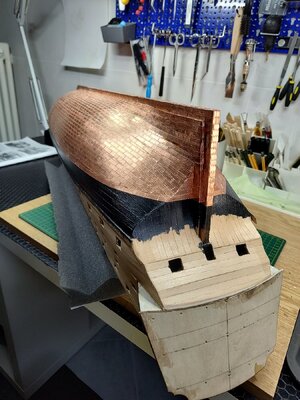
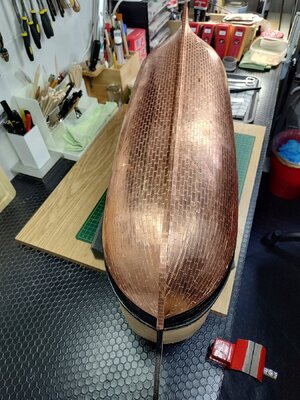
Having decided to use the copper plates provided in the kit, I am quite satisfied with the result, despite the fact that I am well aware of the inaccuracies on the topic of rivets, nails and their proportions.
I also did some copper aging tests, using a flame and different types of acids, but no one really satisfied me.
In the end I therefore decided to leave the copper as supplied, trusting that over time it will end up oxidizing naturally.
Now I'm taking a break to take grandkids to the beach... we'll see you again in a few weeks. Hello everyone!
It looks wonderful Ismaele. You can be rightly proud of your copper plating for this beatiful ship.After more than a month and a half of hard work (!), I finally managed to complete the copper cladding of the hull...
View attachment 458341
View attachment 458342
View attachment 458343
Having decided to use the copper plates provided in the kit, I am quite satisfied with the result, despite the fact that I am well aware of the inaccuracies on the topic of rivets, nails and their proportions.
I also did some copper aging tests, using a flame and different types of acids, but no one really satisfied me.
In the end I therefore decided to leave the copper as supplied, trusting that over time it will end up oxidizing naturally.
Now I'm taking a break to take grandkids to the beach... we'll see you again in a few weeks. Hello everyone!
Congratulations. Enjoy the beach.
Michael
Good morning Ismaele. Well done on that coppering. I have chickened out of coppering hulls as it looks daunting. Cheers GrantAfter more than a month and a half of hard work (!), I finally managed to complete the copper cladding of the hull...
View attachment 458341
View attachment 458342
View attachment 458343
Having decided to use the copper plates provided in the kit, I am quite satisfied with the result, despite the fact that I am well aware of the inaccuracies on the topic of rivets, nails and their proportions.
I also did some copper aging tests, using a flame and different types of acids, but no one really satisfied me.
In the end I therefore decided to leave the copper as supplied, trusting that over time it will end up oxidizing naturally.
Now I'm taking a break to take grandkids to the beach... we'll see you again in a few weeks. Hello everyone!


