HMS Victory 1:78 by Mantua ,Panart - Build log

For the future, the running out rigging and train rigging lines were typically only 2 inches to 2.5 inches in circumference. The ones in the photos look to be the same size as the breeching which was 4.5 inches in circumference for 6 pounders up to 7.5 inches in circumference for 32 pounders. The running out and training tackle were rigged with blocks and hooks rather than thimbles. I found the dimensions in several places and it varied a little for each and for different eras. The chart below should be close. I am pretty sure the math is accurate but if someone would check it to be sure I would be grateful.
Allan
Sorry the pdf did not save the excel sheet blocks exactly. Also attached is a photo that shows what I included in the chart.
1731494019273.jpeg
[/td]​
 

Attachments

Last edited:
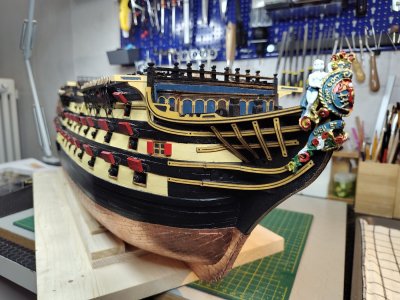
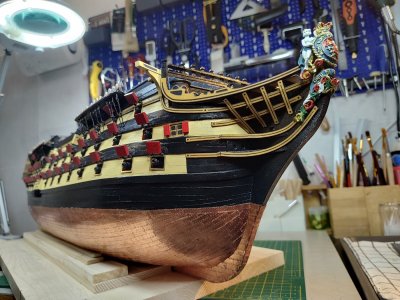
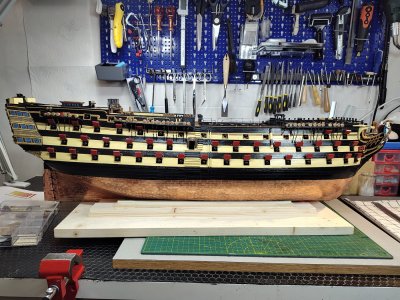
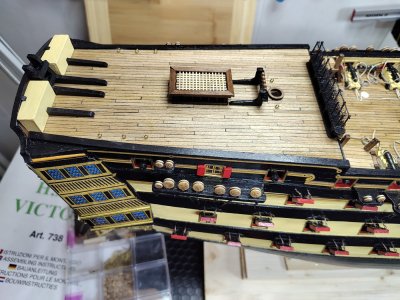
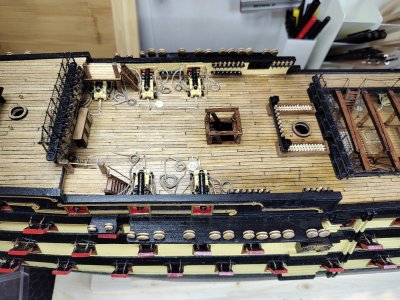
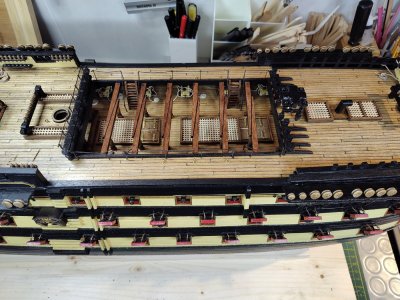
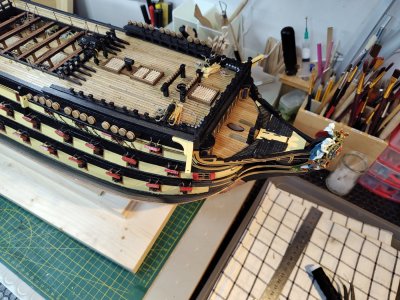
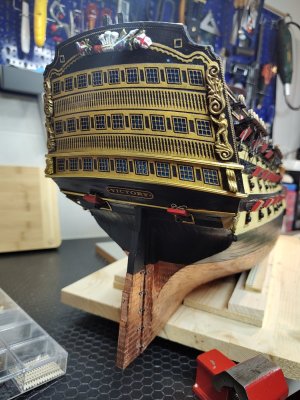
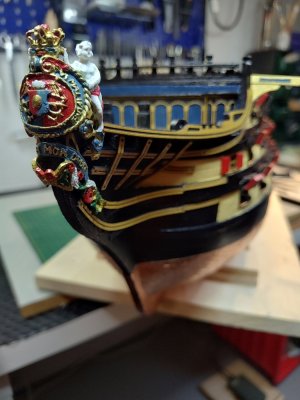
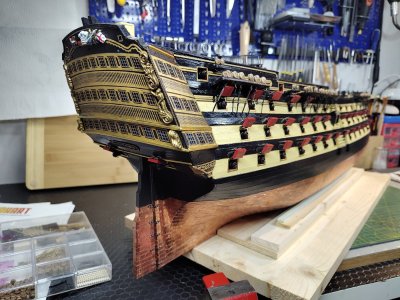
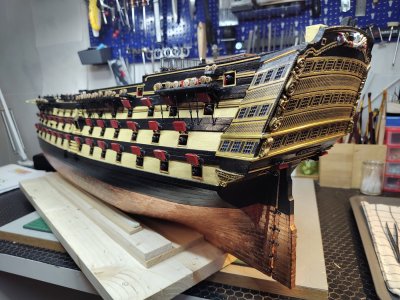
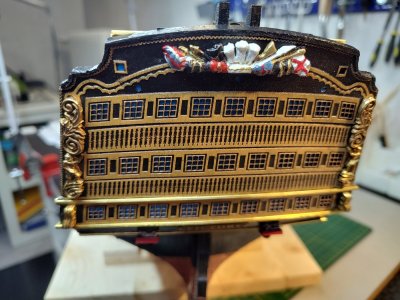
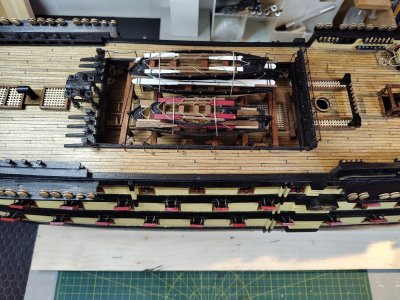
Hello everyone! After about a year since the start of the shipyard, I have practically finished the construction of the hull, the decks and the related coverings and details.
Of course there are still many details missing, but for these I think it is better to wait until after the installation of other parts.
So I think that now is the time to put aside the work done and concentrate on the construction of the masts and yards, which also seem quite complicated to make.
I will show you the work done so far.

IMG_20241208_111022309.jpg IMG_20241208_111034033_HDR.jpg

IMG_20241208_111101775.jpg

IMG_20241208_111153070.jpg IMG_20241208_111149097.jpg

IMG_20241208_111135629.jpg IMG_20241208_111125620.jpg

IMG_20241208_111245924.jpg IMG_20241209_151005849_HDR.jpg IMG_20241208_111259562.jpg

IMG_20241209_150855146.jpg

IMG_20241209_150910063_HDR.jpg

IMG_20241209_151232005.jpg

A special thanks to Grant Tyler for the photos of the decorations, which were very useful to me
 
Hello everyone! After about a year since the start of the shipyard, I have practically finished the construction of the hull, the decks and the related coverings and details.
Of course there are still many details missing, but for these I think it is better to wait until after the installation of other parts.
So I think that now is the time to put aside the work done and concentrate on the construction of the masts and yards, which also seem quite complicated to make.
I will show you the work done so far.

View attachment 489129 View attachment 489130

View attachment 489131

View attachment 489132 View attachment 489133

View attachment 489134 View attachment 489137

View attachment 489138 View attachment 489143 View attachment 489139

View attachment 489140

View attachment 489141

View attachment 489142

A special thanks to Grant Tyler for the photos of the decorations, which were very useful to me
Good morning Ismaele. Lovely pictures of your Victory. Your detail painting on the decorations is beautiful. Not an easy task and you owned this. Cheers Grant
 
Happy Holidays to all!
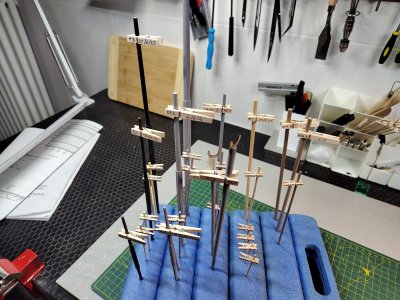
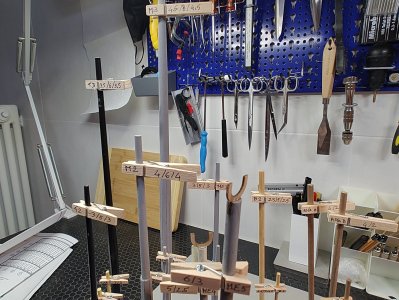
I have started working on the yards to be installed on the masts and, as always, I found myself in need of easily identifying the various pieces, for all the stages of the process. Up until now I had used pieces of paper tape, but this method is very inconvenient, having to remove them every time for tapering, laying out the underlay, sanding, coloring, etc.
This time I had the idea of getting some small wooden pegs (like those for laundry but smaller), on which to mark the identification codes of each piece, diameters and measurements.
In this way, by inserting them into a polystyrene base (gardening cushions are ideal...), all the pieces are easily identifiable, the pegs can be easily removed for processing and put back immediately afterwards and can also be used to hang the pieces to dry.
It seems like a practical and effective method and probably someone else had already thought of it, but I think it's right to share.


IMG_20241225_101837110.jpg

IMG_20241225_101855589.jpg
 
For the future, the running out rigging and train rigging lines were typically only 2 inches to 2.5 inches in circumference. The ones in the photos look to be the same size as the breeching which was 4.5 inches in circumference for 6 pounders up to 7.5 inches in circumference for 32 pounders. The running out and training tackle were rigged with blocks and hooks rather than thimbles. I found the dimensions in several places and it varied a little for each and for different eras. The chart below should be close. I am pretty sure the math is accurate but if someone would check it to be sure I would be grateful.
Allan
Sorry the pdf did not save the excel sheet blocks exactly. Also attached is a photo that shows what I included in the chart.
View attachment 483927
[/td]​
Dear Allan, can I abuse your patience and vast knowledge of the subject? Given the terrible indications provided by Victory's Mantua kit, I would need the correct diameters of all the various ropes for sailing ships of the time, in order to make the best use of the spools supplied or get others. I'm sure you'll have a chart for these details too... Thank you very much!
 
I'm having a lot of trouble applying the mesh to the U-shaped supports along the sides. I don't understand what the best glue is to get a long-lasting fixation. Can anyone give me some advice?
 
I'm having a lot of trouble applying the mesh to the U-shaped supports along the sides. I don't understand what the best glue is to get a long-lasting fixation. Can anyone give me some advice?
Hi Ismaele. Good luck with these they are super fiddly. When I did mine I sewed them on using black cotton. I didn’t try the CA option so I may have “missed the bus” here. Cheers Grant
 
Hi Grant. I've already tried with PVA glue and CA glue, but neither of them seemed to be the solution. I think I'll try your solution with the black cotton thread now. In any case, it's the worst job I've faced so far, a real nightmare! Thank you very much
 
Hi Grant. I've already tried with PVA glue and CA glue, but neither of them seemed to be the solution. I think I'll try your solution with the black cotton thread now. In any case, it's the worst job I've faced so far, a real nightmare! Thank you very much
I agree it was my worst job on my Mantua Victory. Plenty bad words used ROTF
 
May I suggest that you "sew" them on as Grant Tyler did? I did this on my full Mamoli model and have done it on my current cross-section (CS) model. Its not hard and looks better than glue. Use a short needle and file down the point a bit. Its not hard. Use a short needle and file down the point a bit. Use a short needle and file down the point a bit. My issue was trying to get the hammock cranes to stay put. There was no good way to anchor them until I saw how YP did his. See his build log pages 786 and 789. I used his method and it has worked quite well on the CS. Hope this works for you.
 
May I suggest that you "sew" them on as Grant Tyler did? I did this on my full Mamoli model and have done it on my current cross-section (CS) model. Its not hard and looks better than glue. Use a short needle and file down the point a bit. Its not hard. Use a short needle and file down the point a bit. Use a short needle and file down the point a bit. My issue was trying to get the hammock cranes to stay put. There was no good way to anchor them until I saw how YP did his. See his build log pages 786 and 789. I used his method and it has worked quite well on the CS. Hope this works for you.
Thank you, but I cant't find no YP member with a build log of more than 700 pages
 
Dear friends, thanks also to your precious advice I was able to find a fairly simple and effective method for applying the mesh to the sides.
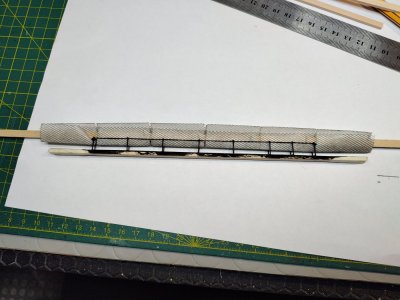
First of all I fixed the U-shaped supports on a strip, so I could work on the bench and not on the model. Next I will glue the complete strips (0.5 mm thick) to their places on the sides.
IMG_20250221_103804284.jpg

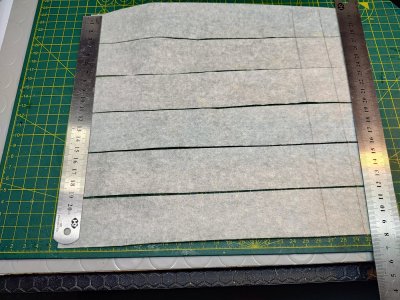
Then I spread the net on strips of paper tape, so I could control it better, especially to cut the strips you need to size.

IMG_20250221_103855809_HDR.jpg

After which I made the two folds of the tape and the mesh to obtain the bottom of the mesh and, using strips of suitable size, I positioned the net inside the U-shaped supports

IMG_20250221_104413621.jpg

IMG_20250221_105047005.jpg

At this point I put a little CA glue on the bottom of the supports and then pushed the mesh onto them, fixing it
IMG_20250221_105330712.jpg

Once the bottom was well fixed, I easily removed the paper tape and here is the result

IMG_20250221_110252384.jpg

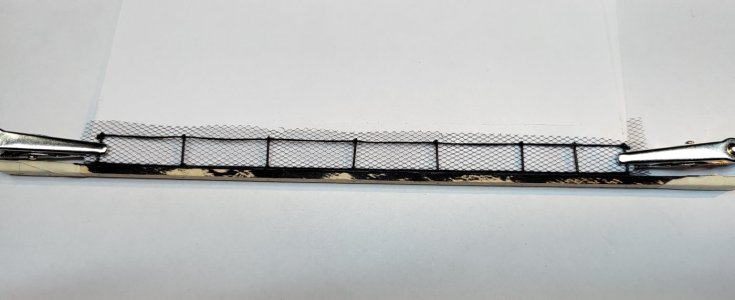
Having cut away the excess parts, I sewed the net to the thread previously installed on top of the U-shaped supports and here is the result

IMG_20250221_154815593.jpg

Naturally, the work can be better appreciated once everything has been installed on the model, but for now I can say I'm satisfied.
In the end the process was quite simple and quick and I even managed to limit the number of bad words...
Ancora grazie a tutti
 
Dear friends, thanks also to your precious advice I was able to find a fairly simple and effective method for applying the mesh to the sides.
First of all I fixed the U-shaped supports on a strip, so I could work on the bench and not on the model. Next I will glue the complete strips (0.5 mm thick) to their places on the sides.
View attachment 502511

Then I spread the net on strips of paper tape, so I could control it better, especially to cut the strips you need to size.

View attachment 502512

After which I made the two folds of the tape and the mesh to obtain the bottom of the mesh and, using strips of suitable size, I positioned the net inside the U-shaped supports

View attachment 502514

View attachment 502515

At this point I put a little CA glue on the bottom of the supports and then pushed the mesh onto them, fixing it
View attachment 502516

Once the bottom was well fixed, I easily removed the paper tape and here is the result

View attachment 502517

Having cut away the excess parts, I sewed the net to the thread previously installed on top of the U-shaped supports and here is the result

View attachment 502518

Naturally, the work can be better appreciated once everything has been installed on the model, but for now I can say I'm satisfied.
In the end the process was quite simple and quick and I even managed to limit the number of bad words...
Ancora grazie a tutti
Good afternoon Ismaele. Bravo. Those came out really well. Cheers Grant
 
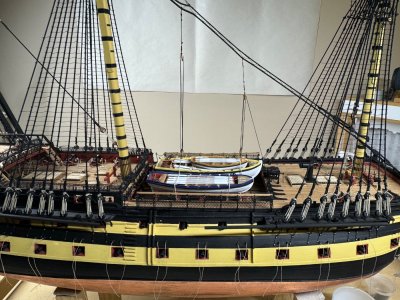
Completed the installation of the foremast with the relative standing rigging. Fixed the mainmast and tomorrow I will start to lay the shrouds.
IMG_20250323_163322096_HDR.jpg

IMG_20250323_163335155.jpg
 
Back
Top