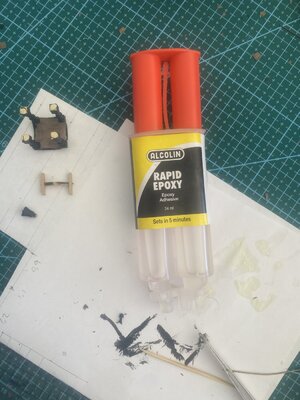
Thanks Thomas, Frank and Jim, for your feedback. the ones I need are 0.8mm unless I can drill out the cannon itself. CheersThe small screws are 1.0 mm and the larger ones 1.4 mm.
Best regards
Thomas
-

Win a Free Custom Engraved Brass Coin!!!
As a way to introduce our brass coins to the community, we will raffle off a free coin during the month of August. Follow link ABOVE for instructions for entering.
You are using an out of date browser. It may not display this or other websites correctly.
You should upgrade or use an alternative browser.
You should upgrade or use an alternative browser.
HMS Victory Mantua 1:78 (first build) by Grant Tyler
- Thread starter GrantTyler
- Start date
- Watchers 102
- Joined
- Oct 17, 2020
- Messages
- 1,673
- Points
- 488

Thanks Thomas, Frank and Jim, for your feedback. the ones I need are 0.8mm unless I can drill out the cannon itself. Cheers
Microviti ottone testa cilindrica taglio a cacciavite M1x3 - 20pz
Microviti ottone grezzo Testa Cilindrica taglio a cacciavite - M1x3 - DIN 84A - confezione 20 pezzi - VTCOT-1x3Hi Grant
this I found in Italy
€ 11,81 | ||
|
Thank you FrankMicroviti ottone testa cilindrica taglio a cacciavite M1x3 - 20pz
Microviti ottone grezzo Testa Cilindrica taglio a cacciavite - M1x3 - DIN 84A - confezione 20 pezzi - VTCOT-1x3
Hi Grant
this I found in Italy
confezione 
Good afternoon.
HMS Victory Belfry
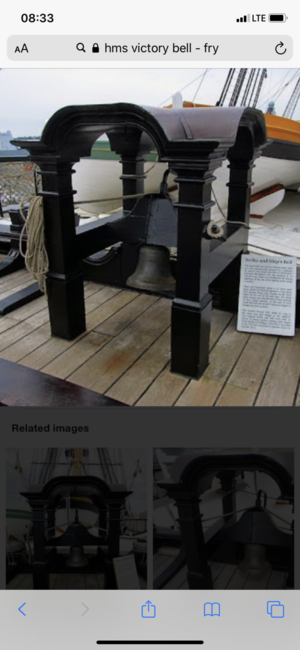
I followed the kit build with a couple of changes:
1: The kit was out of scale (too big again) so I reduced the carving bulk of the block and made the curves wider.
2: I cut the pillars so they did not show on the top.
3: I changed the shape of the wood holding the block to be more rounded at the top
4: I used my Dremel and shaved down the top of the bell however did not play with its shape. It is still too large.
5: shaped the handle to match the Victory and made it connect from the top of the bell support
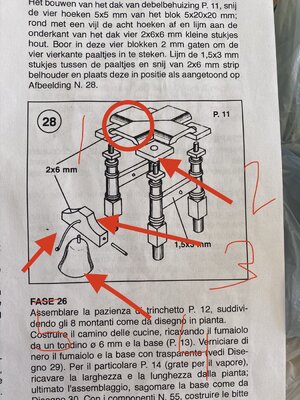
Apologies for not knowing the terms for these parts - look however google let me down badly . Got to hate that.
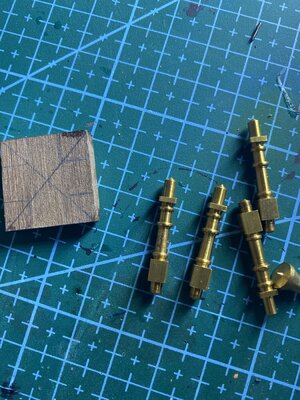
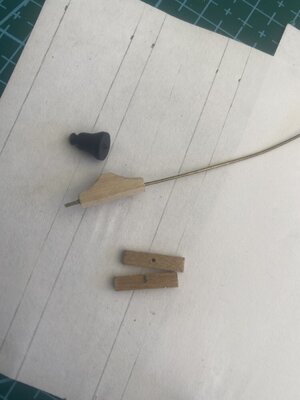
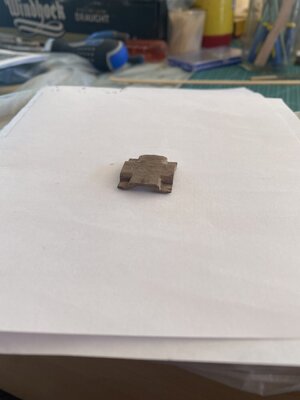
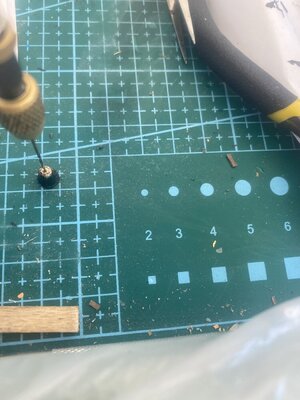
Not fitted - my attempt at the Belfry. I’m happy.


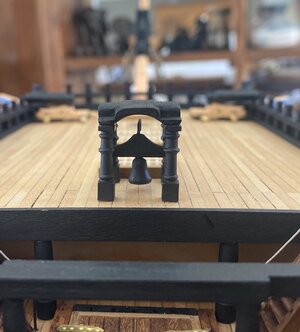
Cheers
Grant
HMS Victory Belfry

I followed the kit build with a couple of changes:
1: The kit was out of scale (too big again) so I reduced the carving bulk of the block and made the curves wider.
2: I cut the pillars so they did not show on the top.
3: I changed the shape of the wood holding the block to be more rounded at the top
4: I used my Dremel and shaved down the top of the bell however did not play with its shape. It is still too large.
5: shaped the handle to match the Victory and made it connect from the top of the bell support

Apologies for not knowing the terms for these parts - look however google let me down badly
 . Got to hate that.


Not fitted - my attempt at the Belfry. I’m happy.


Cheers
Grant

WOW! That turned out great!
Thanks Paul and Heinrich.WOW! That turned out great!
Hello, Grant. I can see your Belfry made with love and skills. You have successfully combined the kit's part and scratch build parts. However, if you don't mind, the Bell itself is made out of bronze\brass and should be a 'bronze' color, not black. It should be an easy fix, though. 
Good morning- Thanks for this. It is my first build and when I started I just followed the instructions. The deck laying pattern/sequence is also in correct and cutting of each plank is a little out. It was too late to fix when I learned such things. We live and learn in this hobbyMaybe you answerd this before, why haven't you done nails imitation on deck?

Thank you Jim- always love your eye for detail and giving me more work to doHello, Grant. I can see your Belfry made with love and skills. You have successfully combined the kit's part and scratch build parts. However, if you don't mind, the Bell itself is made out of bronze\brass and should be a 'bronze' color, not black. It should be an easy fix, though.

 . Cheers
Good morning from a blustery Melkbosstrand.
Do you guys ever get those days when your ship wakes up with an attitude. . This morning she decided to do so
 .
.
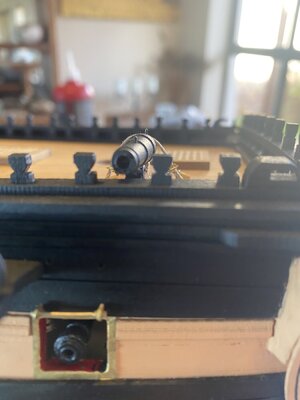
I started rigging the Carronades. Many stern lectures to myself and the Victory.
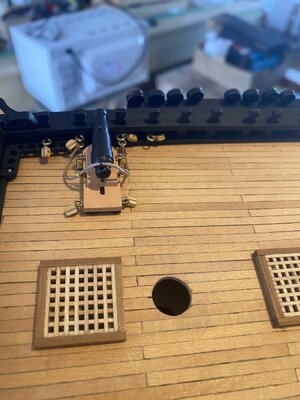
And then....I had forgotten to file and finish these first.... coffee time, mountain Bike ride and then I will see if she has a better attitude.
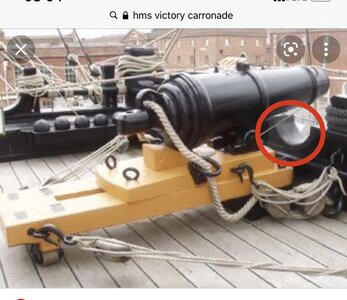
Do you guys ever get those days when your ship wakes up with an attitude.
 .
.I started rigging the Carronades. Many stern lectures to myself and the Victory.

And then....I had forgotten to file and finish these first.... coffee time, mountain Bike ride and then I will see if she has a better attitude.


- Joined
- Sep 3, 2021
- Messages
- 5,074
- Points
- 738

In my case it's more often than not that I didn't RTFDT (Read The Freaking Drawings Twice). RTFBIT comes in a close second (Read The Freaking Build Instructions Twice).Do you guys ever get those days when your ship wakes up with an attitude.. This morning she decided to do so
.

Good evening. Some quick updates:
1. Jimsky and Thomas apologies for not changing the Carronade elevation adjuster and my bell to brass. I did attempt these however I would have to break my attempts and I don’t have the wood, pillars and parts to remake. I have continued with as they are .
.
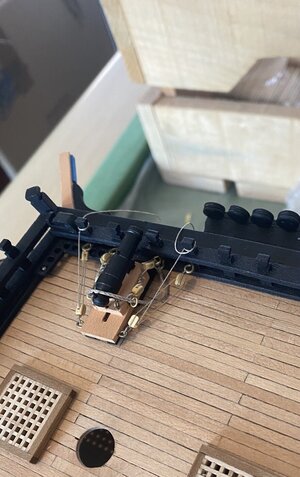
2. Rigged one of the carronades - still deciding how to tie this off. Will not make rope coils though. The blocks which where so cool when I did my quarter deck cannons look sad now but I have to carry on with these. I am not in any way going to re- rig my quarter deck cannons
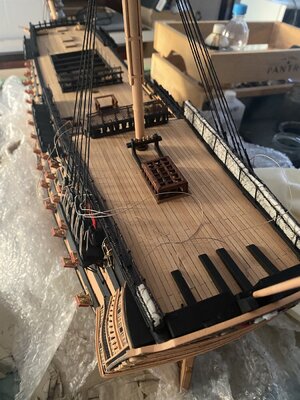
3. One netting completed with the hammocks.
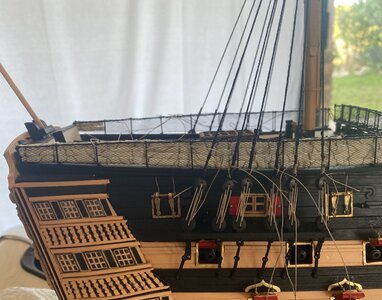
4. Tied the mizzen mast shrouds to dead eyes quickly . Literally just threaded the lanyards- no tension or lining up yet- did this to get them out of the way. Still need to line them up and see which method to tie them off suits my ship. On most pictures and models theses are wrapped rather untidily around the shroud......may actually suit my build.
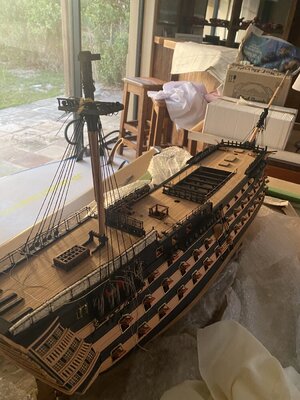
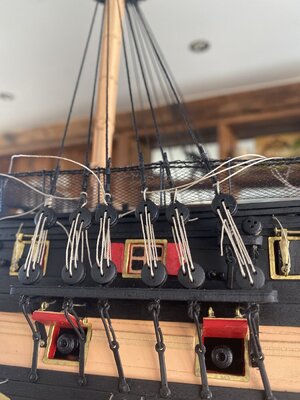
Please excuse the mess in my shipyard it is still cluttered with Justin’s (my Son) furniture- hopefully he finds his new flat soon

Goodnight.
Cheers
Grant
1. Jimsky and Thomas apologies for not changing the Carronade elevation adjuster and my bell to brass. I did attempt these however I would have to break my attempts and I don’t have the wood, pillars and parts to remake. I have continued with as they are
 .
.2. Rigged one of the carronades - still deciding how to tie this off. Will not make rope coils though. The blocks which where so cool when I did my quarter deck cannons look sad now but I have to carry on with these. I am not in any way going to re- rig my quarter deck cannons
3. One netting completed with the hammocks.
4. Tied the mizzen mast shrouds to dead eyes quickly . Literally just threaded the lanyards- no tension or lining up yet- did this to get them out of the way. Still need to line them up and see which method to tie them off suits my ship. On most pictures and models theses are wrapped rather untidily around the shroud......may actually suit my build.


Please excuse the mess in my shipyard it is still cluttered with Justin’s (my Son) furniture- hopefully he finds his new flat soon


Goodnight.
Cheers
Grant
- Joined
- Sep 3, 2021
- Messages
- 5,074
- Points
- 738

Grant,Good evening. Some quick updates:
1. Jimsky and Thomas apologies for not changing the Carronade elevation adjuster and my bell to brass. I did attempt these however I would have to break my attempts and I don’t have the wood, pillars and parts to remake. I have continued with as they are.
2. Rigged one of the carronades - still deciding how to tie this off. Will not make rope coils though. The blocks which where so cool when I did my quarter deck cannons look sad now but I have to carry on with these. I am not in any way going to re- rig my quarter deck cannons
3. One netting completed with the hammocks.
4. Tied the mizzen mast shrouds to dead eyes quickly . Literally just threaded the lanyards- no tension or lining up yet- did this to get them out of the way. Still need to line them up and see which method to tie them off suits my ship. On most pictures and models theses are wrapped rather untidily around the shroud......may actually suit my build.
View attachment 287703View attachment 287710View attachment 287705View attachment 287706View attachment 287702
Please excuse the mess in my shipyard it is still cluttered with Justin’s (my Son) furniture- hopefully he finds his new flat soon
Goodnight.
Cheers
Grant
Just to make sure I remembered well; I read your first couple of posts again and yes, there it was, this is your first try (or one and a half, if you count the Bounty as well).
Hope you don't mind; I have difficulty believing that you didn't build some models before the Victory. Sometimes we Dutch borrow some French words to express ourselves. In this case: chapeau! What a beautiful build.
Johan
Thank you Johan very much appreciated. If we count the supergluing the Bounty rigging to masts and making a lifeboat when I got Covid badly (seems forever ago now) then I will give it a 1 and a half builds.Grant,
Just to make sure I remembered well; I read your first couple of posts again and yes, there it was, this is your first try (or one and a half, if you count the Bounty as well).
Hope you don't mind; I have difficulty believing that you didn't build some models before the Victory. Sometimes we Dutch borrow some French words to express ourselves. In this case: chapeau! What a beautiful build.
Johan
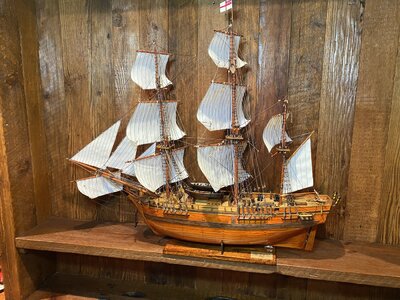
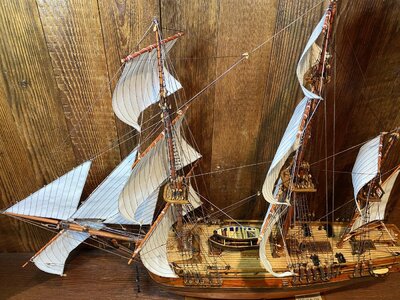
 . Its funny you bring the Bounty up as I have been thinking to restore her. I have ordered some deadeyes and thread from Zoly and I will redo the plastic blocks and cheap polyester thread I bought from China town. I am going to get some wood and see what can do with it after my Victory. The hull has been varnished with some orangey gloss which I don’t know if it can sanded down and I have no idea of how much planking is left to take sanding- anyway a project for another day- thank you again. Here are pictures:
- Joined
- Sep 3, 2021
- Messages
- 5,074
- Points
- 738

Yep, Covid-19 is a bitch; both the Admiral and I attracted it in the first wave and had it pretty bad, though we escaped hospitalization.Thank you Johan very much appreciated. If we count the supergluing the Bounty rigging to masts and making a lifeboat when I got Covid badly (seems forever ago now) then I will give it a 1 and a half builds.. Its funny you bring the Bounty up as I have been thinking to restore her. I have ordered some deadeyes and thread from Zoly and I will redo the plastic blocks and cheap polyester thread I bought from China town. I am going to get some wood and see what can do with it after my Victory. The hull has been varnished with some orangey gloss which I don’t know if it can sanded down and I have no idea of how much planking is left to take sanding- anyway a project for another day- thank you again. Here are pictures:
View attachment 287782View attachment 287783
I found a restoration project can be very satisfying and replacing plastic blocks and deadeyes by wooden ones and using a better quality thread add tremendously to the appearance of your model. Before you begin though, make as many pictures of the rigging as you can. I omitted that step, assuming I had the appropriate rigging and belaying drawings, which I didn't have...
Another issue was that I constantly had to consider what to keep as is and what to redo/improve.
I'm looking forward to see your blog on the Bounty restoration project.
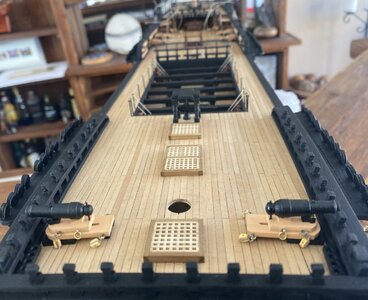
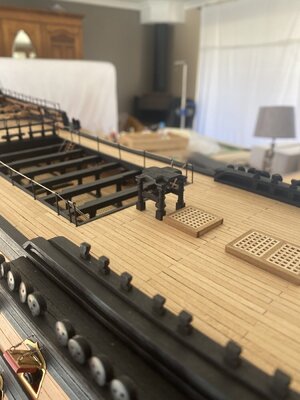
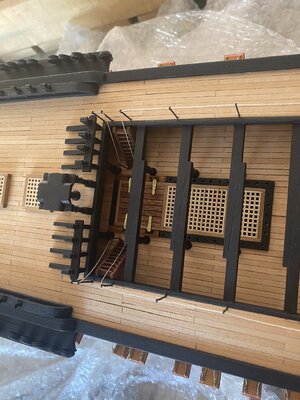
Good morning- I was in a lazy mood this am. So made the 8 posts next to bell fry. Measured and glued with PVa according to instructions. I do see double sheaves on each per many references. I’m not sure if I am going to include these??
I quickly placed on deck for photo- need to rig my other carronade prior to fitting these- will get in my way a little.
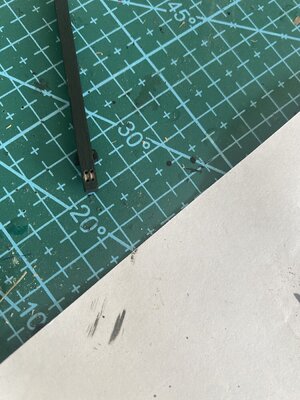
The sheaves got me thinking how to make these- I took my quarter Davits and with a sharp blade made tiny cuts between each hole. Then with a round needle file slowly filed each groove. These are too small to add a pulley wheel (for my skill level anyway). 3mm
Progress so far: I don’t know if these will be visible when painted. We will see.
I quickly placed on deck for photo- need to rig my other carronade prior to fitting these- will get in my way a little.

The sheaves got me thinking how to make these- I took my quarter Davits and with a sharp blade made tiny cuts between each hole. Then with a round needle file slowly filed each groove. These are too small to add a pulley wheel (for my skill level anyway). 3mm
Progress so far: I don’t know if these will be visible when painted. We will see.


