Hello Heinrich- dark art it is....however I am enjoying it.Thank youGrant you are flying along! I am sure the cathead looks exactly the same as before while your rope and rigging work looks absolutely brilliant. It is clean in execution, looks accurate and i have no doubt that you are now getting the hang of this dark art!
-

Win a Free Custom Engraved Brass Coin!!!
As a way to introduce our brass coins to the community, we will raffle off a free coin during the month of August. Follow link ABOVE for instructions for entering.
You are using an out of date browser. It may not display this or other websites correctly.
You should upgrade or use an alternative browser.
You should upgrade or use an alternative browser.
HMS Victory Mantua 1:78 (first build) by Grant Tyler
- Thread starter GrantTyler
- Start date
- Watchers 102
Heinrich, I would never have got close to making this without @WojtasS link for the rigging. It is based on Longridge Anatomy and while there are few things I can’t quite quite replicate it is proving invaluable and I’m starting to understand how it all fits. I see a problem with the number of blocks I bought. I doubled what Mantua had thinking that would be fine, however following a proper guide I have a feeling I am going to have to buy more.....going to get a mental “block” I thinkGrant you are flying along! I am sure the cathead looks exactly the same as before while your rope and rigging work looks absolutely brilliant. It is clean in execution, looks accurate and i have no doubt that you are now getting the hang of this dark art!
- Joined
- Jan 21, 2022
- Messages
- 799
- Points
- 353

If you plan to stay in this hobby and make other models I would suggest buying some milling machine, table saw and lathe(optional but makes things easier). It's quite exspensive but worth it and will pay for itself in time. Pulleys are first example the're very easy to make and will save you a lot of money. All you need is a qood quality wood.
Your build is the best example that if you have patience and skills you can start with very diificult model and only limitation is your commitment
Your build is the best example that if you have patience and skills you can start with very diificult model and only limitation is your commitment
Last edited:
The combination of 100 guns with this complex rigging has relieved me of any thoughts that I might attempt the Victory one day. My thanks  .
.
The combination of 100 guns with this complex rigging has relieved me of any thoughts that I might attempt the Victory one day. My thanks.
You can eliminate half of the hurdle..... no rigging at all.
I have it boxed and that is my plan if I have a life long enought to finish the other, less complicated, models.
Cheers
Daniel
Come on Paul....I know you want to.The combination of 100 guns with this complex rigging has relieved me of any thoughts that I might attempt the Victory one day. My thanks.

Hello Daniel- a wiser choice for sure. Wisdom was clearly far removed when I clicked the buy button for my first model. One day many moons from now I know I will feel great satisfaction when she is done.You can eliminate half of the hurdle..... no rigging at all.
I have it boxed and that is my plan if I have a life long enought to finish the other, less complicated, models.
Cheers
Daniel
Loving these close-up pics, Grant. Great workOh -and a little preplanning: the block for the top mast stay was inserted. I was thinking when the crew had to use the WC (so beautiful) would they have to duck under this block and tackle for the top mast stay?
View attachment 301151

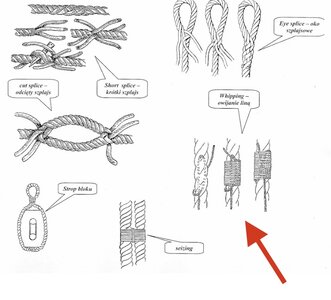
Good morning. Not much building. Just a little beginner learning. I have been doing my whipping incorrectly- no wonder I kept getting little tags. I also now know what is termed seizing vs whipping. Splicing is not on my agenda yet.
I attached dead eyes for the Mizzen top mast stays and they are so much better- still no where near Paul’s and others neatness - I will get there one day .
.
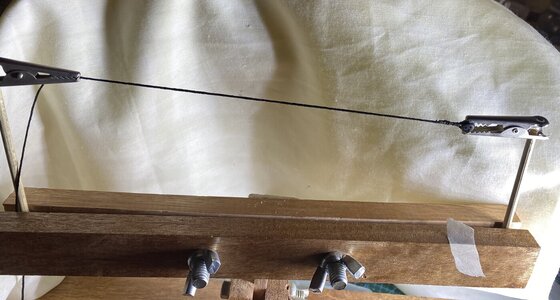
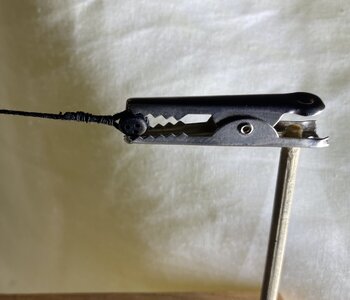
PS - another one of Grants homemade tools. All will be revealed why I make these strange tools vs buying them....that is for a later time.

I attached dead eyes for the Mizzen top mast stays and they are so much better- still no where near Paul’s and others neatness - I will get there one day


PS - another one of Grants homemade tools. All will be revealed why I make these strange tools vs buying them....that is for a later time.
- Joined
- Jan 9, 2020
- Messages
- 10,534
- Points
- 938

Hello my friend. I'm typing with one finger (not that I usually type with many more), because one hand is holding a wale of the small lifeboat in place while the glue sets. I did not even know that a term like whipping existed, so most interesting. Your new seizing/whipping looks tight and faultless, while I think your mother has chosen an excellent theme on which to base her painting. That is really something to look forward to.
The painting is very nice! I look forward to seeing your mom’s artistic version! 
I second you on the splicing Grant, it looks like next-level stuff. But your home-made tools look great and I'm sure they do the job just fine. These alligator clips, for instance, are a novel way to keep a line taut in place for seizing, wish I'd thought of it. Looking forward to seeing more of your home grown toolsGood morning. Not much building. Just a little beginner learning. I have been doing my whipping incorrectly- no wonder I kept getting little tags. I also now know what is termed seizing vs whipping. Splicing is not on my agenda yet.
View attachment 301560
I attached dead eyes for the Mizzen top mast stays and they are so much better- still no where near Paul’s and others neatness - I will get there one day.
View attachment 301559View attachment 301558
PS - another one of Grants homemade tools. All will be revealed why I make these strange tools vs buying them....that is for a later time.

Good morning- did a little more work on my masts. Made the shroud rubbing boards and fitted the yard blocks. The rubbing boards I rounded the leading edge using a little gadget I bought from a local on line store. So cool- I wish I had this when made my decorations on the stern. As you can see these rubbing boards I only found out about later and are an after thought- won’t see them much. To be painted. Main and fore masts.
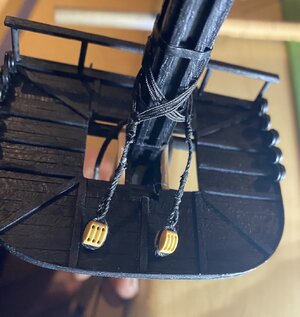
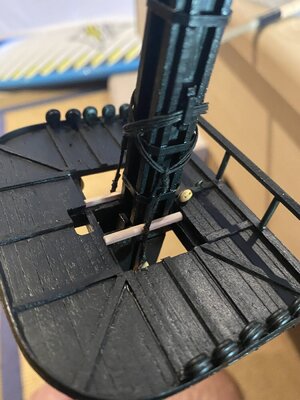
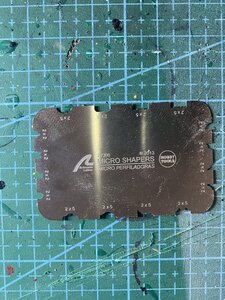


Grant, that black thread you use looks really good and authentic. Is it the thread that came with the kit or did you buy separately? Do you wax your thread or just rig it straight off the reel? Asking for a friendGood morning- did a little more work on my masts. Made the shroud rubbing boards and fitted the yard blocks. The rubbing boards I rounded the leading edge using a little gadget I bought from a local on line store. So cool- I wish I had this when made my decorations on the stern. As you can see these rubbing boards I only found out about later and are an after thought- won’t see them much. To be painted. Main and fore masts.
View attachment 301794View attachment 301795View attachment 301796
Hi Mark. The 5mm for the lashing is from Dry dock- rather good. The 1mm is from the kit. You can see the difference. I put a mixture of beeswax and mineral oil on the thread. Cheers GrantGrant, that black thread you use looks really good and authentic. Is it the thread that came with the kit or did you buy separately? Do you wax your thread or just rig it straight off the reel? Asking for a friend
Sorry 0.5mmHi Mark. The 5mm for the lashing is from Dry dock- rather good. The 1mm is from the kit. You can see the difference. I put a mixture of beeswax and mineral oil on the thread. Cheers Grant
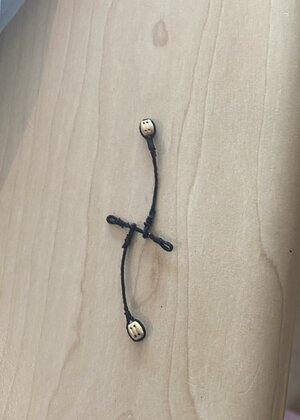
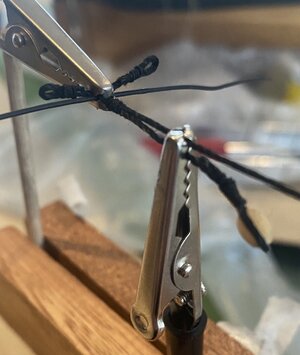
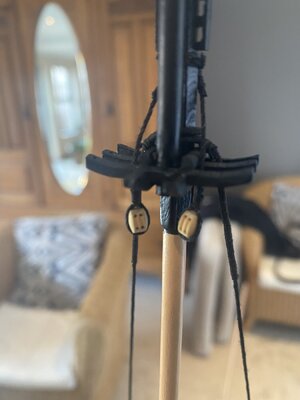
Good morning. I continued with rigging blocks to my mast. The Victory has a number fitted to the mast by a rope looped around and lashed. Here are my attempts:
I made the rope to be lashed to mast- this process is for the Mizzen topmast blocks.The whipping is small and I had to go back to my original way and those little tags reappeared- Eish. I can’t get them neat and have satisfied myself by telling myself that on the real ships the knots and ropes are never perfect . Ahh feel better now
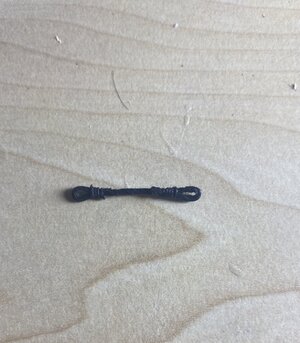
And for the quarter Davits lines on lower Mizzen mast.
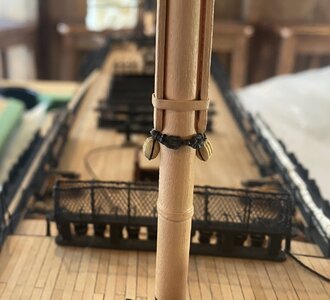
The Mizzen is being difficult due to my exuberant rookie enthusiasm by fitting the Mizzen mast prior to all the blocks etc. For the other masts all blocks and probably even shrouds will be done off the ship.
I am over the masts for the time being and have decided to play with rigging the bowsprit for a while.
Cheers Grant
I made the rope to be lashed to mast- this process is for the Mizzen topmast blocks.The whipping is small and I had to go back to my original way and those little tags reappeared- Eish. I can’t get them neat and have satisfied myself by telling myself that on the real ships the knots and ropes are never perfect
 . Ahh feel better now


And for the quarter Davits lines on lower Mizzen mast.

The Mizzen is being difficult due to my exuberant rookie enthusiasm by fitting the Mizzen mast prior to all the blocks etc. For the other masts all blocks and probably even shrouds will be done off the ship.
I am over the masts for the time being and have decided to play with rigging the bowsprit for a while.
Cheers Grant
- Joined
- Jan 9, 2020
- Messages
- 10,534
- Points
- 938

Grant that is excellent work! If those loops and lashings are not perfect, they must be "oh so damn close" that no one will notice a difference. If you had used @Daniel20 Daniel's or @dockattner Paul's rope on that, it would be unbeatable. And on the mast itself, it looks great!


