HMS Victory of Caldercraft by Wil

Joined
Jul 17, 2024
Messages
6
Points
23

Hello,

Let me first introduce myself. My name is Wil, I am 72 years old and have been under the spell of the Victory for a few years now. Over 35 years ago, I started ship modelling with the ultimate goal of building the Smit Rotterdam at the time. I started with the Nordkap and after completing it, I took the plunge and started building the Smit Rotterdam. The hull of this ship then sat in the cupboard for 30 years because my family and work demanded all my attention. I have since retired for several years and when corona broke out in 2020 and all the chores around the house were pretty much completed, I picked up the thread. To get back into it, I chose the Elbjorn and after completing this in autumn 2021, the Smit Rotterdam was pulled back onto the slipway. This ship was commissioned this spring of 2022. All packages, by the way, were from Billings. Below is a picture of the fleet, which is now in port with me.
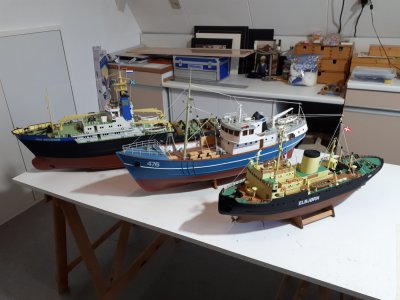
20220112_104815.jpg

When I started working on the Smit Rotterdam 30 years ago, I felt that was about my limit in terms of modelling capabilities. This would remain so for 30 years until I took the hull out of the cupboard again and finished it. Meanwhile, times had changed considerably. To give an example, back then the plates were pre-printed and you still had to cut everything yourself, now almost everything is laser cut. A big difference for an amateur.

During the dismantling of the Smit Rotterdam, I noticed that by now I had enough rest and time to start thinking about a new challenge. This was also when I came into contact with the forum www.modelbouw.nl. What I saw then was mouth-watering. I want this too!

After completing the Smit Rotterdam, with much more free time on the horizon, I knew I wanted to raise my bar a lot higher. During a holiday in Spain, I found out about the existence of the forum. Through the construction reports, some others soon came to mind. We got talking through some personal messages and then the choice was quickly made.

Although the history of historical warships never really caught my attention, building the Victory became the challenge I sought. Soon I noticed that this ship was a sought-after topic on the forum, but also that there were different brands and corresponding differences in quality. However, the choice was not difficult. It became the Victory by Caldercraft, scale 1:72.

When my package arrived from England and I opened it I immediately got confirmation that my choice was the right one. The wood is of the best quality, the 18 drawings are huge and the building instructions are very comprehensive. M.a.w. build away.

The months before, I had read through several build reports on the forum. It gave a good impression of what would be in store for me. But above all, the helpfulness of the various builders who followed this forum appealed to me. I was eager to make use of their expertise and critical notes.

At that time, what were my personal goals?
  • Working with the best material and build description. Well this worked out quite well with Caldercraft's kit;
  • Building as true-to-nature and historically correct as possible, although that's a stretch, I've since found out;
  • Below the waterline one side copper and the other wood (varnished, so the planking is clearly visible);
  • In due course, do a lot of work on the ropework, although I am still a bit hesitant about buying other rope and blocks because of the price;
  • Last but not least: working as meticulously as possible
I know myself to be followed and supported by several colleagues on the forum www.modelbouw.nl . Their advice, comments and critical notes are most welcome.

By now we are over 2.5 years on and I have already spent some 1,200 hours on my Victory. Except for fitting a few fragile parts, the hull is completely finished and I started making the masts this week.

Why my story on SOS too?

During my building process, I was also introduced to the forum www.shipsofscale , which would immediately make my view of modelling global. Even more knowledge, even more quality, this is where I want to belong too.

Therefore, I will first share with you in a nutshell my experiences of the past few years, and then report further on them in sync with my work. I am not going to describe in detail how all the components in the package should be put together, that will be familiar to everyone. What I do want to share are my personal experiences and choices, which I made and implemented during this project.
 
Last edited:
Nice to see you here too Wil, Welcome. We will sure enjoy your build en innovative way of making things possible. Your Victory build is, I know, from a superb quality.
Maybe it is possible for you to write your text in English, it is in that way more easy to read for the fellow builders here. I use most of the time https://www.deepl.com/nl/translator to translate my Dutch to English. Just copy/paste. Hope you will enjoy your time here on SOS.
 
Hello,

Let me first introduce myself. My name is Wil, I am 72 years old and have been under the spell of the Victory for a few years now. Over 35 years ago, I started ship modelling with the ultimate goal of building the Smit Rotterdam at the time. I started with the Nordkap and after completing it, I took the plunge and started building the Smit Rotterdam. The hull of this ship then sat in the cupboard for 30 years because my family and work demanded all my attention. I have since retired for several years and when corona broke out in 2020 and all the chores around the house were pretty much completed, I picked up the thread. To get back into it, I chose the Elbjorn and after completing this in autumn 2021, the Smit Rotterdam was pulled back onto the slipway. This ship was commissioned this spring of 2022. All packages, by the way, were from Billings. Below is a picture of the fleet, which is now in port with me.

View attachment 493230

When I started working on the Smit Rotterdam 30 years ago, I felt that was about my limit in terms of modelling capabilities. This would remain so for 30 years until I took the hull out of the cupboard again and finished it. Meanwhile, times had changed considerably. To give an example, back then the plates were pre-printed and you still had to cut everything yourself, now almost everything is laser cut. A big difference for an amateur.

During the dismantling of the Smit Rotterdam, I noticed that by now I had enough rest and time to start thinking about a new challenge. This was also when I came into contact with the forum www.modelbouw.nl. What I saw then was mouth-watering. I want this too!

After completing the Smit Rotterdam, with much more free time on the horizon, I knew I wanted to raise my bar a lot higher. During a holiday in Spain, I found out about the existence of the forum. Through the construction reports, some others soon came to mind. We got talking through some personal messages and then the choice was quickly made.

Although the history of historical warships never really caught my attention, building the Victory became the challenge I sought. Soon I noticed that this ship was a sought-after topic on the forum, but also that there were different brands and corresponding differences in quality. However, the choice was not difficult. It became the Victory by Caldercraft, scale 1:72.

When my package arrived from England and I opened it I immediately got confirmation that my choice was the right one. The wood is of the best quality, the 18 drawings are huge and the building instructions are very comprehensive. M.a.w. build away.

The months before, I had read through several build reports on the forum. It gave a good impression of what would be in store for me. But above all, the helpfulness of the various builders who followed this forum appealed to me. I was eager to make use of their expertise and critical notes.

At that time, what were my personal goals?
  • Working with the best material and build description. Well this worked out quite well with Caldercraft's kit;
  • Building as true-to-nature and historically correct as possible, although that's a stretch, I've since found out;
  • Below the waterline one side copper and the other wood (varnished, so the planking is clearly visible);
  • In due course, do a lot of work on the ropework, although I am still a bit hesitant about buying other rope and blocks because of the price;
  • Last but not least: working as meticulously as possible
I know myself to be followed and supported by several colleagues on the forum www.modelbouw.nl . Their advice, comments and critical notes are most welcome.

By now we are over 2.5 years on and I have already spent some 1,200 hours on my Victory. Except for fitting a few fragile parts, the hull is completely finished and I started making the masts this week.

Why my story on SOS too?

During my building process, I was also introduced to the forum www.shipsofscale , which would immediately make my view of modelling global. Even more knowledge, even more quality, this is where I want to belong too.

Therefore, I will first share with you in a nutshell my experiences of the past few years, and then report further on them in sync with my work. I am not going to describe in detail how all the components in the package should be put together, that will be familiar to everyone. What I do want to share are my personal experiences and choices, which I made and implemented during this project.
I Will
Welcome to SoS
I'll definitely follow your Victory build and look forward to it.
Best
 
Welcome to the forum Wil. As a fellow Victory Caldercraft builder i will be looking forward to your entries and posts. You are correct about the quality and excellent instructions of this kit etc.

Like yourself, I too have suffered periods of long absence from the hobby, and i hope to provide ongoing updates to my log soon. Life has a way of ‘taking priority’ but i can start to see some clear time during 2025 for building to recommence.

Enjoy and look foreard to your build,

Regards,

PeterG
 
Welcome to SoS Wil.
Your introduction was thoughtful and your goals resonate with many other forum members including myself.
I will follow your build progress with interest. The Victory is a very different beast than your previous ships, especially the rigging.
Welkom je bent hier onder vrienden.
Michael
 
Since 2.5 years, I have been building the Victory.
The hull has just been completely finished and I am going to start working on the masts and ropework.
Since my knowledge of the English language is limited, I would like to ask for your help for the English-language construction description so that I can translate it with DeepL.
I have tried scanning the paper version and translating it, but not successfully. Do any of you happen to have a digital version of the build description, which is not based on a scan, but starts from an original text document.
Hello Will
You can find the Caldercraft documentation in digital format (PDF) at the link below:
Hope this helps
 
Hello Gilbert,

thank you for sending the link. the quality of the translation is now much better.
 
The start on 29 March 2022

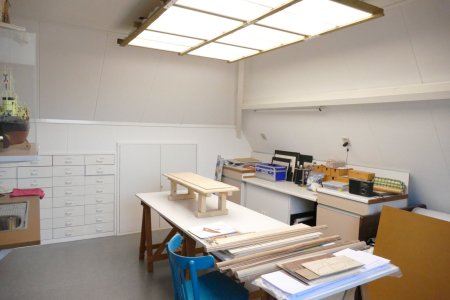
The photo below shows that I first made a table riser, which I will also use as a base for my building ramp. I can place this table riser anywhere on the work table, so I can work standing up on all sides. The photo also gives a good impression of my workstation. At the time, this was still virginly clean and tidy. That has changed in the meantime.

P1280596.JPG

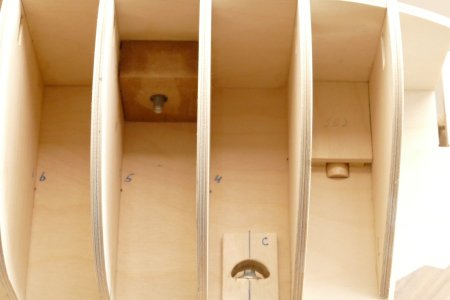
For sizing on my building ramp, I then took from the keel the positions of the trusses. In addition, I received a tip that three M3 screws can be used to screw the boat onto its plinth at a later date. These screws will later be at positions A, B and C.

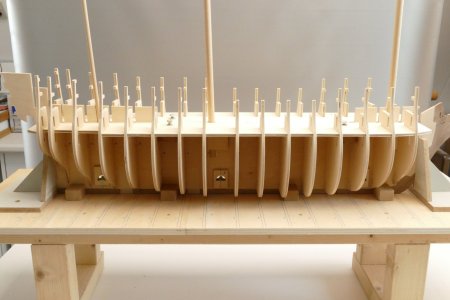
While everything was still looseI immediately ventured to check how the lower deck fits. In the slots for the trusses here, there are no bracing and these were milled to a small tolerance. Everything fits perfectly and taking it out was no problem either. My first serious confirmation that I made a top choice with Caldercraft. During the installation of this deck, I had noticed that later, when gluing the trusses to the keel, only the lower half of the joints needed to be glued, so that the trusses could locate themselves a bit more easily later on during the final assembly of this deck, as far as necessary.

P1280654.JPG

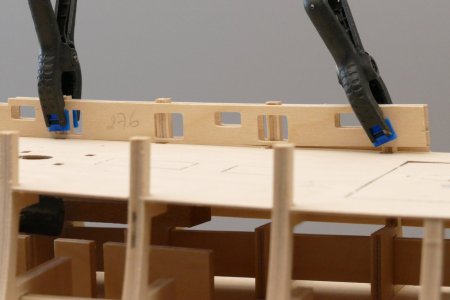
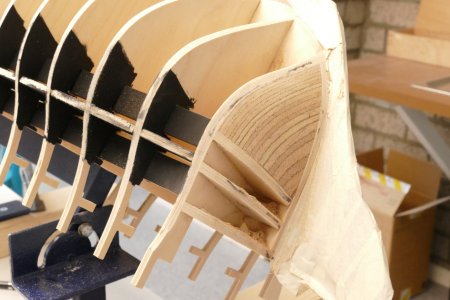
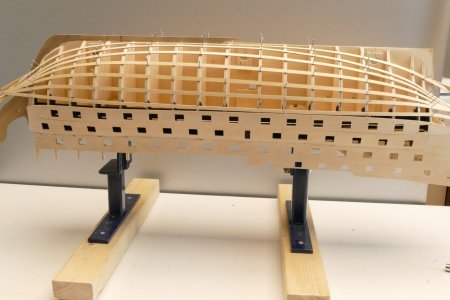
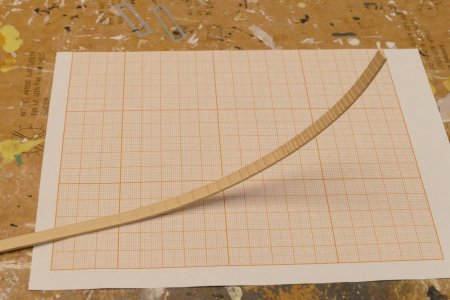
By now, I had also learned that model building is, above all, looking ahead. This already brought me to the next step in the process, which was fitting the dummy barrel strips. These bend inwards at the front and back of the ship. This is manageable for trusses 4 to 17. But from truss 4 to truss 1, the gradient is so large that bending will be necessary.
 
I notice now that this buildlog is placed in the wrong part of this forum. Maybe an admin can place it in the right place. And delete this post after.
 
Welcome aboard! Wil. Caldercraft's Victory is the best kit out there, and it will keep you busy for a while.
Success with this project and I'll be following your progress, as somewhere in the future this kit is also on my list.
Kind regards,
Dirk
 
Hello,

Let me first introduce myself. My name is Wil, I am 72 years old and have been under the spell of the Victory for a few years now. Over 35 years ago, I started ship modelling with the ultimate goal of building the Smit Rotterdam at the time. I started with the Nordkap and after completing it, I took the plunge and started building the Smit Rotterdam. The hull of this ship then sat in the cupboard for 30 years because my family and work demanded all my attention. I have since retired for several years and when corona broke out in 2020 and all the chores around the house were pretty much completed, I picked up the thread. To get back into it, I chose the Elbjorn and after completing this in autumn 2021, the Smit Rotterdam was pulled back onto the slipway. This ship was commissioned this spring of 2022. All packages, by the way, were from Billings. Below is a picture of the fleet, which is now in port with me.

View attachment 493230

When I started working on the Smit Rotterdam 30 years ago, I felt that was about my limit in terms of modelling capabilities. This would remain so for 30 years until I took the hull out of the cupboard again and finished it. Meanwhile, times had changed considerably. To give an example, back then the plates were pre-printed and you still had to cut everything yourself, now almost everything is laser cut. A big difference for an amateur.

During the dismantling of the Smit Rotterdam, I noticed that by now I had enough rest and time to start thinking about a new challenge. This was also when I came into contact with the forum www.modelbouw.nl. What I saw then was mouth-watering. I want this too!

After completing the Smit Rotterdam, with much more free time on the horizon, I knew I wanted to raise my bar a lot higher. During a holiday in Spain, I found out about the existence of the forum. Through the construction reports, some others soon came to mind. We got talking through some personal messages and then the choice was quickly made.

Although the history of historical warships never really caught my attention, building the Victory became the challenge I sought. Soon I noticed that this ship was a sought-after topic on the forum, but also that there were different brands and corresponding differences in quality. However, the choice was not difficult. It became the Victory by Caldercraft, scale 1:72.

When my package arrived from England and I opened it I immediately got confirmation that my choice was the right one. The wood is of the best quality, the 18 drawings are huge and the building instructions are very comprehensive. M.a.w. build away.

The months before, I had read through several build reports on the forum. It gave a good impression of what would be in store for me. But above all, the helpfulness of the various builders who followed this forum appealed to me. I was eager to make use of their expertise and critical notes.

At that time, what were my personal goals?
  • Working with the best material and build description. Well this worked out quite well with Caldercraft's kit;
  • Building as true-to-nature and historically correct as possible, although that's a stretch, I've since found out;
  • Below the waterline one side copper and the other wood (varnished, so the planking is clearly visible);
  • In due course, do a lot of work on the ropework, although I am still a bit hesitant about buying other rope and blocks because of the price;
  • Last but not least: working as meticulously as possible
I know myself to be followed and supported by several colleagues on the forum www.modelbouw.nl . Their advice, comments and critical notes are most welcome.

By now we are over 2.5 years on and I have already spent some 1,200 hours on my Victory. Except for fitting a few fragile parts, the hull is completely finished and I started making the masts this week.

Why my story on SOS too?

During my building process, I was also introduced to the forum www.shipsofscale , which would immediately make my view of modelling global. Even more knowledge, even more quality, this is where I want to belong too.

Therefore, I will first share with you in a nutshell my experiences of the past few years, and then report further on them in sync with my work. I am not going to describe in detail how all the components in the package should be put together, that will be familiar to everyone. What I do want to share are my personal experiences and choices, which I made and implemented during this project.
Good afternoon Wil. Welcome and I will certainly follow your Victory build. Enjoy. Cheers Grant
 
The construction slope

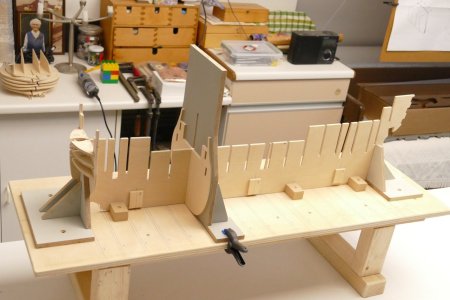
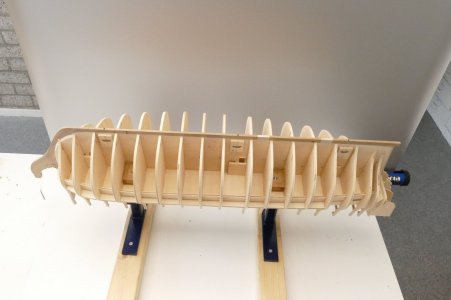
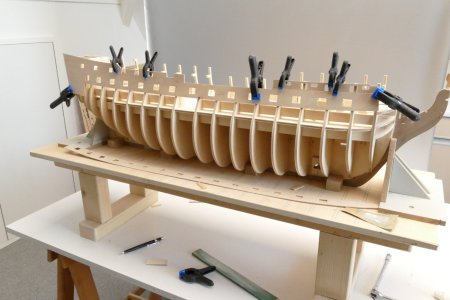
First, using 8 solid lugs to align the keel along the axis. Then, at the bow and stern, made a vertical (book) support to keep the keel properly upright. The longitudinal hull will soon be locked in place because trusses 1 and 18 will be tight against these bookends. And finally, a moveable centre section, which will allow me to align the trusses properly at right angles to the keel.

P1280625.JPG

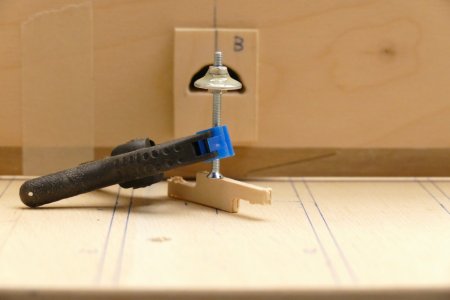
Then made the 3 recesses in the keel for the M3 threaded ends. Immediately put the nut constructions together with two-component glue and let them harden. Next day, glued in the keel with superglue. The keel is rock solid on the slope, held upright by the two "bookends". Placing the trusses can thus begin.

P1280635.JPG

In the keel there are 4 slots for the 3 masts and the bowsprit. The slots for the masts run quite a bit below the lower deck. I was wondering if I should add some reinforcement at the bottom here to prevent lateral displacement of the undersides of the masts and bowsprit.

Besides, I had been brooding on the next egg for several days:
When building one of my previous boats (Elbjorn), I made an attachment on the swivel head of my photographic tripod, which allowed me to fix the boat upside down in all positions. Here, I then used the quick coupling you can normally put on your camera. I would like to use this very handy functionality with the Victory too, were it not for the fact that the Victory will be much heavier than the Elbjorn. That's not going to be it in this form, I feared. I had to come up with something else for this. Hence the egg. To be continued.

20201120_112426.jpg

20201220_165750.jpg

In between jobs, I glued most of the trusses to the keel. Depending on the moment, 2 or 3 pieces a day. When all but truss 1 was on, I went back to fitting the lower deck. I noticed that, at this point, the hull is still flexible enough to accommodate very small deviations in the trusses to the left or right. But by eye, everything looks pretty well aligned.

Before finally assembling the lower deck, I wanted to check all the cutouts for the masts and the bowsprit for the dimensions of the spars provided. Then I could also decide whether I needed to add any reinforcements at the bottom of the masts and how loose/tight the masts should be in the recesses.

Then it turned out, what I was already afraid of, that the fit for the masts was not so good. The recess for the forward mast in the keel had to be made slightly wider, the other two recesses were actually too large. This then made me decide to apply the previously intended reinforcements to the left and right of the masts anyway, so that the mast bases are now fully enclosed the lower 5 cm. After gluing each mast immediately tested and the stability appeared to have increased enormously. If at a later stage it should turn out that the masts need to be fixed in a certain position, I can make the masts slightly longer and make a slot at the bottom of the masts that grips around the keel.

P1280653.JPG

Sorry for the English translation, this is what DeepL made of it.
 
The tilting attachment

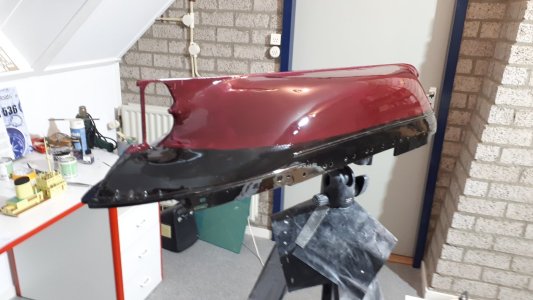
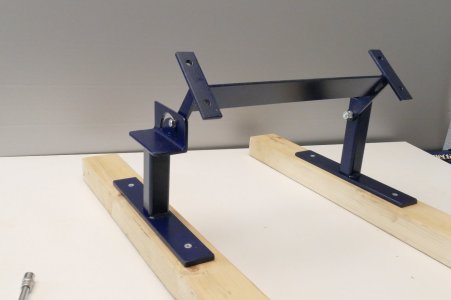
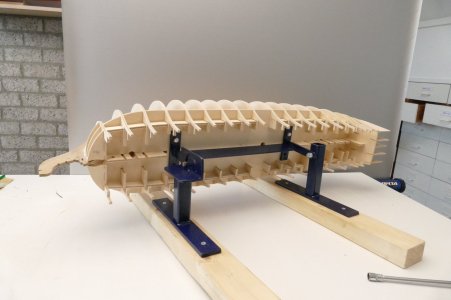
Meanwhile, the idea for the support structure for "the fuselage upside down" was already taking shape. This would determine the building sequence in the future. After studying the drawings and the construction description, it appeared that the next decks only had to be fitted after, in fact, the outside of the hull was largely finished. At least both planking, the sanding and painting and possibly the cuppering. After this phase, the hull can then be turned back to its normal position and the decks completed.

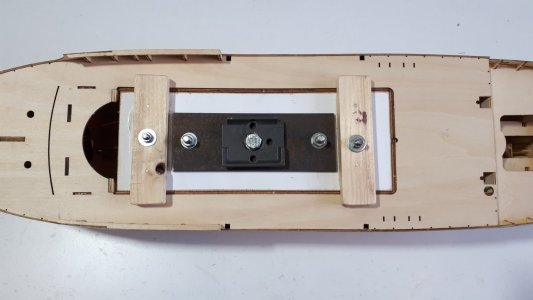
This meant leaving the lower deck completely free during that time to allow an auxiliary structure to be attached to it. The attachment of the hull was mounted on a steel frame with 4 M6 bolts. For this, I glued 4 MDF blocks of 5cm long, measured from the keel, between trusses 4 and 5 and between 11 and 12 against the underside of the lower deck. I drilled 6.5 mm holes through the deck and these blocks and mounted a M6 screw-in nut on the underside of the MDF blocks. This way, the steel frame is screwed and fixed to the hull structure.

What I had to work out next was the remaining part of the supporting structure. For this, I first had to have a look in my iron rack to see what we still had lying around. The idea behind this was that with planking, modelling and finishing, I can mount the hull on a sturdy "stand", where I can also rotate and secure the hull in all positions between vertical and horizontal. After some welding and drilling, the workpiece was painted a nice blue and left to dry outside in the sun. The working height varies from 100 cm (fuselage horizontal) to 115 cm (fuselage vertical), ideal for working on your model while standing. The photos below speak for themselves, I think.

P1280683.JPG

P1280676.JPG

P1280682.JPG
 
Back
Top