HMS Winchelsea 1764, 32 gun Frigate 1:48, Syren Ship model by Trussben

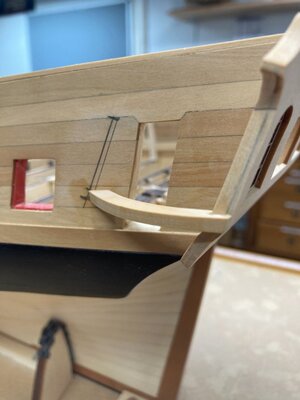
Very interesting method with the black strings to get the correct lines for every single plank - you get immediately a good impression of the location and width of the planks - It is looking like a huge work, but your result is showing, that it is worth to do.
Do you plan to simulate some treenailing on the outer hull planking?
BTW: the keel and head structure in pear is looking much much better than the original kit content - very good decision.
Is my impression correct, that a lot of elements of the stern structure are made out of plywood (see your post #22) ?
 
Thanks All for the "Likes".

Andy - "Lining off a hull" for the planking runs has been around a very long time, It just seems none of us ever really do it and why we get less than great results, I guess you could as a minimum just line off the Belts of planking which would be better than nothing.

Uwek - Yes its a lot of work, but like you say "its worth it" as it really does get better results without a doubt.
No I don't think I will be doing any treenailing on this model, I'm doing it on my Pegasus build and that's takes long enough, so on this build there will be none.
No the stern structures are not made from Plywood, it is ALL laser cut AYC/Boxwood and fits perfectly together with only minor adjustments needed to suit your own hull.

Ben
 
Planked Upper counter and blended perfectly with transom and lower counter, It is blended each side to prepare for the QG construction.
You can also see the dummy QG windows that are laser cut out of Boxwood installed permanently.
01FDD76D-4582-4165-85AE-42E32645A2FF.jpeg
 
Last edited:
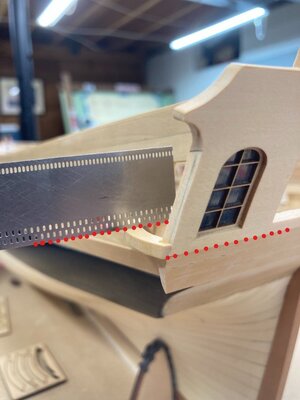
Installation of the stool piece is crucial to a good QG construction, if you get this bit wrong it will just look wrong and weird, so time must be spent getting this right.
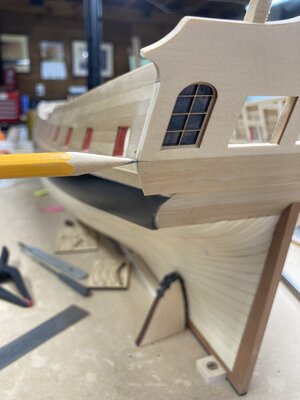
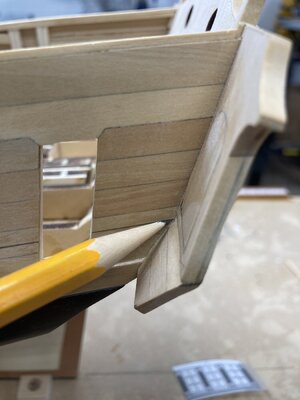
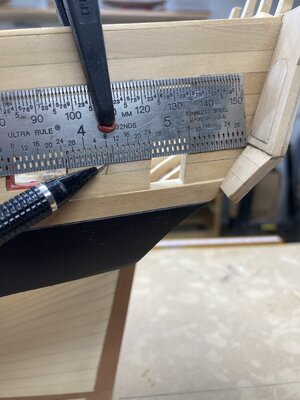
So I want to show you how I eventually figured out the correct height and position of the stool piece.
After advice from Syren model I read and reread page 112 of David Antscherl’s Comet book where he discusses this exact thing although he calls it the berthing piece.
1st - I took the height of the upper counter where it meets the lower corner of the transom.
2nd - I transferred that height to the hull side, you can see the mark is LOWER than the transom which is correct.
3rd - I used a straight edge to follow the sheer of the hull and marked a line that shows where this bottom edge will be.
4th - I used the paper templates to mark the angle and heights of the other needed reference points inc it’s upper face level and the top of the QG ( or bottom of roof )
5th - Sanding and fitting of the laser cut piece being mindful that it’s upper face should follow the roundup of the transom.

F22F9CB6-2E6D-409D-AA5C-30A2F436CBDE.jpeg41EC88B2-A27E-47FD-BEC2-9FC20F1AD17B.jpeg3DAE8B12-2CAE-48A8-BEBB-88CA7862682D.jpegCDF7EC49-D014-49CD-A296-44CD912A75CF.jpegD287A161-CD05-4260-AE82-E60BBDC5CC6D.jpeg
 
Last edited:
This is a great build log. Excellent work on the planking job and great following your explanations as well.
the cleanness of your work is admirable as well.

regards Pter
 
Hull Planking of the first belt is completed.
View attachment 267054View attachment 267055
I admire you taking creative license and putting "your signature" on an already high quality, albeit, unique hybrid kit. The standard you set really says something about the pride you take in your work and unwillingness to take the easy way of doing things, KUDOS!

I see you are using Incra's T Track Plus tracks, although maybe not using on this project. I too have them in a flush application on a building board. Love them. Ah, just noticed in another photo you have two tools I also use. I believe I recognize Sherline mill and lathe. Super tools indeed.

Your planking looks fantastic. Would you please share how you fixed the runs of black stringing along the bulkheads from stem to stern? I attempted to enlarge and discover on my own, but to no avail. I'm always looking to improve my own work and like to employ those methods that work as well as yours.

Again, wonderful work Ben.

Thanks,
Ken
 
Last edited:
Back
Top