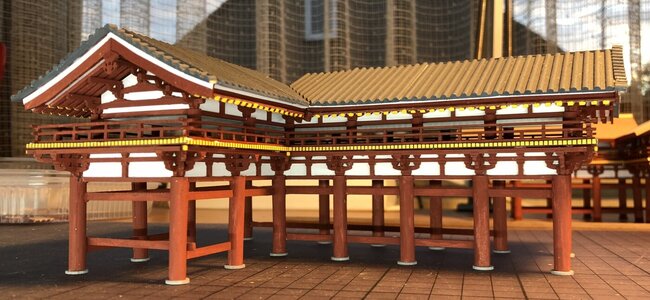
Japanese temple: Byodoin Hououdo Foenix Hall (Kyoto) (Woody Joe)

Joined
Nov 2, 2020
Messages
91
Points
143

Hello,
A couple of weeks ago I started the build of a Japanese tempel from Woody Joe, the Byodoin temple in Kyoto. I documented my progress so far in my log on the Dutch Modelbouwforum, so people who would like to see every step can look right here: https://www.modelbouwforum.nl/threads/japanse-tempel-byodoin-hououdo-kyoto-foenix-hall.274119/

I will resume very quickly here what I have done so far and I'll now keep both logs up to date.
So here the recap:

There was a moment that I knew for certain that I was going to build a Japanese temple. I visited Japan very short, but got fascinated by the shrines and temples all over the country and building one was a good way to get intimate with these structures and the culture surrounding them.

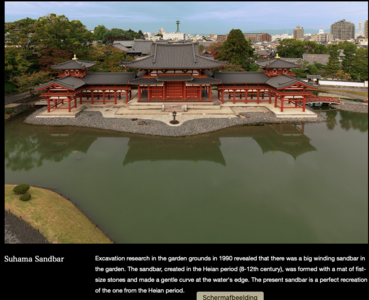
This is the real Byodoin temple in Kyoto and this is how I want to try to make it. Painted, the Central Hall illuminated and with the Buddha statue, the pond with the bridge (on the right), the sand and pebble stone shore and of course the lantern with a flickering LED light.
1604440083603.png

1604419885635.jpeg

This is the model from Woody Joe as they show it on their website:

1604420016356.jpeg

Here is some history of the temple I found somewhere on the internet:

Byodoin temple founded in 1027 depicts the heaven where is believed only dedicated people to Buddhism could go after the death.
The temple was established by Fujiwarano Yoshimitsu in 1052.
It is registered a World Cultural Heritage Site and houses many National Treasures. The highlight is the Hoo-do(Phoenix Hall) depicted on the 10-yen coin. Please admire the sitting image of the Amida Created by the sculptor Jocho, and the reflection of the stunning main hall in the Ajiike pond.
The Hoo-do or Amidado Hall is the most important building of the Byodoin, and it is best to view it from across the pond in front of it as Yorimichi would have seen it from his palace which once stood on this opposite shore. The path from the entrance to the grounds should thus be followed to the left and around the pond rather than toward the Hoo-do directly. The Amida Hall, which was dedicated in March 1053 was Yorimichi’s private chapel.
For many years visitors had to worship Amida from across the Aji-ike Pond since they were not permit to enter the Amida –do itself. From his villa on the opposite side of the pond. Yorimichi could look across the water to the face of Amida appearing through the opening of the trellis work before the image. Here was Amida in his Western Paradise, and here was Yorimichi, free of the world of politics and power, looking across the Lake of Paradise on the Western pradice as described in the Kammuryoujukyo sutra, a paradise which, at his advanced age, he believed , would soon be his in reality.
Before the hall stands a stone lantern set in a bed of raked sand, and before that is the pond which once encircled the Amida Hall.
When the doors to the Amida-do are open, the peaceful face of Amida can still be seen as Yorimichi saw it through the opening of the lattice work as Amida sits in quiet meditation.

In the next post I will start my adventure.

regards,
Gijsbert
 
Last edited:
Hello,

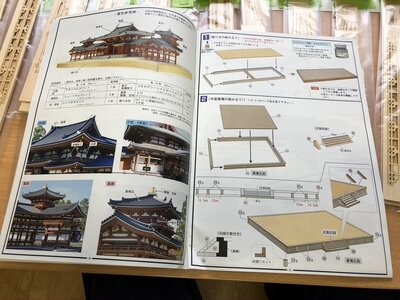
My journey started on october 15, when the box arrived from Japan.

1604431283931.jpeg

No damage, just fine and the content was even finer:


1604431419544.jpeg


1604431452154.jpeg


1604431470520.jpeg

Amazing detail, wonderfull building instructions and almost 100 little plastic bags with nice labels and no damage at all!

Good to start a project in this way.

Gijsbert
 
Last edited:
Hello,

After becoming a bit familiar with the box, I decided not to start with the central hall, but with the North and South wings. It was a little less complicated and I would not be pressed to think about the extras I had in mind for the Central Hall. And all the elements of the central hall could be practiced.
The Japanese language was no problem at all, the instructions could be understood just by the drawings and a little help from Google Translate, mostly confirmed what I had already concluded.

The detail of the lasercut parts is unbelievable. You really must develop a very "soft" grip and any force on the parts is capable of snapping the part in pieces. Luckily it is wood, so wood glue is your best friend and I had to grab for it quite often.
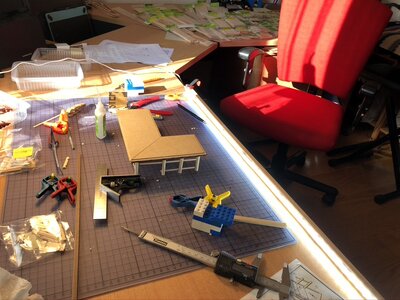
Here are the first subassemblies that I made.

1604432265967.jpeg

1604432294869.jpeg

1604432323847.jpeg

These planks are glued to the inside of the frames, but first everything must be painted. The frame was red, a wonderful reddish brown or brownish red (Vallejo Model Color Cavalry brown) which showed a different color with every change of lighting condition. The solid panels were painted white.
After that the columns were glued to the frame, where the columns on the corners needed some attention to have them nicely in line with the rest of the columns. Also I had some problems with the connecting beams, but with some "manipulation, putty and paint" it looked just perfect.

1604432804438.jpeg

1604432835796.jpeg

1604432877403.jpeg

With a LED-strip glued to a little piece of wood, I made a nice floodlight, which is very helpful because you often look to the model from a very low point of view.

1604433001801.jpeg

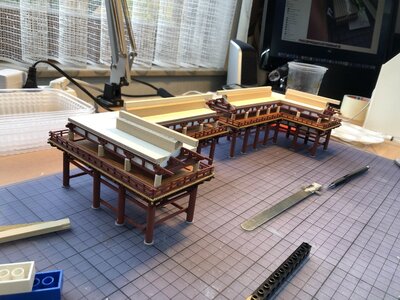
With all the columns on their proper place and painted red it begins to look like something.

1604433163205.jpeg

With the railing on the first floor and everything painted it is time to take a lot of time to look and look and look...

1604433331653.jpeg

1604433357699.jpeg

1604433379256.jpeg

1604433413472.jpeg

So far the first steps.

Gijsbert
 
Hello Gijsbert,
Nice to see here on the SOS the building of another Temple.
Regards, Peter
Peter, I cannot thank you enough for introducing me to this forum. I like it so much because it's an international forum and a lot of magnificent projects (yours included!!!) and great people!!!
 
Hello,
The next issue was to make the very significant blocked yellow line from the painted ends of the beams of the first floor. Quite a lot of solutions passed in my head, but I finally chose for a very simple one: print a yellow square with a lot of vertical lines and cut small strips to glue them to the sides of the first floor.

This is how it looks in real life

1604435142014.png

This is what I printed

1604435094059.png

And this is how it looks at the model, with some very subtle yellow ends of the beams supporting the corners of the floor.

1604435231938.jpeg

So far so good,
Gijsbert
 
Hello,

I get it that the rest of the world is looking to the election in the States, but I have decided not to look... much better for my piece of mind, hahaha.

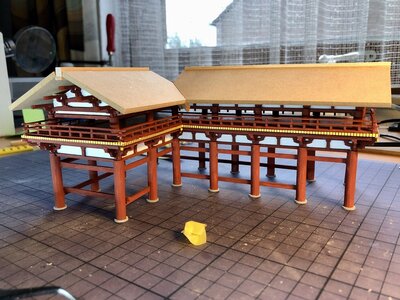
The next phase is the roof construction of both wings.

It starts with a red painted frame again with short columns and white solid panels glued to the inside.

1604436004462.jpeg

Again it is all so extremely fragile... but glued together it is quite rigid luckily.

On top of it comes the construction that forms the support for the roof.

1604436125244.jpeg

This is all quite straight forward, but every time you get struck by the accuracy of the dimensions and the finesse with which the parts are produced. Lots of kudos!!!

On these frames the basic roof panels are glued. They are going to carry small panels suggesting the roof tiles on the outside and on the inside the support beams that are supposed to carry the roof. But that comes later.

1604436519916.jpeg

I must say that I was impressed!

1604436597138.jpeg

to be continued
Gijsbert
 
I am very happy that you started this interesting building log - Looking very good
- Your work and also the kit
Great stuff
 
Thank you Uwe and all the others who commented or liked my posts. This kit is amazing and the challenge to paint it like the original is giving it an extra dimension. I really appreciate your support!
I am almost ready with catching up and then the updates will come further apart, but I hope they will be interesting. At least I can share with you my dilemmas and questions.

Gijsbert
 
Hello,

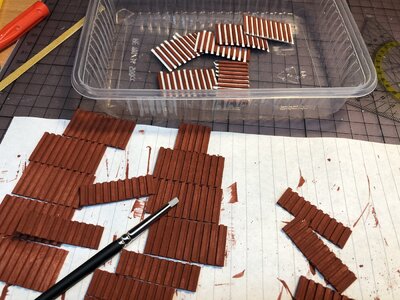
As promised, this is the last post to get to where I am right now. As you can see on the picture below, you have the support beams for the roof (colored red) but in between it is white. In the model this is simulated by a small panel in which 2 mm wide channels are machined in it. I had no clue how to get the beams red and the space in between nice white. Painting was no option because my hand is not so steady... so how???

1604499828046.jpeg

Discussing this issue in the Dutch forum, someone handed me the solution and suggested to put some 2mm wide tape in between. That made sense! But instead of tape I decided to use paper, glued with diluted glue and when dry it will not shine through.

The pictures below show how I went on with it. With the paper cutter, I made strips of 2 mm.


1604500345403.jpeg

These I glued in between the ribs on the red painted panels and use a silicone "pencil/brush" to press the paperstrip nicely down in the corners.

562379E2-61A2-4245-81FF-908DC993E29E_1_201_a.jpeg

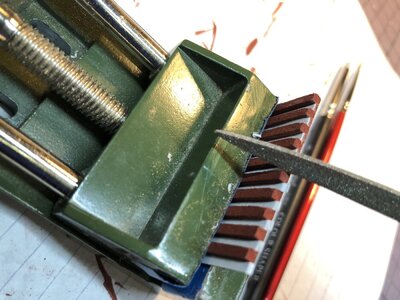
After drying I used a file to cut of the remaining pieces of paper

D52E6C31-DA16-4409-A8E8-8C4D93832546_1_201_a.jpeg

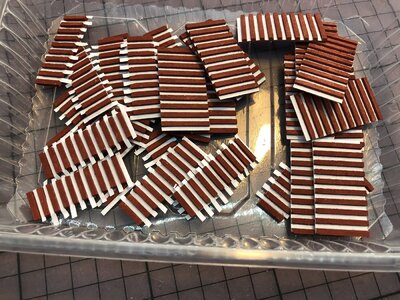
And voila... (this is just for one wing!)

9CE9CD89-38FA-4F5E-921A-06C38841A70B_1_201_a.jpeg

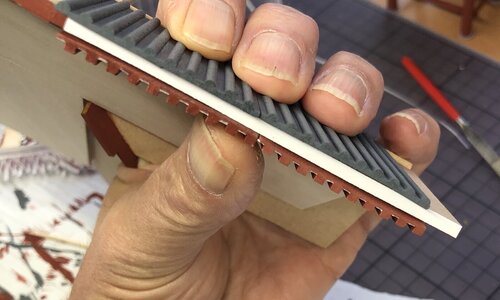
This is how it will be positioned agains the downside of the roof (now upside down). First the longer (wider) panels and then the shorter (smaller) panels on top of them.

A0F6FBAE-F27B-411D-9F98-144CFB0818C4_1_201_a.jpeg

With the ends of both rows of beams painted yellow, I think it will match the original in the best possible way.

33041B96-994D-4158-A153-A5C80458EB51.jpeg

To be continued...
Gijsbert
 
Hello,

One new "problem" I have to find a solution for is the white band below the grey roof covering. I tried a paper strip positioned to the support structure, all with the idea of not having to paint it with my unstable hand ;).
This looks good, but it should be around 1/3 of the width. That's the plan now.

46437C22-8426-45C1-ADC9-C31FC6438D8D_1_201_a.jpeg

To be continued...
Gijsbert
 
Hello,

This looks good, the glued white paper strips gives just this accent to the roof that suggests the situation in the real world. It will be under all the roofs and accentuates the horizontal lines of the building, so it is quite critical. It had been given a little thought by the ancient masters ;).
1604659671301.png

to be continued...

Gijsbert
 
This kit looks awesome and great job in the intricate detail work. I am so happy that somebody started a build log on this as I was thinking about taking it on after I finish my Black Pearl and Royal Caroline. Will be watching with great interest. Thanks for sharing.
 
This kit looks awesome and great job in the intricate detail work. I am so happy that somebody started a build log on this as I was thinking about taking it on after I finish my Black Pearl and Royal Caroline. Will be watching with great interest. Thanks for sharing.
@WarrLight. Thank you for your kind comments on my attempts to honor the grandeur of this temple by building this model to the best of my (still limited) abilities. I hope I can make it up to your expectations.
I think I have already expressed how delighted I am with the quality of the kit. So far I haven't been disappointed.

Also thanks for all the likes I have received so far!!!

Gijsbert
 
Hello,

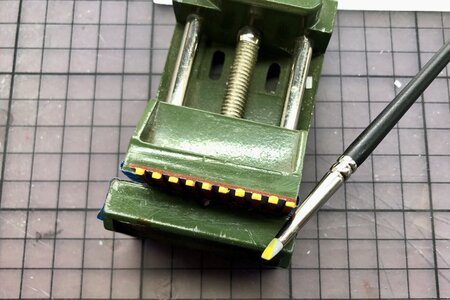
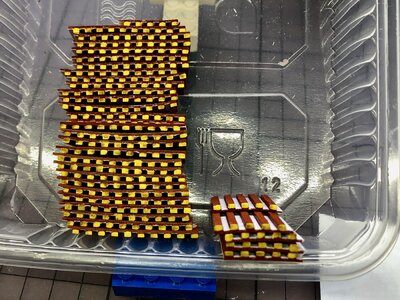
One more little step, painting the ends of the support beams of the roof. These small squares are ca. 2 x 1 mm. The challenge was to find the adequate method to do this. The paint had to be as viscous as possible to prevent it to be sucked in the wood and the brush should not slip outside the little square. Tricky...
After some experimentation it appears to be the easiest to put the undiluted paint on the wood with the small silicone tool/brush. This was good to control and everything stayed clean.

Sea the pictures below for the result.

6B1FB2CE-83CC-477E-AE65-3FF6F2C87D42_1_201_a.jpeg

045D4B32-E4A6-4F5F-8209-7F8545E1580D_1_201_a.jpeg

to be continued...
Gijsbert
 
Hello,

First of all, thank you for the likes, I appreciate that very much!

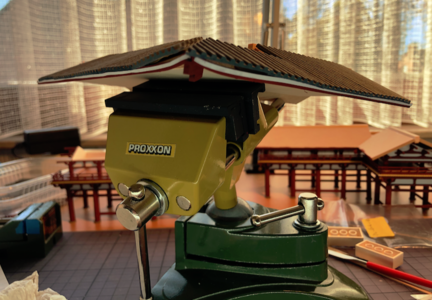
Today I got a nice result when I assembled the underside of the roof. I could paint the yellow ends of the support beams the way they should be and when all the panels were glued to the roof, the result was wonderful. Look for yourself...

57585673-8FF5-495D-BFAF-3D7CFA91BCC6_1_201_a.jpeg

D0996491-6194-44C0-85E8-D62F9AD69671_1_201_a.jpeg

1EBB9FD2-BACD-4F81-9824-F696E7B6A944_1_201_a.jpeg

The funny thing is that you can only see this when you are about 20 mm high :D!

To be continued...

Gijsbert
 
Hello,

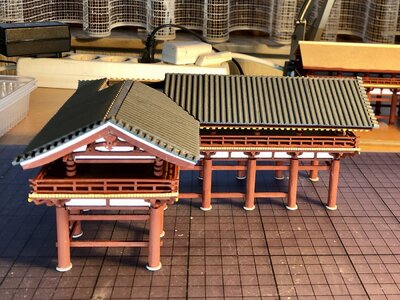
The first of many roofs is on its place. First the boarding on both faces with the white stripe and than the grey panels. Not too many problems, just in the corner where the roof curls upward a gap occurs and I have to keep that in mind when I make all the other roofs.

4A6DE480-3606-4488-984A-1F8B6A24D1CF_1_201_a.jpeg

F9956BE7-29CA-4471-B72A-51DC8AEB861A_1_201_a.jpeg

Now a number of little things must be done, just to finish this part before I make the little tower.

to be continued...
Gijsbert
 
Last edited:
Back
Top