Kingfisher 1770 1:48 POF

Hello Friends,

With the completion of the fairing, I turned my attention to the addition of trenails at the locations of the frame chocks. For anyone interested there is a nice discussion about trenails (treenails, trunnels) on Dean's build log. That conversation runs for several pages:


Issues raised include wood species, material options for the trenails, what is visible at a normal viewing distance (especially inside of a case), time commitment vs ROI, even the simple fact that once one begins there is really no turning back, etc. But at the crosshairs of that discussion was the issue of scale...

Well, for this Kingfisher build, the decision to add trenails was made long ago. Factors: 1. this is a POF build, and I really wanted to showcase the construction of the ship to the extent possible, 2. at 1:48 I believe trenails would be visible when examined at close range, 3. my earlier experiments with making trenails got me down to 0.56-0.58 mm (scaled to about 1.15 inches or 30 mm) which meant I could make 'true-to-size' trenails, 4. and finally, I like the look!

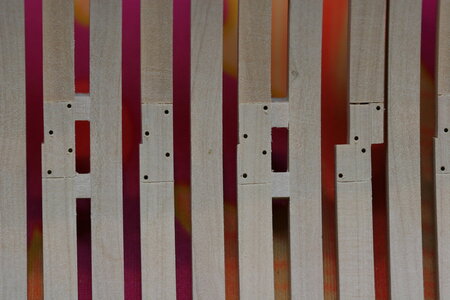
First job was to drill some holes. This was easier said than done as there is very little space inside the hull (that's where I began just in case this all went tragically wrong). I first tried to use a pin-vise type manual drill but that didn't work for me: the holes were too irregular - and I kept breaking the hardened metal drill bits. I ended up using a small, powered drill and never broke another drill bit:
IMG_9801.JPG

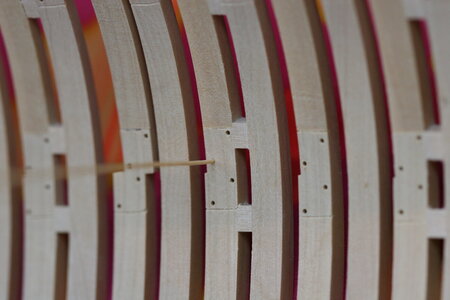
The hole is just a bit under 0.6 mm... Test fitting a boxwood trenail:
IMG_9805.JPG

Glued in (PVA):

IMG_9807.JPG

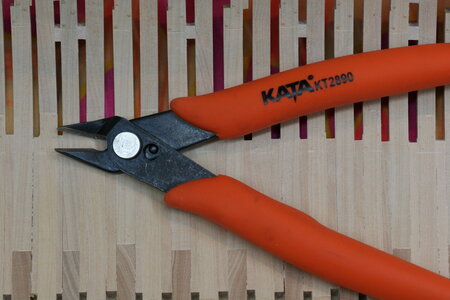
Nipped off:

IMG_9810.JPG

IMG_9813.JPG

I learned that I needed to insert the trenails using my fingers and not a tool. The use of tweezers (or orthodontic pliers) tended to 'dent' the trenail and caused it to snap (yes, I broke lots of trenail strips using my fingers as well). Given the difficulty of creating trenails this small you can be confident that I used up every broken scrap I could :rolleyes:.

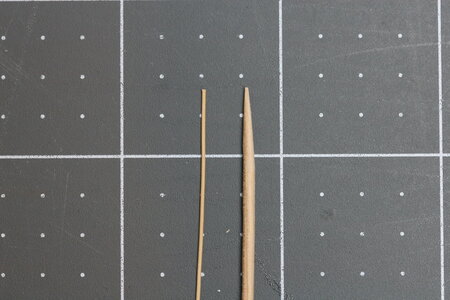
Here is the thickness of my trenail stock compared to a garden variety toothpick:
IMG_9812.JPG

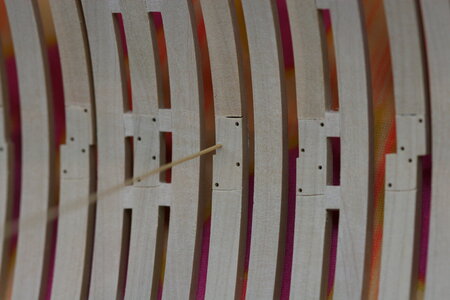
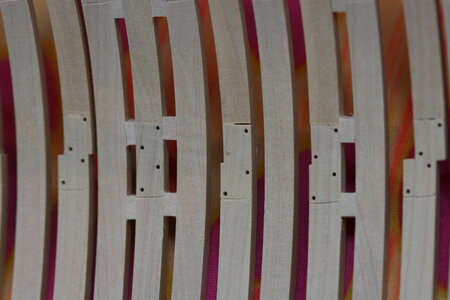
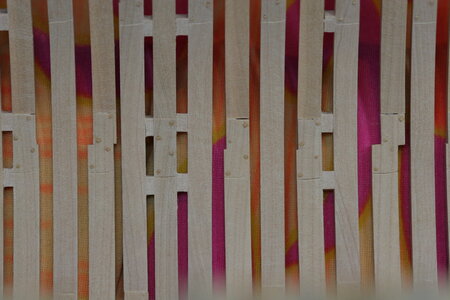
Anyway, here we are after installing the trenails:
IMG_9816.JPG

And after sanding:

IMG_9819.JPG

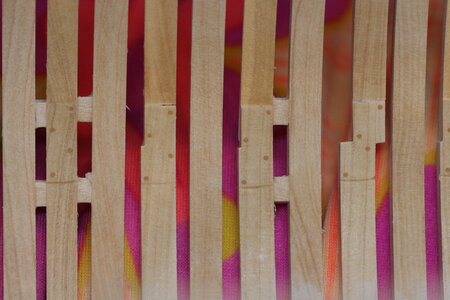
And with a little something on the wood to show what the trenails will look like after the addition of a finish coat of poly:
IMG_9822.JPG

I am very happy with the size, shape, and uniformity of these trenails. I believe careful drilling, use of a draw plate to create trenail stock, and adequate sanding all contributed to the final appearance.

Next, I'll add the chock trenails to the outside of the hull - but first a short break. My bride and I are headed to Yellowstone / Glacier National Parks for some sightseeing and hiking. See you in a few weeks!
 
Hello Friends,

With the completion of the fairing, I turned my attention to the addition of trenails at the locations of the frame chocks. For anyone interested there is a nice discussion about trenails (treenails, trunnels) on Dean's build log. That conversation runs for several pages:


Issues raised include wood species, material options for the trenails, what is visible at a normal viewing distance (especially inside of a case), time commitment vs ROI, even the simple fact that once one begins there is really no turning back, etc. But at the crosshairs of that discussion was the issue of scale...

Well, for this Kingfisher build, the decision to add trenails was made long ago. Factors: 1. this is a POF build, and I really wanted to showcase the construction of the ship to the extent possible, 2. at 1:48 I believe trenails would be visible when examined at close range, 3. my earlier experiments with making trenails got me down to 0.56-0.58 mm (scaled to about 1.15 inches or 30 mm) which meant I could make 'true-to-size' trenails, 4. and finally, I like the look!

First job was to drill some holes. This was easier said than done as there is very little space inside the hull (that's where I began just in case this all went tragically wrong). I first tried to use a pin-vise type manual drill but that didn't work for me: the holes were too irregular - and I kept breaking the hardened metal drill bits. I ended up using a small, powered drill and never broke another drill bit:

View attachment 390423

The hole is just a bit under 0.6 mm... Test fitting a boxwood trenail:

View attachment 390424

Glued in (PVA):

View attachment 390427

Nipped off:

View attachment 390428

View attachment 390430

I learned that I needed to insert the trenails using my fingers and not a tool. The use of tweezers (or orthodontic pliers) tended to 'dent' the trenail and caused it to snap (yes, I broke lots of trenail strips using my fingers as well). Given the difficulty of creating trenails this small you can be confident that I used up every broken scrap I could :rolleyes:.

Here is the thickness of my trenail stock compared to a garden variety toothpick:

View attachment 390429

Anyway, here we are after installing the trenails:

View attachment 390431

And after sanding:

View attachment 390433

And with a little something on the wood to show what the trenails will look like after the addition of a finish coat of poly:

View attachment 390434

I am very happy with the size, shape, and uniformity of these trenails. I believe careful drilling, use of a draw plate to create trenail stock, and adequate sanding all contributed to the final appearance.

Next, I'll add the chock trenails to the outside of the hull - but first a short break. My bride and I are headed to Yellowstone / Glacier National Parks for some sightseeing and hiking. See you in a few weeks!
Hi Paul, I think that your setting the bar too high for me.
 
Paul, I am impressed with your continual improvement as a ship model builder. You’re doing top notch work! And I agree at 1/48 scale treenails are feasible and look good!
At scale my treenails would be .013” or smaller! I tried on a scrap piece and the hole was so small I could barely find it! ROTF
Also due to the wood grain on my stained planks, they would basically disappear or even worse ruin the appearance.
That said, your ship scale and wood type are a prime candidate for treenails. And it looks like you will do a fantastic job!
Enjoy your time with the Admiral!
 
Hello Friends,

With the completion of the fairing, I turned my attention to the addition of trenails at the locations of the frame chocks. For anyone interested there is a nice discussion about trenails (treenails, trunnels) on Dean's build log. That conversation runs for several pages:


Issues raised include wood species, material options for the trenails, what is visible at a normal viewing distance (especially inside of a case), time commitment vs ROI, even the simple fact that once one begins there is really no turning back, etc. But at the crosshairs of that discussion was the issue of scale...

Well, for this Kingfisher build, the decision to add trenails was made long ago. Factors: 1. this is a POF build, and I really wanted to showcase the construction of the ship to the extent possible, 2. at 1:48 I believe trenails would be visible when examined at close range, 3. my earlier experiments with making trenails got me down to 0.56-0.58 mm (scaled to about 1.15 inches or 30 mm) which meant I could make 'true-to-size' trenails, 4. and finally, I like the look!

First job was to drill some holes. This was easier said than done as there is very little space inside the hull (that's where I began just in case this all went tragically wrong). I first tried to use a pin-vise type manual drill but that didn't work for me: the holes were too irregular - and I kept breaking the hardened metal drill bits. I ended up using a small, powered drill and never broke another drill bit:

View attachment 390423

The hole is just a bit under 0.6 mm... Test fitting a boxwood trenail:

View attachment 390424

Glued in (PVA):

View attachment 390427

Nipped off:

View attachment 390428

View attachment 390430

I learned that I needed to insert the trenails using my fingers and not a tool. The use of tweezers (or orthodontic pliers) tended to 'dent' the trenail and caused it to snap (yes, I broke lots of trenail strips using my fingers as well). Given the difficulty of creating trenails this small you can be confident that I used up every broken scrap I could :rolleyes:.

Here is the thickness of my trenail stock compared to a garden variety toothpick:

View attachment 390429

Anyway, here we are after installing the trenails:

View attachment 390431

And after sanding:

View attachment 390433

And with a little something on the wood to show what the trenails will look like after the addition of a finish coat of poly:

View attachment 390434

I am very happy with the size, shape, and uniformity of these trenails. I believe careful drilling, use of a draw plate to create trenail stock, and adequate sanding all contributed to the final appearance.

Next, I'll add the chock trenails to the outside of the hull - but first a short break. My bride and I are headed to Yellowstone / Glacier National Parks for some sightseeing and hiking. See you in a few weeks!
Magnificent detail Paul, have fun with your bride on vacation.
 
Paul, I am impressed with your continual improvement as a ship model builder. You’re doing top notch work! And I agree at 1/48 scale treenails are feasible and look good!
At scale my treenails would be .013” or smaller! I tried on a scrap piece and the hole was so small I could barely find it! ROTF
Also due to the wood grain on my stained planks, they would basically disappear or even worse ruin the appearance.
That said, your ship scale and wood type are a prime candidate for treenails. And it looks like you will do a fantastic job!
Enjoy your time with the Admiral!
Thanks Dean. I agree with you on all accounts. The scale and the boxwood lend themselves nicely to the addition of some visible details.
 
Hi Paul,

Your choice of treenails gives a bive subtle contract.

Ps look out during your hikes, maybe j7st maybe you stumble across a boxwood forest, be prepared.

My regards to Lynn and have a wonderfull time.
I have a hard time imagining that you didn't find some loose scraps that fit into a backpack...

For the record, Lynn will not be happy is there is spiderweb carpet...it's a good thing we only DROVE through the Gorge du Verdon.
 
I have a hard time imagining that you didn't find some loose scraps that fit into a backpack...

For the record, Lynn will not be happy is there is spiderweb carpet...it's a good thing we only DROVE through the Gorge du Verdon.
Scraps… like a few branches that fell off the trees…wink wink! ROTF

Spiderweb carpet sounds scary! Bring a few pet lizards. ;)
 
Hey Paul,
I'm rather opiniated about adding treenails (especially at scale 1:72 and beyond), but you're one of the few pulling it of splendidly. Looking forward seeing the next 6000 treenails appearing on your Kingfisher!
Johan
Thanks Johan. I agree that we should be selective. But if trenails were ever to be used I think they should fit on this particular build. I just hope it turns out good when I get to the planking. I'll start selectively on the inside before I commit to the outside of the hull.
 
Thanks Christian. I'm not disappointed with the result. Of course now the horse is out of the barn, so I'll have to continue on at least the frames.
This reminds me of a few times I started adding details like nails on the gratings, when I soon realized there are a lot of them, more than I anticipated! And I thought, what have I gotten myself into. But that’s what we do on these ships, all in the interest of adding detail. ;)
 
Excellent job, as can only be expected from you:cool:. It requires a steady ortho hand to drill holes so perfecty aligned.

Enjoy your break!
I should have done crappy work early on to diminish expectations! And yes, free-hand drilling tiny holes would not be the best option for everyone. That said, perhaps a drilling guide could be created...but there's not much room inside the hull so maybe not.
 
Back
Top