I, too, lived in LA many years ago when the Preservation Hall was still going strong. In the French Quarter for about 6 months while working in the area. I loved the Quarter.
-

Win a Free Custom Engraved Brass Coin!!!
As a way to introduce our brass coins to the community, we will raffle off a free coin during the month of August. Follow link ABOVE for instructions for entering.
-

PRE-ORDER SHIPS IN SCALE TODAY!
The beloved Ships in Scale Magazine is back and charting a new course for 2026!
Discover new skills, new techniques, and new inspirations in every issue.
NOTE THAT OUR FIRST ISSUE WILL BE JAN/FEB 2026
You are using an out of date browser. It may not display this or other websites correctly.
You should upgrade or use an alternative browser.
You should upgrade or use an alternative browser.
Kit-Bashing the King of the Mississippi Riverboat (7/21/20)
- Thread starter allricksstuff
- Start date
- Watchers 10
Kurt Konrath
Kurt Konrath
I was up in Alexandria (England AFB) for most part of 18 years, with a two year break in Shreveport (Barksdale AFB) and one year in good old Korea, just to get a bit time abroad!
In 92 they closed the base in Alexandria and I move to OKC (Tinker AFB) and retired from USAF in Y2K!
We go back to Alexandria every year or so to visit friends and family, as my wife is local to Alexandria.
In 92 they closed the base in Alexandria and I move to OKC (Tinker AFB) and retired from USAF in Y2K!
We go back to Alexandria every year or so to visit friends and family, as my wife is local to Alexandria.
I've found it very interesting that about most modelers, worldwide, are military men and women. I was once a sailor myself. Made two tours to Nam back in the late 60's.
Thank you for your service.Made two tours to Nam back in the late 60's.
I am retired USAF like Kurt. I helped end the Cold War and bring the wall down in Berlin!!
Hi guys,
I think I have a problem and don't know what to do about it.
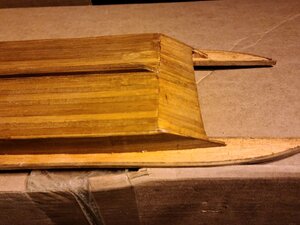
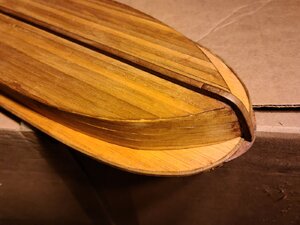
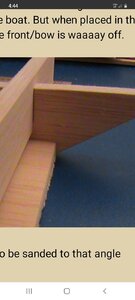
Ready? The bottom of the hull is made up of two pieces. The rear or back of these pieces need to be sanded to an angle to match the stern of the boat. But when placed in the proper position the front/bow is waaaay off.
View attachment 167037
The stern to be sanded to that angle
View attachment 167038
The bow is waaay off!
What should I do??? Is this an anomaly of the kit?
I can cut off about a 1/2" or so of the two bottom pieces then sand the bow to mold in. Is that what I'm supposed to do?
Hi
I hope these pictures help you a little. I started this kit more than 20 years ago and have been traveling with my around the world in this stage. I will finish it when I retire. Just in case I have lost something, I was able to find at eBay a full unopened kit 3 months ago, like you. Stop the Bla, Bla Daniel and post those pictures
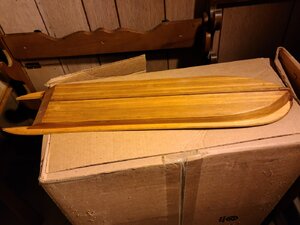
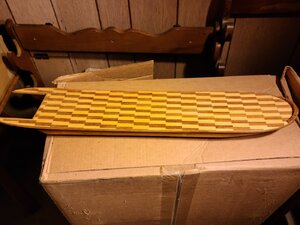
Cheers
Daniel
Before sanding the bow, place the keel to check how it fits. It is strange that AL be so way off.
Stupid of me, I boxed the kit again after taking the pictures for you. But I can go back and take a look to the instructions pictures/text and drawings. No problem at all.
I love this kit. I also got the new AL version because it has many different details.
I am following your thread. I like very much what your are doing.
Best
Daniel
I think I see why you are way off.
Looking your stern picture, i think it has to be pushed to the front. The floor, probably, has to finish flush (the upper part) and then you sand the bottom to take the excess and shape it.
In that way you will be able to plank the hull like my pictures (see the angle at the stern of my planking).
That was a screen shot of your picture
Do you see what I meant ?
I hope I am OK. To be 100% sure I will need to go back to the instruction pictures and drawings.
If you haven't glued it yet, check my suggestion.
Cheers
Daniel
Looking your stern picture, i think it has to be pushed to the front. The floor, probably, has to finish flush (the upper part) and then you sand the bottom to take the excess and shape it.
In that way you will be able to plank the hull like my pictures (see the angle at the stern of my planking).

That was a screen shot of your picture
Do you see what I meant ?
I hope I am OK. To be 100% sure I will need to go back to the instruction pictures and drawings.
If you haven't glued it yet, check my suggestion.
Cheers
Daniel
Last edited:
Kurt Konrath
Kurt Konrath
Of course you can make any changes to kit design since you are making a slightly different design of the boat overall.
Of course you can make any changes to kit design since you are making a slightly different design of the boat overall.
You are correct Kurt. But I understood he will keep the hull as it is. If he is able to correct that small issue without doing a lot of sanding will be great. For some reason I remember that it wasn't as easy as I though the planking of this hull. But that was sooo many years back.
Cheers
Daniel
Wow! What a cool deck, Daniel!
Excellent! I believe I know how to handle it now.
A big Thank You, guys
Excellent! I believe I know how to handle it now.
A big Thank You, guys
All in all, it's just another brick in the wallI am retired USAF like Kurt. I helped end the Cold War and bring the wall down in Berlin!!
All in all, you're just another brick in the wall
HI Rick, seems like we are almost neighbors as I am in Mississippi. Unfortunately, I am not familiar with this kit even though I have been wanting to buy this one for a long time. I wish I could see the plans. This would help a lot. The only thing I can think of is to make sure that you do not have some type of stern piece or Bow piece that TAKES UP that extra space. Kind of hard to explain what I am talking about. I think something else might be going on. I am thinking that you should NOT have that much wood sticking out - something else is going on here. I can see maybe 1/8" less or more. But not the excess that I see here.
Ok.... I went again to my kit. The old King of Mississippi version was without pictures. Just plans.
But !!! The new version has the booklet with pictures.
The problem was as I wrote. The floor needs to be moved to the back. The back has to finish flushed to the false keel. Then you sand to shape the bottom.
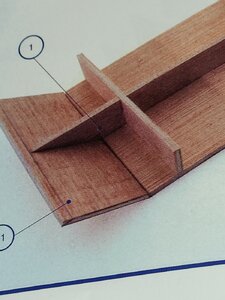
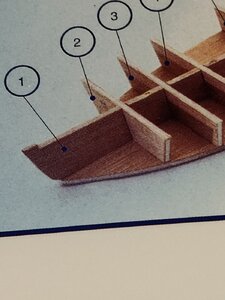
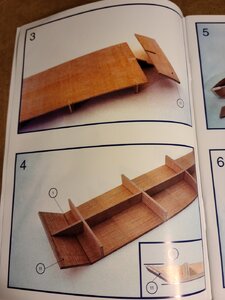
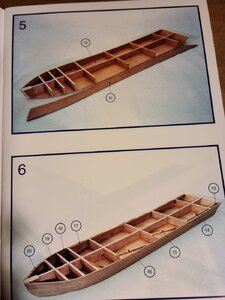
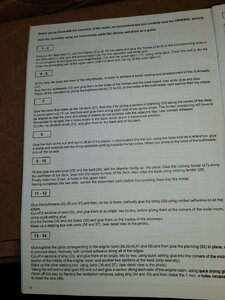
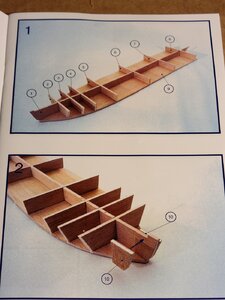
Cheers
Daniel
But !!! The new version has the booklet with pictures.
The problem was as I wrote. The floor needs to be moved to the back. The back has to finish flushed to the false keel. Then you sand to shape the bottom.


Cheers
Daniel
Last edited:
- Joined
- Dec 16, 2017
- Messages
- 34
- Points
- 48

Patience is a virtue!!!
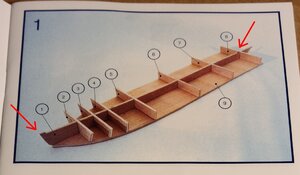
I notice that your version has 'guides' on where to assemble the individual pieces. My model has no guides. (Pins and Holes) I have to slide the pieces around until they look right then glue 'em and hope it was right.
I spent ten years in Tunica, MS as a poker dealer. Hi neighbor.HI Rick, seems like we are almost neighbors as I am in Mississippi. Unfortunately, I am not familiar with this kit even though I have been wanting to buy this one for a long time. I wish I could see the plans. This would help a lot. The only thing I can think of is to make sure that you do not have some type of stern piece or Bow piece that TAKES UP that extra space. Kind of hard to explain what I am talking about. I think something else might be going on. I am thinking that you should NOT have that much wood sticking out - something else is going on here. I can see maybe 1/8" less or more. But not the excess that I see here.
I notice that your version has 'guides' on where to assemble the individual pieces. My model has no guides. (Pins and Holes) I have to slide the pieces around until they look right then glue 'em and hope it was right.
Do you meant guides where do you have to place the bulkheads ?
I have another vintage like
your model unused. I can go and take a look to that one. I can't remember the one I already assembled the hull.
The last pictures are from the model that AL is selling now. Has a lot of changes in the decks design, but i will bet the hull is the same design as the vintage but laser cut.
Let me know. It will be my pleasure to help on this.
Daniel
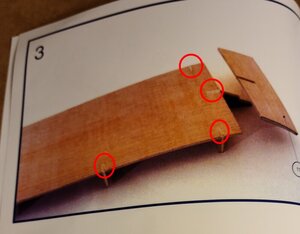
I am talking about these things. See these pix. They are yours. I drew the circles and arrows to show the guides, (Pins and Holes) My kit doesn't have these guides. I have to guess where things have to go. I have to slide pieces around until they look right then after gluing I prey I guessed right.Do you meant guides where do you have to place the bulkheads ?
I have another vintage like
your model unused. I can go and take a look to that one. I can't remember the one I already assembled the hull.
The last pictures are from the model that AL is selling now. Has a lot of changes in the decks design, but i will bet the hull is the same design as the vintage but laser cut.
Let me know. It will be my pleasure to help on this.
Daniel
I'm guessing that I have a very old version before it was 'updated'. The rubberbands that held the smaller parts together were all brittle and broken.
Last edited:


