Krick “Alert” U.S. Cutter, 1/25 scale

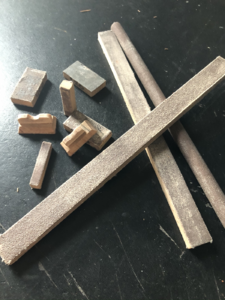
I have used small angled sanders with rotating bands that have a angled point to get almost into corners.

Yours looks like it will work well, at least until the sandpaper wears thin, then pull and replace I guess.

I have those little sanders, but find the bands aren't wide enough to cover the area I'm trying to sand. I've got quite an assortment of sanding blocks made the same way. As the sandpaper wears out I pull it off and replace it with a new piece. The glue stick works great for that, sometimes I have to sand and rough up the old surface to get a proper glue seal between the sandpaper and the sanding block.

Jan
 
Hello Jan, you are absolutely correct, those sanding sticks\block of different sizes and shapes often use and indispensable tools. In Russia, we call them 'Suhariks'. Personally, I use double-sided tape to hold sandpaper. There is no way I consider it is better, it is just another method.

1589324250842.png
 
Boatyard versus outdoor yard:

It’s the time of year when outdoor yard work can‘t be ignored. But a guy has to have little respite :D

So with an hour here and there I did a little scratch build.

ED6443BF-D2DD-4AFC-B816-C4EB33235995.jpeg

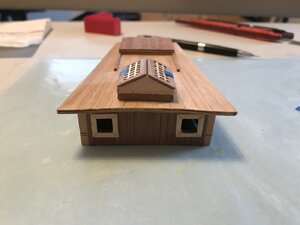
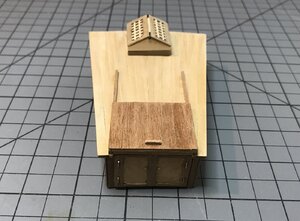
I tried to build the cabin skylight as shown in post #68. It’s a flat box with protective rungs over the windows.
The holes for the metal rungs were a problem to drill, not much wiggle room. So after several attempts with mixed results I decided there had to be a better way.
A little bit of research via Google Image and I found a number of “Alert” builds with the above skylight configuration. So a little scratch build was in order. Final sanding and staining is on agenda for the next break from yard work.

Jan
 
That cabin and skylight really look good. Don't work too hard doing other things - there are plenty of builds waiting for us. :D
 
That cabin and skylight really look good. Don't work too hard doing other things - there are plenty of builds waiting for us. :D
Heinrich,

Thank you for your response, this has been a fun build so far. I think it’s great to have bits and pieces that are left over from other builds. That little skylight was built from the pieces of Walnut, Pear, Mahogany and Basswood.

Jan
 
The work is looking good, are you going to stain the cabin top or leave as is? Sliding hatch has nice wood grains and tone.
I'm trying to decide what to do, use oil to show the grain in the wood or stain it with light Oak. I think it will depend on how the hull comes out. I'm leaning towards a natural wood type finish.

Jan
 
I've spent most of today shaping and sanding the bow fillers. Made a lot of sawdust outside.
Hello Jan, You may count the time spent shaping the bow, and clean lot's of sawdust but... I am glad you didn't underestimate this important step some of us didn't pay attention. Trust me, you will be rewarded soon, once you will start planning. Another really important task - fairing the bulkheads. I am sure you didn't forget about it... ;) BTW, very good, steady progress Thumbsup

What timber the kit supplied for the hull planking? Personally, I am big fan oils use. But it is well depends on many factors. The final decision will be once you hull will be planked.
 
Jim,

Yup, lots of work that sanding stuff. I haven’t glued the bulkheads to the false keel yet. Currently I am more interested in doing a lot of the pre work outside. The fairing step is on the agenda as soon as l finish all the filler blocks. The hull will be double planked, “Linde - Basswood “ for the 1st planking and “Nussbaum - Walnut” for the 2nd planking.

I’ve learned from my past builds, 1) the Lobster boat and 2) the in progress “Seguin Tug” , that bow and stern filler blocks are “VERY GOOD” addition. It would have made planking those less of a struggle.

Jan
 
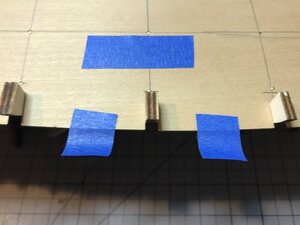
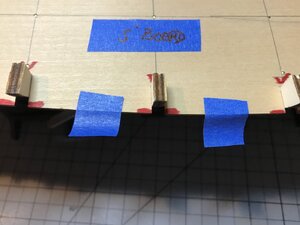
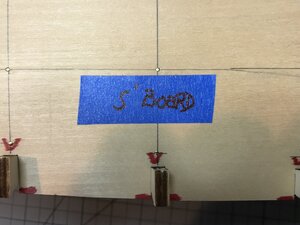
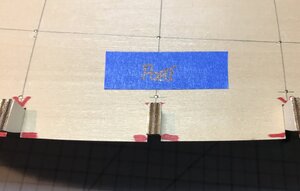
RoOh, Found a Glitch.

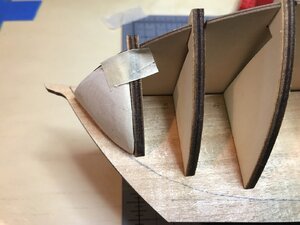
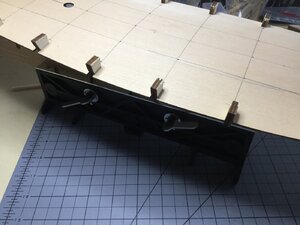
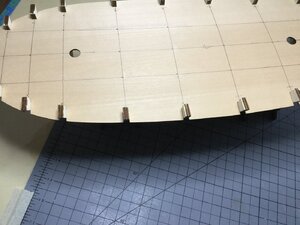
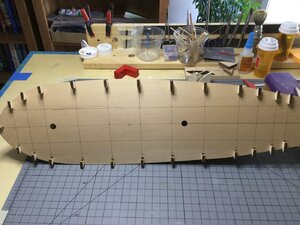
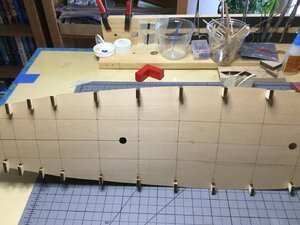
I squared the bulkheads to the keel, glued them in place and used the deck to hold everything aligned.

But, now I have a problem.

D9A3F9A2-624D-4D03-9226-38976A362ED6.jpeg
63D7539A-4C58-48A4-A7CA-2AD88BBBA163.jpeg
F15E5CAE-1C13-4FCE-B0AC-690A2FF50E16.jpeg
761ACE58-000F-44CB-8A0C-5C0F2BD3BF69.jpeg

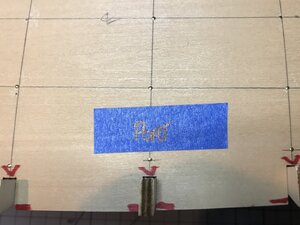
There are places the deck is not even with bulkheads. I’ve checked the square to keel of the bulkheads, the deck is properly positioned and nailed down. Do I sand the deck edges to be even with the bulkhead edges, fair the bulkheads and then adjust the deck? The bulkwards build up from the first plank which is placed slightly below the deck edge. But without a good placement of the 1st plank and some adjustments to the deck edge ??

I definitely need some opinions.

Jan
 
First I would make sure the deck is dead center on the keel! Ask me how I know.

Second if deck is still wider then bulkheads I think you would be ok to sand them even with bulkheads.

Others may give you better advise on this subject.
 
You can check against the drawings if the deck width is ok and the height from the bottom of the keel to the top of the deck. Maybe there is a double planking below the deck level filling this space. If all this is fine then just sand it down.
 
First I would make sure the deck is dead center on the keel! Ask me how I know.

Second if deck is still wider then bulkheads I think you would be ok to sand them even with bulkheads.

Others may give you better advise on this subject.

As best as I can see the deck is dead on center, the bulkheads are square on, there is no misalignment of the keel.

9F079404-08B1-44B5-BCFF-D608D0CA77AB.jpeg
67230506-C1FC-401F-AA9B-F9C8293CA61B.jpeg

3C6BC063-60A8-4A0F-9184-B29F22D25786.jpeg

12740904-0793-4D12-8E00-4572DF61B99D.jpeg

3205D6BA-57DF-487B-86DB-C1A40420C1E5.jpeg

There is very little wiggle room between the bulkheads and the deck interior fit both on the Port and Starboard side. But looking at the outside fit of the deck against the bulkhead the gaps are quite noticeable.

Jan
 
You can check against the drawings if the deck width is ok and the height from the bottom of the keel to the top of the deck. Maybe there is a double planking below the deck level filling this space. If all this is fine then just sand it down.
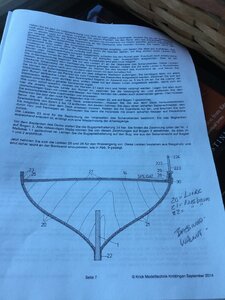
I’m at a loss here. The drawings/plans don’t really show the configuration.

08BECD93-370C-4B5A-B18D-4F4E5560C83B.jpeg
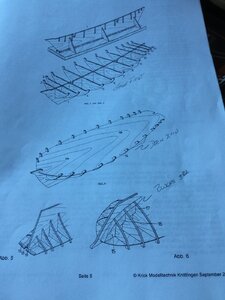
The page from the build manual shows the ideal set of isometric drawings, with all the parts fitting together as they should.

D8F5A0CA-A0AC-479C-9937-16A81C6FBA74.jpeg

The hull planking build shown in the instructions has no planking extending past the bulkheads.
The next page shows the ideal hull with planked sides and deck.

I think I’ll be making more sawdust. Very carefully and a little bit at time, but a lot more. I did manage to find a similar “Alert” build on another ship forum. There was quite a discussion of the deck fit versus the bulkheads. The author of that thread also cut, trimmed and sanded the deck edges to get a better fit to the bulkheads.

Jan
 
Hello Jan. Draw the centerline alone the top of the fasthkeel (the frames holder) from head to sternpost. Carefully measure the distance from centerline to toptimebrs on each bulkhead. You will get an idea of missilighments (if any). It is possible that false decks notches are wrongly cut. At the end of the day, it is only false deck, it can be trimmed, if necessary. It will be covered with the deck planks, I guess.
 
Hi Jan,

See the drawings are more like isometric sketches and not really drawings.
I would as Jim also mentions just trim it back to the bulkheads, in your final model you won't notice this.
 
Hi Jim,

I'm not worried about the "fix", I was just surprised at how the parts fit. The bulkheads locked into the keel with minimum effort and very close to square. The initial use of the false deck is to check the fit and hold the bulkheads square while then glue dries. It's great kit and so far it's been a lot of fun to work on. I'm also glad I have three other builds under my belt that helped me gain the confidence I needed to tackle this one.

Jan
 
Back
Top