Krick “Alert” U.S. Cutter, 1/25 scale

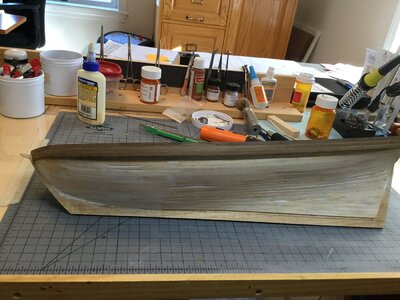
I am really anxious to see the final hull shape when everything is done. It looks to have beautiful lines. The extra piece of mahogany only adds some nice contrast so nothing to worry about.

Heinrich,

I'm looking forward to getting the hull in shape for the second planking. It's Nussbaum (Walnut??), I think that will really show off the ships lines.

Jan
 
Second Planking Start:

Rainy day yesterday so there was an opportunity to work in the shipyard. I started the second planking and found that the Walnut planks are easy to work with. I think this part of the build will take a little time. I tried to “iron on” the planks using my newly acquired Kolderstok plank bender. To that end I’m going to have to “practice“ the technique some more.

AC010171-3F2F-462D-88AE-347720021241.jpeg

The above picture shows yesterdays effort of “plank ironing”.

Jan
 
That looks very good, Jan! I like the line of planks at the bow - its a good idea to start reducing the width of the planks early on.
Heinrich,

Thank you for the reply. I spent quite a bit of time bending, sanding and filing a piece of Basswood to get the right "taper" at the bow and then cut a piece of 2 X 5mm Mahogany as a template. The first planking showed me that to prevent the "clapboard" look of overlapping planks, the fairing of the bulkheads as well as the fitting of the planks was more critical on this build than my other three builds. I'm working on getting the "plank ironing" technique down. On another note, the Walmart soldering iron has a short electrical cord, to use the tool on my hull from stem to stern without a lot of fiddling around I had to add an extension cord.

Jan
 
Day in Boatshop:

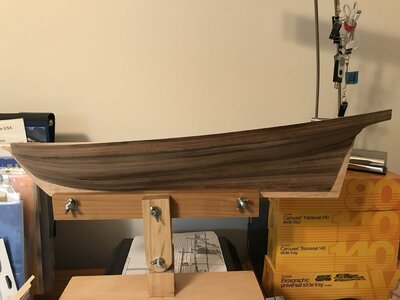
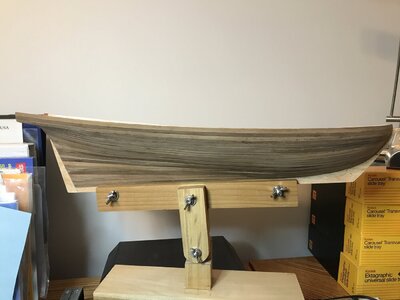
Rainy day good chance to work on planking. The Port side is complete except for the Walnut planking of the stem, stern and Keel. That part will be completed when the Starboard side is completely planked.

AC6210E8-377A-4656-8A38-D3407399BAFF.jpeg

The planking is quite interesting. The tapering at the stem is very sharp. The planks are 5mm wide and need to be reduced to about 2mm or less at the bow and according to the side view plan the same taper should be used at the stern. I tried to follow the plan but finally cried "uncle" after ruining a few planks. My final method was to adjust the taper at the stem but use the whole plank width at the stern. I think the skill level required for working on this hull would frighten off the average "Novice". I found that working slowly, cutting, sanding and fitting each plank took a bit of time, but the satisfaction of having the plank fit was both gratifying and encouraging. Off and on the Port side took about a week and half.

BE6E8862-0EBA-4357-B458-230BD6458E8B_1_201_a.jpeg

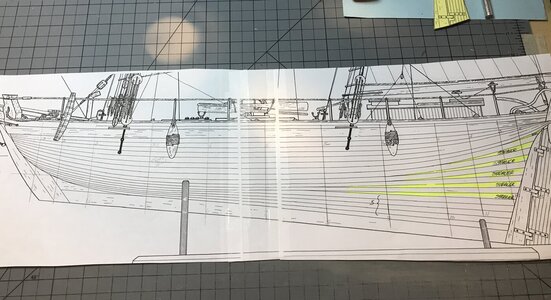
The above is the 2D plan showing the planks, and shows the severe taper at the stem. I wound up with couple more "stealers" at the stern than the number shown on the plan because I didn't taper the planks at the stern. But Im extremely satisfied with my result. I think the Starboard side will go much faster.

Jan
 
Last edited:
Absolutely beautiful, Jan! You hit this one out of the park. You have created a beautifully smooth finish and the walnut looks really rich in colour. I actually quite like the unplanked keel stem and stern!:D Take your time with the starboard side and don't try to finish it any quicker. Treat the other side as a separate ship and start over with the same dedication - you are creating something very special here! Well done, young man!
 
Absolutely beautiful, Jan! You hit this one out of the park. You have created a beautifully smooth finish and the walnut looks really rich in colour. I actually quite like the unplanked keel stem and stern!:D Take your time with the starboard side and don't try to finish it any quicker. Treat the other side as a separate ship and start over with the same dedication - you are creating something very special here! Well done, young man!
Heinrich,

Thank you for your kind words, they are greatly appreciated. You're right about taking ones time to build. I've reminded my boys that this a hobby and I'm learning as I go, it's not a contest to see who can finish first.

The plans call for 0.5mm X 10mm Walnut strips to enclose the stern post, keel and stem. I "think" those pieces are in lue of having a babbit to recess the planking into. The 2nd planks are 1.0mm X 5.0mm Walnut over the first layer of 1.5mm X 5.0mm Basswood. I'm not quite sure what I want to do for this part of the build.

Jan
 
Day in Boatshop:

Rainy day good chance to work on planking. The Port side is complete except for the Walnut planking of the stem, stern and Keel. That part will be completed when the Starboard side is completely planked.

View attachment 185765

The planking is quite interesting. The tapering at the stem is very sharp. The planks are 5mm wide and need to be reduced to about 2mm or less at the bow and according to the side view plan the same taper should be used at the stern. I tried to follow the plan but finally cried "uncle" after ruining a few planks. My final method was to adjust the taper at the stem but use the whole plank width at the stern. I think the skill level required for working on this hull would frighten off the average "Novice". I found that working slowly, cutting, sanding and fitting each plank took a bit of time, but the satisfaction of having the plank fit was both gratifying and encouraging. Off and on the Port side took about a week and half.

View attachment 185773

The above is the 2D plan showing the planks, and shows the severe taper at the stem. I wound up with couple more "stealers" at the stern than the number shown on the plan because I didn't taper the planks at the stern. But Im extremely satisfied with my result. I think the Starboard side will go much faster.

Jan

Love the color of the hull, great job.
 
Another Rainy Day:

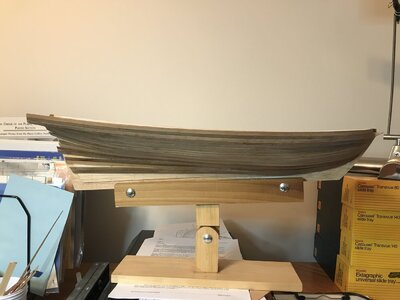
A great day to be in the boatyard. Most of the outside paraphernalia has been put in winter storage, some minor construction outside is on hold because we are waiting for material. The forecast for the next couple of days is wet, wet, wet. So we have an excuse to work inside.

A2625763-B396-420D-800E-38156046C6AD.jpeg

We've made some progress on planking the starboard side. I should be able to finish this tomorrow. I'm finding the Walnut planks easy to work with although soaking, fitting, sanding and clamping and waiting for them to dry before final gluing does take some time. The next step is to plank the deck.


Jan
 
Great work Jan! You look to have achieved great symmetry between the tow sides; i.e. your planking on the starboard side seems to follow exactly the same pattern as that of port side. This is testimony to a very accurate build. Well done!
 
Great work Jan! You look to have achieved great symmetry between the tow sides; i.e. your planking on the starboard side seems to follow exactly the same pattern as that of port side. This is testimony to a very accurate build. Well done!
 
Great work Jan! You look to have achieved great symmetry between the tow sides; i.e. your planking on the starboard side seems to follow exactly the same pattern as that of port side. This is testimony to a very accurate build. Well done!
Heinrich,
Thank you for your comments they are much appreciated.

Jan
 
Planking update:

A0454128-E12F-44C3-8391-98B57878F3DF.jpeg


Starboard side planking is all done. Now the sanding will start, 200 grit at first and a finish up with 600 grit. I'm holding off on the final finish until after the stem, stern and keel are covered with .5mm X 10mm Mahogany.

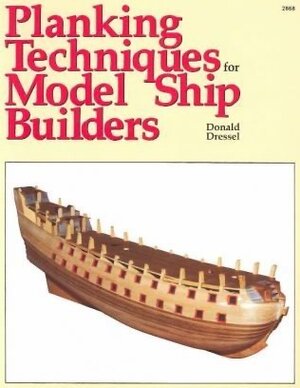
The next build step is research on deck planking and planking patterns, I"m working my way through

36D75235-4768-4CF6-B0A3-91B1BAD16D63_4_5005_c.jpeg

and other materials to figure out how to do the various deck planking techniques. A lot of the terms associated with that part of the build aren't clear in my mind yet.

Jan
 
Deck Planking:

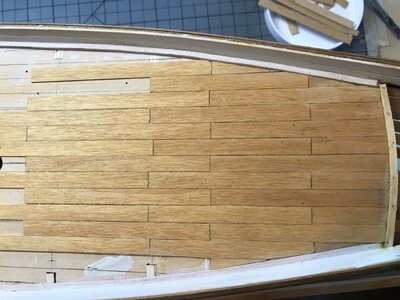
Having given it a lot of thought, I decided to follow the deck planking pattern shown on the kit’s plans. I haven’t quite developed the expertise to try some of the techniques I’ve read about or seen in various Forum logs.

I’ve made some progress and have found that one of my assumptions was in error. I assumed the deck planking material was uniform in dimensions but am finding out that the thickness and width vary, not by much but enough to notice as I placed the pieces. I had roughly marked the pattern on the deck before I started and think if didn’t have the lines to follow the planks would deviate in either direction and would not be aligned with the center line at the bow.


863941FC-3DD2-4F55-A72A-0A518740A0E8_1_201_a.jpeg
The process so far.


Jan
 
Looking good Jan! Nice colour on the deck!
 
Back
Top