Kurt's Canoe Build 19"

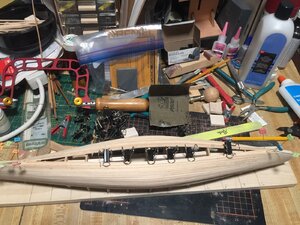
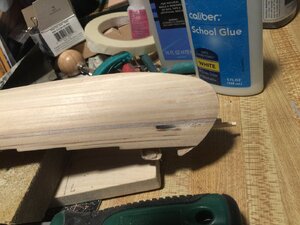
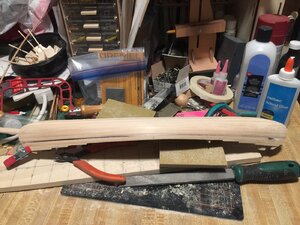
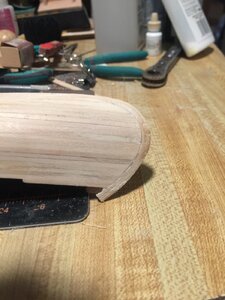
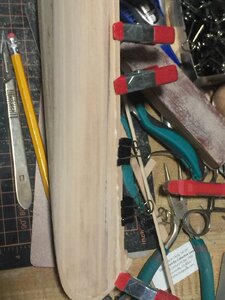
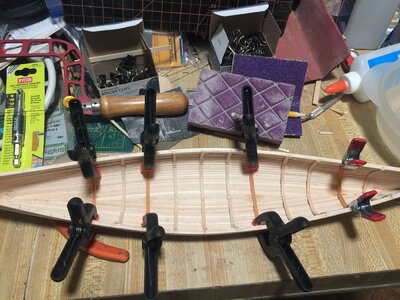
After letting planks dry good for a day ( got tied up on other projects) I removed the clamps to check progress.

I small fix need on last two strips on one end where they didn’t lay flat on stem to fix but should be easy.

At least I am now seeing a shape that resembles a canoe!

Just need a little more time to put more planks but my wife and I are stay with my 96 year old mom while her care taker is on vacation so project is at house across town for a week.

Here is last update on work
74C0F7BC-6224-4796-858F-43024F7C3A63.jpeg
 
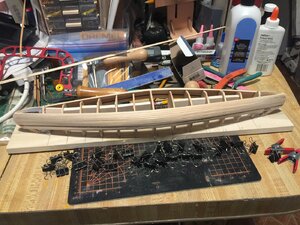
My stations started wiggling and twisting also.

I stopped by Hobby Lobby and got a length of 1” x 1/4” balsa and cut fillers to glue between stations, just make sure they are far enough down not to interfere with planking. Cost about $2.50 for 24” strip!

Helped out a lot!

Next hardback build will have them from start.

Gilles mentioned this in one of his posts, so not my idea.
I had a similar problem using hot glue, not well though as several stations were too high and others broke loose. I used some TightBond as a measure to get the loose ones in place. Bad vertical alignment and poor cutout/sanding of the frames from my poor eyesight caused planking alignment problems that do not go away. I have proceeded as a learning experience before doing a second one. After planking up and around to the bottom two of the stations have come loose again but the planking is holding things in place except for not providing a solid base to lay down the last closing strips. There will be a massive sanding job next to try and fair out the exterior and interior faces. All part of live and learn I tell myself not to be too harsh with this one. Some of my strips were not well butted on the edges or aligned so that there is a lot of "corbeling" which hopefully I can sand out. No photos of this mess. Too embarrassing to put up in SoS. Maybe later ones. PT-2
 
After letting planks dry good for a day ( got tied up on other projects) I removed the clamps to check progress.

I small fix need on last two strips on one end where they didn’t lay flat on stem to fix but should be easy.

At least I am now seeing a shape that resembles a canoe!

Just need a little more time to put more planks but my wife and I are stay with my 96 year old mom while her care taker is on vacation so project is at house across town for a week.

Here is last update on work

View attachment 174169
Looks great! I had particular problems in the "twisted" planks approaching and then contacting the stems. Some ended up still not twisted enough or parallel with the stem nose. . . maybe my clamping was not well placed there. I am now looking forward to second build, probably only 17" that time after finishing the present 19" which still has about a 3/4" wide midships bottom to be closed off. I am moving rather slowly tapering the ends of the strips on each end and fighting the vertical alignment with my bad and now loose No. 5 station which is spinning on the pins set for the first plank like a cat entry door from the outside. Keep up your nice work. I cannot continue Thursday as I am a Range Safety Officer at the local gun club for a public shooting day (hunting sight-in mainly right now.) I will have to buy out the local store's stock of sandpaper on the way home. PT-2
 
If any one needs a good small flat sanding board the blue one comes from Walgreens ladies nail section.

Medium grit on blue and back side is rougher black color.

About 1” wide by 7-8” long and fairly stiff to help but still flexible where needed

Only a few bucks. Hard tap on table cleans dust. Onto the floor of course!
 
Back at the canoe again after a week of traveling for my other hobbies of Model Railroading in Nebraska.

I got a few more planks laid on the canoe hull and now I am starting the bottom closing process!

Slow speed ahead the Captain said!

7AABA8E2-C673-40C2-84F8-8A5246B83666.jpeg
 
Back at the canoe again after a week of traveling for my other hobbies of Model Railroading in Nebraska.

I got a few more planks laid on the canoe hull and now I am starting the bottom closing process!

Slow speed ahead the Captain said!

View attachment 177317
Slow speed, Aye, Aye Captain and steady on the helm. Closing is an interesting process with the herringbone as long as you are not fish intolerant. I am waiting for a new order of mahogany being curious what grain and color that will be for a second canoe. Strips look nice. PT-2
 
Slow is good as long as you keep at it.
Closing the hull can be faster, as to more strips can be laid in one session: don't have to wait so long for between each strip being laid. Dry fit every strip once or twice to make sure the angle of the cut is good in order to avoid wide gaps in those areas.
The canoe looks great. The pear wood is a pleasure to work with...
G
 
Finished the bottom in and separated from base board.

Started adding extra rows of strips to ends to bring stem up as directed

Working now on making piles of sawdust as I start to smooth the outsides of hull.

Have one stem almost shaped and with a bit most cleanup will be ready to add stem boards or what ever they are called!

Now to read up in the guide more for process to next steps!

CB6828FB-D39A-4D44-9833-1CB6B7922743.jpeg054C67C0-225C-40EE-BFD5-5FE81200D808.jpeg
.

W
 
More sanding and filing today few more hours and I should be ready to add end stem planks and outer gunwale!

I have selected two strips for gunwhales and put them thru scrapper to give a finished shape to bands when attached
 
More sanding and filing today few more hours and I should be ready to add end stem planks and outer gunwale!

I have selected two strips for gunwhales and put them thru scrapper to give a finished shape to bands when attached
I am really impressed as Giles says that he has no power tools and does everything by hand as I understand it. I am not able to carve as well as he can so I used a small Dremel type sander drum for some fairing of the risers from midships up to the top of the stems. I also used a scraper for the wales before they were installed and then finished up by sanding. Glue and sawdust make great caulking for gaps between my strips first time which I hope to reduce greatly in the second build. Keep up the nice work. I'll be looking forward to your finished canoe. PT-2
 
I am really impressed as Giles says that he has no power tools and does everything by hand as I understand it. I am not able to carve as well as he can so I used a small Dremel type sander drum for some fairing of the risers from midships up to the top of the stems. I also used a scraper for the wales before they were installed and then finished up by sanding. Glue and sawdust make great caulking for gaps between my strips first time which I hope to reduce greatly in the second build. Keep up the nice work. I'll be looking forward to your finished canoe. PT-2
Check this YouTube video out. It is very similar to what we are doing.
You may have to copy and paste it into your browser to watch and hear. PT-2
 
Sometimes the three best tool sets you have are your mind, eyes and hands!

With time and patients you can train them to do most any job well.
 
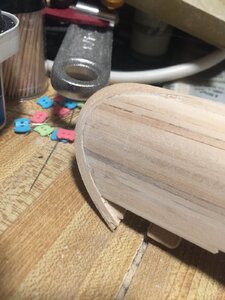
After much time taken here and there to sand the hull I have what I think will do!

3E087D1E-4EE6-4CFC-8A74-E1BA66219B86.jpeg2EA2AE7D-245E-4D00-BDF1-034B7A3464F2.jpeg

I have glued on end stem ribs and cut and sanded to shape today!

I have also glued one of external wale ribs on!

C51C749B-FAC5-4698-95F9-1E22E644BCC9.jpeg

I am not truly happy with canoe over all, it was a test build with cheaper basswood bought locally. Much poorer wood and I got in a hurry and some strips didn’t stay with station alignment so bottom looks horrible.

Sanding and putty helped as I will paint this hull and give as gift to a friend
 
After much time taken here and there to sand the hull I have what I think will do!

View attachment 181783View attachment 181784

I have glued on end stem ribs and cut and sanded to shape today!

I have also glued one of external wale ribs on!

View attachment 181785

I am not truly happy with canoe over all, it was a test build with cheaper basswood bought locally. Much poorer wood and I got in a hurry and some strips didn’t stay with station alignment so bottom looks horrible.

Sanding and putty helped as I will paint this hull and give as gift to a friend
If you can go past the putty and remember how Gilles said that "minor" defects/gaps can be filled by applying some glue, smearing it about with your finger and orbitally sand over the area. The sanding dust will mix with the glue and fill the gap. "Minor" gaps are subjective but with my dark Mahogany I notice that the lighter colored Tightbond may still show up. In a light tone wood it is invisible. "Trust Me" the car sales man and manager said. . . Oh yeah? IT worked in my first light tone canoe but does not in the dark Mahogany. You can always go to the painted hull like Gilles did in his last classic and traditional dark green which looks great! Keep the focus and you'll get her ready to float. PT-2
 
I got second external gun wale attached and after hours of drying I got the extra planks trimmed down to gun wale.

Now to start on inside!
 
I got second external gun wale attached and after hours of drying I got the extra planks trimmed down to gun wale.

Now to start on inside!
Every step or stroke of the paddle takes you further along and it looks more and more like it wants to float. I will be looking for more of your excellent work. PT-2
 
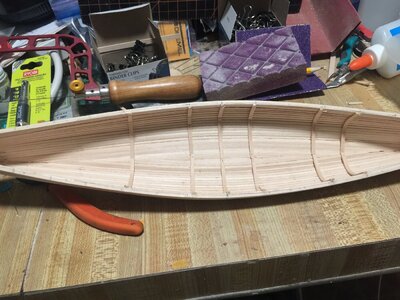
Sanding done for inside.

I started working ribs in batch based on clips I have

View attachment 184151

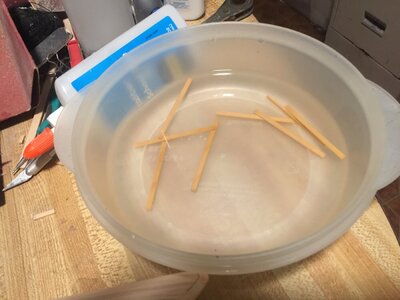
Next batch of ribs soaking

View attachment 184150

And second batch (darker color as they are wet) glued in and drying.

View attachment 184152
I did the ribs in my canoe in the same manner matching the keel end of the opposite side to the previously one set and midships fore and aft in a balanced manner as you are doing. It was best for my bad eye but I still did not get all of the mahogany ones well placed. Never again mahogany . . too stiff and brittle even with soaking and my added shaping with the electric bender. Actually I liked the ribs except for the care needed in trimming the end ends to the gunnels. Nice progress by you. Are you using the CA or Titebond. I used CA and glued my fingers together several times hold ine rib in place for a few minutes. I then added either binder clips or clothes pins depending upon the spacing available. I'll be watching your nice work progress.
My marsh has been a fiberglass sea of troubles as the resin melts my foam base and leaks out with each pour. I lost at least a quarter of each pour under the base and flowing out from the sides. Finally done with that and removing the underflow and sanding off the excess resin!!!!! Oh well, life and learn and come back another day. PT-2
 
Back
Top