Very good appearance - realistic deck timbers - very good work
-

Win a Free Custom Engraved Brass Coin!!!
As a way to introduce our brass coins to the community, we will raffle off a free coin during the month of August. Follow link ABOVE for instructions for entering.
-

PRE-ORDER SHIPS IN SCALE TODAY!
The beloved Ships in Scale Magazine is back and charting a new course for 2026!
Discover new skills, new techniques, and new inspirations in every issue.
NOTE THAT OUR FIRST ISSUE WILL BE JAN/FEB 2026
You are using an out of date browser. It may not display this or other websites correctly.
You should upgrade or use an alternative browser.
You should upgrade or use an alternative browser.
La Candelaria OcCre 1:85 - First build
- Thread starter dThomas
- Start date
- Watchers 23
-
- Tags
- la candelaria occre
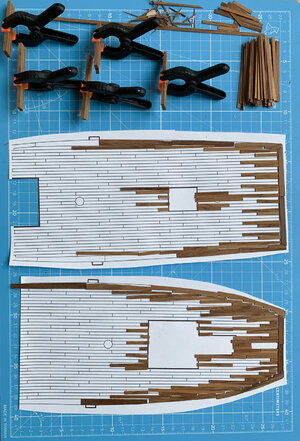
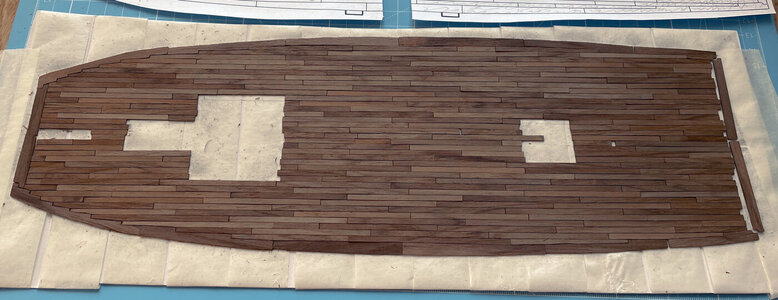
It’s a long time since my last update. I was busy making the planks for the main deck wich took considerably longer than expected. Also there was not so much time to actually work in the shipyard. But now it’s time for some progress. All planks for the main deck are made and have been prepared for gluing. There are nearly 200 single pieces that had been cut out, fitted and blackened on the sides using a pencil.
Work in progress, cut out planks on the paper template:
All planks completed and prepared for application of contact glue:
Beside the actual progress on the model I had a lot of time to think about how to realize the different aspects of the model and made some decisions any preparations. But I will talk about that in another post…
Work in progress, cut out planks on the paper template:

All planks completed and prepared for application of contact glue:

Beside the actual progress on the model I had a lot of time to think about how to realize the different aspects of the model and made some decisions any preparations. But I will talk about that in another post…
Thank you for the kind comments and it was definitely worth the effort! I still have to decide which treatment to choose for the deck. I have three options: boiled linseed oil, wood butter or teak oil. I will have to prepare some samples to decide which to choose. Despite that I like the look of the current untreated wood I think it will be no good idea to leave it without any stain especially. What are your experiences what will happen with the wood in a few years if I leave it without any stain?
The weathered look on the picture below has been archived by mixing white PVA glue with graphite dust sanded of from a pencil. I used the mixture to fill the small gaps between the individual planks the I used a wet cloth to wipe of the excessive glue and by leaving just a little bit of the black mixture at the edges it creates this look.
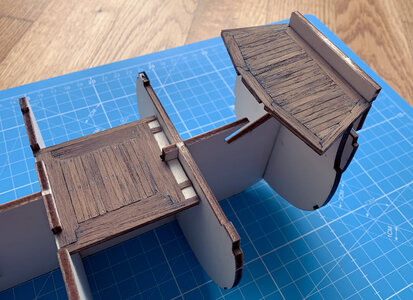
The weathered look on the picture below has been archived by mixing white PVA glue with graphite dust sanded of from a pencil. I used the mixture to fill the small gaps between the individual planks the I used a wet cloth to wipe of the excessive glue and by leaving just a little bit of the black mixture at the edges it creates this look.

As mentioned earlier some decisions had to be made and here’s the conclusion I came to:
There are some parts of the kit I really don’t like, especially the stern. This is an official product image from Occre:

Now that looks quite nice and there are several pictures in the manual showing it like this. But if you go through the assembly steps you will only find one step to assemble the stern which tells you to paint a photo etched brass piece and glue it to the model (step 55):
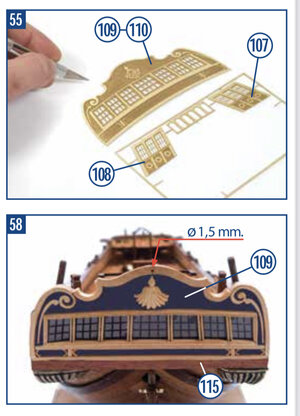
For sure this would be easy and not so challenging but I would never be happy with the result…
So I thought about what I can do. At first I considered getting some walnut strips and a set of profile scrapers and cut and bend them to form the structure shown in the picture. Probably I will actually use the window grating from the photo etched brass. Then I thought, that it would be good to replace the plywood base for the brass element with a walnut piece but how to construct that…
I started making a list of tools that would be required for this and it got quite long. Then I found this one on Amazon:
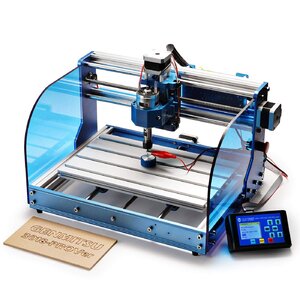
Since I am using 3D Software for many years now (and given the fact that I am a software developer) this seems to be the right tool for me!
I got it last week and decided to test it with two planks I had to remake because they did not fit very well.
At first I need the NC code file. I started by importing my existing plan of the planks into Autodesk Fusion 360 and extruded the imported shape by my raw material thickness (0.6 mm). That’s the result:
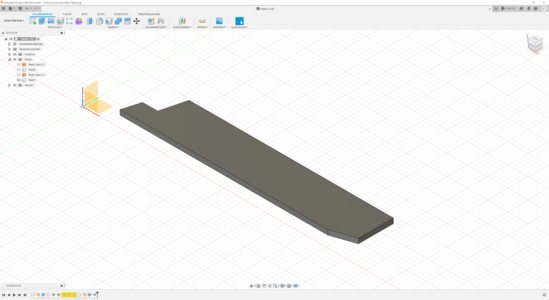
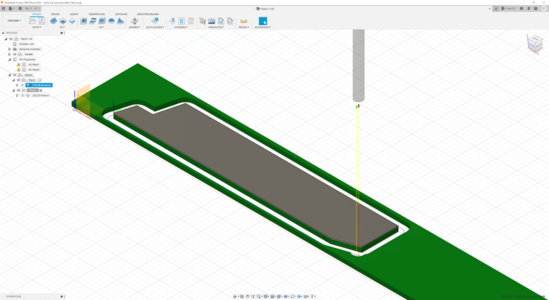
Next I created a tool definition for the 1mm corn shaped end mill I will use. The next step was to setup the router coordinate system and add a 2d shape operation to cut out the plank from the raw material (green):
Afterwards I exported the actual NC file to be used. I used double sided tape to fix the wood on the machine and after some test runs I got this:
View attachment CNC1.mp4
And some pictures of completed cleaned planks (not the plank from the video above) with blackened edges:
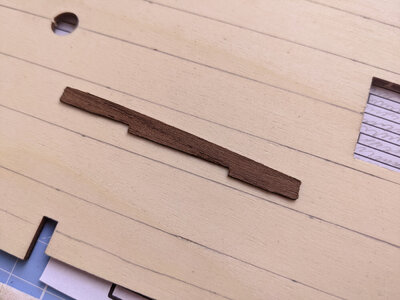
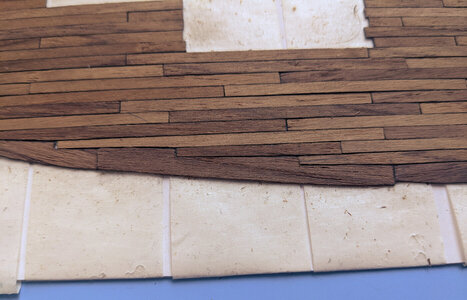
(Only one plank was cut using the CNC the others are hand cut with an Exacto)
I am happy with the result but I think I could still improve it by tweaking the settings. I used 5000 rpm and 600mm/min cutting speed, no clue if that is reasonable or not. If you look closely at the first image you can see that the cutting is fine when it runs parallel to the grain but when it’s orthogonal the seam is feathered a bit (the right end in the first picture)
There are some parts of the kit I really don’t like, especially the stern. This is an official product image from Occre:

Now that looks quite nice and there are several pictures in the manual showing it like this. But if you go through the assembly steps you will only find one step to assemble the stern which tells you to paint a photo etched brass piece and glue it to the model (step 55):

For sure this would be easy and not so challenging but I would never be happy with the result…
So I thought about what I can do. At first I considered getting some walnut strips and a set of profile scrapers and cut and bend them to form the structure shown in the picture. Probably I will actually use the window grating from the photo etched brass. Then I thought, that it would be good to replace the plywood base for the brass element with a walnut piece but how to construct that…
I started making a list of tools that would be required for this and it got quite long. Then I found this one on Amazon:

Since I am using 3D Software for many years now (and given the fact that I am a software developer) this seems to be the right tool for me!
I got it last week and decided to test it with two planks I had to remake because they did not fit very well.
At first I need the NC code file. I started by importing my existing plan of the planks into Autodesk Fusion 360 and extruded the imported shape by my raw material thickness (0.6 mm). That’s the result:

Next I created a tool definition for the 1mm corn shaped end mill I will use. The next step was to setup the router coordinate system and add a 2d shape operation to cut out the plank from the raw material (green):

Afterwards I exported the actual NC file to be used. I used double sided tape to fix the wood on the machine and after some test runs I got this:
View attachment CNC1.mp4
And some pictures of completed cleaned planks (not the plank from the video above) with blackened edges:


(Only one plank was cut using the CNC the others are hand cut with an Exacto)
I am happy with the result but I think I could still improve it by tweaking the settings. I used 5000 rpm and 600mm/min cutting speed, no clue if that is reasonable or not. If you look closely at the first image you can see that the cutting is fine when it runs parallel to the grain but when it’s orthogonal the seam is feathered a bit (the right end in the first picture)
Last edited:
Just my humble opinion. My best guess would be to at least to have a finish coat of gloss, semi gloss or satin varnish or polyurethane. I personally like using spray cans of semi gloss or satin polyurethane as a final coat. Or spray varnish if you can find it. That should protect the Model for many, many years.
Welcome aboard Tomas what a wonderful show of craftsmanship
Hallo @dThomasHello SOS builders,
Now after I have gathered a huge load of information and inspiration from the fine build logs here on SOS it’s finally time to start my own first model.
I have chosen La Candelaria from OcCre which seems the right size and complexity for me to start with ( but it was hard to withstand buying one of the larger more complex models available, like for example the ZHL San Felipe )
Since there seems to be no other build log for this ship I will start one by myself and maybe it will be helpful for others also interested in this model.
Before I had even purchased the kit I already started making plans on how I could modify it. So I also purchased some 3 and 9 x 0.5 mm Teak strips which I will use for a custom deck planking pattern.
But at first it’s time to see what‘s actually in the box…
Additionally I made a draft picture in PhotoShop to test the colors I want to use, and this shows which colors I want to use on the model:
Finally some pictures of my first steps, not so much progress so far but at least building has started!
A small note: I was surprised that the bulkheads are sitting relatively loose inside the notches so I had to be careful while the wood glue dries to ensure a right angle.
we wish you all the BEST and a HAPPY BIRTHDAY

A wonderful display of craftsmanship.
Many thanks for the birthday wishes!
I hope I can post some progress in the near future. Currently I’m having some trouble with the planking of the main deck. Had to remove some already glued planks because they were not fitting well. So I learned that the order for placing planks must be carefully chosen…
At least the small fire deck is now finished
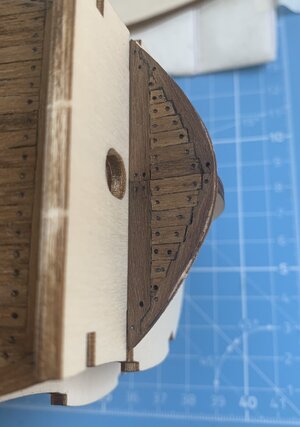

we all should learn every day something newSo I learned that the order for placing planks must be carefully chosen…
most important is, that we are not doing the same mistake twice (ok maybe some time third time or so....)
In the last weeks I increased the time spent working at the shipyard in order to finish planking the main deck and now it is done! Everything had been glued in place and the edges received a finish using files. The surface has been scraped smooth.The deck has been dry fitted to ensure everything will work out as expected.
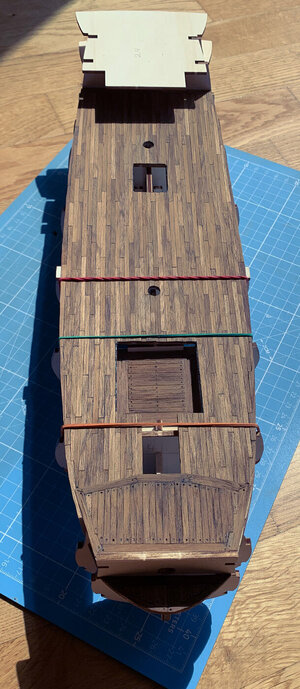
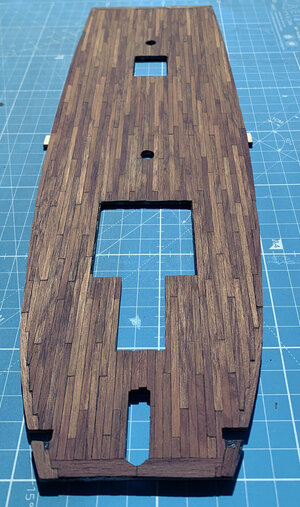
The next step will be simulating nails using a pencil. Since there will be approximately one zillion nails this will take some time...
I am planning to add fake decks below the two gratings instead of just a look inside the empty hull. Therefore I need some cutouts from the basic plywood hull structure where the fake decks will be placed. I started removing material below the front grating so you will be able to see the fake deck and the mast base through the grating.
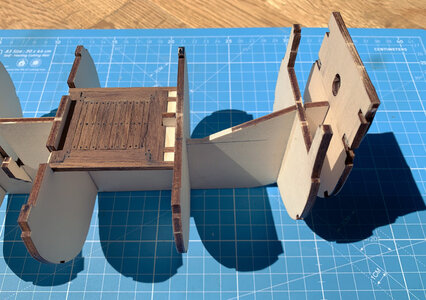
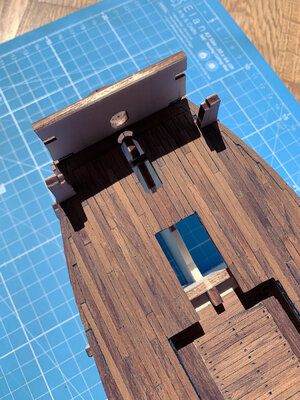
Additionally I am working on a scratch built bell tower as a replacement for the kit provided metal casting. The parts will be CNCed from walnut but I still need some practice and need to improve the process. Below you find the intended design for the pillars and a first milled test pillar. The test piece is already quite as expected but I need to improve the calibration after changing the end mill because the edge beveling is slightly off center (the image only shows the good side ).
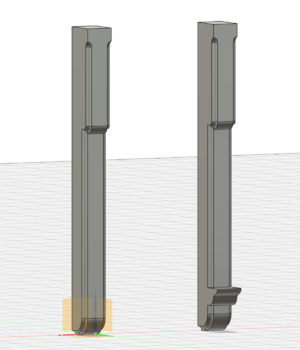
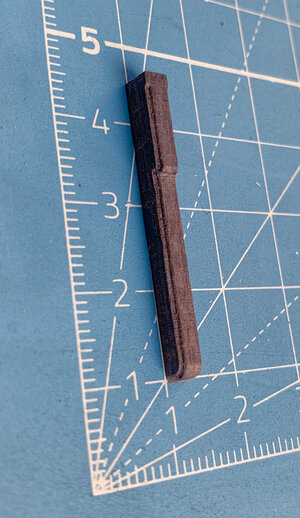


The next step will be simulating nails using a pencil. Since there will be approximately one zillion nails this will take some time...
I am planning to add fake decks below the two gratings instead of just a look inside the empty hull. Therefore I need some cutouts from the basic plywood hull structure where the fake decks will be placed. I started removing material below the front grating so you will be able to see the fake deck and the mast base through the grating.


Additionally I am working on a scratch built bell tower as a replacement for the kit provided metal casting. The parts will be CNCed from walnut but I still need some practice and need to improve the process. Below you find the intended design for the pillars and a first milled test pillar. The test piece is already quite as expected but I need to improve the calibration after changing the end mill because the edge beveling is slightly off center (the image only shows the good side ).


I build this model from mid-1985-to 1990. In fact a very good model for beginnerHello SOS builders,
Now after I have gathered a huge load of information and inspiration from the fine build logs here on SOS it’s finally time to start my own first model.
I have chosen La Candelaria from OcCre which seems the right size and complexity for me to start with ( but it was hard to withstand buying one of the larger more complex models available, like for example the ZHL San Felipe )
Since there seems to be no other build log for this ship I will start one by myself and maybe it will be helpful for others also interested in this model.
Before I had even purchased the kit I already started making plans on how I could modify it. So I also purchased some 3 and 9 x 0.5 mm Teak strips which I will use for a custom deck planking pattern.
But at first it’s time to see what‘s actually in the box…
View attachment 276420
View attachment 276423
Additionally I made a draft picture in PhotoShop to test the colors I want to use, and this shows which colors I want to use on the model:
View attachment 276430
Finally some pictures of my first steps, not so much progress so far but at least building has started!
A small note: I was surprised that the bulkheads are sitting relatively loose inside the notches so I had to be careful while the wood glue dries to ensure a right angle.
View attachment 276432
View attachment 276433
Kommen gernIch denke Tobi. wir könnten zusammen eine nette Gesellschaft machen und ein gutes bayerisches Bier trinken


