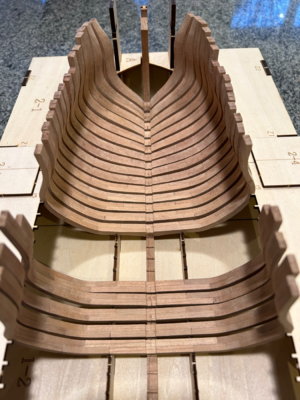
La Salamandre 1752 1:48 (CAF) by Salty

Paul, Jack and Grant, thanks for your encouragement. You were probably just as surprised as my family to see something other than a bag full of U-shaped wooden objects - AKA frames - on the end of the kitchen table.

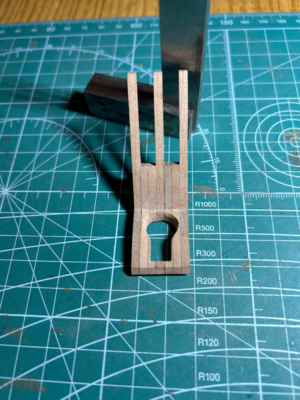
I have started the rest of the stern structure. First of all the counter timbers. Same procedure as before - cut pieces from billet and glue up.
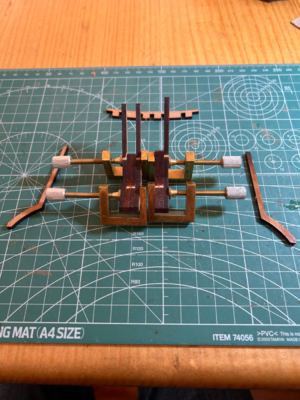
IMG_0345.jpeg
 
Next step is to cut out a section for the stern post and rudder stock.

I cut a rectangular slot with a small chisel and used a musical instrument maker’s knife to widen the top to form the circular section at the top.

IMG_0353.jpeg
 
Thanks again to everyone who has been looking in on my progress.

The next part is the stern timbers and fashion pieces

IMG_0344.jpeg

This will be my last post for a little while. I am going on holidays for a few weeks. I live in Tasmania and we are going somewhere a bit warmer for a break.

Although Tasmania was settled by the British, it has some French connections as many areas were explored by the French and bear French names - eg D'Entrecasteaux Channel, Furneaux Islands and Freycinet Peninsula. So perhaps it’s not so strange I am building a French ship…
 
It has taken me a little while to get back to normal after my holiday and start work again on La Salamandre.

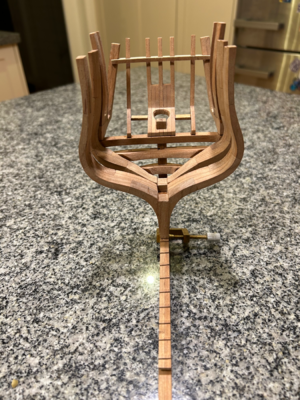
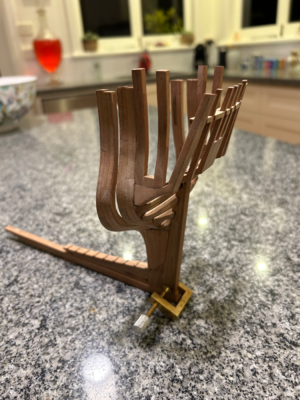
This is the finished stern.

IMG_0367.jpeg

IMG_0368.jpeg

I had to consult Boudroit and Berti about the placement of the fashion pieces and the reinforcement blocks between them on each side. The glue joints for the aft fashion pieces aren’t quite up to standard, but the structure is quite solid considering how delicate each part is. One saving grace is that the joints will not be visible in the finished model.

Although it looks relatively straightforward, quite a bit of fitting was needed to get it all together, especially the starboard stern timber (for some unknown reason) and the aft fashion pieces of course.
 
It has taken me a little while to get back to normal after my holiday and start work again on La Salamandre.

This is the finished stern.

View attachment 389756

View attachment 389757

I had to consult Boudroit and Berti about the placement of the fashion pieces and the reinforcement blocks between them on each side. The glue joints for the aft fashion pieces aren’t quite up to standard, but the structure is quite solid considering how delicate each part is. One saving grace is that the joints will not be visible in the finished model.

Although it looks relatively straightforward, quite a bit of fitting was needed to get it all together, especially the starboard stern timber (for some unknown reason) and the aft fashion pieces of course.
Hi Salty. I’ve just come across your log, I’m very impressed and am surprised at your standard for a first attempt. You are compiling a detailed and interesting log that I find I’m enjoying, it’s easy following, and I feel that I’m looking over your shoulder as you build. Nice one, Ken
 
Ken, Tobias and Uwek, thanks for your posts. I am pretty happy with how things have gone to date, but there is quite a bit of thinking before I do any actual work. Unfortunately, I still have a job, so progress is quite sIow. I am a little surprised at the number of people interested in my model, but I will do my best to keep you and everyone else entertained.

The next step is to bevel frames 1 to 43 and fit them to the keel.

I am using a small rasp - about 60-80 grit - to remove most of the wood - followed by 120, 240 and 320 grit sanding sticks. I like the rasp as it doesn’t dull or clog like sandpaper and it makes a nice flat bevel. I can’t bring myself to use an electric sander, partly because I am not confident my hand-eye coordination is up to scratch and partly because my workspace is the end of the kitchen table, so mess has to be kept to a minimum. In any event, it’s not a race and the work is strangely relaxing after a day in the office.

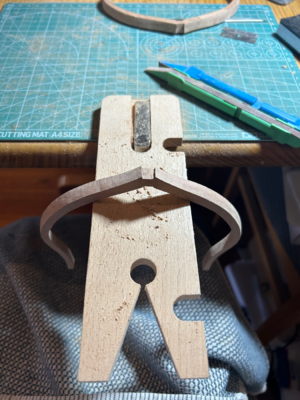
I also use one of these - I don’t really know what to call it, but it’s really handy for supporting your work while sanding.

IMG_0395.jpeg

I am hoping I can do most of the work on the frames while still separated from the keel. It seems the laser marks for the bevels follow Boudroit and Berti closely and I assume they will result in a fair hull.
 
..... It seems the laser marks for the bevels follow Boudroit and Berti closely and I assume they will result in a fair hull.
Yes - I can conifrm that based on the experiences with my Salamandre some years ago.
The lasered fairing lines are very accurate - so leaving some 0,1 or 0,2 mm "meat" is absolutely enough to keep for the final sanding of the complete hull. And if you install all frames very accurately on the keel, than you can reduce the meat.
My Salamandre was for me the first POF and also CAF-kit, so I left more meat and had to sand it down afterwards
 
Michel, thanks for naming my fret saw bench. It sounds so dull compared to plateau pour scie à découper!

Uwek, thanks for confirming the accuracy of the bevels. Your log was one of the reasons I am building La Salamandre - it is almost like an additional set of instructions that must be consulted before each step.

Paul, don’t fret (sorry, but I can’t really say no pun intended and, yes, I agree the pun is the lowest form of humour), I will be treating the frames very carefully. I don’t put much faith in shortcuts and quick fixes generally. Better to spend a few extra minutes now rather than a few hours later repairing something. I have been following your Kingfisher closely and it looks fantastic. I certainly know what to aim for.

Here are frames 1 to 5:

IMG_0439.jpeg

Thirty three to go…
 
Michel, thanks for naming my fret saw bench. It sounds so dull compared to plateau pour scie à découper!

Uwek, thanks for confirming the accuracy of the bevels. Your log was one of the reasons I am building La Salamandre - it is almost like an additional set of instructions that must be consulted before each step.

Paul, don’t fret (sorry, but I can’t really say no pun intended and, yes, I agree the pun is the lowest form of humour), I will be treating the frames very carefully. I don’t put much faith in shortcuts and quick fixes generally. Better to spend a few extra minutes now rather than a few hours later repairing something. I have been following your Kingfisher closely and it looks fantastic. I certainly know what to aim for.

Here are frames 1 to 5:

View attachment 390967

Thirty three to go…
Good morning. Very impressive work. Cheers Grant
 
Frame bevelling continues.

One thing I didn’t mention is the removal of the laser charring. Although the charring is a chore to remove, I am finding it quite helpful when defining the bevel. I only remove the charred wood as I progressively widen the bevel. That way, I know exactly how much more to remove as the bevel reduces to a point on the opposite edge. It also has the advantage of not reducing the dimensions of the frame unnecessarily as could be the case if you removed all the charring first before making the bevel. Of course, we aren’t talking about much (a fraction of a millimeter) but as far as I can tell, the pieces are cut to more or less the exact size as in Bourdroit and Berti.

I might post a bit less during this phase of construction. I am trying to get to an almost finished standard as I don’t want to do much sanding after installation on the keel. It probably takes 1 1/2 to 2 hours per frame, which means about 5 frames a week.
 
Finishing the frames is getting easier.

The bevels are becoming quite small - 1-2 mm deep - that I don’t use the rasp, but go straight to the sanding sticks. I seem to becoming a regular at the local hobby shop buying the sanding belts…

Frames 1 to 10 and 20 to 25 (previously cleaned up - see post 29) finished:

IMG_0397.jpeg
 
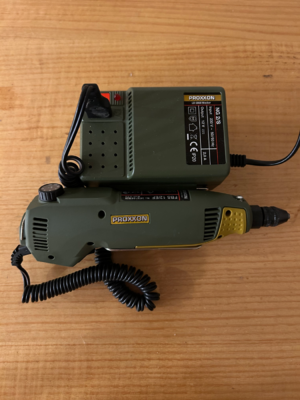
Today, I took delivery of an early Father’s Day (in Australia it’s on the first Sunday in September) present to myself - a Proxxon FBS 12/EF drill:

IMG_0377.jpeg

I have only used hand tools to date, but at some point I will need to drill a few (thousand) holes for bolts and treenails. It seems sturdy, but reasonably small and lightweight and should do the trick.
 
It has been six months since I started La Salamandre and I can safely say she has become a part of daily life. I am enjoying not only building her, but also updating this dairy. Model building is quite a solitary pastime so it’s nice to be able to share some of what you are doing with others.

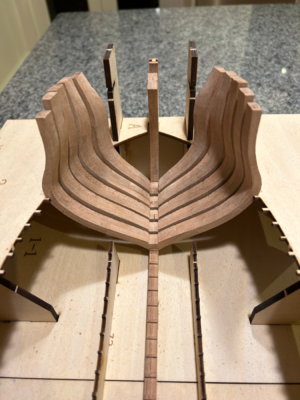
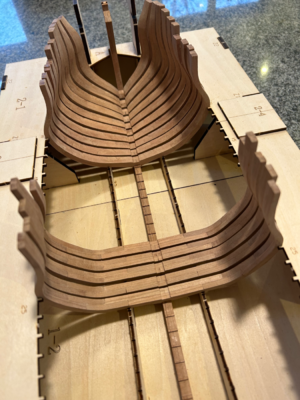
The jig is gradually filling up:

IMG_0403.jpeg

I am reasonably happy with the results. I can’t see the frames will need much additional work as everything seem pretty fair to my eye.
 
I fully understand your words - and we see the result, which would be not possible, if you would not like what you do.
Looking very good - you and your Salanadre are on a good way
 
Back
Top