La Salamandre 1752 1:48 (CAF) by Salty

Joined
Mar 1, 2023
Messages
107
Points
213

Fellow modellers

This is my diary of building La Salamandre 1752 using a kit purchased from CAF.

IMG_6283.jpeg

La Salamandre may not as popular as some other ships, but there are enough examples being built on forums so I am not completely by myself. I like the idea of a partially planked hull showing the frames and below decks, as well as the fact that she is rigged. There are some great examples being built from this kit - Koreets, Uwek, ADC, BigMike and Tedboat - and I will be happy if mine turns out half as well.

I don’t intend to do a review of the kit as this topic seems to be well covered by Uwek and others. I am pleased with the quality of the parts, but obviously assembling them is the challenge. The instructions are basic, but at least they provide a sequence for building. Hopefully, I can work out how each step should be undertaken to achieve the necessary results. Tom at CAF is a pleasure to deal with.

To help, I have a copy of the Boudroit and Berti monograph, as well as Frolich’s The Art of Ship Modelling which has a section devoted to this ship. I also have a small collection of other nautical books bought over the years, including Marquardt’s Eighteenth Century Rigs and Rigging, Harland’s Seamanship, as well as a number on traditional wooden boat building and rigging.

I am using a few basic hand tools. I don’t have any power tools, although I might change my tune when it comes to bolts and treenails. At present, my “workshop” is the end of the kitchen table.

I don’t expect this will be a quick build by any means, but I hope you will find it interesting.

Salty
 
Hallo Salty,
first of all - a warm welcome here on board of our froum.
second - I wish you a lot of fun with this project - and I am sure you will have it
third - you are well prepared to make a very good model - Tom from CAF in the background, Boudriot on your table and a lot of friends who will follow your work here in your building log - if there is anything to clarify, ask, show and describe, we will try to help and assist
I will take a seat in the first row
 
Making your first post is a bit like walking into a room full of strangers, so I am grateful to those who said hello.

Frame 1 (of 45) consists of 11 pieces forming two layers.

The only minor issue at this stage is that the edges of the pieces of each frame may not be square as the laser cut seems fractionally wider on top face of each sheet than on the underneath. At present, it doesn’t seem to matter, except for where the edges of the floor timbers, futtocks and top timbers meet.

I removed the char only from those edges by scraping and finishing lightly with a 320 grit sanding. Only a small adjustment seems to be actually needed to each surface to get them to meet flush. This is probably an overly cautious approach as this type of work is new to me and I am in no hurry.

I am also not sure whether parts are oversized or not in general, so removing a minimum of material seems sensible. On this frame, there seems to be no extra material in the parts to speak of when compared to the plan, but I am not taking it for granted this will always be the case.

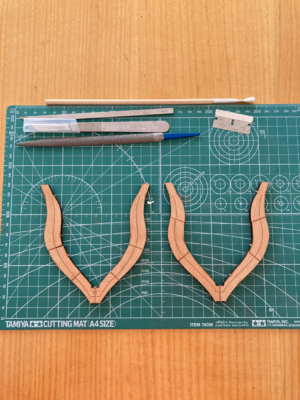
The two blank faces of each layer are glued together, leaving the bevelling lines visible - outside bevel on the left (frame numbers face forward) and inside on the right. This is how the frames look before gluing.

IMG_6272.jpeg

I didn’t remove char from the inner and other edges of this frame as they will both need to be bevelled later.

I then checked all the pieces against the plan for a final time before assembly. Gluing was a bit fiddly, but everything went together in the end.

IMG_6279.jpeg

Forty four to go.
 
a very good start - you are on a very good way

The only minor issue at this stage is that the edges of the pieces of each frame may not be square as the laser cut seems fractionally wider on top face of each sheet than on the underneath. At present, it doesn’t seem to matter, except for where the edges of the floor timbers, futtocks and top timbers meet.

The joints between the elements of a frame should be rectangle, so it would be good to sand them. Also in my opinion, and I agree with you the char should be removed here - I did this with my disk sander


I am also not sure whether parts are oversized or not in general, so removing a minimum of material seems sensible. On this frame, there seems to be no extra material in the parts to speak of when compared to the plan, but I am not taking it for granted this will always be the case.

99% the lines are very accurate you can follow them in general...... but I was also in the beginning very careful

The two blank faces of each layer are glued together, leaving the bevelling lines visible - outside bevel on the left (frame numbers face forward) and inside on the right. This is how the frames look before gluing.

Looking very good

I didn’t remove char from the inner and other edges of this frame as they will both need to be bevelled later.

Correct - this can be done really later -


I then checked all the pieces against the plan for a final time before assembly. Gluing was a bit fiddly, but everything went together in the end.

I used a thicker glas plate - maybe this could be also a method for you

 
Uwek, thank you for your comments and confirming I am on the right track. The glass plate looks like a great idea. With clamps, you need to be careful tightening them as they can twist the sections frames out of alignment. Thanks also to others who have visited the log.

A bit more about the kit…

The frames are “American cherry” which I have not encountered before. A quick internet search tells me:
  • it is classified as a hardwood, although I think it is relatively soft compared to hardwoods in Australia;
  • it has a fine grain and finishes well; and
  • it is used furniture, cabinet making, boat interiors and musical instruments.
Sounds like the perfect wood for frames in a model ship. Based on my limited experience to date, I like working with it, but I would be interested in what others think as well.
 
Hello Salty, welcome :)
I wish you a lot of fun and success in building the beautiful model of the salamander. the frame looks great Thumbsup
I will continue to follow with great curiosity
 
Shota70, I am very much enjoying the building so far and sharing what I have done.

I seem to be getting into a rhythm with the frames which is just as well as there are now 15 pieces in each frame.

IMG_6282.jpeg

The areas to be bevelled are decreasing on each frame at this stage, which makes sense, and the amount of char that needs to be removed to glue up is also less as the frames are thinner.

Time seems to pass quickly and I can easily spend a couple of hours doing small jobs and generally messing around
 
Awesome! I know a professional ship modeler who built many kits with mostly an XActo no. 11 hobby knife! So no worries about tools. Eventually you will find a Dremel tool very helpful for drilling and sanding. Otherwise stay the course! Well done!
 
Jim, I have been amazed what forum members can achieve with a few tools and a lot of patience and persistence.

Hubac and WDO, thanks for your interest in my project.

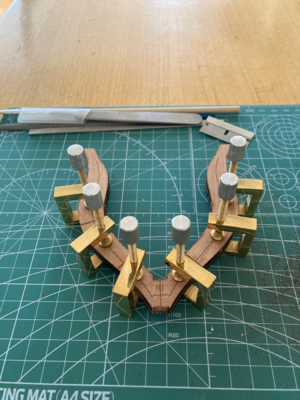
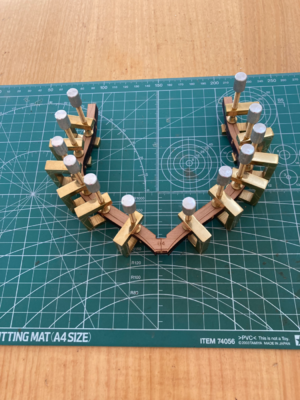
I am using fish glue on the frames. I apply it straight from the bottle (no heat required) with a small brush. It grips quite quickly so that the pieces stay where positioned but allows time for adjustments if required. I put the pieces of the frames together working from the floor timbers to the futtocks to the top timbers. I glue and clamp the left and right pieces of each type of component (mirror images of each other) alternating between the upper and lower layers.

Thankfully, no disasters yet and the layers at the tips of the frames are flush (or very close to).

I understand that the glue can be loosened with water if needs be, but haven’t tried this yet. Supposedly, it can be used for other materials such as cork, leather and metal (!?). It also fills small gaps in joints as it is 45% solids.
 
Before finishing all the frames, I would also check sometimes the dimensions inside the jig on top of the keel.....
only to check if there is no systematical mistake in your work
 
Uwek, thanks for your advice to build the jig. It will be good to use it to confirm each frame is the right dimensions. I am also sure the frames will be safer there than in a bag on the floor!

I am scraping the charred surfaces to be glued with a Gem razor blade and finishing with a very fine rasp called an NT Dresser which is claimed is the equivalent of 320 grit. The sole is disposable (detached by loosening the screw) and apparently lasts 50 times longer than sandpaper.

I quite like it as the surface is perfectly flat, which isn’t always the case with sandpaper which I find can cup and round edges. The raised sections on the sole are fine enough so there is no pattern on the surface being worked. Unfortunately, I have only been able to find 320 grit, so it is obviously suited to finer work.

Most of the work seems to be done by the razor blade and only a few swipes with the tool needed to finish.
 
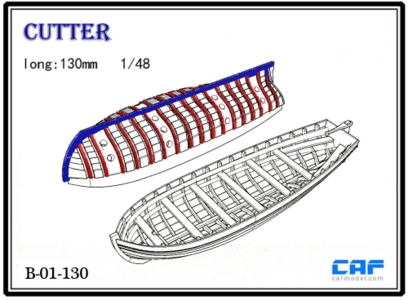
I ordered a cutter and longboat from CAF.

6686d3045f.jpg.500x500.jpeg

f50cbc428c.jpg.500x500.jpeg

I think these may have been included with the La Salamandre kit at some point in the past, but were not included when I ordered. On the flips side, the price of the La Salamandre kit doesn’t seem to have increased recently, so no cause for complaint.

I will try to resist the temptation of starting one or both until much later when they are to be installed on the deck…
 
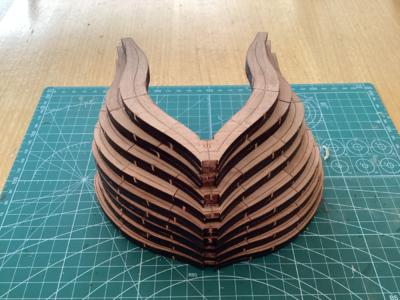
I imagine all models have repetitive phases and I am certainly in one of them. Fortunately, the work isn’t too difficult and I can see the results as my stack has frames is getting higher.

IMG_8461.jpeg

There is a gap between some frame components - e.g between the floor timber and the futtock on the top frame on frame 1 - but I have tried very lightly scraping some joints and the gap seems to almost disappear leaving only a glue line.

It probably takes about one and a half to two hours to get each frame to the stage where it is glued up and ready for bevelling.

I have a day job, so I don’t have much time, except for a few hours in the evening. The routine is to glue up a frame and then start scraping and sanding components for the next frame. I have a small stockpile of frames ready for gluing but I try to do some frame preparation (which take the most time) most days.

I think I am getting “modellers’ finger” - staining from the char and thickening of the skin, particularly the thumb and index finger. Is there anything else I should have been told about before starting this hobby? Perhaps the administrators should post health warnings…
 
Back
Top