LA SALAMANDRE, bomb ketch - POF - (CAF-models, 1/48)

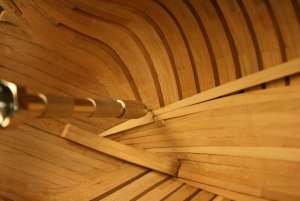
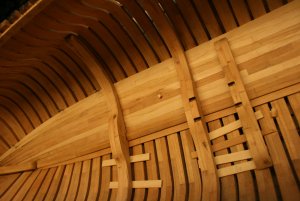
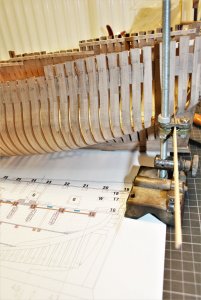
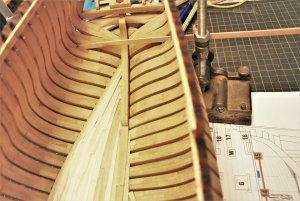
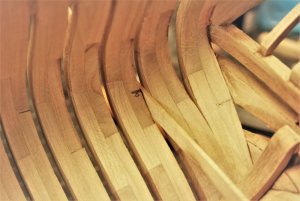
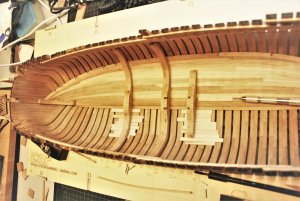
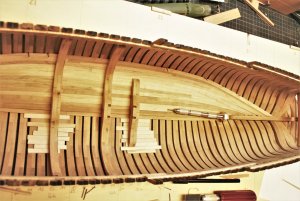
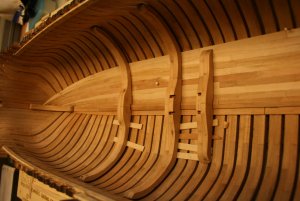
A small progress with my inside planking ...... not so easy, but with patience it is working....

View attachment 48525 View attachment 48526 View attachment 48527

Yesterday evening I needed 1 and 1/2 or 2 hours for only one row of plank, means four elements - very time consuming work.
Means I will need appr. 2 weeks for the inner planking (only on one side) - In the beginning I thought, that this ship will be finished in one year - no chance
 
  • Like
Reactions: ADC
Yesterday evening I needed 1 and 1/2 or 2 hours for only one row of plank, means four elements - very time consuming work.
Means I will need appr. 2 weeks for the inner planking (only on one side) - In the beginning I thought, that this ship will be finished in one year - no chance
I found it slow work too. I have 4 rows left to do on the starboard side which will now have to wait a month. These should be a lot easier than the middle rows. This hopefully should be the last of the tedious work until the rigging I hope .
 
I found it slow work too. I have 4 rows left to do on the starboard side which will now have to wait a month. These should be a lot easier than the middle rows. This hopefully should be the last of the tedious work until the rigging I hope .

I am pretty sure, that before rigging starts, there will be other parts of the built also, which are tedious or feel like they will never end......and realy tedious is the inside planking for me not........it is taking very much time
So if I count correctly: my calculated 2 weeks for the insdie planking and you make in the same time four weeks a break - I have a real chance to overtake you in the work :cool::cool::cool:
 
I am still working on my La Salamandre kit from CAF........but as I mentioned before (several times) - > it is slow motion and takes some time to install the inner planking. And now I know why other modelers making some building logs in chinese or russian foren are not showing these works very much in detail o_O

Today a short report how I did the widening from one plank to two planks, using half stealers.
........I am realizing now, that the last planking job I did some 10 years ago (due to my modeling break), so I have to come back into the routine in this work

-> If you see something which can be made better - please comment and give hints - I am happy to learn !!!!


To show the also my mistakes, during the planking:
The lower one was the first try - you see I thought completely wrong, means reverse and started to prepare the plank completely wrong - It took some time until I realized it :eek:
The middle one was the the second - fitted well, but too short on the right end, so I could not bend it over the curve#
The top one was the third and last one - fitting and possible to bend.
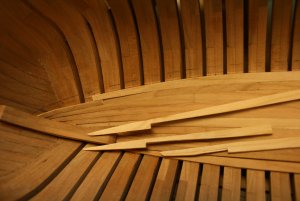
IMG_4337.JPG

Drilling some holes with a hand drill in order to use small nails to keep the plank at the correct place and force the plank to keep the bending curveIMG_4338.JPG

Using wood-glue and prepared to take over the plank
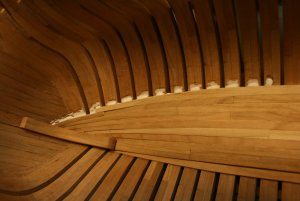
IMG_4339.JPG

Finaly installed plank with the nails and some wooden scrap sticks to press the plank down
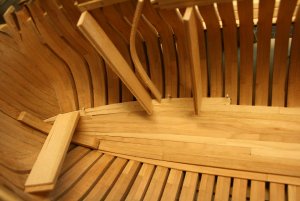
IMG_4340.JPG

Off course sometimes you have to take a look, how it would look like.......dry-fitted off course
IMG_4343.JPG IMG_4344.JPG

Today in the evening I will make one more plank, and the next evening, and the next, and and and.......
 
Last edited:
Before I continue with the installation of the insdie planking, it was time to mark some levels onto the frames, f.e. the bottom line of the beams, where the beams are laying on top of the deck clamps. First of all I checked the height of these points (keel bottom line <-> beam bottom line) and compared the kit´s drawings with the Boudriot drawings. I realized only very small differences (which can be already a result out of different the line thicknesses of the drawings) and decided to use the kit drawing measures.
Afterwards it was time to mark these heights inside the hull on the frames, so I can finaly calculate tapering of the missing planking.
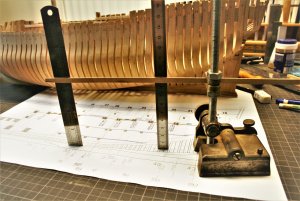
For this I used this time an old device, which I got once from a modeling friend in Croatia....thanks Zeljko!!

IMG_43481.jpg
As a horizontal level I used a strait wooden strip and checked for every use, that the strip is realy horizontal.
The height of the strip can be adjusted with two screw nuts on a thread.

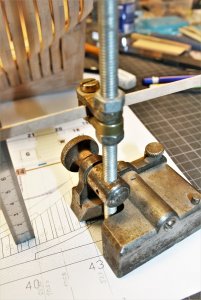
IMG_43491.jpg
The inclination of the thread and with this the horizonatl alignment of the strip can be easily adjusted with the knurled screw on the right hand of the photo

IMG_43501.jpg IMG_43511.jpg
The strip has the thickness, here better width, of 1,5mm, so it can be laced between two frames of the hull. Here between frames 43 and 44 in order to mark the level of beam # 15 (see visible part of drawing).
The length of the horizontal strip has to be longer, than the distance between the two armes of each frame.

IMG_43521.jpg
Finaly marked level of the bottom line of beams or the top line of deck clamps.....This way is off course only one way to mark different heights inside a hull.
Off course with this tool, it can be done only at P(lank)O(n)F(rames) models.......

Many thanks for your interest and visiting my Building Log of the 1:48 La Salamandre kit from CAF....... to be continued ....
 
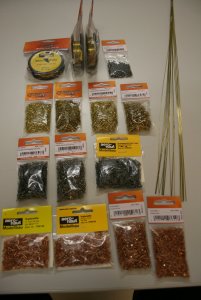
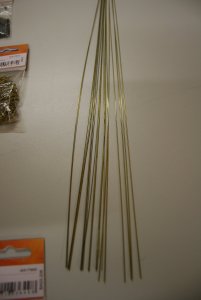
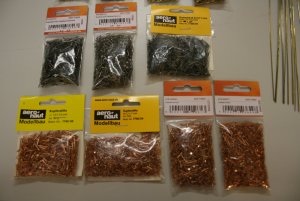
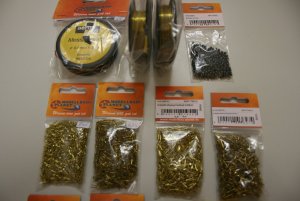
Today I received my ordered nails and wire to make the necessary nails and bolts on my La Salamandre.
I received copper, steel and brass nails in thicknesses of 0,6 to 0,9mm, also some brass wire with 0,3 to 0,5mm.
After some trials I will decide which one I will use for the different elements of the ship.

IMG_4388.JPG IMG_4387.JPG

IMG_4385.JPG IMG_4386.JPG
 
Last edited:
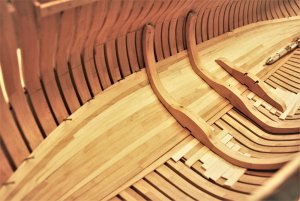
Some small progress with the inside planking - step by step and per day one row of planks

IMG_43911.jpg

IMG_43891.jpg IMG_43901.jpg

The raiders are only "laying" on top of the planks - to get a better impression

Many thanks for your interest ..... to be continued ......
 
Is the inside planking harder than the outside one?
Hallo Zoly,
thanks for your interest.....
YES, I think a little bit!
The biggest problem is the fact, that you have to work in a limited space, so you should not have extreme thick fingers :D
 
Uwe,
nice work!
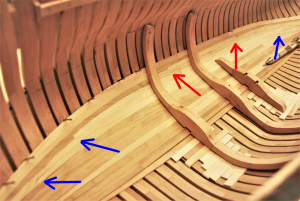
I realised that at the inside planking you used both the English and the Dutch method to join the planks. Is this deliberately so?
Janos
 
Uwe,
nice work!
I realised that at the inside planking you used both the English and the Dutch method to join the planks. Is this deliberately so?
Janos

Good point @janos !!
It is a french ship, therefore I can mix it ;)
Beside this joke: The inside planking will be 90% or 95% not visible and if, than the parts visible are only a very small area. Therefore my intension is in moment to cover the frames with a closed planking and I try to use planking techniques which are easiest possible to do at the local "problem" or situation.
Later on, especially at the outside planking I will follow the Boudriot drawings and use only the french techniques.
 
For motivation and to get inspired
G'day Uwe
This is one thing that you don't need!
It might be good to look at when you're on your best 100 club tour, to keep your mind focus only.
Havagooday mate
Greg
 
The inner planking looks really good Uwe, it may be slow progress but the results are worth it. What's the difference between English and Dutch planking?

Prost Andy
 
The inner planking looks really good Uwe, it may be slow progress but the results are worth it. What's the difference between English and Dutch planking?

Prost Andy
Many thanks for your positive comment - I am trying my best, therefore only a small progress every day.

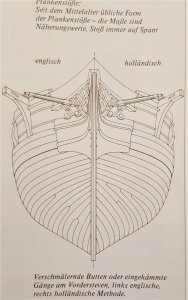
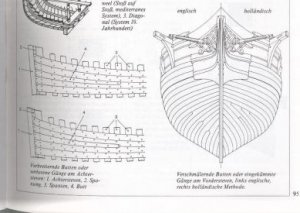
A very good comparison is the Mondfeld sketch, showing on the left side the english and on the right side the dutch way.

20180723_0758471.jpg

Mondfeld Planken.jpg
 
And here for comparison my planking. On the photo I marked the "dutch" way with blue arrows and the english with red ones.
I have also to admit, that I used at the case the english part until now only once, in order to adjust the planking, so that it is horizontal (the plank under it made a bow and was not strait horizontal)

IMG_43911.png
 
Back
Top