-

Win a Free Custom Engraved Brass Coin!!!
As a way to introduce our brass coins to the community, we will raffle off a free coin during the month of August. Follow link ABOVE for instructions for entering.
-

PRE-ORDER SHIPS IN SCALE TODAY!
The beloved Ships in Scale Magazine is back and charting a new course for 2026!
Discover new skills, new techniques, and new inspirations in every issue.
NOTE THAT OUR FIRST ISSUE WILL BE JAN/FEB 2026
- Home
- Forums
- Ships of Scale Group Builds and Projects
- Le Coureur 1776 1:48 PoF Group Build
- Le Coureur 1776 1:48 Group Build Logs
You are using an out of date browser. It may not display this or other websites correctly.
You should upgrade or use an alternative browser.
You should upgrade or use an alternative browser.
I have a reef tank and a few other hobbies that takes quite a lot of my spare time so I cannot spend so much time in the ship yard. Thus the progress of the last week is limited to a couple very small steps. I have made the inner planking of the stern section, glued one of the middle deck clamps and I have started to dryfit some of the other deck clamps.
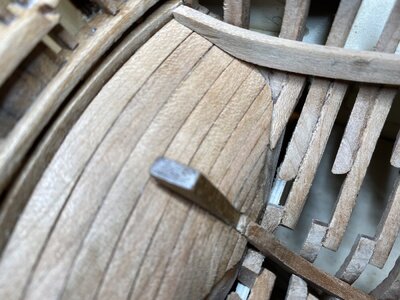
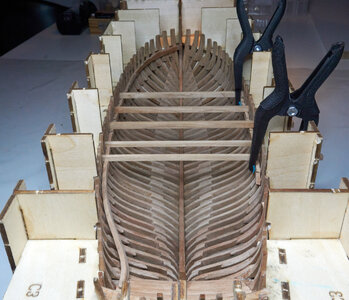
One of the spring-clamps had a strong desire to fly all the way across the living room. I don't know if it mistook the Courreur for an aircraft carrier but without permission it made a close flyby over the ship and broke one on the bat wings on the stern


One of the spring-clamps had a strong desire to fly all the way across the living room. I don't know if it mistook the Courreur for an aircraft carrier but without permission it made a close flyby over the ship and broke one on the bat wings on the stern
Last edited:
They always wanted to invent multiple uses for transportation like amphibia (drive and float) or floatplane to land on the water, but ships who can also fly? Hmmm...
Space-ships can flyThey always wanted to invent multiple uses for transportation like amphibia (drive and float) or floatplane to land on the water, but ships who can also fly? Hmmm...
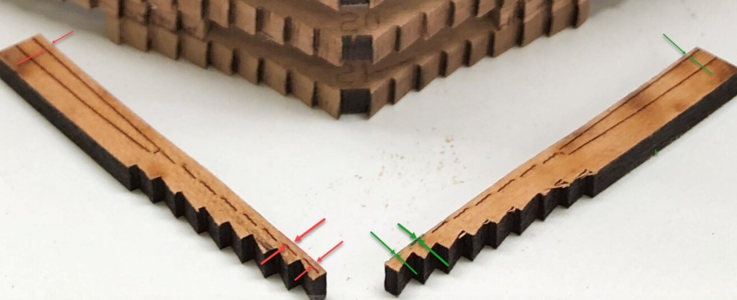
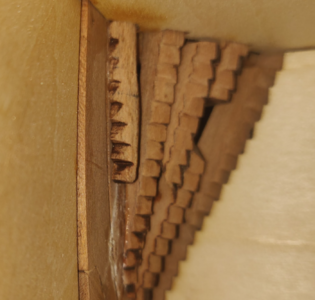
I rushed ahead and did frame 1. It was not straightforward. The key is to figure out the correct orientation first. The only way I could make it work was to orient the frame so the teeth were pointing to the bow. Then use one of the contour lines to get a rough fit with the notches in the jig (this should be obvious once the piece is oriented the right way). Finally, start at the bottom and gradually fair the piece so that it fits into jig to the required depth.
It actually makes sense once you start doing it... but very hard to guess from the lines themselves.
It actually makes sense once you start doing it... but very hard to guess from the lines themselves.

I have the same type of clamps - they are very good, if they stay there where they should - but ......
Very clean and accurate work - you are on a very good way
Very clean and accurate work - you are on a very good way
Kurt Konrath
Kurt Konrath
I am planning to make some clamps like you show in the blog. Can you provide approximate size on what you are using to I know what to cut parts too. I have scrap lumber from other kits to use to make some or all of the parts needed to build a few for my use.In July Pete “Maverick” Mitchell was grounded due to Corona. Today "Eddie the Eagle" aka Spring-Clamp has also been grounded due to pushing the envelope and making a supersonic flyby followed by a destructive touch and go on the stern section of Le Coureur.
View attachment 197869
Thanks
Kurt
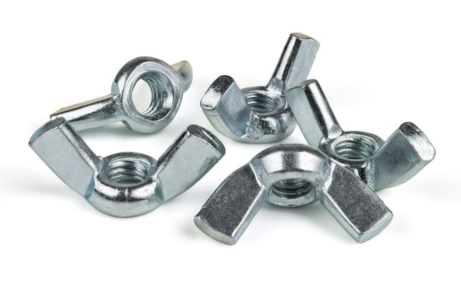
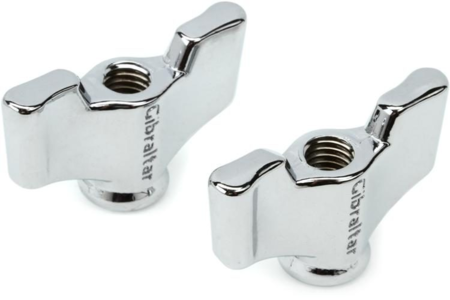
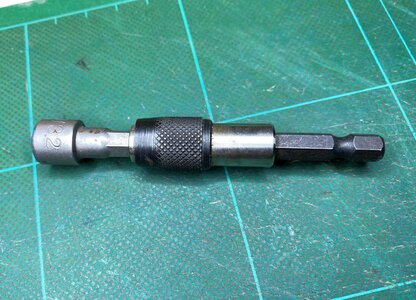
Thank you for the advice my friendGreat clamp additions, Poul. If I may suggest, to swap a regular 'nut with a 'wingnut'. They come in a variety of shapes and\or sizes. Here is the typical one
Hence I opted for the nuts I had in the garage. Using a top it is actually just as fast as wingnuts and by turning the shaft with my fingers only I have good sensitivity of the force used. So maybe I'll just stick to this solution. Unless you tell me there are some advantages with wingnuts I overlooked?
BTW: Speaking about advices. In the light of a recent debate in another thread I'd like to emphasize once again that my personal objective with this log is to get a lot of critique and as much advises as possible. Being brand new in this field I need to learn a lot. Of course I also like praise but I cannot learn anything from praise and likes. Therefore all kinds of critical comments whatsoever and straight from the shoulder, are most welcome. And advises how to do better are highly appreciated. With pleasure also from modelers that are not building this particular kit.
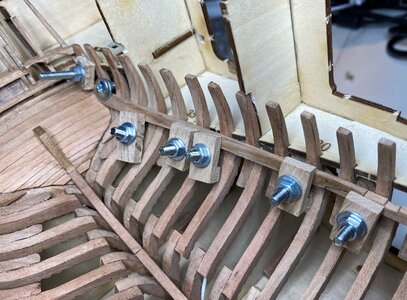
Hi Kurt, I made a few different sizes but most of them has aprox. these measurements:I am planning to make some clamps like you show in the blog. Can you provide approximate size on what you are using to I know what to cut parts too. I have scrap lumber from other kits to use to make some or all of the parts needed to build a few for my use.
Thanks
Kurt
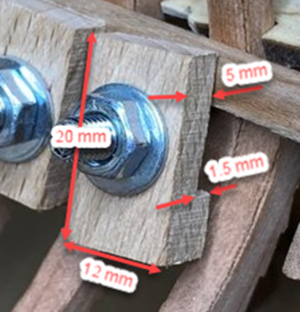
the outside part has same lenght an width but flat 5 mm thick all over. The screw is M4 (for some ships in 1:48 I think perhaps M3 is better, or the screw may have to be flattened between the frames. Anyway it does not take more than a few minutes to make half a dozen so I can alway make some more in other sizes)
The only advantage, IMHO is an ability for a quick set, While holding and positioning parts with one hand, you can tight clamp with another. Also tightening by hand you can control the force you are applying. But I totally understand the availability situation and crazy shipping costs.Thank you for the advice my friendI would have used wingnuts but I didn't have any. Apparently physical shops around here does not have less than M5 and I could use maximum M4. So the only option was internet shops. I'm too much of a Ebenezer Scrooge to pay a fortune in freight for something that cost 1$ for 4 pcs.
Hence I opted for the nuts I had in the garage. Using a top it is actually just as fast as wingnuts and by turning the shaft with my fingers only I have good sensitivity of the force used. So maybe I'll just stick to this solution. Unless you tell me there are some advantages with wingnuts I overlooked?
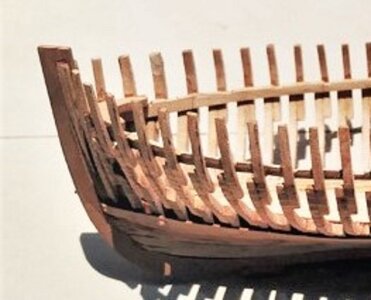
I'm thinking a little bit ahead for the inner planking and I wonder if there is kinda best practice regarding which side to keep open for a glimpse of the interior? Looking at others I noticed that Uwe and Etienne Piette seems to have decided leaving the starboard side open while Tom/CAF and Francesco has opted for the port side. I think the same goes for the model build for Jean Boudriot & Hubert Berti's monograph. If there is no best practise, what are the pros and cons of either side? The only thing I can think of myself is that the small cutter / lifeboat is placed on the starboard side and thereby might obstruct part of the view through the deck.
you're right Poul not only you do not miss anything .. but also read the thoughts of others! after the effort I had to make the lifeboat I absolutely wanted to enhance it . I didn't want it to obstruct the view of the interior from the deck.. and even less so that it was placed in the void
After all I don't think it makes much difference though..
After all I don't think it makes much difference though..
Once again very little progress during the past week, but I'm actually quite happy about that because it was caused by a long weekend visit by 3 of my most favourite girls, my daughter and my 2 little granddaughters (their father is also a navy officer and away for weeks). It gives me so much more than any hobby can do.
Anyway, I've got all the deck clamps installed and have slowly started on the inner planking. Since I did not hear a lot of pros and cons for which side to leave open I opted to have the port side open (due to the minor obstruction of the lifeboat).
I'm taking a different approach to other before me and starting with the top section (1R) trying to see if by doing it that way could exclude the need of stealers - and it does! The intricate shapes of the planks does actually fit together without using any stealers and no excessive sanding other than barely removing the laser char. Moreover the lowest part of this section almost hit the pencil marks I had initially made for the top of plank 12 of section 1P
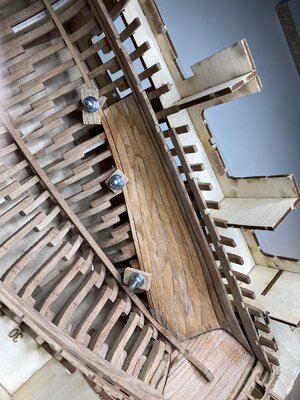
The top plank from section 1P is only dry fit.
The color is just a tiny bit of water put on with my finger to spot residual glue.
The pencil mark on the port side was an attempt to mark the locations of the 2 lower deck. As Uwe said, these marks can of course not be made when the inner planking is in place but I'm thinking they can be transferred to the inner planks when the planking is approaching the marks, using e.g. a compass or a piece of 10 mm wide plank to displace the marks with 10 mm and then shift them back the 10 mm in the opposite direction once the planking is finished (just mentioning this for the sake of others, for me it is too late to do it that way, I have to mirror the marks from the port side to the starboard site)
I'm thinking about leaving out plank 12 (maybe also 11) in section 1Q (port side) to get a bigger "window" to view the interior from the outside. What do you guys think? Bad or good idea?
Anyway, I've got all the deck clamps installed and have slowly started on the inner planking. Since I did not hear a lot of pros and cons for which side to leave open I opted to have the port side open (due to the minor obstruction of the lifeboat).
I'm taking a different approach to other before me and starting with the top section (1R) trying to see if by doing it that way could exclude the need of stealers - and it does! The intricate shapes of the planks does actually fit together without using any stealers and no excessive sanding other than barely removing the laser char. Moreover the lowest part of this section almost hit the pencil marks I had initially made for the top of plank 12 of section 1P

The top plank from section 1P is only dry fit.
The color is just a tiny bit of water put on with my finger to spot residual glue.
The pencil mark on the port side was an attempt to mark the locations of the 2 lower deck. As Uwe said, these marks can of course not be made when the inner planking is in place but I'm thinking they can be transferred to the inner planks when the planking is approaching the marks, using e.g. a compass or a piece of 10 mm wide plank to displace the marks with 10 mm and then shift them back the 10 mm in the opposite direction once the planking is finished (just mentioning this for the sake of others, for me it is too late to do it that way, I have to mirror the marks from the port side to the starboard site)
I'm thinking about leaving out plank 12 (maybe also 11) in section 1Q (port side) to get a bigger "window" to view the interior from the outside. What do you guys think? Bad or good idea?
Last edited:
The starboard side is always the "right" side to plank in my mind. Excellent work. Keep it up.
Looking pretty sweet Poul
This was a very good approach to start with these 1R planks - seems to be the correct way.
and I fully understand this - this is definitely much more important - the ship can easily waitOnce again very little progress during the past week, but I'm actually quite happy about that because it was caused by a long weekend visit by 3 of my most favourite girls, my daughter and my 2 little granddaughters (their father is also a navy officer and away for weeks). It gives me so much more than any hobby can do.


