Le Coureur 1776 CAF Model by OT1138

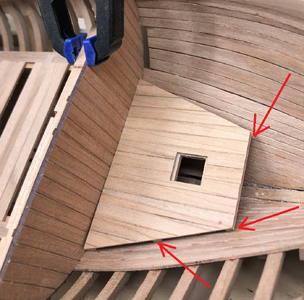
Adjust the beams and the outer edges to the angle of the inner planking with some careful sanding

as an example you can see this on this floor (from my building log)

deck laying on top of the inner planking without adjusted beams of the floor
Screenshot 2024-01-17 094503.png

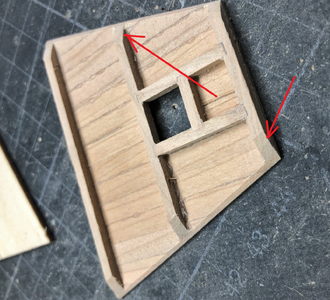
The same floor with adjusted edges - view from the undersight
Screenshot 2024-01-17 094535.png
With this you can also adjust one side more than the other, so that the floor is coming down on one side mora than on the other

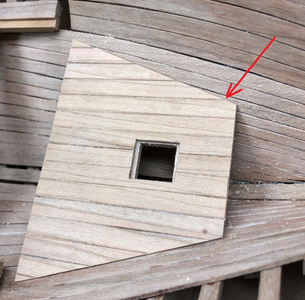
Now no gap between the floor and the planking
Screenshot 2024-01-17 094518.png

It is important that you have at the end the correct heights, that the interior walls and beds have enough height
Screenshot 2024-01-17 094716.png
 
Good suggestions, fellas. However, I don't think sanding down the vertical wall is safe as those planks are very thin. I might get at most a fraction of a millimeter. Furthermore, I already anticipated @Uwek's suggestion and faired the crossbeams to adjust as much as possible. It's not possible to adjust it any further without cutting into the planks and leaving a gap. The photo below shows why:

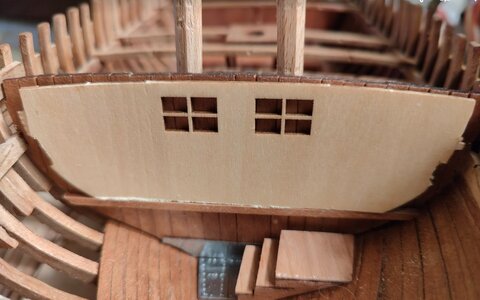
As it turns out, the supporting beam which is glued to the front wall is ever so slightly rotated (note the port side has more of a height difference between the two walls than the starboard does). Furthermore, the front wall itself is slightly tiled counterclockwise as well. I only noticed this now (well after gluing) as the port side sits perhaps a millimeter or so above the starboard.

So it is the supporting crossbeam itself which is the culprit (possibly the ammo compartment wall beneath but that is easily adjusted if necessary).

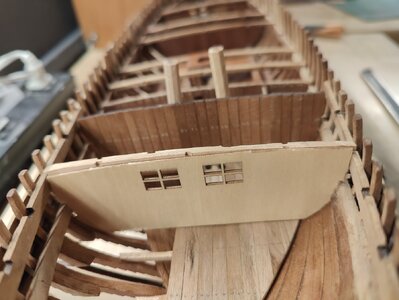
So the first step will be to carefully check the measurements of the new wall (the one with the doors) to ensure both sides are the same height. Perhaps I can recover a millimeter or so that way without the doors looking uneven. Then if necessary, I will break the supporting crossbeam off the front wall and reposition (I'm hoping that Gorilla wood glue will soften with acetone).

uneven wall.jpg
 
So we have a solution. I started by ensuring that the wall template was perfectly level (it had a bit of an angle due to prior fitting). I then removed the floor and trimmed the wall so that it would move freely up and down as needed. The crossbeam was then removed by carefully injecting acetone to dissolve the gorilla wood glue (it popped off easily in about 3 minutes). This brought the gap down from 3mm to about 1.5mm.

I then had the brilliant idea of temporarily fitting the top crossbeam to see how the wall would fit, and it turns out that the port side is in fact, a bit short (see photo below). This is good news, as I can easily leave a bit extra on top while building up the wall. Note that the difference between the port and starboard wall heights is much smaller than before.

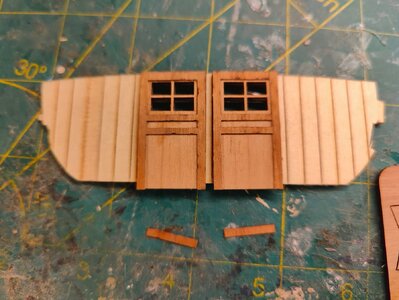
The only downside to this is that the pre-cut doors are a bit longer than the fitted template. I was able to get around this by removing the lower door trim (from part 1Y) prior to gluing the door pieces together. Once I trim the doors to fit, I will reattach this so that nobody will ever be able to tell that my doors have been shortened.

I am now waiting for the glue on the supporting floor crossbeam to dry. Once this repair is complete, I'll share a few more photos to make it clear what I've done.

IMG20240118175141.jpg
 
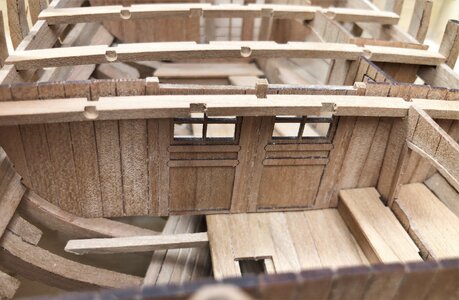
@Uwek - I just noticed that your doors were taller than the space allowed for them, so you must have run into a similar problem. I also note that the bottom of your door trim appears to have been sanded down a bit and if I'm not mistaken, there appears to be an ever so slight tilt to the wall as well.

Not nitpicking - just happy to see that I am perhaps not the only one who has encountered this problem.

(Photo below from your build log)

uwek doors.JPG
 
To clarify what I wrote above, the doors are taller than the template and will necessarily need to be sanded to fit. So rather than sand through the bottom portion of the framing, I cut them away. Once the doors have been fitted, I will glue them in place so it will appear that the door was built to perfectly fit the available space.

IMG20240118185224.jpg
 
Anyone have tips for making the blankets? The ship came with a package of silk fabric (some imprinted with the Fleur-de-lis, for the flags). I'm not sure if I should use some pieces of this or source some elsewhere.

The plastic beds that came with the kit are rather ugly. I can't see using them for anything other than a template.
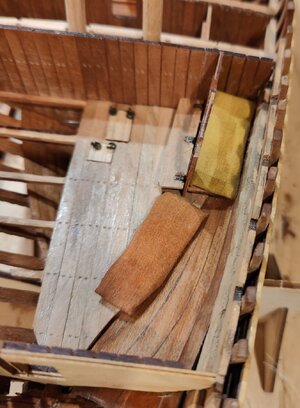
Take a look here, where I described how I did these blankets
 
@Uwek - thanks. I must have remembered seeing that some time ago because I attempted to make a bed that looks very similar to yours. I notice that your edges are quite soft while mine are sharp... I'm wondering if you wrapped your fabric around something to get that effect?

I also purchased a set of Ecoline markers with five earth tones to try out a few colors.
 
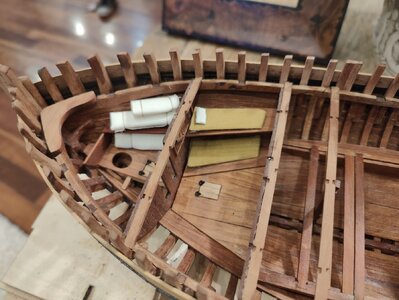
I found that the sail cloth made for much more realistic bedding than the flag material. In addition, I discovered a good method for making them more realistic. I created some padding from paper towels (folded in half) and then wrapped the outer material around them. The padding made for nice soft edges.

Ecoline markers were used for coloration. The two best earth tone colors were 245 (Saffron yellow) and 259 (sand yellow). In the end, the Admiral decided that the former looked too much like the wood and so we went with 259 for better contrast. It looks real pretty.

I haven't made the pillows yet... I might go with white ones for some extra interest.

IMG20240124203718.jpg
 
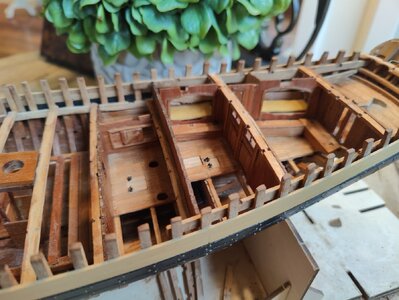
I've been working slowly and steadily on the aft cabins. I've been a bit disappointed because it seems like my work isn't as good as it was before. In particular, I've found small globs of polyurethane have formed on some of the finer details (cabinets) and some areas are shiny despite using satin poly.

Furthermore, I've been wondering why the fore of the ship is a darker red than the aft section. I had assumed it was due to age and was looking forward to the aft section darkening up over time.

However... I went over my log and realized that I had previously been using Tung oil for the finish! Now I am sitting here fretting about the fact that my aft rooms will forever be lighter in color than the front of the ship (luckily, they will rarely been seen and probably never in full light). Still... I'm now wondering if I can just apply Tung oil over the poly to give it a deeper color or if that ship has sailed.

I certainly won't be able to sand everything back down again now that it's installed. I could reach many of the surfaces of course but that could result in a patchy looking finish.

IMG20240128113539.jpg
 
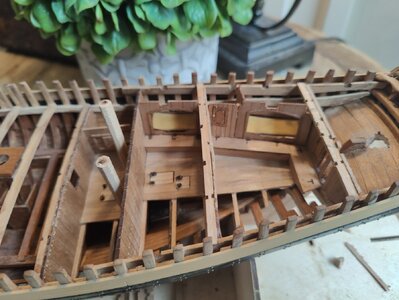
I decided I just had to bite the bullet and refinish as much as I could. I used acetone and a syringe to dissolve the gorilla wood glue (love that stuff). This allowed me to remove several of the walls and the cabinetry. I sanded everything back down and applied tung oil. It is 1000x better.

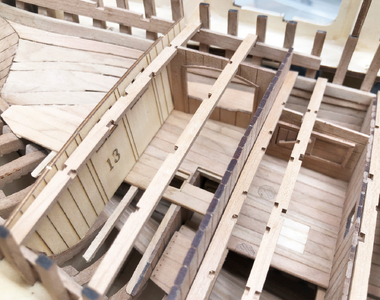
You can see the results in the photo below. I note that I did not do a terrific job on parts of the floor. However, this gave it an interesting weathered look that looks similar to old wood so I've decided to leave it (not that anyone will ever see it again once the deck is on).

IMG20240128140758.jpg
 
Such things can happen, especially after months restarting some works - we are forgetting how we did it and with which material etc.
I have a similar problem on my Granado project - I cut the hull in two halfs and worked for several months on the upper part, now I have to check my own building log how and what I prepared for the interior.......
Related to the interior of the Coureur - these small differences will be definitely not visible later on when you finished the deck - I know very well from my own Coureur -> becauser of this I am think to make a second Coureur model and prepare to cut the deck similar to my Granado - only to show the beautiful interior
 
Thanks, Uwek.

I am pretty happy with how it came out. I touched up a few more spots and the difference can only be seen in bright daylight.
 
Made some beds and spare sails. Still experimenting with pillows. I was inspired heavily by Uwek's log... it is aspirational to attempt to reproduce his incredible work!

On a different note, I'm wondering if anyone has attempted to cut out some of the exposed frames to make the interior easier to view from the side?

IMG20240131193136.jpg
 
Back
Top