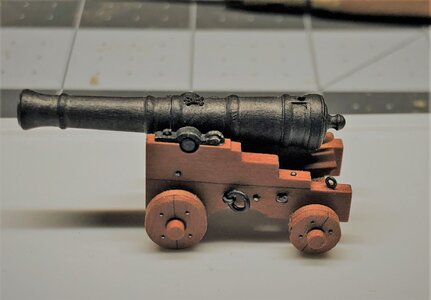
Such beautiful work with such tiny parts, just great Uwe, small gun big time.
-

Win a Free Custom Engraved Brass Coin!!!
As a way to introduce our brass coins to the community, we will raffle off a free coin during the month of August. Follow link ABOVE for instructions for entering.
-

PRE-ORDER SHIPS IN SCALE TODAY!
The beloved Ships in Scale Magazine is back and charting a new course for 2026!
Discover new skills, new techniques, and new inspirations in every issue.
NOTE THAT OUR FIRST ISSUE WILL BE JAN/FEB 2026
- Home
- Forums
- Ships of Scale Group Builds and Projects
- Le Coureur 1776 1:48 PoF Group Build
- Le Coureur 1776 1:48 Group Build Logs
You are using an out of date browser. It may not display this or other websites correctly.
You should upgrade or use an alternative browser.
You should upgrade or use an alternative browser.
LE COUREUR - french Lugger 1776 - POF kit from CAF in 1:48 by Uwe
Many Thanks for your kind comments and all the likes received
all eight guns are now prepared.
Only the quoins (wedge), which are already also prepared, are missing on the carriages, but with them I will fix the angles of the muzzles.
The tackles I will install before I finally fix them on the deck - I have still to decide when I will do this (before or after the masts and rigging)
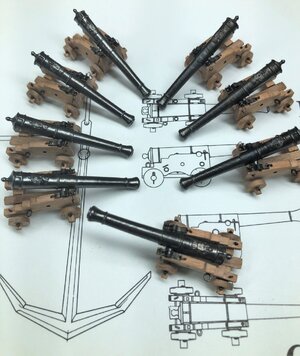
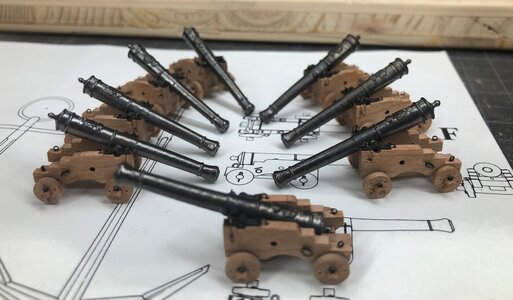
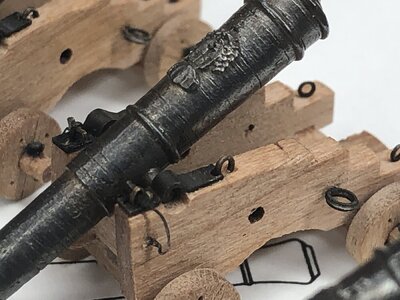
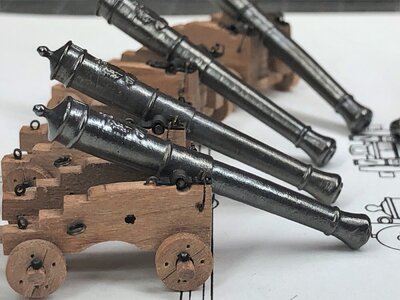
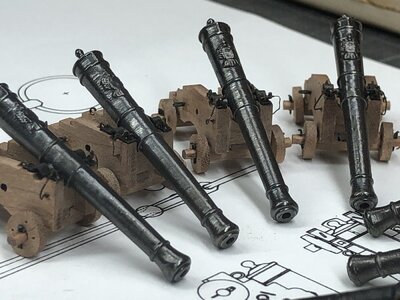
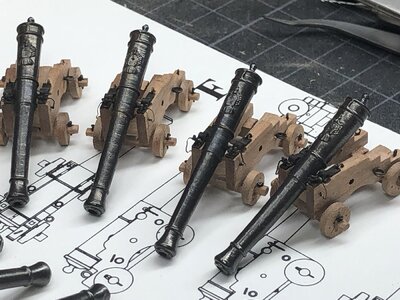
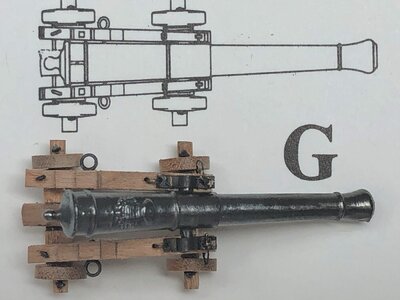
In an earlier post the question came up, if the muzzles are maybe too long for the carriages.
Here you can see a comparison with the Boudriot drawing
all eight guns are now prepared.
Only the quoins (wedge), which are already also prepared, are missing on the carriages, but with them I will fix the angles of the muzzles.
The tackles I will install before I finally fix them on the deck - I have still to decide when I will do this (before or after the masts and rigging)


In an earlier post the question came up, if the muzzles are maybe too long for the carriages.
Here you can see a comparison with the Boudriot drawing

Kurt Konrath
Kurt Konrath
I don't know if having the gun carriages done to this point is the easy or hard part compared to all the fine work needed to complete the rigging.
They look grand, and I await your images when you show them fully rigged and installed.
Are you going to rig for battle, or stowed tight to the bulkheads for in port and rough seas?
They look grand, and I await your images when you show them fully rigged and installed.
Are you going to rig for battle, or stowed tight to the bulkheads for in port and rough seas?
Amazing detail at that scale! Great job!Many Thanks for all your comments, hints, likes and all the friendship
I am still in Colombia for some more days, so my photos from today are "stock"-photos from two weeks ago
All eight carriages prepared for the marriage with the muzzles
View attachment 263755
View attachment 263756
In order to fix the muzzle also the metal parts have to be blackened
View attachment 263753
to get a feeling for the size please compare with the toothpick
View attachment 263754
The first gun where the muzzle is fixed with the capsquare
View attachment 263757
View attachment 263758
View attachment 263759
View attachment 263760
Now the mass-production of the other seven guns can start
The guns as the units look really good. One tip you may try on barrels (if you choose to accept it). Take graphite on the tips of your fingers and lightly (gentle) rub the barrel, Or, take a very soft brush and use light motion to cover with graphite powder. You may like the results... 
Thats a great idea Jim. The graphite will give a more realistic look.The guns as the units look really good. One tip you may try on barrels (if you choose to accept it). Take graphite on the tips of your fingers and lightly (gentle) rub the barrel, Or, take a very soft brush and use light motion to cover with graphite powder. You may like the results...
The guns looks very nice, meet and greet for guns. I'd like to support the proposal of Jim and Brian with graphite treatment.
Many Thanks for all your kind words and also the hint with the graphite powder.
I was also thinking about this (I have some powder in my workshop) also, still I am not sure to use it.
When you take f.e. a look at the guns on the HMS Victory, especially the guns on the main deck (not exposed to weather) are all shiny.
Also in museum contemporary guns are matt or shiny - at the end it is a question of taste - and I am not sure about my personal taste ......
For now I will make my last post in my building log before traveling back to Austria - and also for the moment the last related to the guns - next posts will be the ship´s boat - a small project in the project...... See you soon
Here now some impressions of the guns on the deck (still not fixed and adjusted)
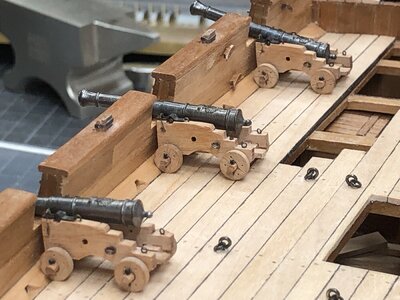
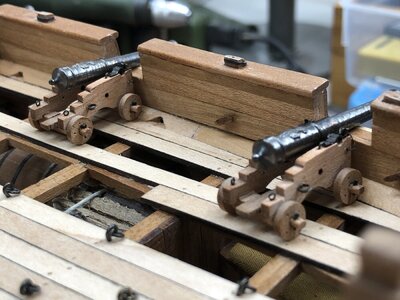
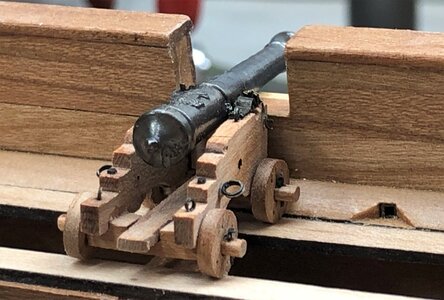
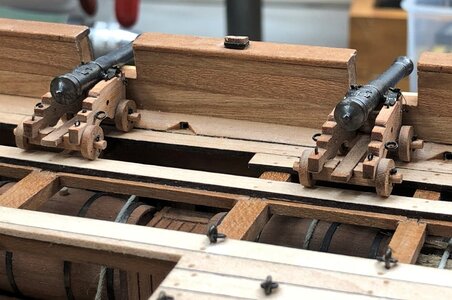
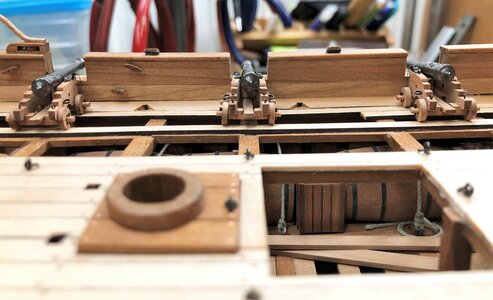
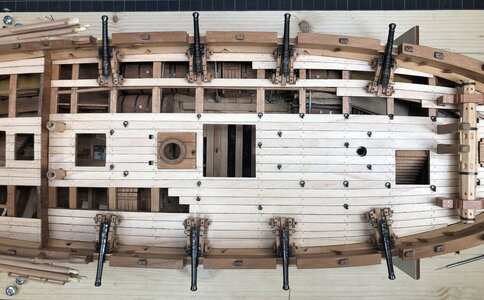
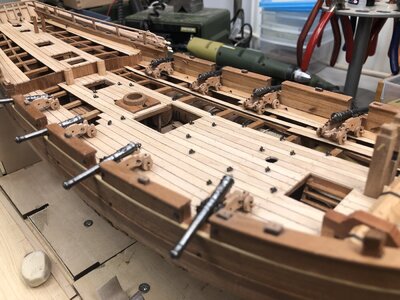
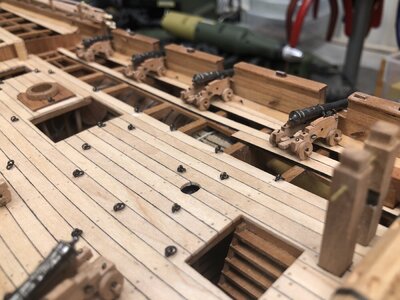
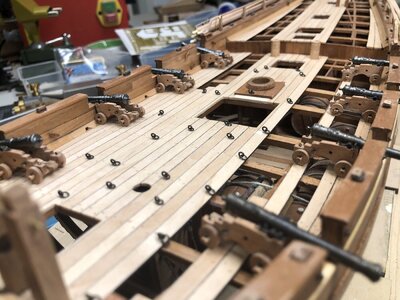
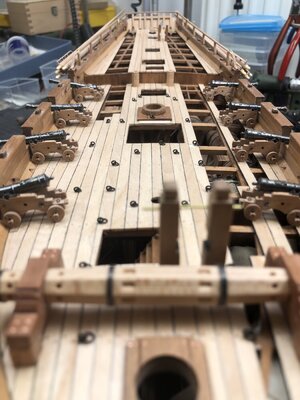
somehow I like them shiny ......
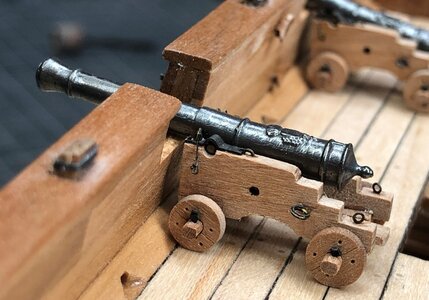
I was also thinking about this (I have some powder in my workshop) also, still I am not sure to use it.
When you take f.e. a look at the guns on the HMS Victory, especially the guns on the main deck (not exposed to weather) are all shiny.
Also in museum contemporary guns are matt or shiny - at the end it is a question of taste - and I am not sure about my personal taste ......
For now I will make my last post in my building log before traveling back to Austria - and also for the moment the last related to the guns - next posts will be the ship´s boat - a small project in the project...... See you soon
Here now some impressions of the guns on the deck (still not fixed and adjusted)


somehow I like them shiny ......

Looks absolutely great. Wunderschön.
Very nice Uwe.
I wish you a safe and healthy return trip to Austria.
I wish you a safe and healthy return trip to Austria.
- Joined
- Apr 20, 2020
- Messages
- 6,257
- Points
- 738

it's looks amazingMany Thanks for all your kind words and also the hint with the graphite powder.
I was also thinking about this (I have some powder in my workshop) also, still I am not sure to use it.
When you take f.e. a look at the guns on the HMS Victory, especially the guns on the main deck (not exposed to weather) are all shiny.
Also in museum contemporary guns are matt or shiny - at the end it is a question of taste - and I am not sure about my personal taste ......
For now I will make my last post in my building log before traveling back to Austria - and also for the moment the last related to the guns - next posts will be the ship´s boat - a small project in the project...... See you soon
Here now some impressions of the guns on the deck (still not fixed and adjusted)
View attachment 264312
View attachment 264313
View attachment 264314
View attachment 264315
View attachment 264316
View attachment 264317
View attachment 264318
View attachment 264319
View attachment 264320
View attachment 264321
somehow I like them shiny ......
View attachment 264322

Many Thanks for the comments and likes received
And also many thanks for the wishes received for a safe trip back to Vienna - it worked, the pilot was flying not so fast and also had no accident with birds or other planes - so I am back in sweet Austria (which also can see on the country flag near my avatar)
not to forget to answer your comment - I think, that the guns were never stowed parallel to the bulkhead, but every time in 90° angle to the bulkhead, and fully out at the gunport as much as possible, so that the front wheel were in contact with the waterway (like shown on the last photos)
So at the end, there will be only a small difference with the tackles, showing stowed or ready for action.....
And also many thanks for the wishes received for a safe trip back to Vienna - it worked, the pilot was flying not so fast and also had no accident with birds or other planes - so I am back in sweet Austria (which also can see on the country flag near my avatar)
Hallo Kurt,Are you going to rig for battle, or stowed tight to the bulkheads for in port and rough seas?
not to forget to answer your comment - I think, that the guns were never stowed parallel to the bulkhead, but every time in 90° angle to the bulkhead, and fully out at the gunport as much as possible, so that the front wheel were in contact with the waterway (like shown on the last photos)
So at the end, there will be only a small difference with the tackles, showing stowed or ready for action.....
Kurt Konrath
Kurt Konrath
That does make more sense, having it pulled tight, and lines secured to keep them out of way of those moving past the guns.
now coming to the small project inside the project.
As content of the kit there is also the ships boat, which can be either stowed on the deck or theoreticaly also towed behind the ship
Let us shortly read, what Jean Boudriot is telling us about the boat

and the drawing
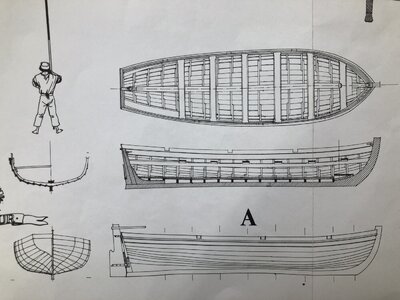
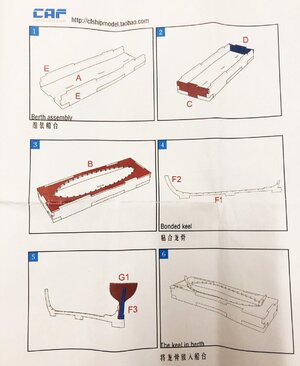
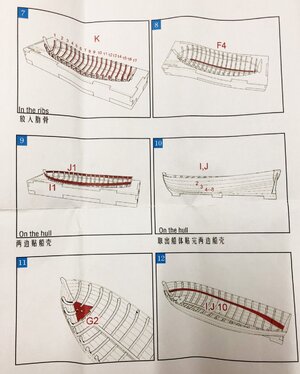
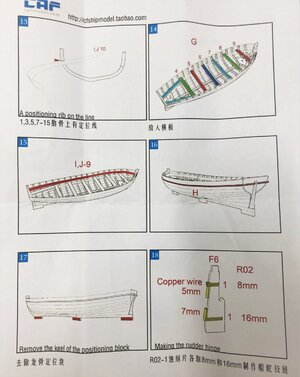
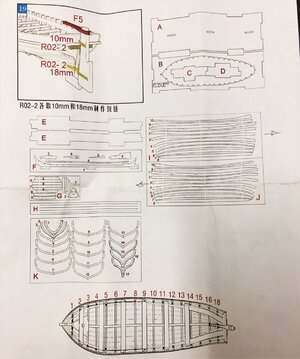
Content of the kit, but also offered by CAF separatly (for other projects and ships usable) is the standard boat
here the manual so you can better imagine the work with this boat
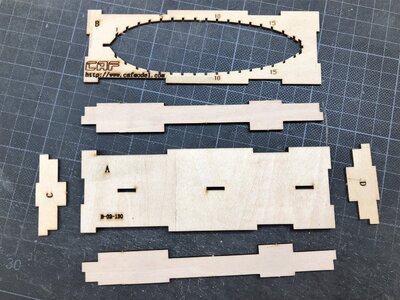
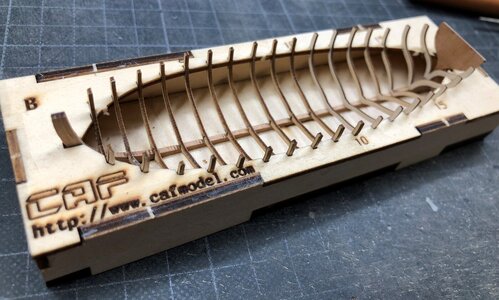
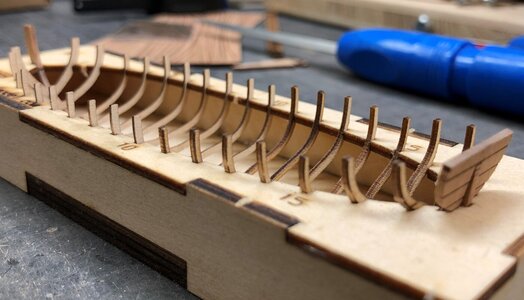
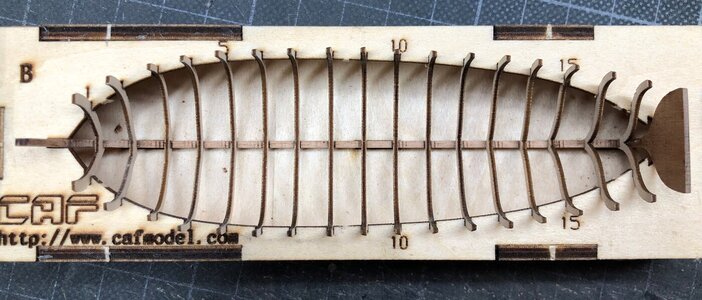
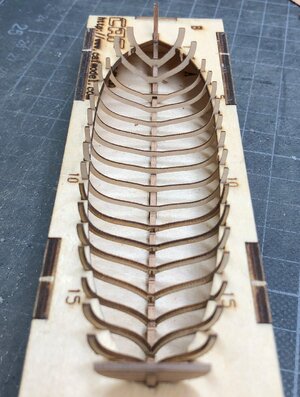
So let us start with the small jig which prepared not any problem - you can see the notches for the individual frames
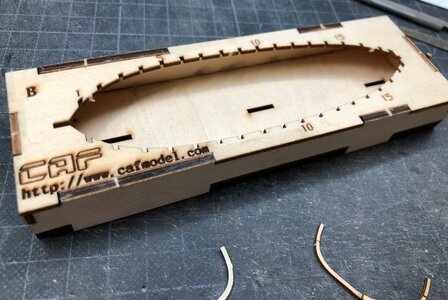
and fixed - a small job of less than 5 to 10 minutes
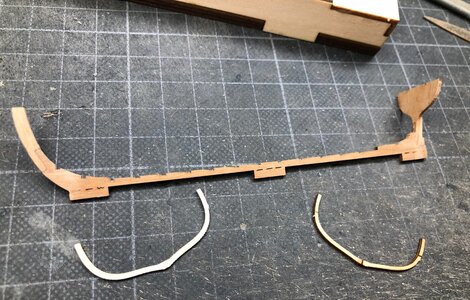
but now the very fragile work will start - here the prepared keel of the boat with already attached stern - the frames are appr. 1mm in square - made out of very fine and riggid plywood - normal timber would brake easily
The keel insatlled in the jig
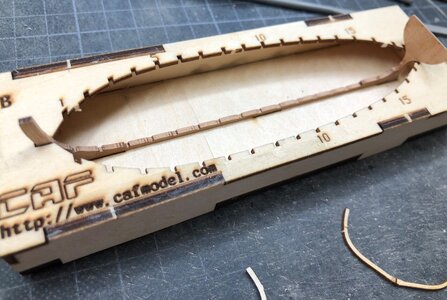
and all frames in place - I decided not to remove the laser char now, because the frames could break with a certain pressure. This can be done also later when the planking is done and each frame is fixed
to be continued ......
As content of the kit there is also the ships boat, which can be either stowed on the deck or theoreticaly also towed behind the ship
Let us shortly read, what Jean Boudriot is telling us about the boat

and the drawing

Content of the kit, but also offered by CAF separatly (for other projects and ships usable) is the standard boat
here the manual so you can better imagine the work with this boat


So let us start with the small jig which prepared not any problem - you can see the notches for the individual frames

and fixed - a small job of less than 5 to 10 minutes

but now the very fragile work will start - here the prepared keel of the boat with already attached stern - the frames are appr. 1mm in square - made out of very fine and riggid plywood - normal timber would brake easily

The keel insatlled in the jig

and all frames in place - I decided not to remove the laser char now, because the frames could break with a certain pressure. This can be done also later when the planking is done and each frame is fixed


to be continued ......
Yes, Uwe the dinghy is very fragile, I've already had experience with it.
Hello Uwe, I build 2 of those ships boat kits from CAF model for my H.M.S Alfred ship model.
They are very fiddly to assemble and I found it better to paint them.
They are very fiddly to assemble and I found it better to paint them.
Hallo Uwe, the boat looks very delicate, but that makes it particularly appealing. I like it very much. Are you going to display it on board Le Coureur or somehow in a towing position?
Like Bryian mentioned already - the parts are very filigran and you need some patience and calm fingers working on and with the boatskit.
and it is very light refering the weight - you have the feeling, that you have only paper in hand
But with some time you get used to this .....
Now we start the outside planking - for this you have to install the first top layers with the small notches for the boat oars - here I made a mistake, which I will show also in this post - so be aware about and make it correct
The two top planks and also the thin keelson
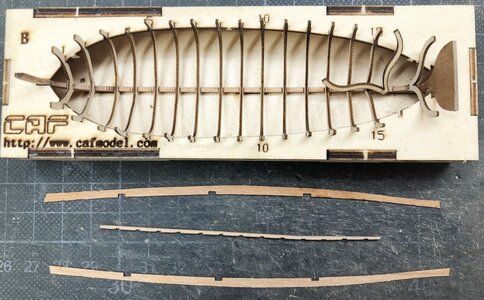
On one side the plank is installed and also the keelson
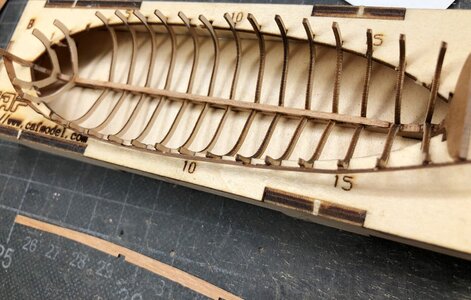
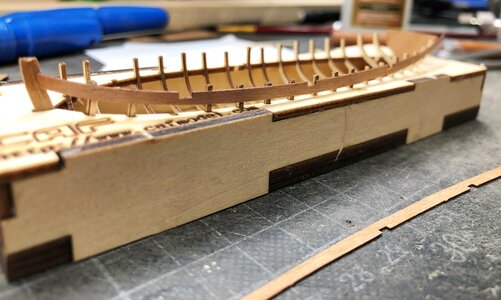
and the other side
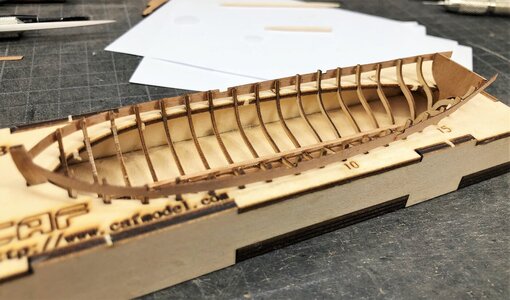
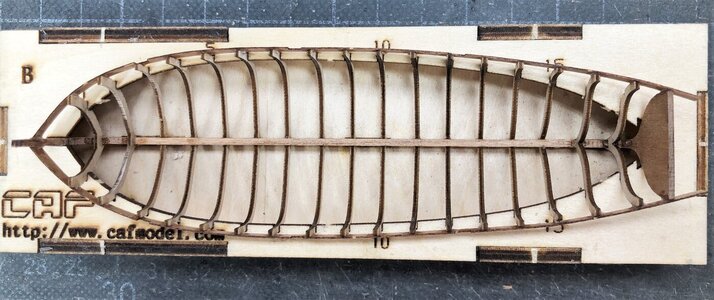
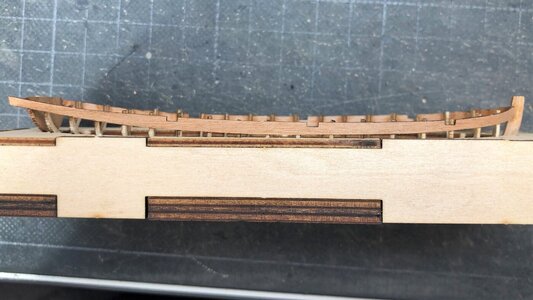
and here the mistake happened - I installed the second top plank in the wrong direction
Let us take one more look at the Boudriot drawing:
The boat was rowed by six seamen, one seaman sitting on one bench - therefore the notches for the oars have to be staggered on revers order on both sides (see green and red arrows) - > My error was, that I made them mirrored !!!! WRONG !!!!
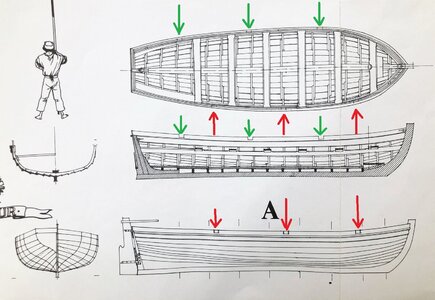
I realized this much later, so no chance to correct it
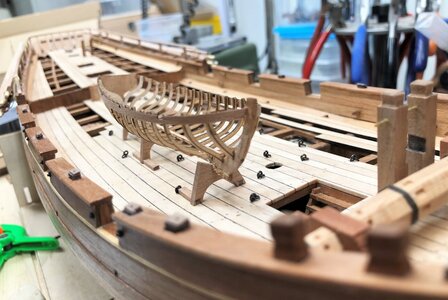
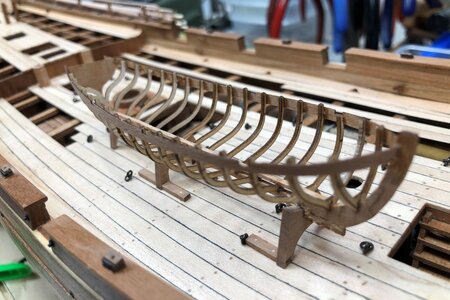
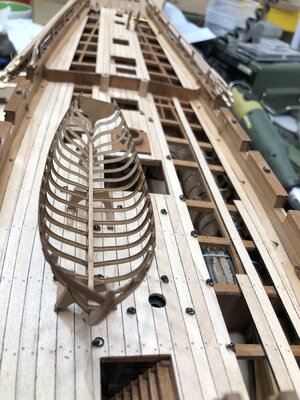
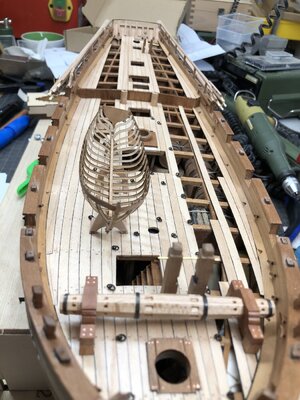
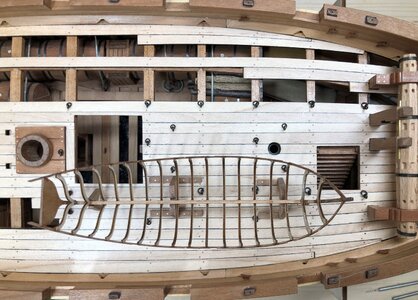
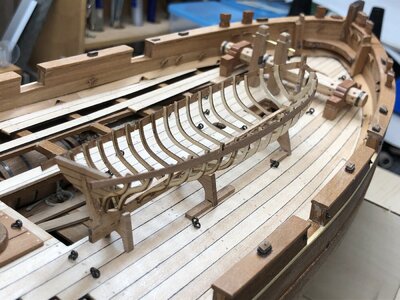
After installation and fixing of the two planks and the keelson the boats model can be removed out of the jig and off course I checked the look of the skeleton on top of the Le Coureur - would be also a nice idea.....
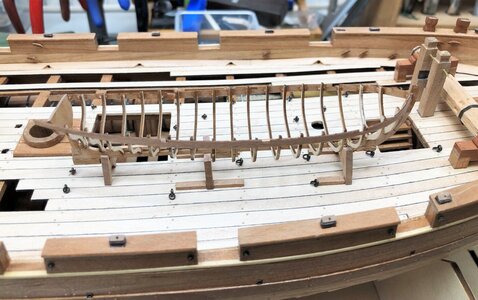
and it is very light refering the weight - you have the feeling, that you have only paper in hand
But with some time you get used to this .....
Now we start the outside planking - for this you have to install the first top layers with the small notches for the boat oars - here I made a mistake, which I will show also in this post - so be aware about and make it correct
The two top planks and also the thin keelson

On one side the plank is installed and also the keelson


and the other side


and here the mistake happened - I installed the second top plank in the wrong direction
Let us take one more look at the Boudriot drawing:
The boat was rowed by six seamen, one seaman sitting on one bench - therefore the notches for the oars have to be staggered on revers order on both sides (see green and red arrows) - > My error was, that I made them mirrored !!!! WRONG !!!!

I realized this much later, so no chance to correct it
After installation and fixing of the two planks and the keelson the boats model can be removed out of the jig and off course I checked the look of the skeleton on top of the Le Coureur - would be also a nice idea.....


