looking great Ewe. 
-

Win a Free Custom Engraved Brass Coin!!!
As a way to introduce our brass coins to the community, we will raffle off a free coin during the month of August. Follow link ABOVE for instructions for entering.
-

PRE-ORDER SHIPS IN SCALE TODAY!
The beloved Ships in Scale Magazine is back and charting a new course for 2026!
Discover new skills, new techniques, and new inspirations in every issue.
NOTE THAT OUR FIRST ISSUE WILL BE JAN/FEB 2026
- Home
- Forums
- Ships of Scale Group Builds and Projects
- Le Coureur 1776 1:48 PoF Group Build
- Le Coureur 1776 1:48 Group Build Logs
You are using an out of date browser. It may not display this or other websites correctly.
You should upgrade or use an alternative browser.
You should upgrade or use an alternative browser.
LE COUREUR - french Lugger 1776 - POF kit from CAF in 1:48 by Uwe
coming on very nicely Uwek looks great
Fantastic work Uwe, very nice detailing.
Many Thanks to all for your nice and friendly comments and all the Likes received - much appreciated.
Due to a week illness, I was not able to do something in the shipyard, but yesterday evening I was able to restart some small works
So I started to think about the stone ballast and how these stone will be fixed and on which areas they shall be visible. Because most of the area I have to close, so that the barrels, boxes and other stuff like canvas can be located and fixed.
First I tried the fixing of some "sample"-stones with wood glue - and it is working
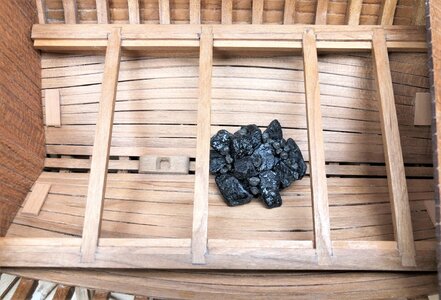
Filling the complete ballast box with stones, the model would get really heavy. For a real ship, with full canvas area in the wind enough stone ballast was necessary. My model will be finally fully rigged with sails, but hopefully there will be no wind producing forces to the mast and ship, so I will reduce the total volume of real stones as much as possible
So the solution (for the moment) will be a not visible platform made out of a plywood. On the photo you see one side, the other left side will be also prepared
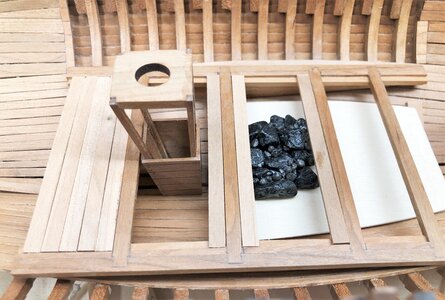
In the moment I am planing to close the marked areas (with red lines) with boards - the others will stay open showing the stone ballast beneath
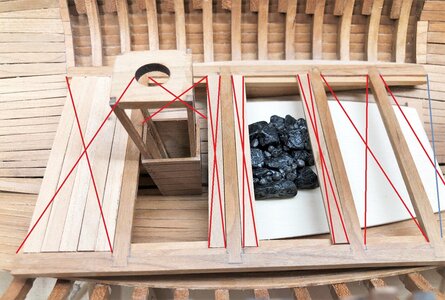
Due to a week illness, I was not able to do something in the shipyard, but yesterday evening I was able to restart some small works
So I started to think about the stone ballast and how these stone will be fixed and on which areas they shall be visible. Because most of the area I have to close, so that the barrels, boxes and other stuff like canvas can be located and fixed.
First I tried the fixing of some "sample"-stones with wood glue - and it is working

Filling the complete ballast box with stones, the model would get really heavy. For a real ship, with full canvas area in the wind enough stone ballast was necessary. My model will be finally fully rigged with sails, but hopefully there will be no wind producing forces to the mast and ship, so I will reduce the total volume of real stones as much as possible
So the solution (for the moment) will be a not visible platform made out of a plywood. On the photo you see one side, the other left side will be also prepared

In the moment I am planing to close the marked areas (with red lines) with boards - the others will stay open showing the stone ballast beneath

Very nice Uwe, I am striving to do my work, with your work, as an inspiration of what can be done. Thank you for taking the time to inspire me and others who follow you.
Yesterday I finished the preparation of the hidden platforms made out of plywood, painted them black and fixed on the main parts which are visible the stones.
After permanent installatioon of this platforms I plan to adjust and add additional stones (over the edges between playwood and inner planking), so that the this plywood is not visible any more
I think you are getting a good impression, of how it is looking like - the whit spots between the stones is the wood-glue, which is still wet, after drying it will be not visble any more (I hope so)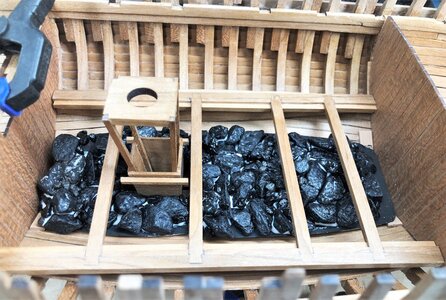
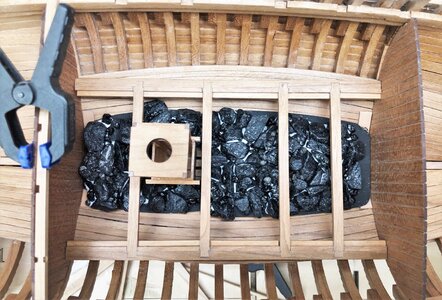
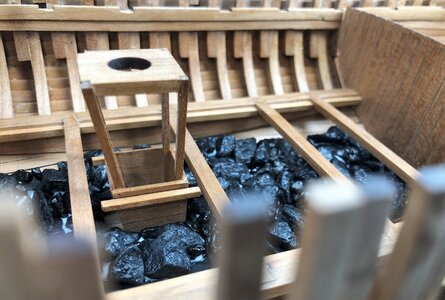


Today I am able to show the finish works on the stone ballast.
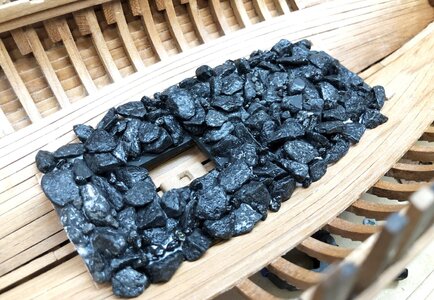
Here visible the two segments of the false and hidden platform - necessary now are some more stones to cover the edges
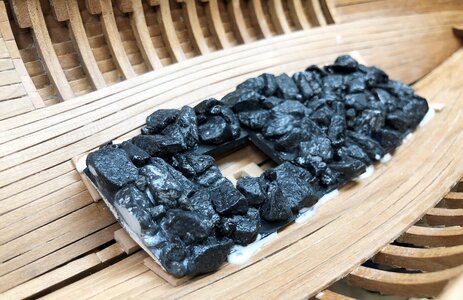
no way back - the most of the work is done
here the view with the ballast box and some of the cover boards on the ballast box
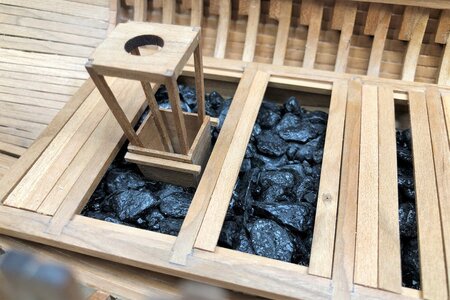
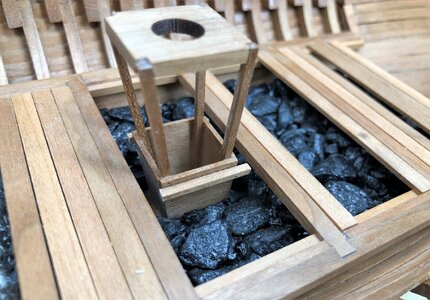
The top view - you can see, that I have to prepare some more of the cover boards - on the right you can see still the (to be completely) hidden platform
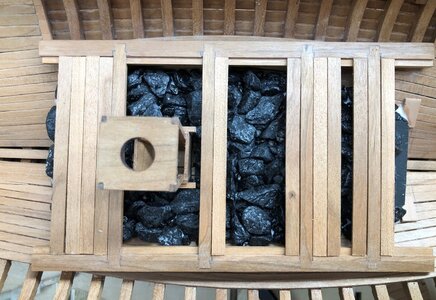
and afterwards I realized, that I forgot something - I forgot completely to leave some space between the stones for the Monkey ladder - I have to solve it somehow - >
SO DO NOT FORGET THIS SMALL MONKEY LADDER


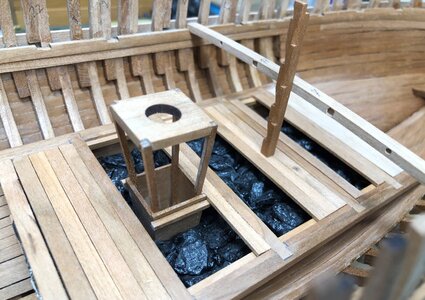
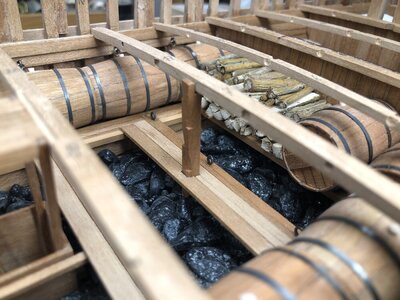
and finally - I could not resist to put some barrels and boxes into the hold - only to get an impression ......
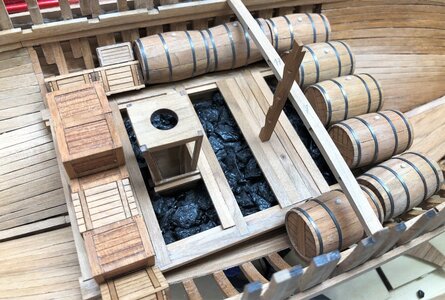
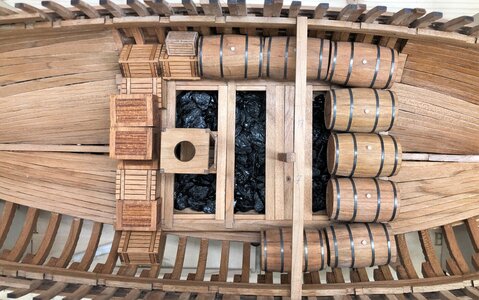
Before installing the deckbeams, I have to decide how to arrange and fix the cargo
Many Thanks for your interest ..... see you soon on this channel
Here visible the two segments of the false and hidden platform - necessary now are some more stones to cover the edges

no way back - the most of the work is done

here the view with the ballast box and some of the cover boards on the ballast box


The top view - you can see, that I have to prepare some more of the cover boards - on the right you can see still the (to be completely) hidden platform

and afterwards I realized, that I forgot something - I forgot completely to leave some space between the stones for the Monkey ladder - I have to solve it somehow - >
SO DO NOT FORGET THIS SMALL MONKEY LADDER


and finally - I could not resist to put some barrels and boxes into the hold - only to get an impression ......


Before installing the deckbeams, I have to decide how to arrange and fix the cargo
Many Thanks for your interest ..... see you soon on this channel
The hold looking awesomely great and busy with barrels and boxes 

Hallo Uwe, looks very nice. Stone ballast, crates and barrels give an exceptionally abyssel image. Great job. I really like it.
Many Thanks for your kind words - good for the own personal motivation to spend hours and hours for the small things.....
During the weekend I was able to start the final installation of walls and decks and also tried to fine-tune and prepare the material and stowage
In the hold near the pumps are some canvas bags stowed - only that there is something
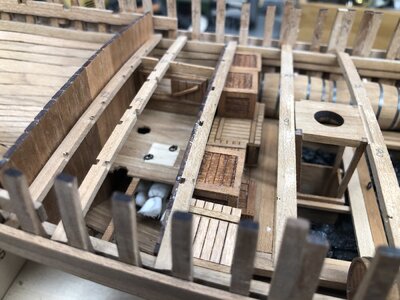
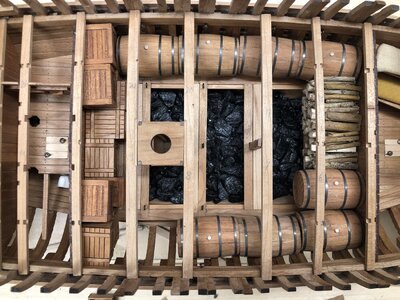
Final installed two sleeping compartments and also final adjustments of the bitts in the wall - in the room directly in the bow are three spare sails stowed (according the contemporary drawing this room was the "sail-room"
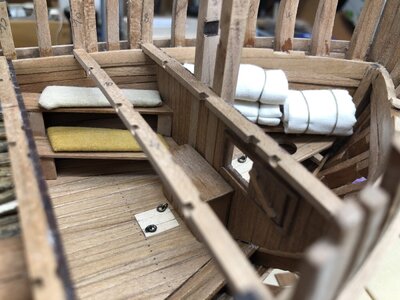
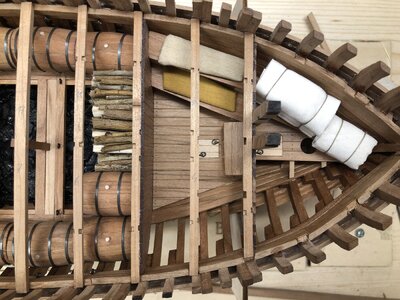
The barrels, boxes and the firewood are not finally fixed
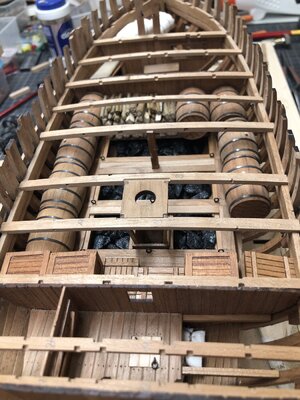
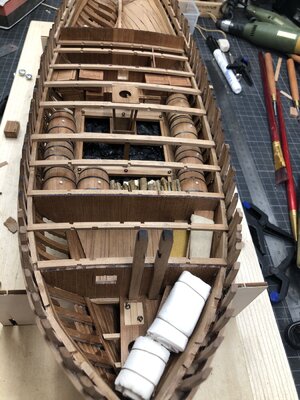
actual horizonatl views through the frames - I guess a video will show it better, which I will try to make, when it is really finalized
the bags near the pumps
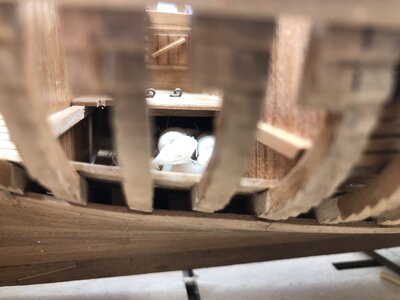
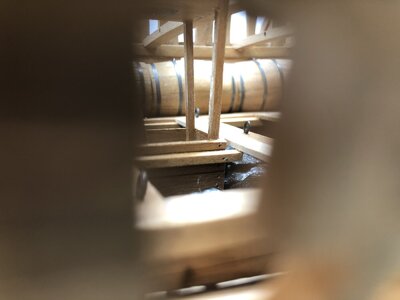
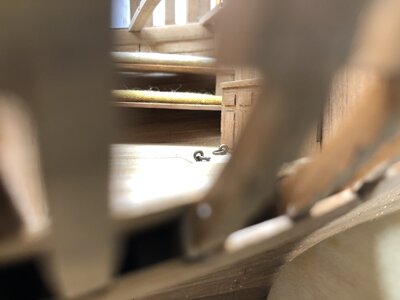
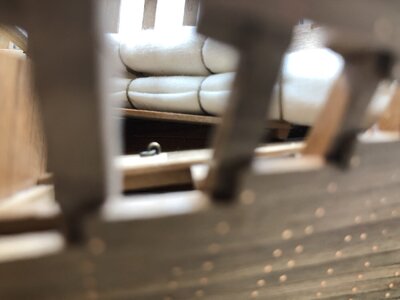
I installed in the stowage compartment also some ring bolts for a later lashing of the barrels, maybe some more are necessary (in moment 20 rings) - also firewood is prepared
also my mistake with the forgotten monkey ladder is solved for the moment -> I think I will leave it like this
Many Thanks for the interest - comments (positive and negative) are well come
During the weekend I was able to start the final installation of walls and decks and also tried to fine-tune and prepare the material and stowage
In the hold near the pumps are some canvas bags stowed - only that there is something


Final installed two sleeping compartments and also final adjustments of the bitts in the wall - in the room directly in the bow are three spare sails stowed (according the contemporary drawing this room was the "sail-room"


The barrels, boxes and the firewood are not finally fixed


actual horizonatl views through the frames - I guess a video will show it better, which I will try to make, when it is really finalized
the bags near the pumps


I installed in the stowage compartment also some ring bolts for a later lashing of the barrels, maybe some more are necessary (in moment 20 rings) - also firewood is prepared
also my mistake with the forgotten monkey ladder is solved for the moment -> I think I will leave it like this

Many Thanks for the interest - comments (positive and negative) are well come
Wow Uwe! Simply fantastic attention to detail with superior execution at every turn. You are building something truly beautiful! If I ever get to a 'next' ship I'm going to work at a larger scale - these details are too much fun!
- Joined
- Sep 28, 2020
- Messages
- 287
- Points
- 168

I like your ideas with the spare sails and the firewood! This brings much life into your model. Lets set sails and go privtaeering!
But I think I bring my own linen for my bunk
But I think I bring my own linen for my bunk
Once more Many Thanks for your kind words, comments and thumb ups - highly appreciated
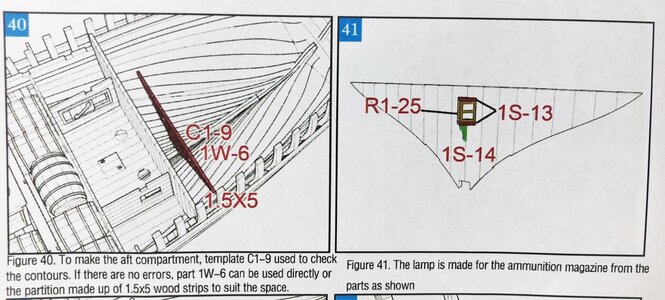
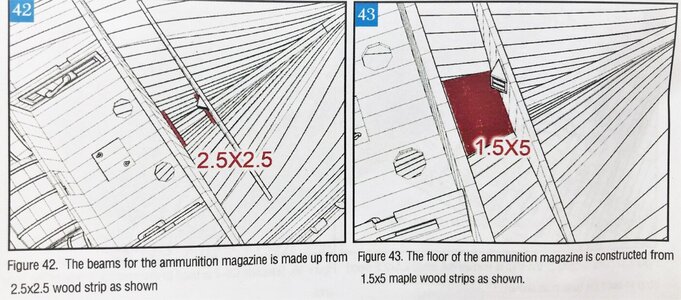
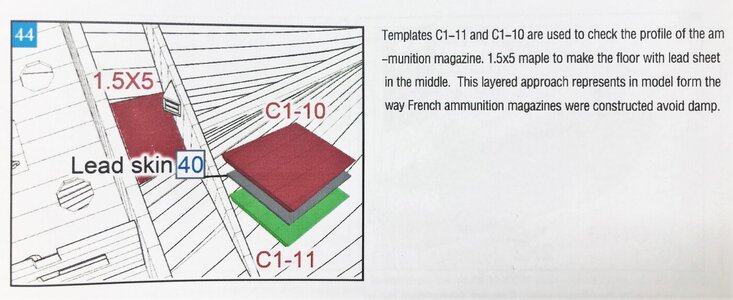
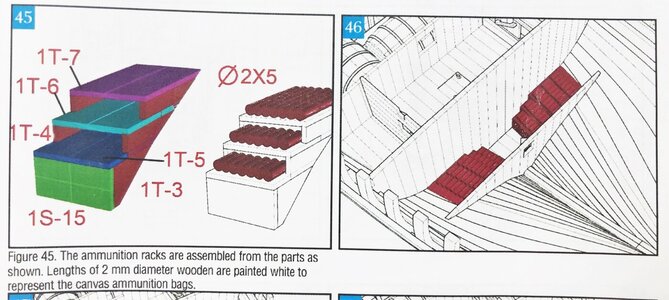
Going further yesterday evening I worked on the munition magazine / room - as often I show you the descriptions of the manual
the small wall with the small lighting
installation of the floor
in the kit, there is also a small felxibel sheet of some "lead"
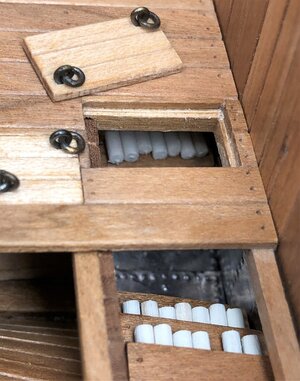
the ammunition racks with the gun-powder bags
and the floor (which was already prepared weeks ago)
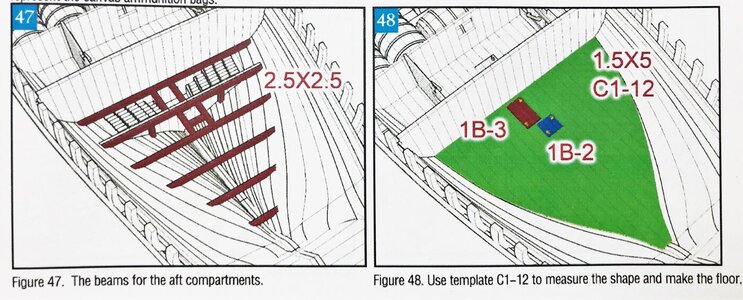
Going further yesterday evening I worked on the munition magazine / room - as often I show you the descriptions of the manual
the small wall with the small lighting

installation of the floor

in the kit, there is also a small felxibel sheet of some "lead"

the ammunition racks with the gun-powder bags

and the floor (which was already prepared weeks ago)

now let us take a look at the execution
the small wall with the lighting and the lead cover of the wall
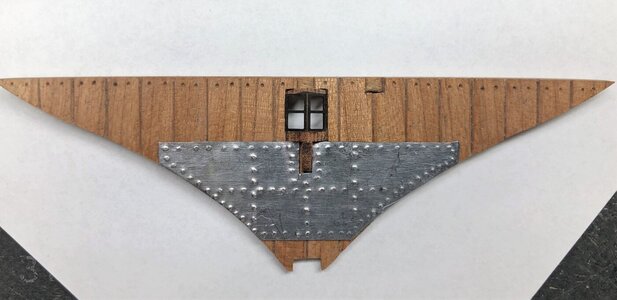
also the fllor and the other wall was covered with the lead
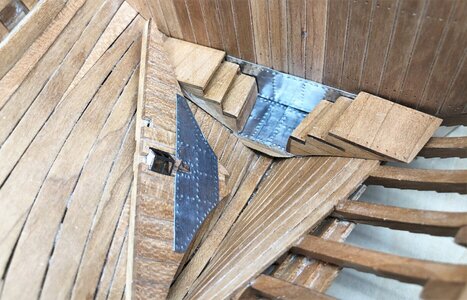
First check of visability of the interior of the ammunition magazine when the floor / deck is installed
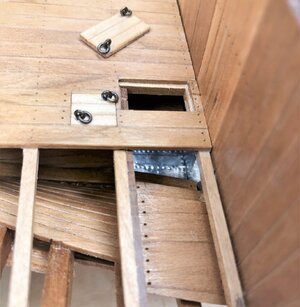
not much is possible to see - but I know it, that it is there
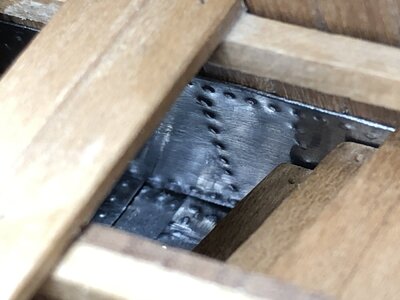
view from the top through the opening
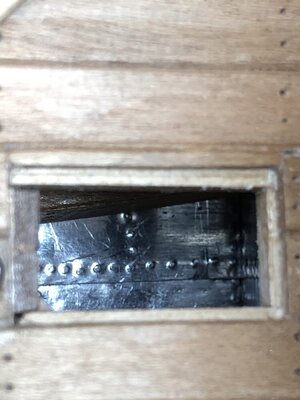
the racks are now filled with some gun-powder bags
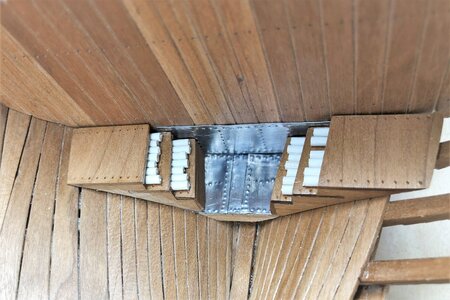
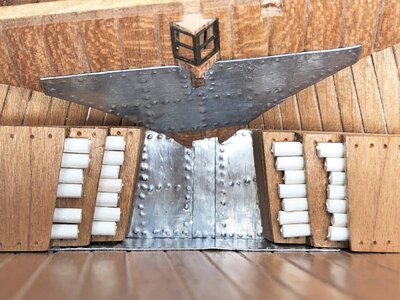
top view with both walls on their place
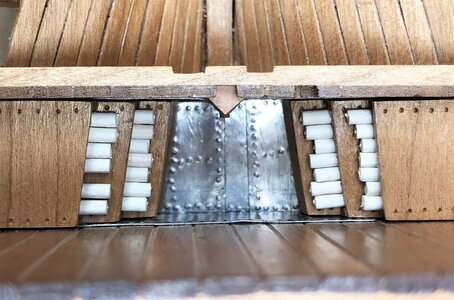
the view through the frames (without floor)
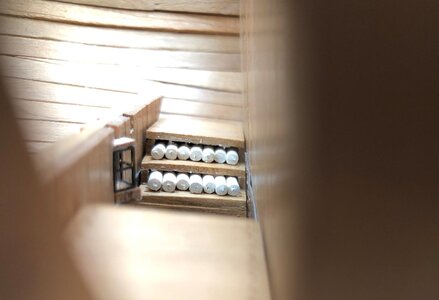
the same with the floor covering most of the magazine
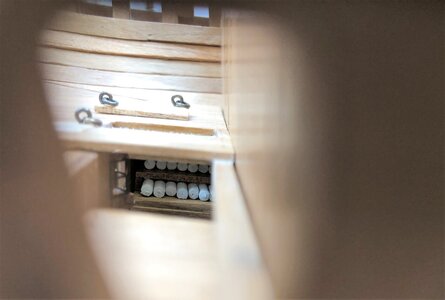
the small wall with the lighting and the lead cover of the wall

also the fllor and the other wall was covered with the lead

First check of visability of the interior of the ammunition magazine when the floor / deck is installed

not much is possible to see - but I know it, that it is there

view from the top through the opening

the racks are now filled with some gun-powder bags


top view with both walls on their place

the view through the frames (without floor)

the same with the floor covering most of the magazine


Amazing Uwe! Incredible attention to detail and marvelous execution.
Прекрасная работа Недурнотеперь давайте посмотрим на исполнение
небольшая стена с освещением и свинцовым покрытием стены
View attachment 231238
также пол и другая стена были покрыты свинцом
View attachment 231227
Первая проверка видимости внутренней части магазина боеприпасов при установке пола / палубы
View attachment 231228
не так много можно увидеть - но я знаю, что это есть
View attachment 231229
вид сверху через проем
View attachment 231230
Стеллажи теперь заполнены мешками с порохом
View attachment 231232
View attachment 231234
вид сверху с обеими стенами на своих местах
View attachment 231235
вид через рамы (без пола)
View attachment 231236
то же самое с полом, покрывающим большую часть журнала
View attachment 231237
View attachment 231233
Fine work Thumbs up
Last edited by a moderator:
Beautiful work again Uwe.
I am in the same process in my Alert, unfortunately we Alert builders have to build from scratch here, nothing provided for interior of the powder room.
I have to make some powder cartridges and yours look very well, keep them in mind.
I am in the same process in my Alert, unfortunately we Alert builders have to build from scratch here, nothing provided for interior of the powder room.
I have to make some powder cartridges and yours look very well, keep them in mind.


