-

Win a Free Custom Engraved Brass Coin!!!
As a way to introduce our brass coins to the community, we will raffle off a free coin during the month of August. Follow link ABOVE for instructions for entering.
-

PRE-ORDER SHIPS IN SCALE TODAY!
The beloved Ships in Scale Magazine is back and charting a new course for 2026!
Discover new skills, new techniques, and new inspirations in every issue.
NOTE THAT OUR FIRST ISSUE WILL BE JAN/FEB 2026
- Home
- Forums
- Ships of Scale Group Builds and Projects
- Le Coureur 1776 1:48 PoF Group Build
- Le Coureur 1776 1:48 Group Build Logs
You are using an out of date browser. It may not display this or other websites correctly.
You should upgrade or use an alternative browser.
You should upgrade or use an alternative browser.
LE COUREUR - french Lugger 1776 - POF kit from CAF in 1:48 by Uwe
BTW one additional information related to the used copper nailing of the outside hull planking.
In the meantime the nails got back there slightly red copper color - so the shining and glossy appearance is disappearing with the time.
The outer planking was not treated with oil or something else until now - so pure natural timber and copper
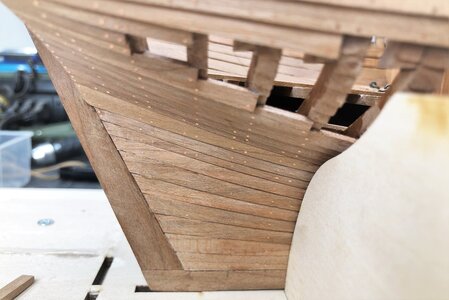
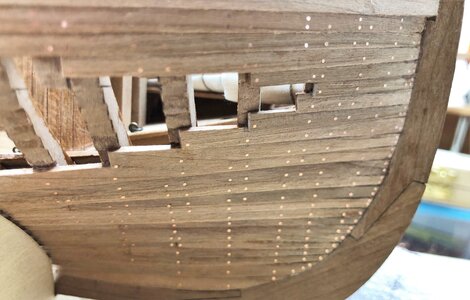
In the meantime the nails got back there slightly red copper color - so the shining and glossy appearance is disappearing with the time.
The outer planking was not treated with oil or something else until now - so pure natural timber and copper


Hallo my friends,
sorry for the late reply, but it was a long weekend here in Austria (Thursday to Sunday) so this time is reserved for the family (and workshop) with a partly abstinence to I-phone and laptop.....
The ladders which I am using are not included in the kit. It was a special laser cut sheet, I received once from Tom for testing, which are fitting well to the Coureur.
I told him already, that he should and could add them to the Le Coureur kit......
Here two photos which I made building them - I used double sided adhesive tape to fix the two ladderbeams, so it was easy to install the rungs
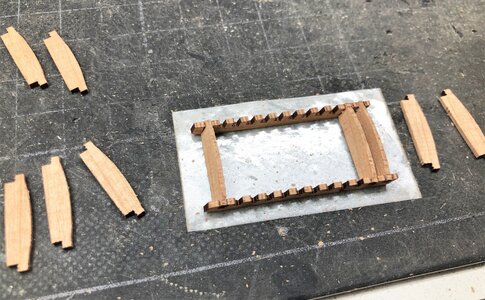
final result
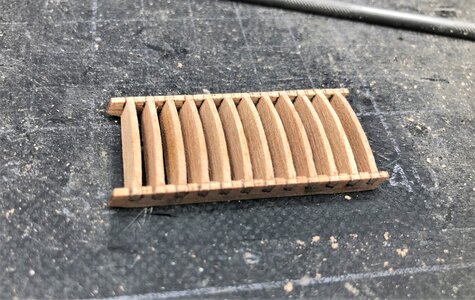
sorry for the late reply, but it was a long weekend here in Austria (Thursday to Sunday) so this time is reserved for the family (and workshop) with a partly abstinence to I-phone and laptop.....
The ladders which I am using are not included in the kit. It was a special laser cut sheet, I received once from Tom for testing, which are fitting well to the Coureur.
I told him already, that he should and could add them to the Le Coureur kit......
Here two photos which I made building them - I used double sided adhesive tape to fix the two ladderbeams, so it was easy to install the rungs

final result

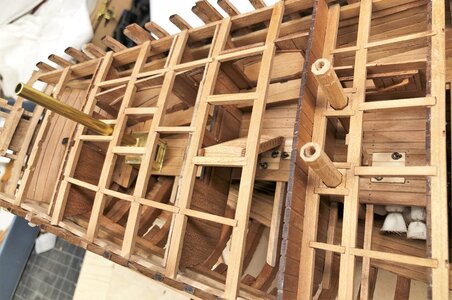
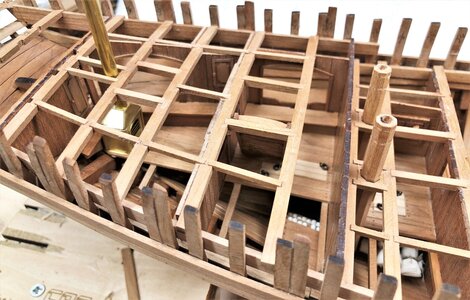
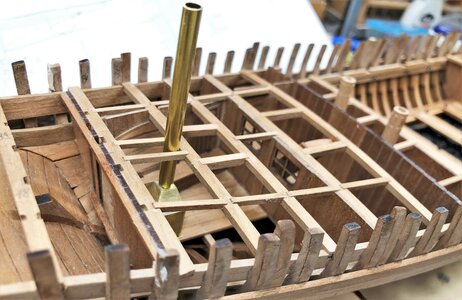
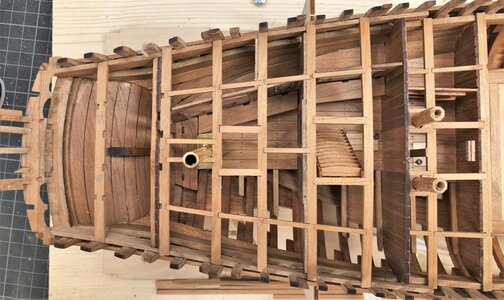
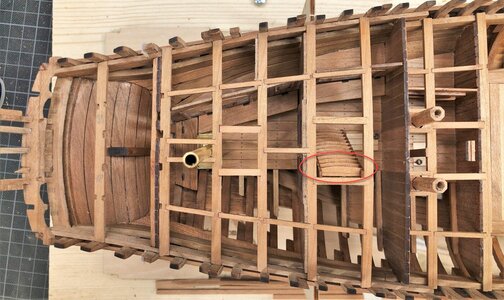
some more progress on the carlings and beams
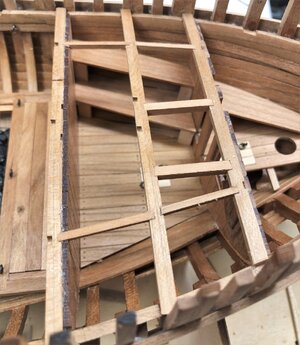
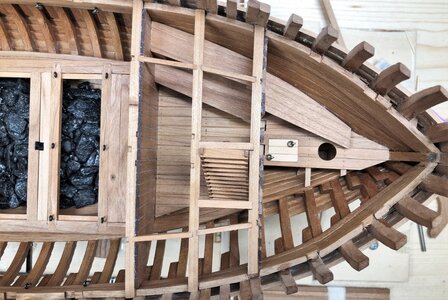
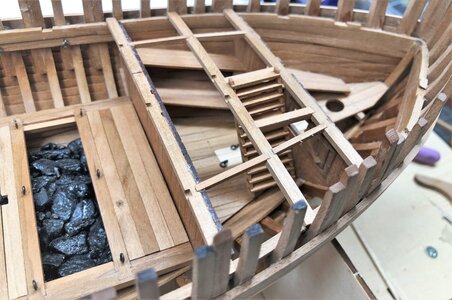
IMPORTANT:
Be aware, that you do not fix the carlings left of the ladder (on the photos still missing) before the fireplace / oven is finally installed !
So FIRST oven and onyl afterwards the last carlings .....
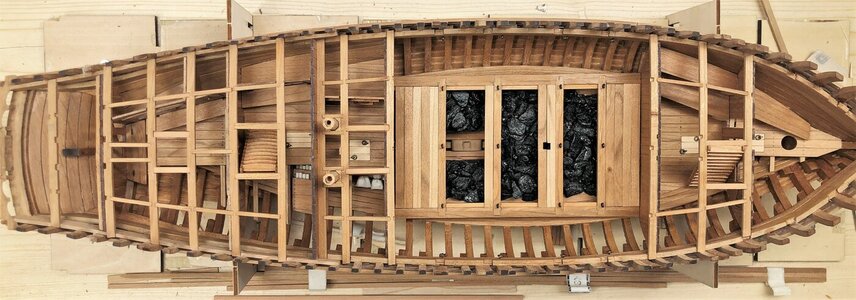
and moving to the sail room at the bow with the mast partner
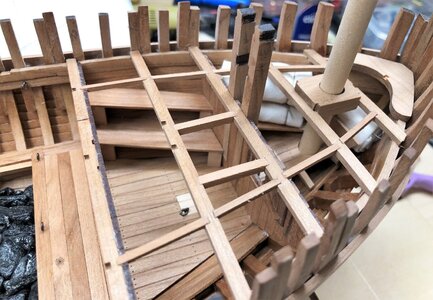
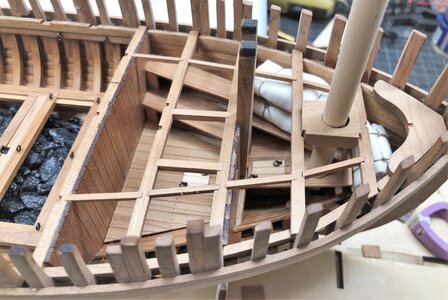
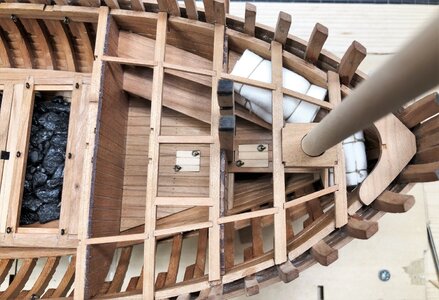


IMPORTANT:
Be aware, that you do not fix the carlings left of the ladder (on the photos still missing) before the fireplace / oven is finally installed !
So FIRST oven and onyl afterwards the last carlings .....

and moving to the sail room at the bow with the mast partner


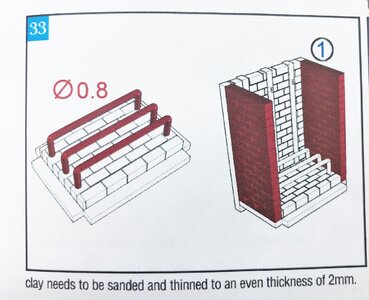
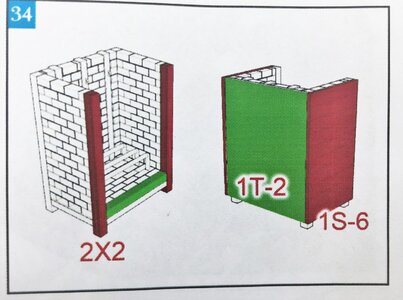
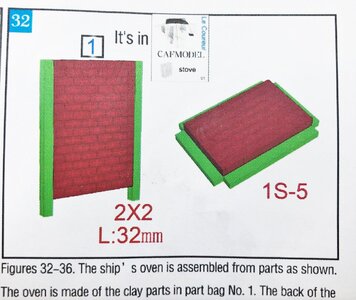
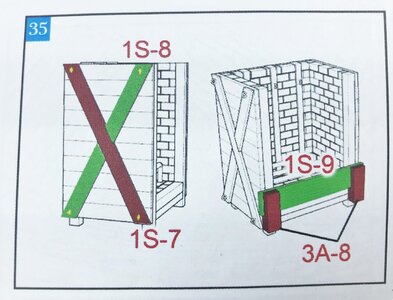
Included in the kit are four nice and very realistic wall elements made out of real clay - each brick is visible - so I am very happy with this solution
Nevertheless the work with these has to be done very gentle and careful, they can break easily
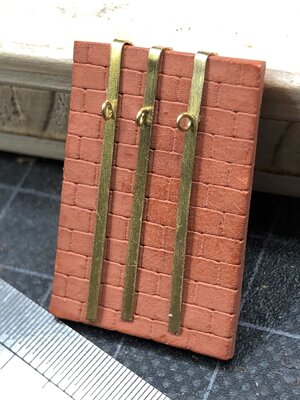
First step was the base element, drilling six holes for fixing the three brass elements (also included as a wire in kit, which has to be bended into the correct form)
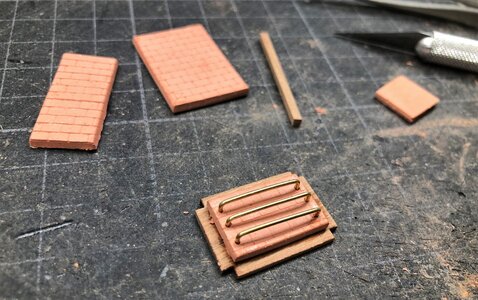
Here you can see the the backside wall - the three brass elements are made out of scratch with the use of some 0,2mm brass sheet and the rings are made out of a 0,4mm brass wire
Maybe you recognized already some change in the color of the bricks - I painted the slightly orange clay with Ecoline watercolor pen to get a darker red
and here the final result of the oven with the base and the three side walls already inside the wooden box - I used for the ringbolts (with which the oven will be fixed inside the ship) the kit content - they are slightly too big, but I was too lazy to make eight from scratch - to be realsitic - it will be hardly visible later one
I discussed this with Tom some days ago, and he will add in future some bolts to the kit, which are more scale correct
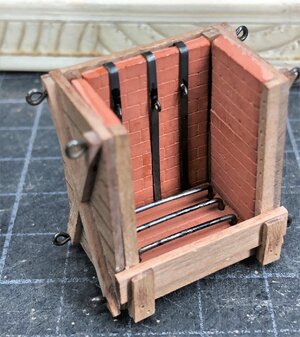
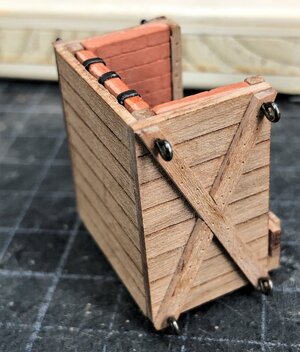
with an scriber I made also some small holes into the wood, in order to imitate some nails (but this is only for me -> nobody can see this detail later on
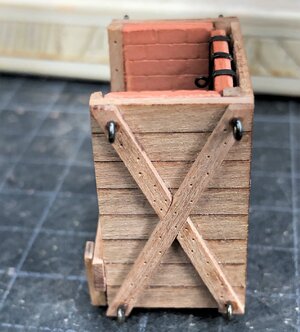
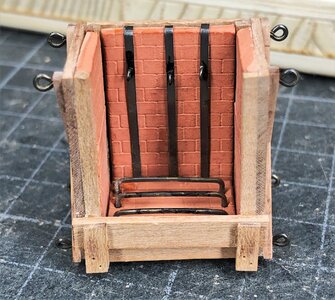
Only to comare the size of these two heating places which have to be installed in the Le COUREUR
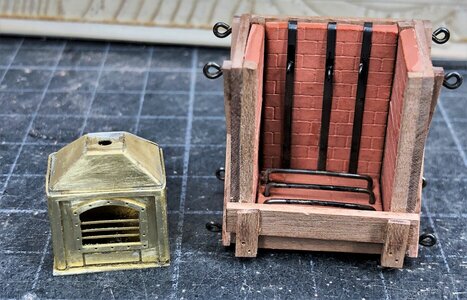
and now the oven at his final place
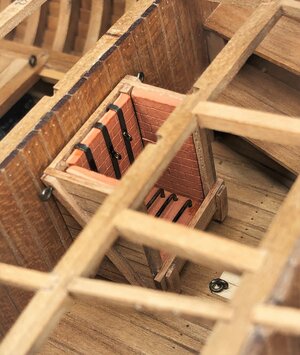
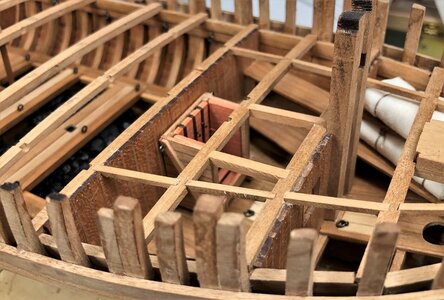
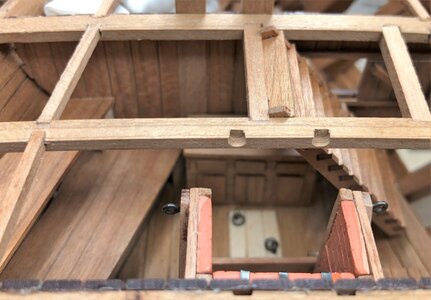
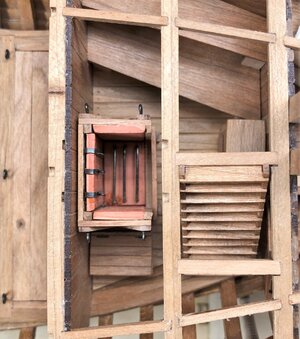
Many Thanks for your interest .... to be continued .....
Nevertheless the work with these has to be done very gentle and careful, they can break easily
First step was the base element, drilling six holes for fixing the three brass elements (also included as a wire in kit, which has to be bended into the correct form)

Here you can see the the backside wall - the three brass elements are made out of scratch with the use of some 0,2mm brass sheet and the rings are made out of a 0,4mm brass wire
Maybe you recognized already some change in the color of the bricks - I painted the slightly orange clay with Ecoline watercolor pen to get a darker red

and here the final result of the oven with the base and the three side walls already inside the wooden box - I used for the ringbolts (with which the oven will be fixed inside the ship) the kit content - they are slightly too big, but I was too lazy to make eight from scratch - to be realsitic - it will be hardly visible later one
I discussed this with Tom some days ago, and he will add in future some bolts to the kit, which are more scale correct


with an scriber I made also some small holes into the wood, in order to imitate some nails (but this is only for me -> nobody can see this detail later on


Only to comare the size of these two heating places which have to be installed in the Le COUREUR

and now the oven at his final place


Many Thanks for your interest .... to be continued .....
Hallo Uwe, super work. It looks just perfect. Too bad that the stairs are not included in the kit, I will have to make some myself.
In order to finialy fix the oven the oven has to be tied up by the eight ring bolts with the inner planking.
It was not easy to handle, but somehow I was able.
Keep this in mind, when you come to this working step...... install the oven first, before you glue any beam or carlings at this area
This is the final result
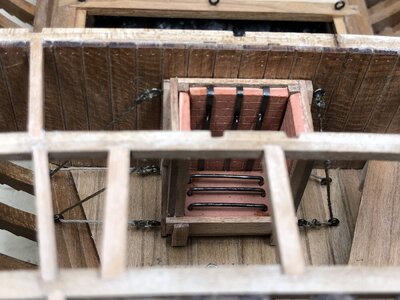
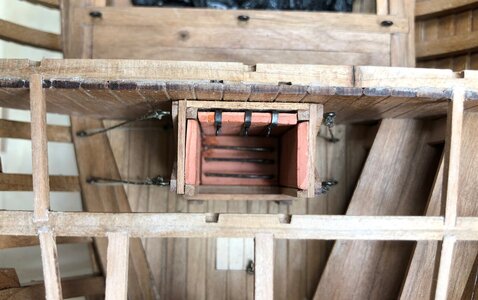
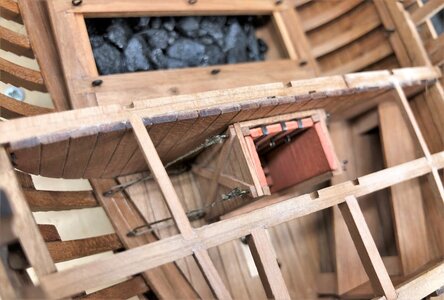
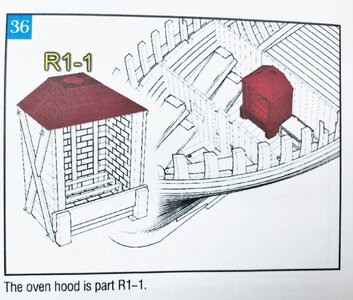
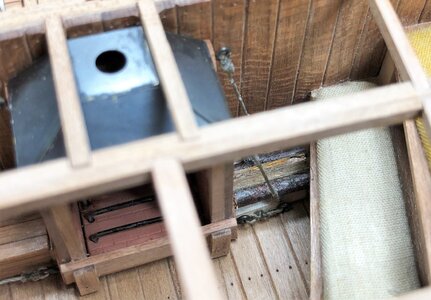
Now, after fixing the blackened brass roof the oven is finalized
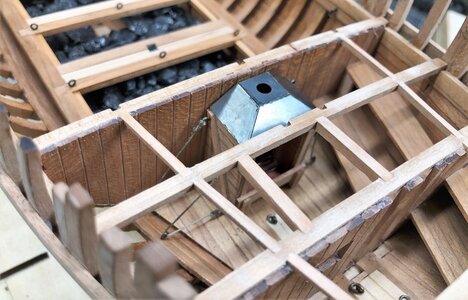
Some fire-wood next to the Oven - fixed between the ropes
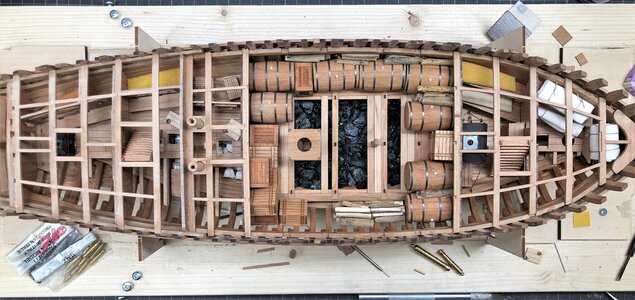
the overview of the interior at this stage of construction - Note: the barrels etc. are only dry fitted in order to find out the final arrangement
It was not easy to handle, but somehow I was able.
Keep this in mind, when you come to this working step...... install the oven first, before you glue any beam or carlings at this area
This is the final result


Now, after fixing the blackened brass roof the oven is finalized

Some fire-wood next to the Oven - fixed between the ropes

the overview of the interior at this stage of construction - Note: the barrels etc. are only dry fitted in order to find out the final arrangement

- Joined
- Sep 28, 2020
- Messages
- 287
- Points
- 168

That`s really good looking Uwe!
Respect Uwe, has become really good. I like it extraordinarily.
Looks stunning Uwe, so much to take your eye and look at
Amazing detail and workmanship. I'll be at this stage many months from now, but looking at your build has been a guide and an inspiration. Bravo !In order to finialy fix the oven the oven has to be tied up by the eight ring bolts with the inner planking.
It was not easy to handle, but somehow I was able.
Keep this in mind, when you come to this working step...... install the oven first, before you glue any beam or carlings at this area
This is the final result
View attachment 233879
View attachment 233880
View attachment 233881
Now, after fixing the blackened brass roof the oven is finalized
View attachment 233882
Some fire-wood next to the Oven - fixed between the ropes
View attachment 233885
the overview of the interior at this stage of construction - Note: the barrels etc. are only dry fitted in order to find out the final arrangement
View attachment 233883
Very nice Uwe, love your sail room with the wrapped up cloth, keep that one in mind.
Uwe, your fireplace is awesome and 'sounds'! I guess we are ready to roast a pig unless a decision already made to test the fireplace on her first voyage. Anyways, pig on me. 
Hallo my friends and modeling collegues
first of all many many thanks for your kind words about my progress - and also the likes received
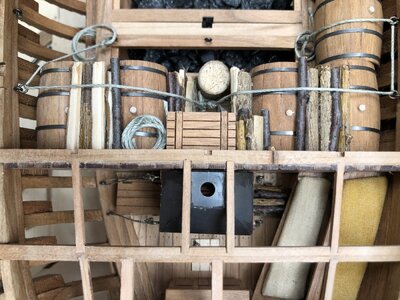
Today I can show the final arrangement of the cargo in the cargo compartment
I am not a specialist of correct lashing cargo in such a small hold...... I am pretty sure, that there should me more ropes, maybe crossed over the barrels etc......
I tried to simulate somehow some lashing........ Maybe my model is simulating the status still in harbor during the loading and lashing the cargo - both works are shown in between and not finalized, because there are still to barrels of red wine missing, which will be delivered from Bordeaux
But now the photos
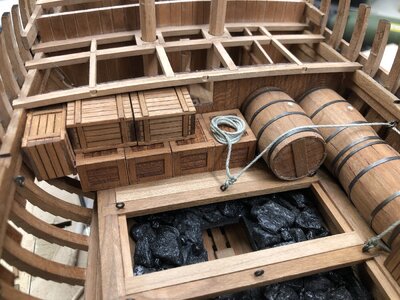
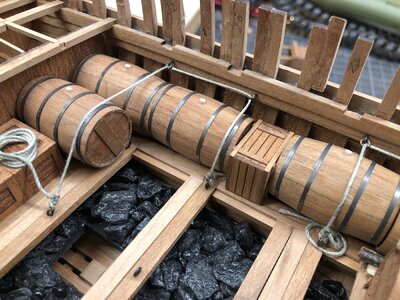
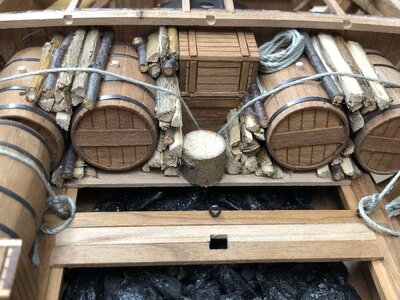
I added also some firewood - sometimes it is cold and the captain likes to have it warm in his cabin
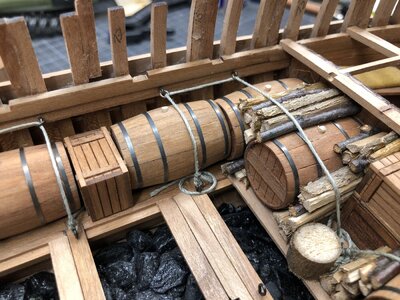
but most of the wood will be used by the ships-cook
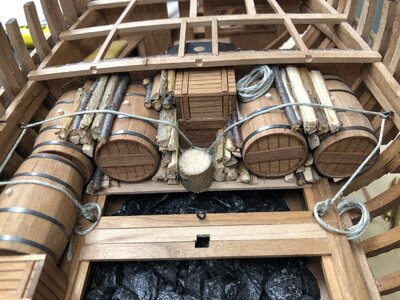
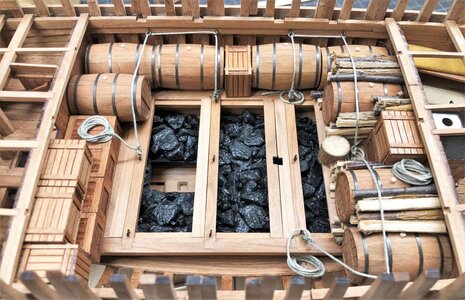
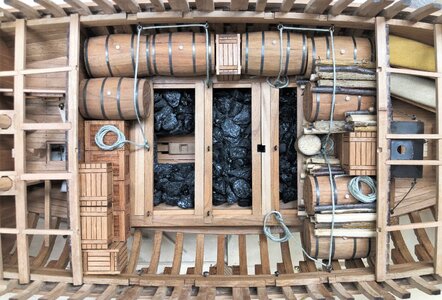
In the center you can see the Chopping block for the firewood - I am still searching for a miniature axe in correct scale
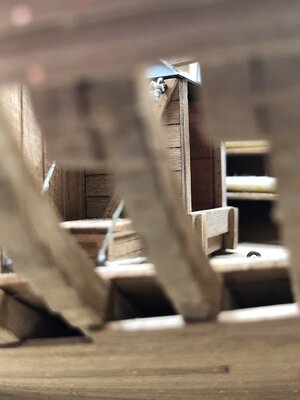
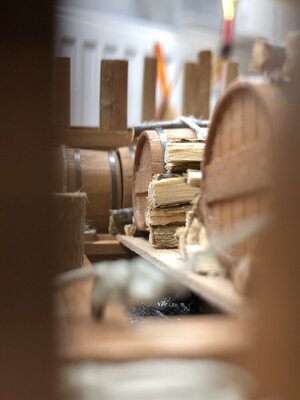
And to complete the sequence some views through the space between the frames
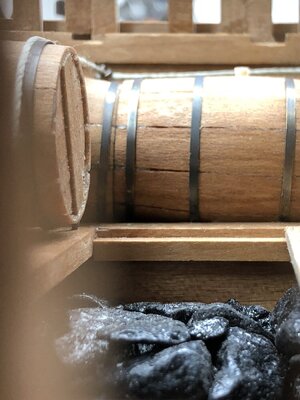
Many Thanks for your interest - to be continued .....
first of all many many thanks for your kind words about my progress - and also the likes received
Today I can show the final arrangement of the cargo in the cargo compartment
I am not a specialist of correct lashing cargo in such a small hold...... I am pretty sure, that there should me more ropes, maybe crossed over the barrels etc......
I tried to simulate somehow some lashing........ Maybe my model is simulating the status still in harbor during the loading and lashing the cargo - both works are shown in between and not finalized, because there are still to barrels of red wine missing, which will be delivered from Bordeaux
But now the photos


I added also some firewood - sometimes it is cold and the captain likes to have it warm in his cabin

but most of the wood will be used by the ships-cook


In the center you can see the Chopping block for the firewood - I am still searching for a miniature axe in correct scale

And to complete the sequence some views through the space between the frames


Many Thanks for your interest - to be continued .....
Sehr, sehr schön, really beautiful. 

A chopping block with chop scars on it! You've outdone yourself!  Brilliant!


