Welcome abord Jim, if I had to choose between a brand-new Porshe or a well-done Resto mod 1970 Dodge Charger, well it's the Charger hands down.I agree with Paul (a.c.a the Doc mon ami), absolutely love the smell of a brand new Porshe and ship model kit! I am boarding your build log, no matter what!
-

Win a Free Custom Engraved Brass Coin!!!
As a way to introduce our brass coins to the community, we will raffle off a free coin during the month of August. Follow link ABOVE for instructions for entering.
-

PRE-ORDER SHIPS IN SCALE TODAY!
The beloved Ships in Scale Magazine is back and charting a new course for 2026!
Discover new skills, new techniques, and new inspirations in every issue.
NOTE THAT OUR FIRST ISSUE WILL BE JAN/FEB 2026
You are using an out of date browser. It may not display this or other websites correctly.
You should upgrade or use an alternative browser.
You should upgrade or use an alternative browser.
... I was talking about the smell, ONLYWelcome abord Jim, if I had to choose between a brand-new Porshe or a well-done Resto mod 1970 Dodge Charger, well it's the Charger hands down.
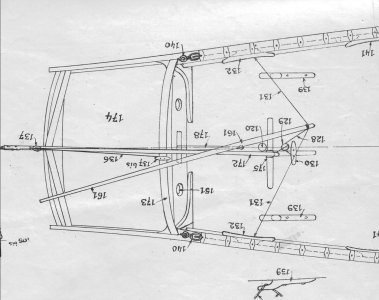
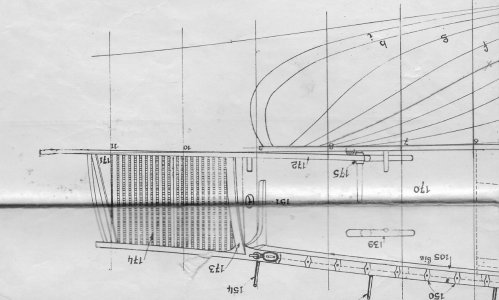
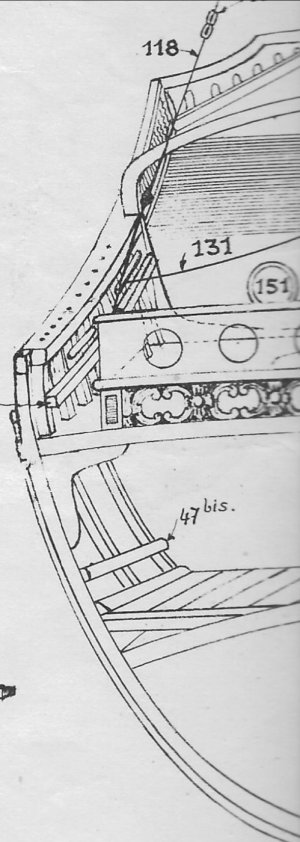
Hello Daniel,Welcome aboard Tobias, I have heard the stern grill extension isn't correct, I will be researching to find the correct configuration if one exists. I assume the data must be somewhere or how else would one know the kit isn't correct.
here you can find some information, I hope this helps a little.

CHEBECE 1750
Bonjour. Demandez á tout le monde: quelle représentation de la plate-forme de la grille est correcte? 1. plan de Boudriot, ma photo? 2. photo + description de B
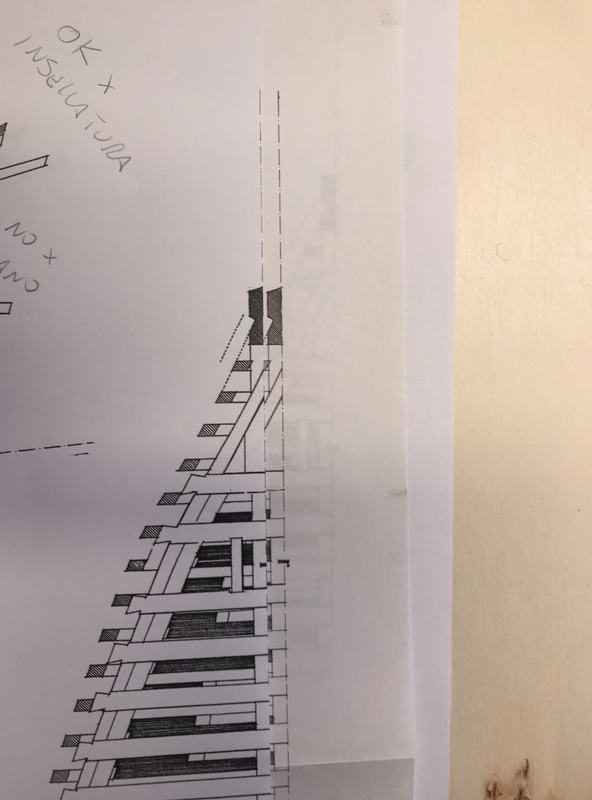
Le Requin de Daniel Forlani 1/48 - Page 15
C'est vraiment la perfection dans les assemblages... que donnerait un agrandissement de 48 ? On aurait peut-être sous nos yeux le graal du modéliste d'arsenal,
I think Rüdiger @Lucius and Karl @Jeronimo will be happy to answer any questions you may have and help you.
CHEBECE 1750 by Jeronimo [COMPLETED BUILD]
Hello Model Friends, I show some photos of my last model here. The CHEBECE as a cross-sectional model with interior fittings. The carvings I did not do, is a commissioned work. This carving art exceeds my artistic ability but considerably. Karl (Google Translator) PART 1
shipsofscale.com

Ihr persönlicher Freigabelink | WEB.DE Online-Speicher
Mit diesem Link erhalten Sie Zugriff auf die mit Ihnen geteilten Daten.
 c.web.de
Last edited:
That is a beauty !
Watching this very closely.
Watching this very closely.
Kurt Konrath
Kurt Konrath
I will be pulling up a seat in second row, as not to block Paul and others view.
Nothing I like better than watch others have fun building a new and exciting project.
Maybe a set of long keel clamp boards on your support base to help keep the keel straight and on track.
Nothing I like better than watch others have fun building a new and exciting project.
Maybe a set of long keel clamp boards on your support base to help keep the keel straight and on track.
Thank you Tobias, this will really help save some time.Hello Daniel,
here you can find some information, I hope this helps a little.

CHEBECE 1750
Bonjour. Demandez á tout le monde: quelle représentation de la plate-forme de la grille est correcte? 1. plan de Boudriot, ma photo? 2. photo + description de B5500.forumactif.org

Le Requin de Daniel Forlani 1/48 - Page 15
C'est vraiment la perfection dans les assemblages... que donnerait un agrandissement de 48 ? On aurait peut-être sous nos yeux le graal du modéliste d'arsenal,5500.forumactif.org
I think Rüdiger @Lucius and Karl @Jeronimo will be happy to answer any questions you may have and help you.
CHEBECE 1750 by Jeronimo [COMPLETED BUILD]
Hello Model Friends, I show some photos of my last model here. The CHEBECE as a cross-sectional model with interior fittings. The carvings I did not do, is a commissioned work. This carving art exceeds my artistic ability but considerably. Karl (Google Translator) PART 1shipsofscale.com

Ihr persönlicher Freigabelink | WEB.DE Online-Speicher
Mit diesem Link erhalten Sie Zugriff auf die mit Ihnen geteilten Daten.c.web.de
Hello neilm, welcome aboard.That is a beauty !
Watching this very closely.
Theres plenty of room on this gigantic ships deck.I will be pulling up a seat in second row, as not to block Paul and others view.
Nothing I like better than watch others have fun building a new and exciting project.
Maybe a set of long keel clamp boards on your support base to help keep the keel straight and on track.
Right off the bat I can see where the rail line runs straight off the main deck onto the grated transom area instead of having a slight bend where the railings would be parallel. Thanks again Tobias.A few more pictures
DittoWelcome abord Jim, if I had to choose between a brand-new Porshe or a well-done Resto mod 1970 Dodge Charger, well it's the Charger hands down.
I hit the ground running this morning by spending a couple hours studying the plans, making some translations and setting up the ships jig. A stable straight keel is paramount to success here. I've been warned about vertical keel warping so we shall see.

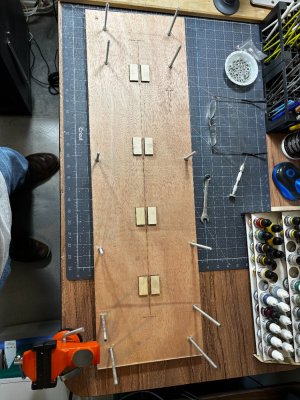

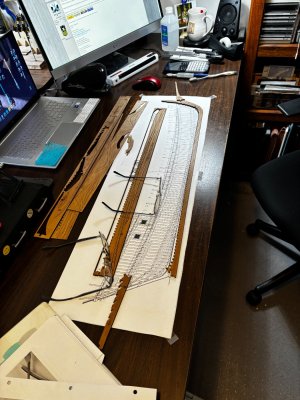
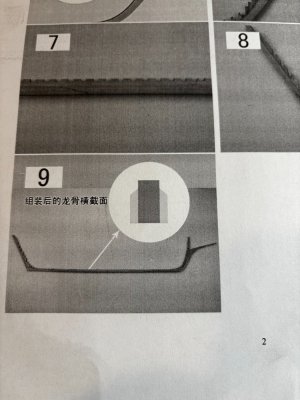
The ships parts design and construction are almost identical to my YQ Bluenose, I have to wonder if they actually put the kit together, if so, there is no room for error. For those who are staring out like me, the keel has a built-in rabbit once you put the keel together in the 'sandwich' style as shown in the next picture.
This ship at 1:48 is HUGE, I didn't realize how much room it's going to take up. I will be reorganizing my shipyard in the near future to accommodate it.
Thank you all for all the helpful suggestions coming in, I love how this build is starting out.
Till next time!


The ships parts design and construction are almost identical to my YQ Bluenose, I have to wonder if they actually put the kit together, if so, there is no room for error. For those who are staring out like me, the keel has a built-in rabbit once you put the keel together in the 'sandwich' style as shown in the next picture.

This ship at 1:48 is HUGE, I didn't realize how much room it's going to take up. I will be reorganizing my shipyard in the near future to accommodate it.
Thank you all for all the helpful suggestions coming in, I love how this build is starting out.
Till next time!
Around 4 feet long. Man ! That is huge !
Good afternoon Daniel. Good thinking. Those are some serious bolts you haver thereI hit the ground running this morning by spending a couple hours studying the plans, making some translations and setting up the ships jig. A stable straight keel is paramount to success here. I've been warned about vertical keel warping so we shall see.
View attachment 506880View attachment 506881View attachment 506882View attachment 506883
The ships parts design and construction are almost identical to my YQ Bluenose, I have to wonder if they actually put the kit together, if so, there is no room for error. For those who are staring out like me, the keel has a built-in rabbit once you put the keel together in the 'sandwich' style as shown in the next picture.
View attachment 506884
This ship at 1:48 is HUGE, I didn't realize how much room it's going to take up. I will be reorganizing my shipyard in the near future to accommodate it.
Thank you all for all the helpful suggestions coming in, I love how this build is starting out.
Till next time!
Good afternoon, all. I have spent about 4 hours setting up the jig, this was after I finished the keel assembly. The jig has 4 levels for fitting the ribs into but after you set the first lower layer, you have to set the keel in then finish the jig construction around it. I spent quite a bit of time fine tunning verticle as well as horizontal alignment. There are 90 notches that have to line up in X,Y,Z directions. Check it out.

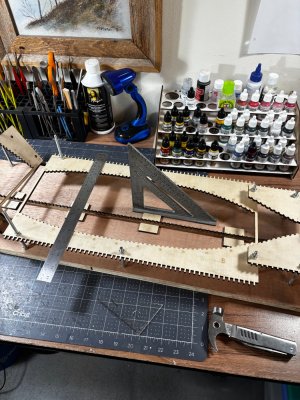


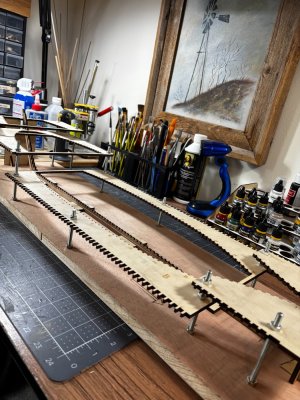
Next comes the stage of very slow progress de-charring the multipiece ribs, who knows 5,000 hours should do it
 .
.
I will post periodic updates of stacks of frames.
Thanks for stopping by, have a great weekend.


Next comes the stage of very slow progress de-charring the multipiece ribs, who knows 5,000 hours should do it

 .
.I will post periodic updates of stacks of frames.
Thanks for stopping by, have a great weekend.
Ugh, looks like a complex jig. Your translator app must be working overtime.
Jan
Jan
Great start Daniel, I will be following this new adventure of yours and I am sure you will end up with a beautiful ship in the end. 
I have used the translator a little but mostly just following the pictorial that shows each stage of development. The translator will come in very handy when trying to identify the ships fiddly parts, especially when I purchase certain aftermarket items such as fittings for the rigging, or line sizes. Having built the POF Bluenose will play a huge roll in what needs to happen on this ship.Ugh, looks like a complex jig. Your translator app must be working overtime.
Jan
Thanks Dean, I'm glad you found my build.Great start Daniel, I will be following this new adventure of yours and I am sure you will end up with a beautiful ship in the end.


